Its been quite a few years since I visited the page on this website which is about , ‘things I have been interviewed for’. It made me realise how time flies, and that I have not grown any younger! Things have moved on since then, but I see that the same issues are still out there. To name one, its clothing sizing. I see that AI might be the solution, excuse my guffaws.
A company called, ‘Fit Collective’ mentioned in this article on the BBC website sound like they might be working towards some solutions, but the trouble is, we are all different. Not just in our physical dimensions, but in the way we want our clothing to fit. That is a style issue, not a cutting and sewing issue.
I see so many women wearing the incorrect size for their waist circumference, squashing themselves into ‘muffin tops’ because they want to wear the size they aspire to, but the manufacturer/designer/buyer whatever, deems that their waist should be a particular circumference in comparison to that of their hips, (or even bust!). I feel for them, because I can’t fit into a size 14 with a non-elastic waist, but am a size 14 in most other places, not that that is a true designation anyway.
A pair of main-store M&S trousers I tried a few months ago had a totally different waist to hip ratio to a similar pair in Per Una, so what does that make me? If I went a size up in either, the bum area hung loose, the hips looked weird and a bit ‘jodhpury’, and the Per Una ones were still too tight on the waist. So I left them on the rail and went home and got my sewing machine out.
Ah, ‘mummy jeans’, might be the answer, but once again the waist to hip ratio is nearly always wrong for me. I have always had a big waist compared to hips and bust, and that is not uncommon. Others might have a smaller than average waist to hip ratio ,but not many women are the ‘perfect’ shape.
Have a read of the article linked to below and see if we have progressed much since 2017. I also ask you to consider the vast amounts of irreplaceable resources being gobbled up by AI. Is the application of AI really going to make us happier with our clothing fit? Isn’t more about how we see ourselves, and how we feel comfortable, something that is not quantifiable en masse, and is so, so subjective.
I’ve been having problems with adjusting the foot pressure on my Jones 125 machine. I’ve not seen one like it before and couldn’t work out how to use it. Today I’ve had 3 broken needles and I traced this to the really strong pressure on the foot. My Bernina 1030 doesn’t have this adjustment so it’s not something I work with much.
The pop darner for pressure adjuster on the Jones 125.
Before reading this I’d been twiddling it, popping it up, trying to unscrew it and seeing no difference. After reading this helpful page, it seems the Jones has a ‘pop darner’ style pressure adjuster. The central core pops up when you push down the outer ring, and then you depress the central core in increments to achieve the pressure you want. I imagine the name comes from popping it up to take pressure off when darning (or free embroidering) on the machine. Suddenly it all makes sense. The 3/4 position is so much better for what I am sewing today than all the way down, where it was because I couldn’t work out how to adjust it.
Probably common sense to others, but not to me!
Thank you to the kind person who took the time to write about the different methods of adjusting foot pressure, and for such a clear explanation.
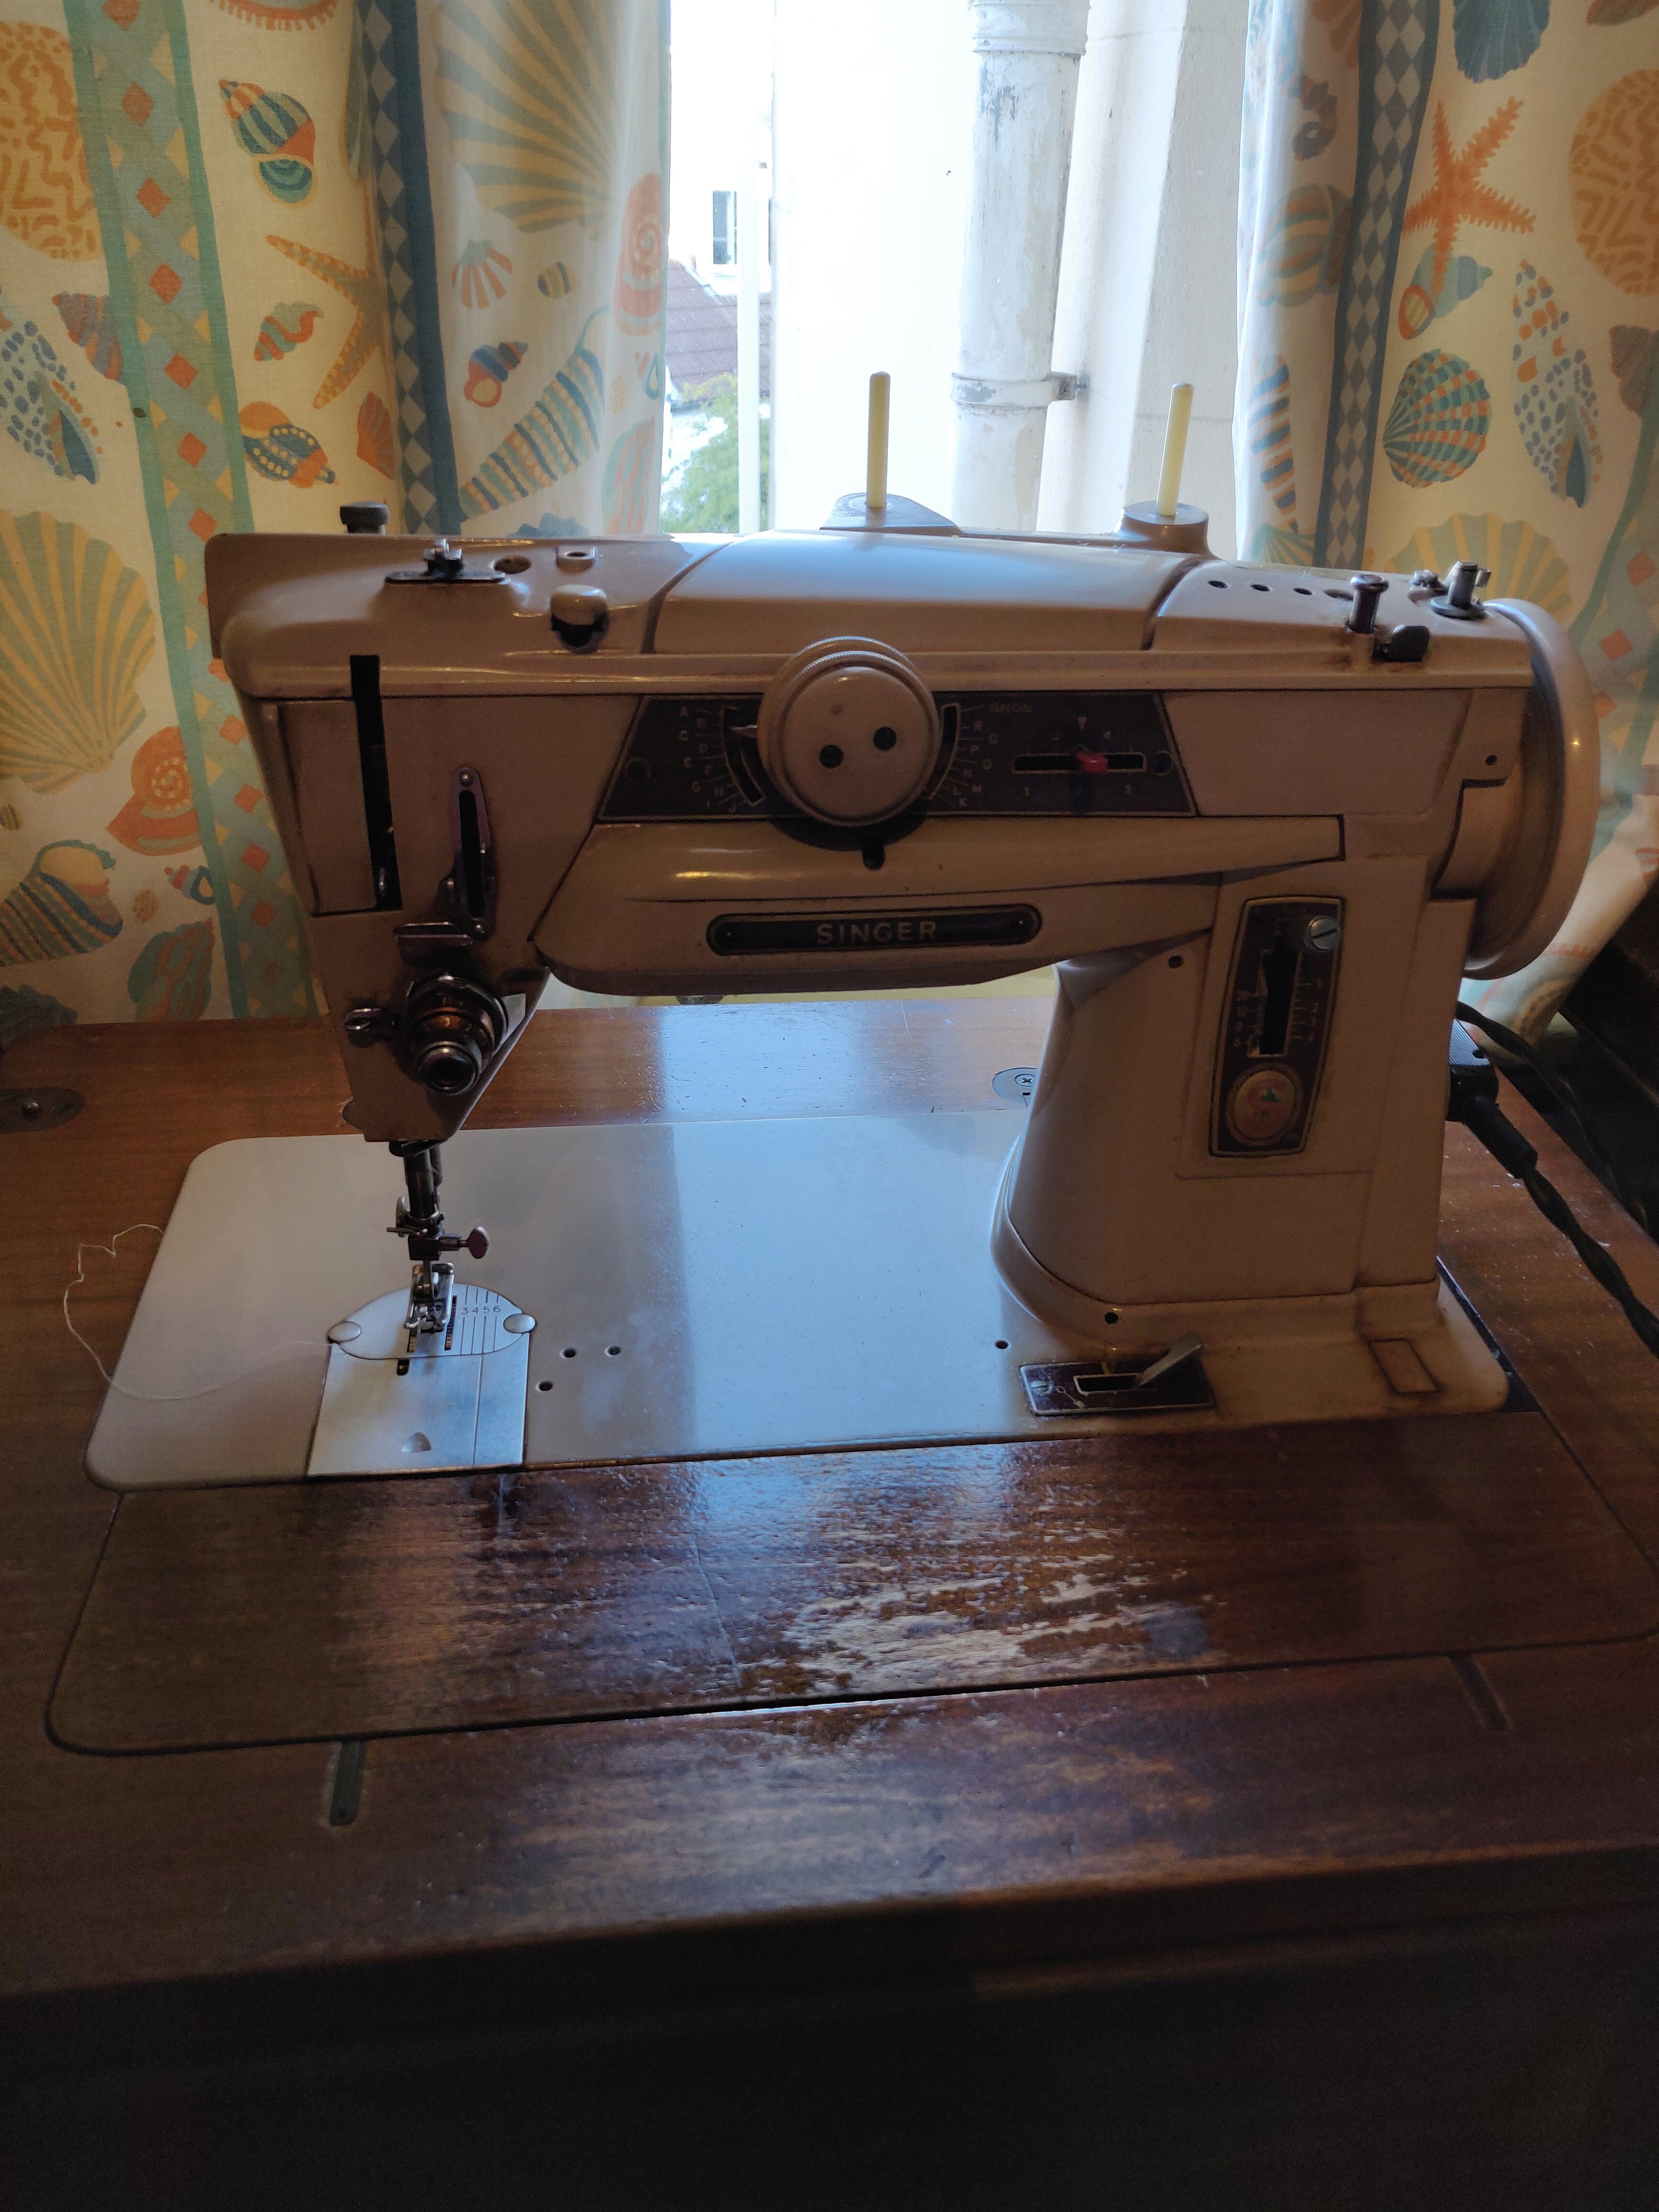
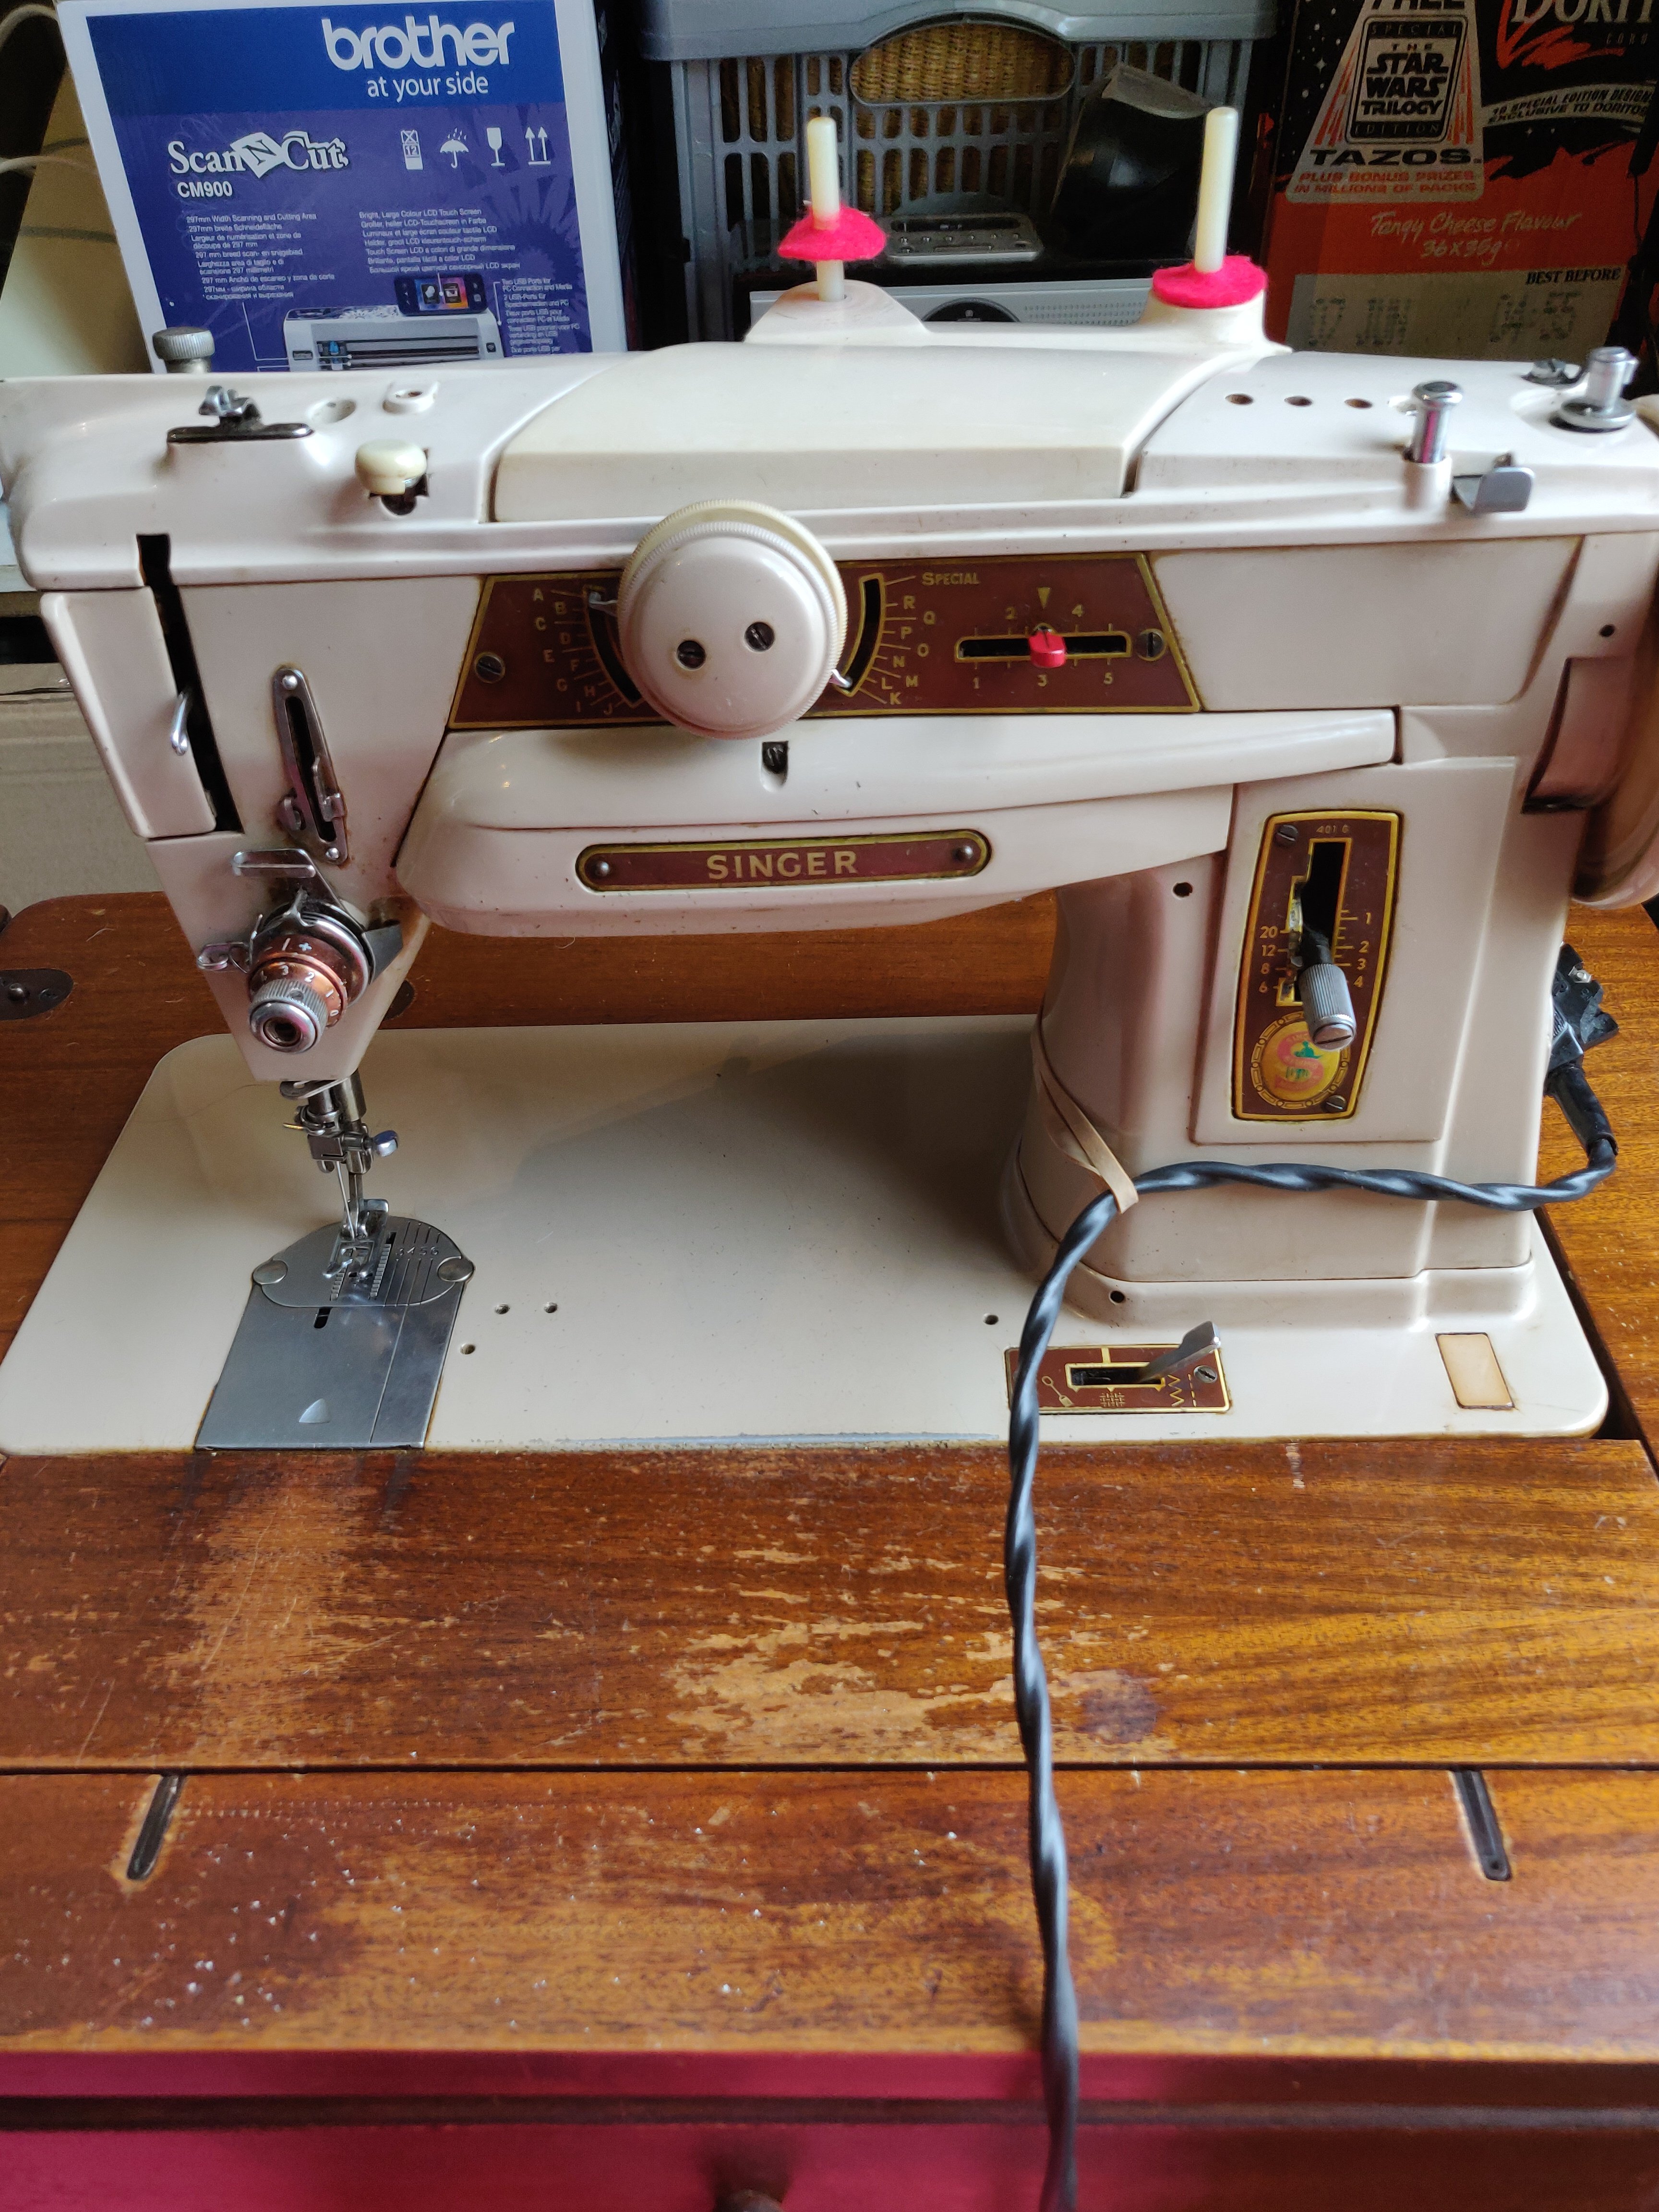
I have been toying with the idea of buying a Singer slant shank machine for a while, and during lockdown I took a punt and bought one reasonably local on eBay. Not the smartest move you might say, sight unseen and all that. I spent quite a time scrutinising the photos very carefully, read up about the machine, and asked lots of questions of the seller. Call it a treat to myself.
Updated with some photos just now, 16:00 4th July
Above, as it arrived, a bit grubb
And below, after a good clean up
Finally I went to collect it – social distanced collecting methods in use and no stopping en route. Its outside is a bit grubby, but its working and has all its accessories down to the lint brush and set of screwdrivers. Its obviously well used, it was owned by a dressmaker before, but I would guess not used for several years. However, its got service labels and having all its accessories indicates to me that it was well cared for and valued. It came in a drop down table, which was perfect as wanted one in a table, but not a massive cabinet.So far I’ve opened it up and cleaned its insides, removed as much old gummy oil – or as I can reach – and given it a thorough oil with light sewing machine oil. The double direction pattern dial was gummed up, and this gentle cleaning and oiling helped to loosen it up so that I could (very carefully) encourage it to move, and now it works freely. Its fascinating to see how the selection mechanism works, not that I am an expert at mechanics, but I can see the little paddle moving and the rise and fall of the selector post (probably the wrong name). I am itching to try out all those amazing built in patterns. I can’t right now as you will see in the next paragraph.The original clam-shell foot pedal is with it, and it did work – sporadically. After a while there was a nasty smell (reminded me of when my Bernina 1030 went into melt down, and when my Brother 950i knitting machine and very, very vintage Kenwood Chef did the same) and the machine would not stop running. Luckily the plug was close to me, so I whipped it out to the socket before any damage was done.My clever son opened the pedal and told me I should have cleaned that out (didn’t even think of it, sorry), and then he replaced a blown capacitor – he is pretty nifty at this and has a stock of electrical bits. The pedal now works – but the connection from the pedal lead to that ‘banana’ plug is dodgy. In addition some of the old plastic has broken away inside the pedal and the plug has a chunk missing which worries me. I’m not confident around electricity having had a few experiences that unnerved me, (see above). He offered to repair the lead and plug (he thought Sugru) and will in time, but I decided to order a replacement so that I could use the machine until then. I will compare them to find which gives the best speed control as some reports say new ones are not as sensitive.The motor seems OK, and my son will clean it at some point. So far the machine has displayed a lovely straight stitch – equal if not better than my Bernina 1030, and far better than the Jones 125.I did hanker after a Singer 411g or 431g but I think the 401g will satisfy me. It was only the chain stitch of these I wanted, but reading about it it sounds to require lot of fiddling to get it right and so that do you leave the machine set up just for that? Seems a waste to me, so I’ve let that wish go for the moment. I also think I remember that my Janome Coverstitch machine will do chain stitch, so maybe that is something to explore. I’m not even sure why I want chain stitch – I’m just a machine nerd (maybe?).Want this space for more chats about the Singer 401g that has joined my machine stable. Its going to be sewing frontline masks once the new pedal arrives.
I’m doing quite a lot of sewing at the moment, so to supplement my Bernina 1030 I bought an old machine on eBay – not a modern one, an old second-hand 1980s model (my guess), very cheap and local pick up only. It’s a Jones, (later these were rebranded Brother), built like a tank and weighs a ton as the machine itself is all metal.
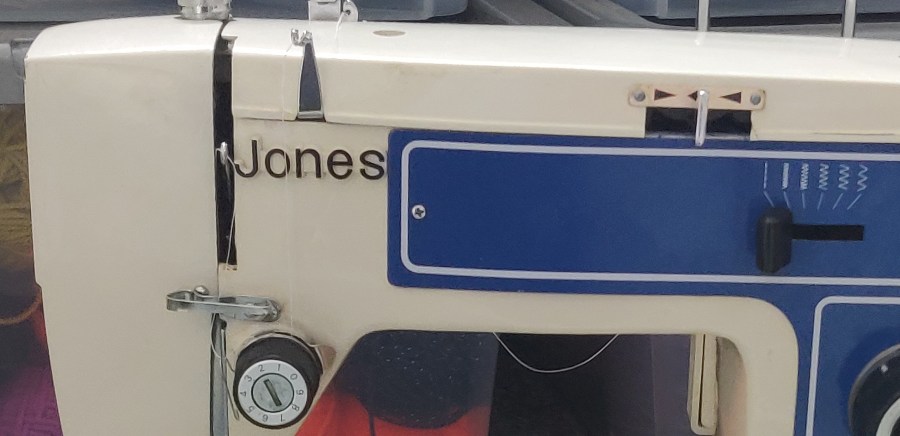
Its a Jones model number 125 with TUR 2 written on the motor at the back. I can’t find any info online about this machine, so if anyone has a manual or other info that would be helpful if be most grateful if you’d contact me.
The main problem was that the plastic case is degraded so the bed machine has dropped below the top edge of the case which means you couldn’t open the bobbin case, so that needed a bit of attention.
The Jones 125 machine
I have it several hours of TLC; opening the machine top, checking, cleaning and oiling everything. The bobbin and shuttle hook had all sorts of thread wrapped around it but that was easy enough to take out, clear and oil. Then I had to sort out the bobbin tension that was wildly awry. the light bulb had blown, and I will replace it with an LED version.
There was no manual with the machine just a foot pedal, a plastic need extension and some spare bobbins – which for the price I really didn’t mind. However someone had put the needle in with the hole from front to back, like my Bernina, when actually it should have been in so that you thread it left to right. Its been a while since I’ve used a machine which threads like that, so it took me a minute or two to work out why the bobbin thread was not being picked up. Once I put in a new needle that faced left or right it picked up the bobbin thread no problem.
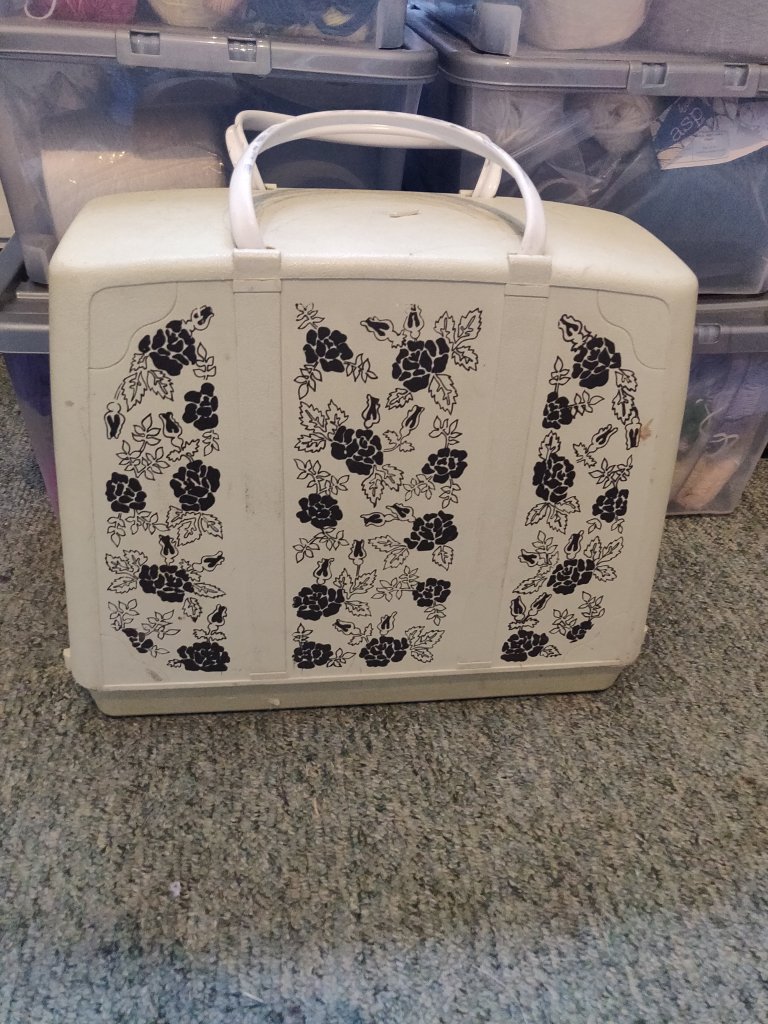
Going back to the bobbin and case. The machine has a side facing bobbin in a vertical shuttle that is accessed from the top, so it’s not as easy to get to as a front loading one. Because the bottom case in which the machine suits is degraded and the plastic hinges have broken, the machine has dropped below the level of the case-edge, making it hard to reach the bobbin. I’ve stuck some shims in the sides of the bottom case which have raised the machine bed so that the bobbin plate will now side open. This also means the bed extension will now for correctly. The machine is in one of those classic Jones and Brother flowery carry-cases and although the bottom case plastic is a bit fragile, this seems reasonably sound.
Unlike the Bernina the Jones has adjustable pressure on its presser foot which takes a bit of getting used to. Now I’ve got it sewing it’s working fine.
What’s nice is that the feed dogs will drop for free embroidery if needed. It has good stitch length and a nice wide zigzag, so does the face mask job perfectly.
Having got it sorted out I prefer to keep the Jones threaded for the masks and my Bernina for my personal sewing. OK, I’ll admit it, I’m a machine nerd!
I think the Jones is also a bit of a consolation prize to myself; I’ve bought myself a vintage Singer slant shank machine which I’m really looking forward to getting, but I can’t collect it because of Covid.
The Jones is a great everyday all-purpose robust machine. I do get fed up with those people on eBay who are selling old machines as ‘heavy-duty’ and ‘semi industrial’. There are industrial or domestic sewing machines, but none that I know of were ever sold originally as ‘semi-industrial’. I agree that some modern machines are a load of rubbish, plastic and not really got for purpose, not that only a few – believe me I have seen some in the course of helping people with their machines.
I’ve always preferred older machines, having owned a hand cracked Singer and a treadle one (I am filled with regret that I didn’t have the storage to keeping these), an Elna Supermatic (why oh why did I get rid of that?), a Singer Touch and Sew, and then a Bernina 730 (still got that one) and an Elna TS (had to go for lack of storage again).
Even the Touch and Sew would sew through loads of fabric, and I did like the pattern cams of that and the Supermatic. I think the slant needle slant shank machine I have just acquired probably won’t go through that many layers of fabric because the needle may possibly deflect? I will have to wait and see!
So now it’s back to my sewing.
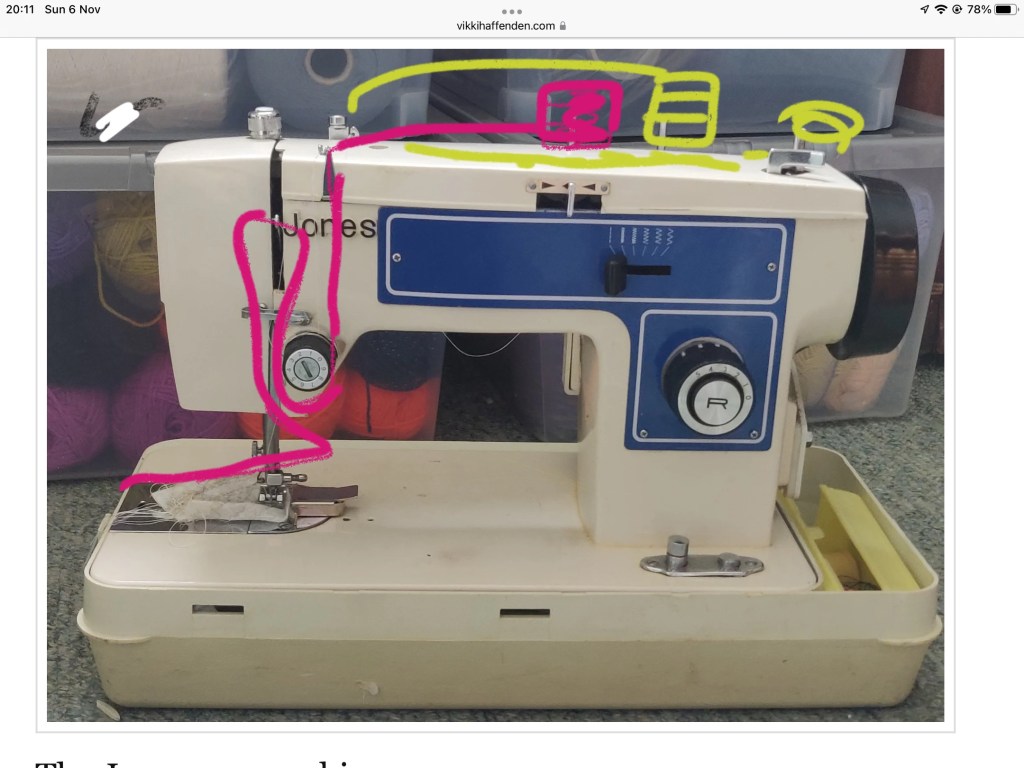
Someone has asked how to thread the machine, but as I no longer have the machine I have drawn onto the photo. Also see my post about adjusting the presser foot pressure. Search ‘Jones’ at the top of the page to find the post. I do hope this is helpful.
How to thread the machine . Pink is the top needle thread. Needle threads sideways. Yellow is the bobbin.
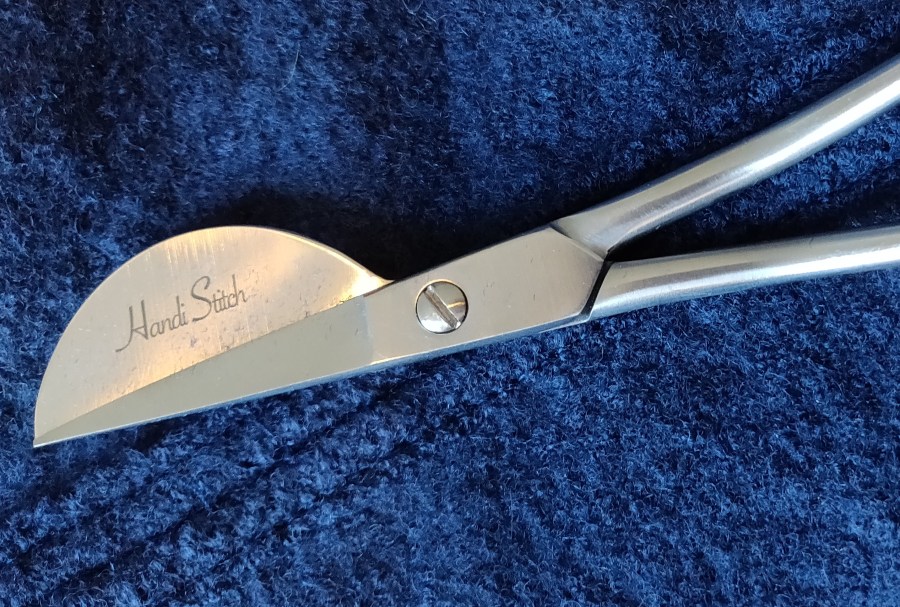
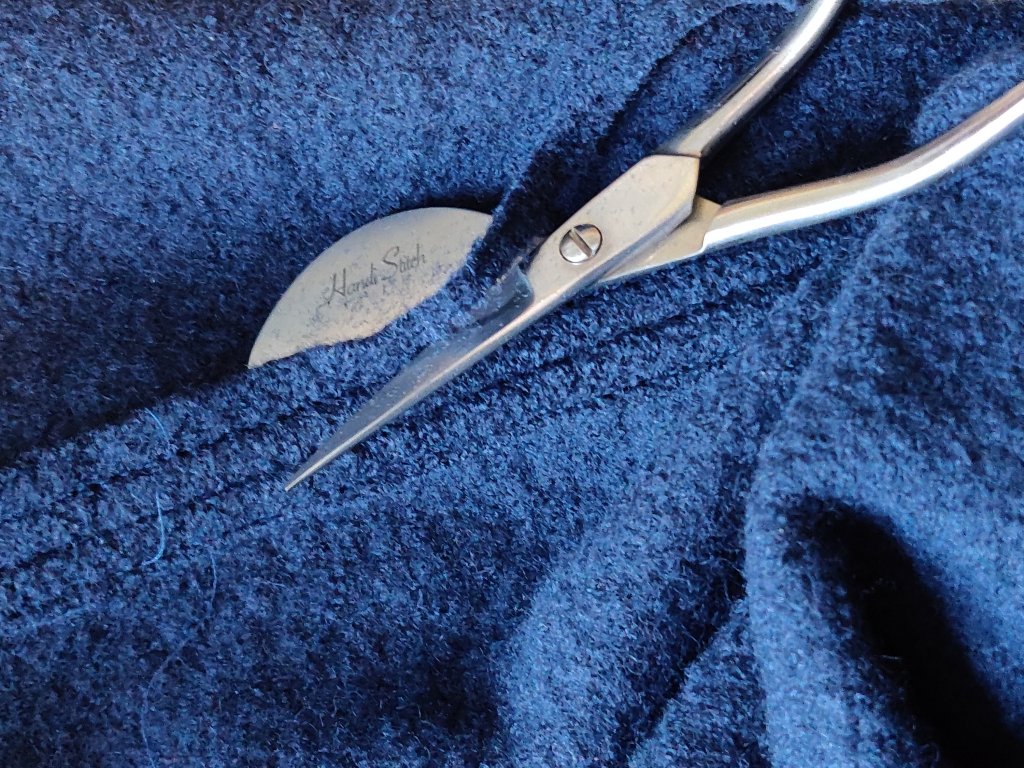
I’ve just made a boiled wool dress with to stitched seams. These needed to be trimmed to reduce bulk, which have me the chance to try out these duck-bill scissors I’d bought at an exhibition. The wide blade is supposed to prevent accidental snips into the main fabric, and enables you to get close to the stitching line.
These worked well, and are nice and sharp. A successful purchase!
I’m not sure if this is the accepted easy to use these scissors, but it worked for me.
In a flurry of energy today I made a T-shirt tunic out of some of my fabric stash. My stash is a pile of fabric that hunkers down in the corner, offering me enticing glimpses of exotic colours, textures and exciting new projects before my guilt makes me go and do the hoovering.
So today I said ‘hang the Hoover, dump the dishes, it’s time to SEW!’. And I did!
This is my variation of The Makers Atelier ‘Boxy T-Shirt’ pattern. I’ve lengthened the whole T-Shirt into a tunic, and made the back a little longer than the front. They advise using stretch interfacing to stabilise the shoulder seams, neck, cuffs and hem, and luckily I had some to hands – that’s the beauty of being a fabric hoarder.
The Makers Atelier patterns are easy sized and they encourage you to be inventive when using their patterns. I cut between the medium and large to get the fit I wanted. I considered altering the pattern by adding bust darts but am now pleased I didn’t bother. In a fabric with less drape that might still be a good idea for the future.
This cotton print Jersey fabric has been tantalising me from the depths of my stash for a few years. It was a remnant, so only just over a metre long and never quite enough for most things I considered. It had been expensive as it’s really good quality fabric so I didn’t want to waste it on something I wasn’t going to be happy with. All of which meant that it’s lain there waiting for its moment.
Now it is finally made-up into this tunic I am very pleased with it; this will be going on holiday with me. The Jersey won’t crease too adult and I can dress it up and ring the changes with linen trousers, Capri pants, leggings and even skirts I think. Plus it will work on the beach. Win-win I think!
It took me about 4 hours to make including cutting out the main fabric and interfacing, (oh and finding the interfacing which I had put somewhere totally illogical). The making was interrupted by the ‘incident of the bloody overlocker’ – when there was a ‘bang’ and the machine light went out. Well yes, I did panic, but it turned out that the bulb had gone ‘pop’ and blown the fuse of the overlocker at the same time. So it was easily repaired thank heavens. I hate it when my machines break.
Finishing off called for the coversew machine. I could have topstitched with a double needle on the sewing machine, but why have a coversew machine if you don’t use it? Threading it up is a bit of a pain but it sews a lovely hem, especially when the fabric is interfaced, so it was worth the bother.
I have a glow of achievement as I sit here blogging.
Today I’ve been sewing a jersey dress, and the fabric is a double-sided tubular jacquard which has very fine yarn loops that are easy to pull. When I was cutting it out I found that the pins points were catching the fine knit threads, even breaking one and making a hole so I had to move the whole pattern around – not much fun! I usually weight the pattern pieces and don’t pin, but this fabric is over stretchy for this, hence the pins.
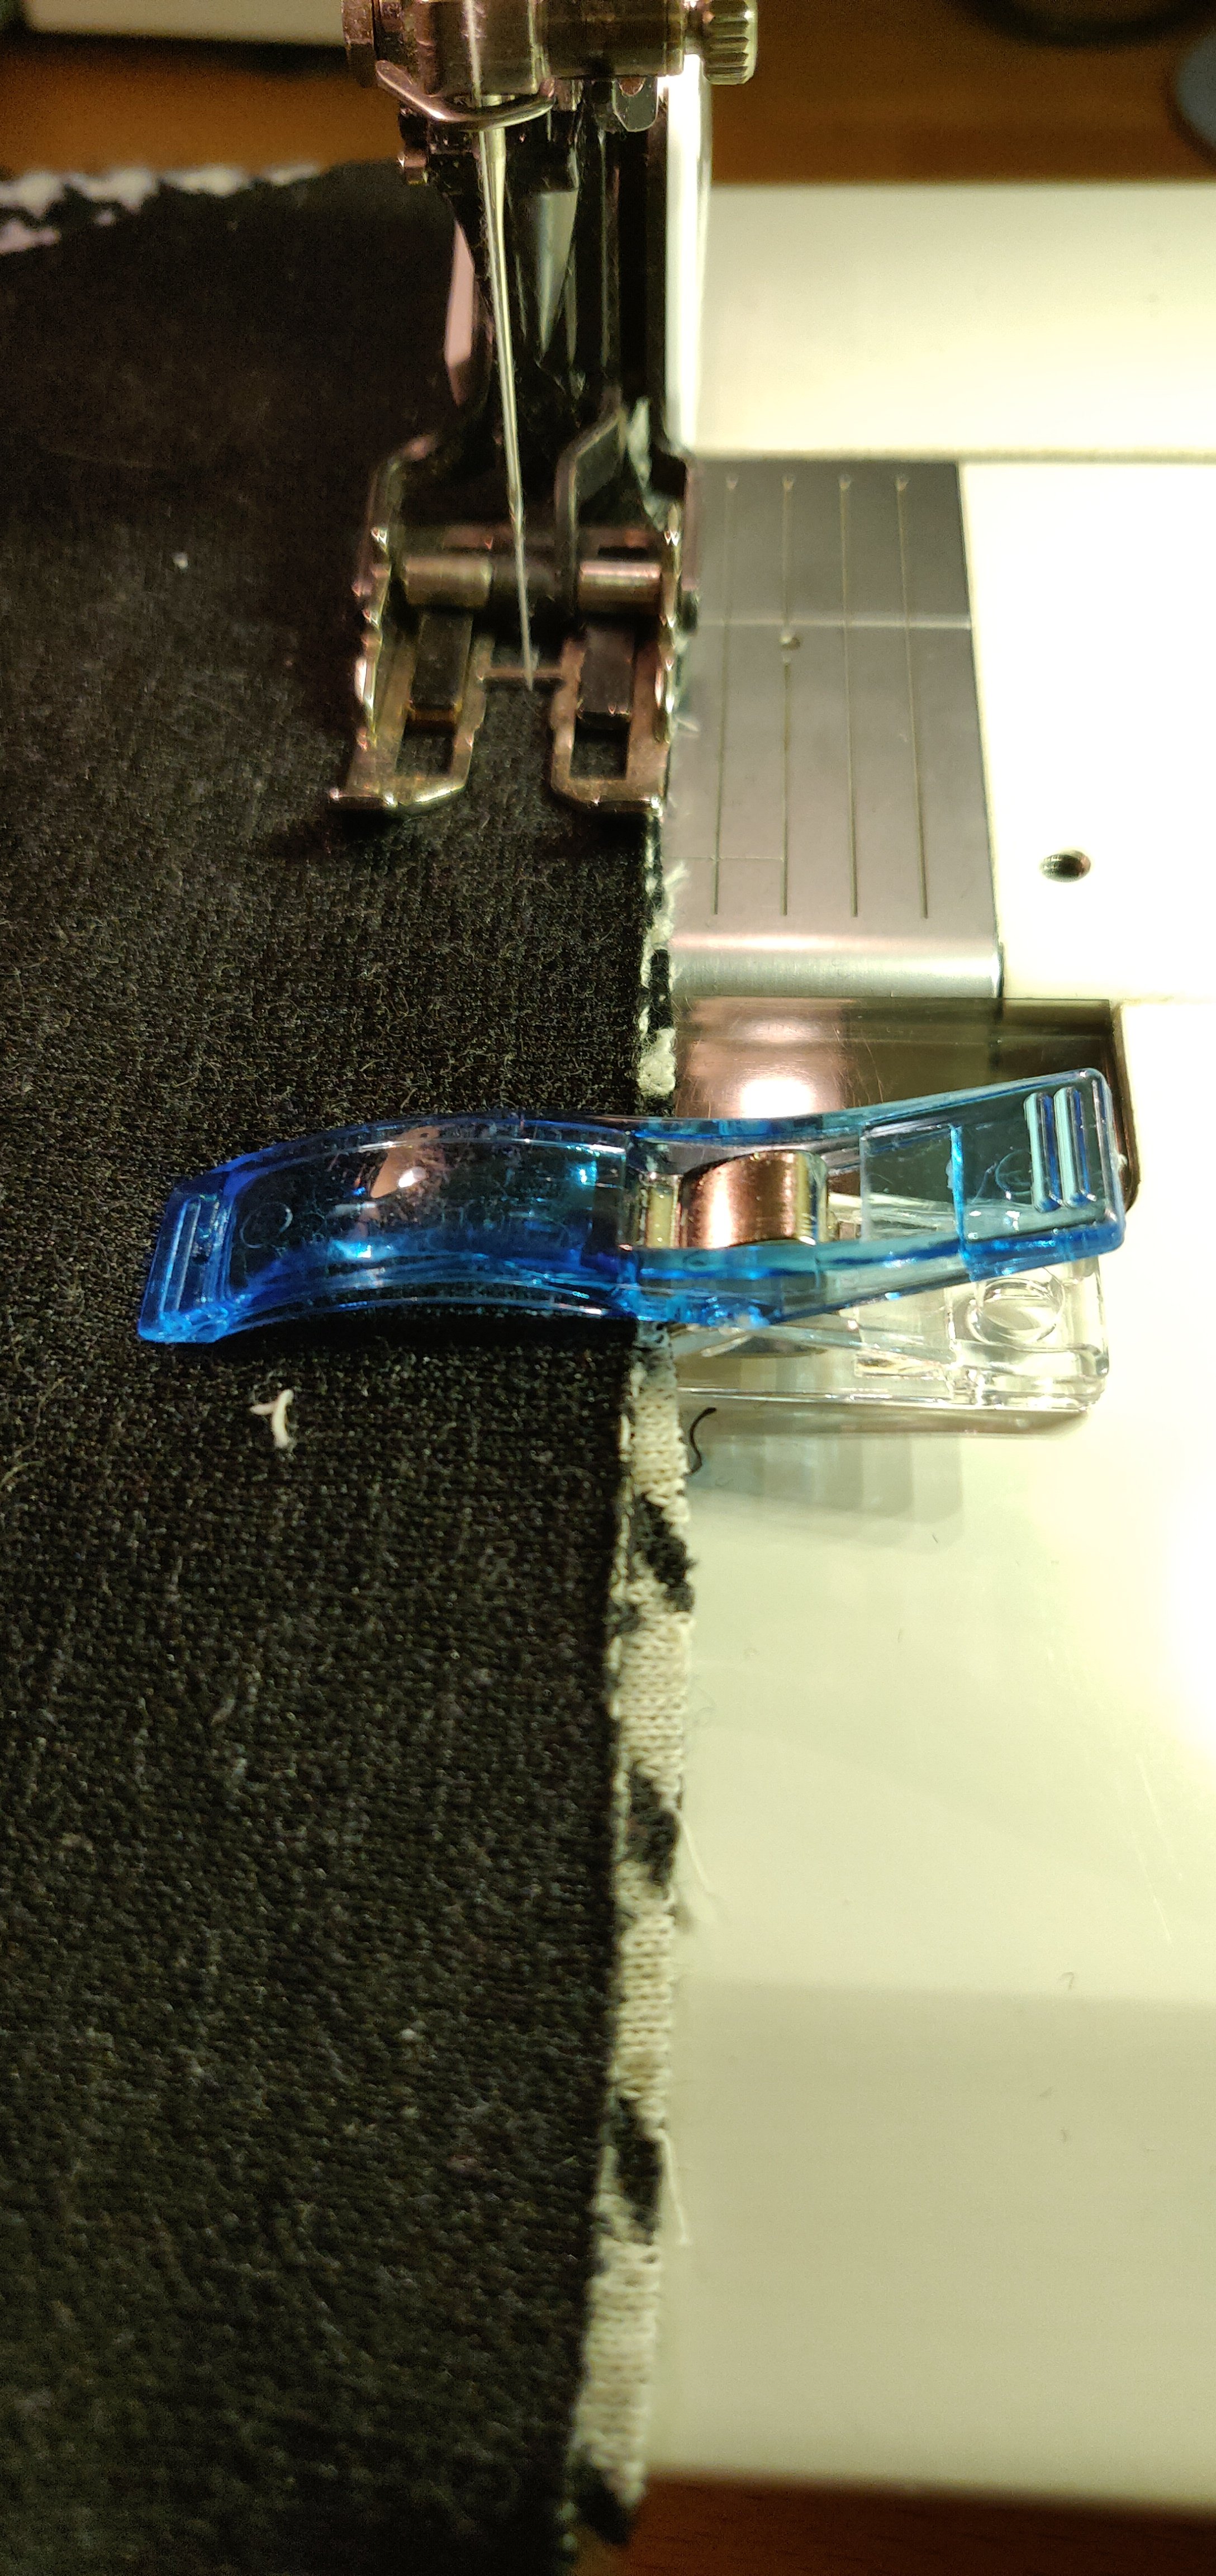
So now I’m sewing-up the dress, I’m testing out using Clover Wonder Clips rather than pins to hold the seams together. These clips have made joining the seams very easy and seem to be a really good addition to my equipment. They have a flat back and a curved jaw with a ridge at the point that grips the fabric securely. The flat side makes it very easy to slide the clip under the fabric without disturbing it. On this flat side they also have measurement lines marked out to help keep a straight seam.
I’ve already used them to hold knitted pieces together when hand sewing them and they work extremely well for this, there are no pins drop out onto the floor for the dog to tread on!
I also used the little ones to clip long yarn tails (I keep them long to use for sewing-up), to both hand and machine knitting whilst I work. Yes I could use binder clips or bulldog clips or clothes pegs for this, and I still do, but I find the Wonder Clips grip more firmly and they look a lot nicer. They’re also not as heavy as the binder clip so don’t drag the knitting down.
Overall I’m really pleased with the way they work, and now have three sizes to work with. Their bright ‘jelly’ colours cheer me up on a grey day!
Sewing towards the Wonder Clips – I’m using a walking foot in my Bernina 1030 in this photo.
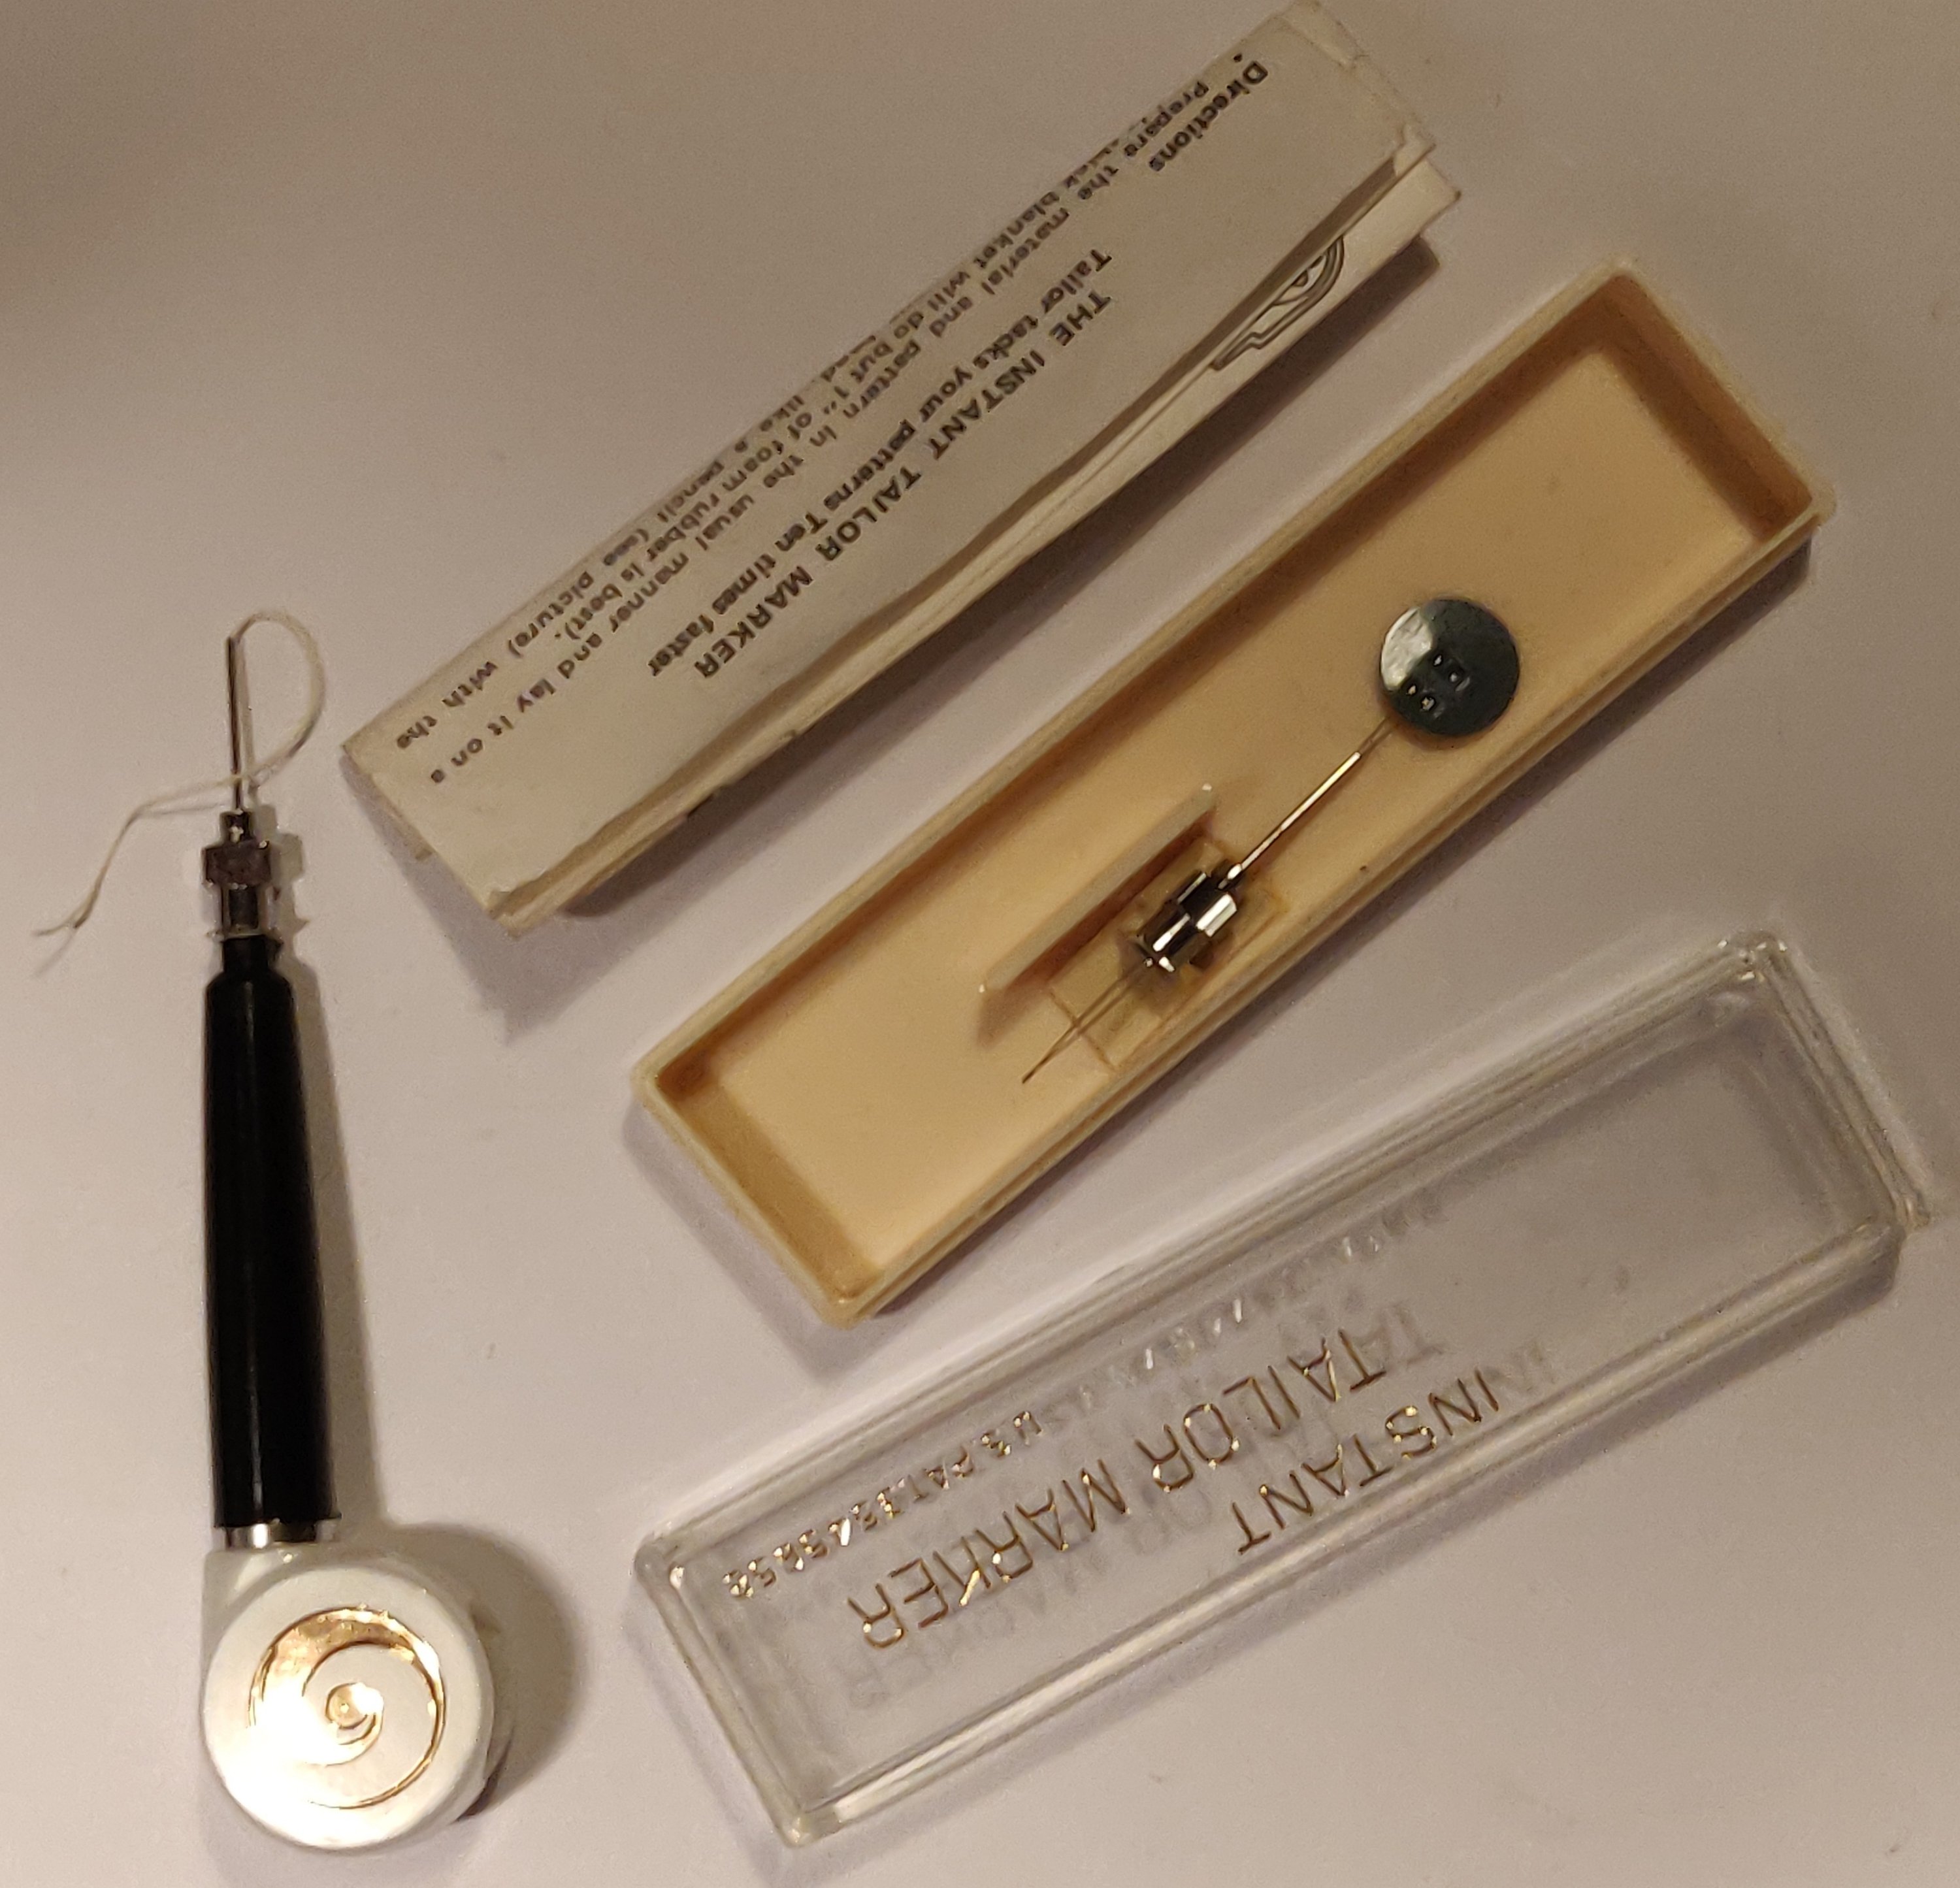
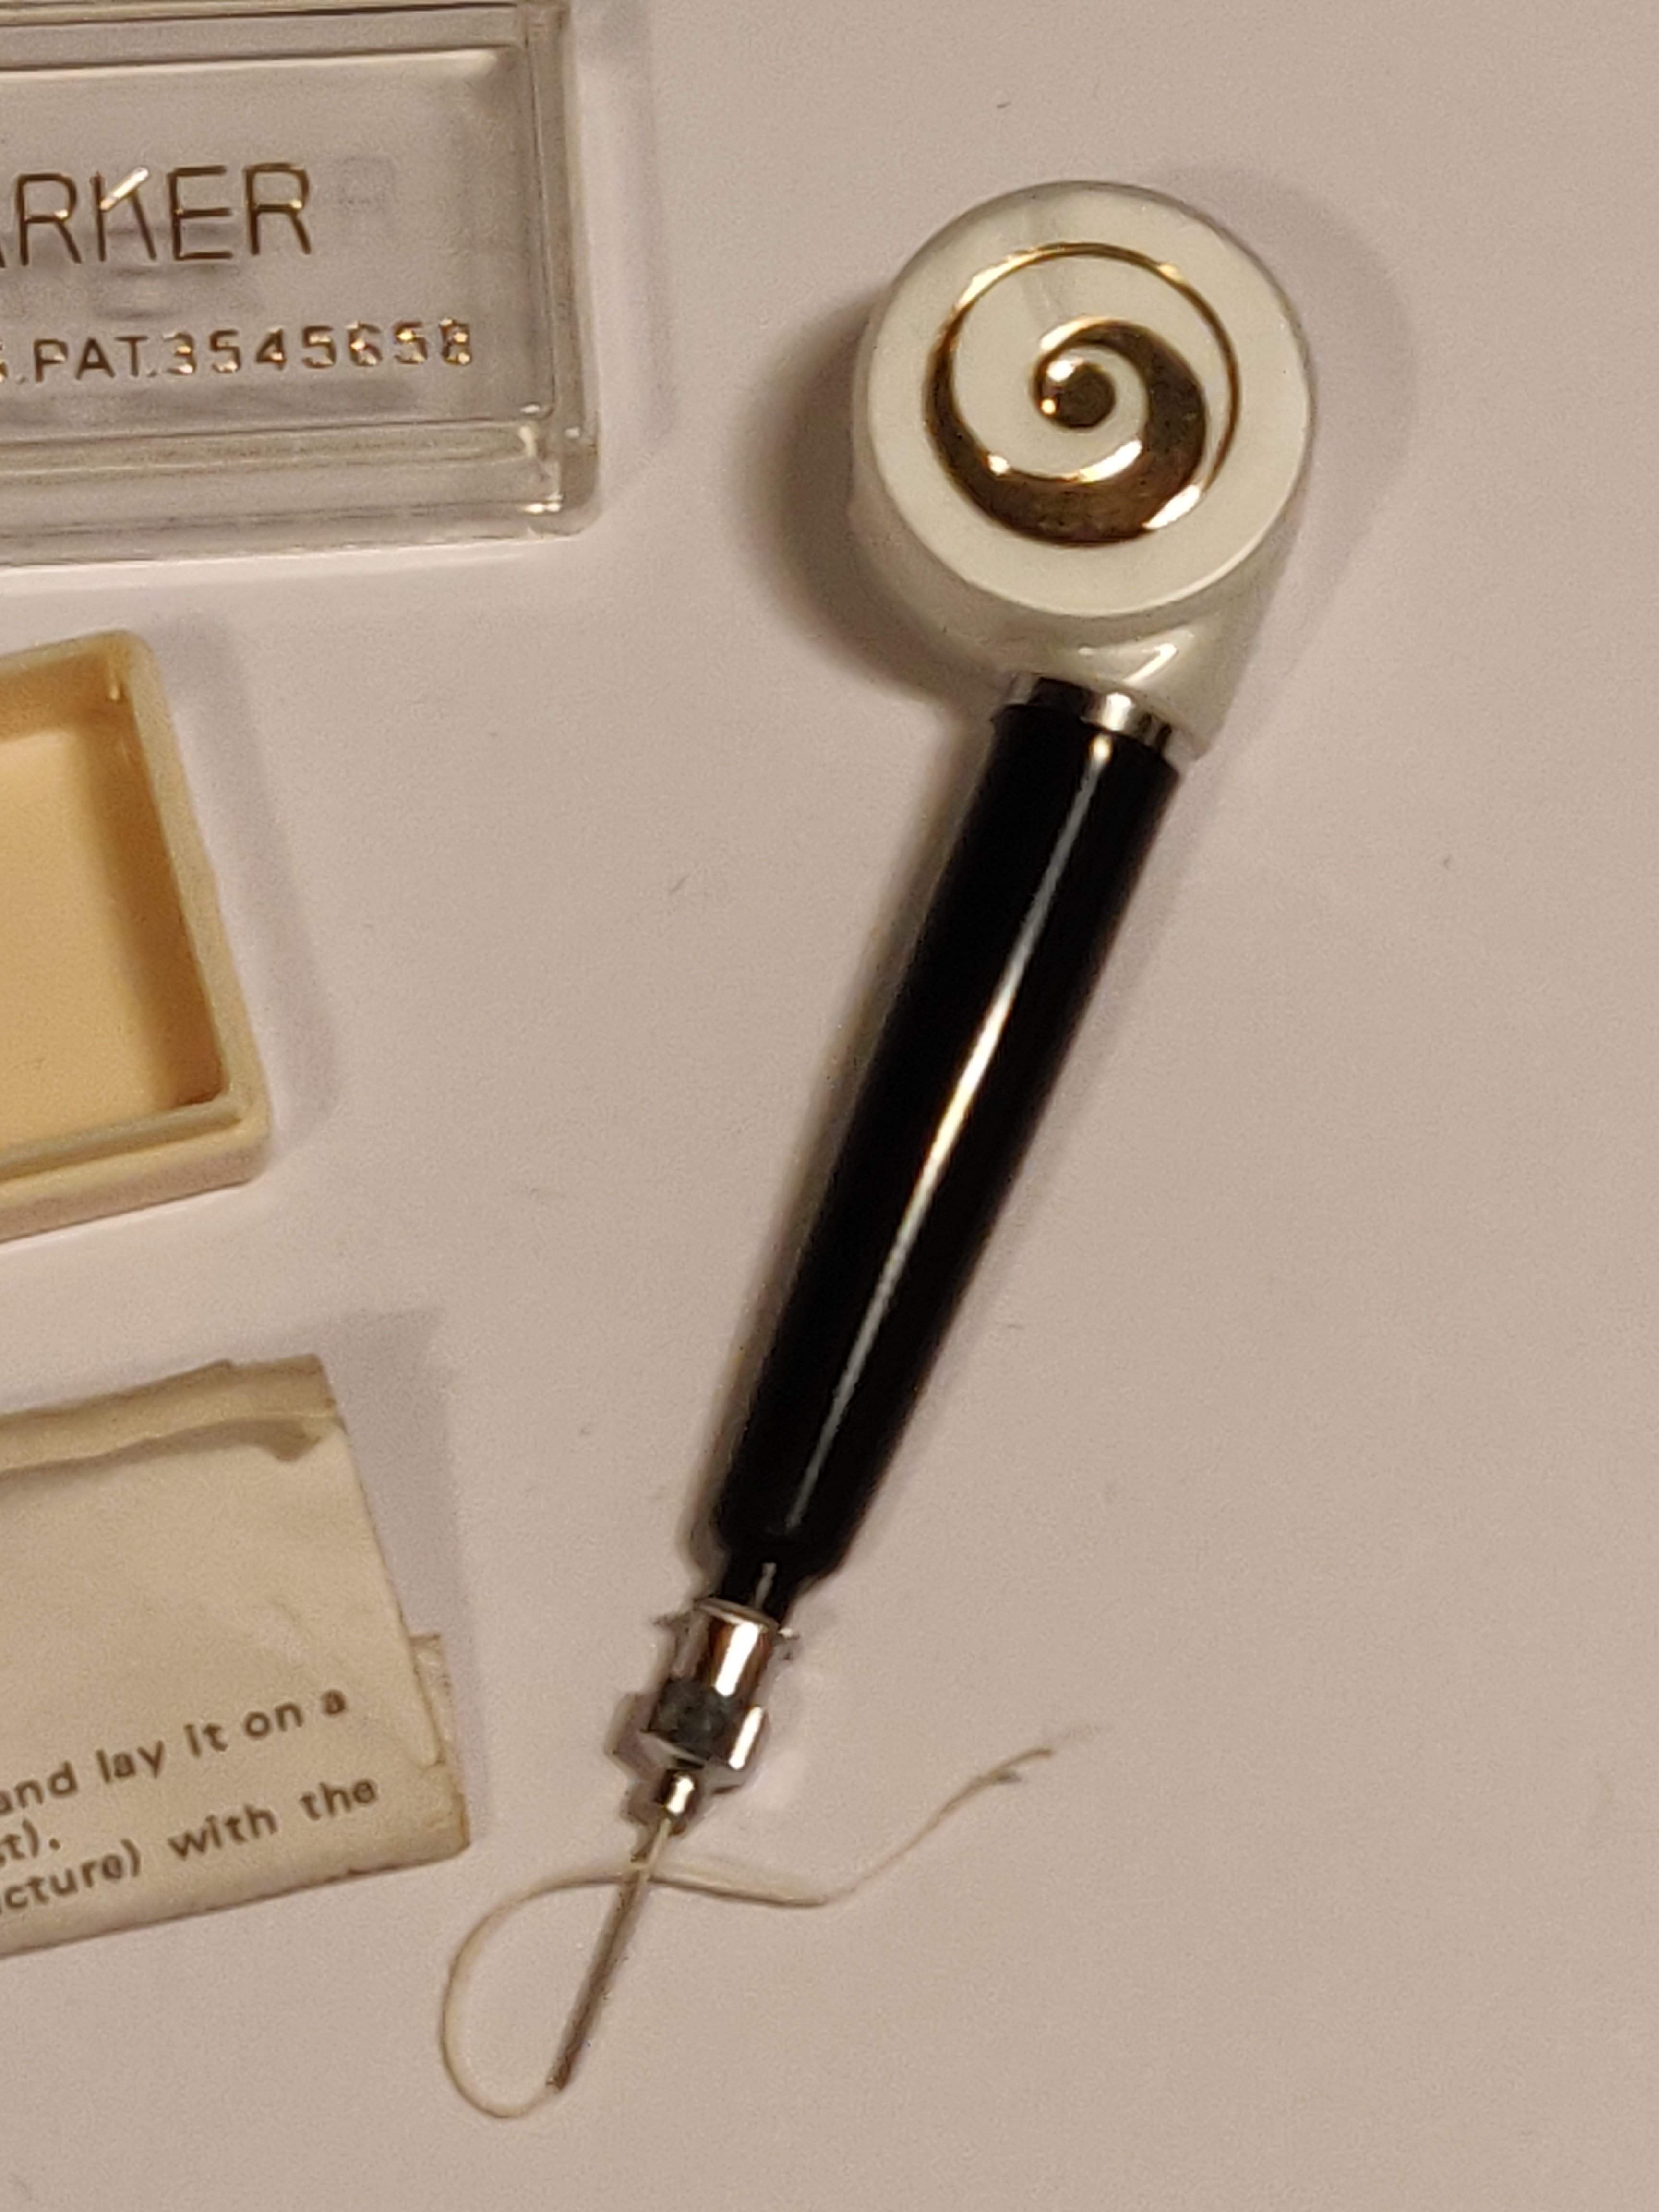
I found this little gadget in a market in Stoke-on-Trent. I guess it’s probably 50 years old or so it still has its instructions and even had a spool of thread in it.
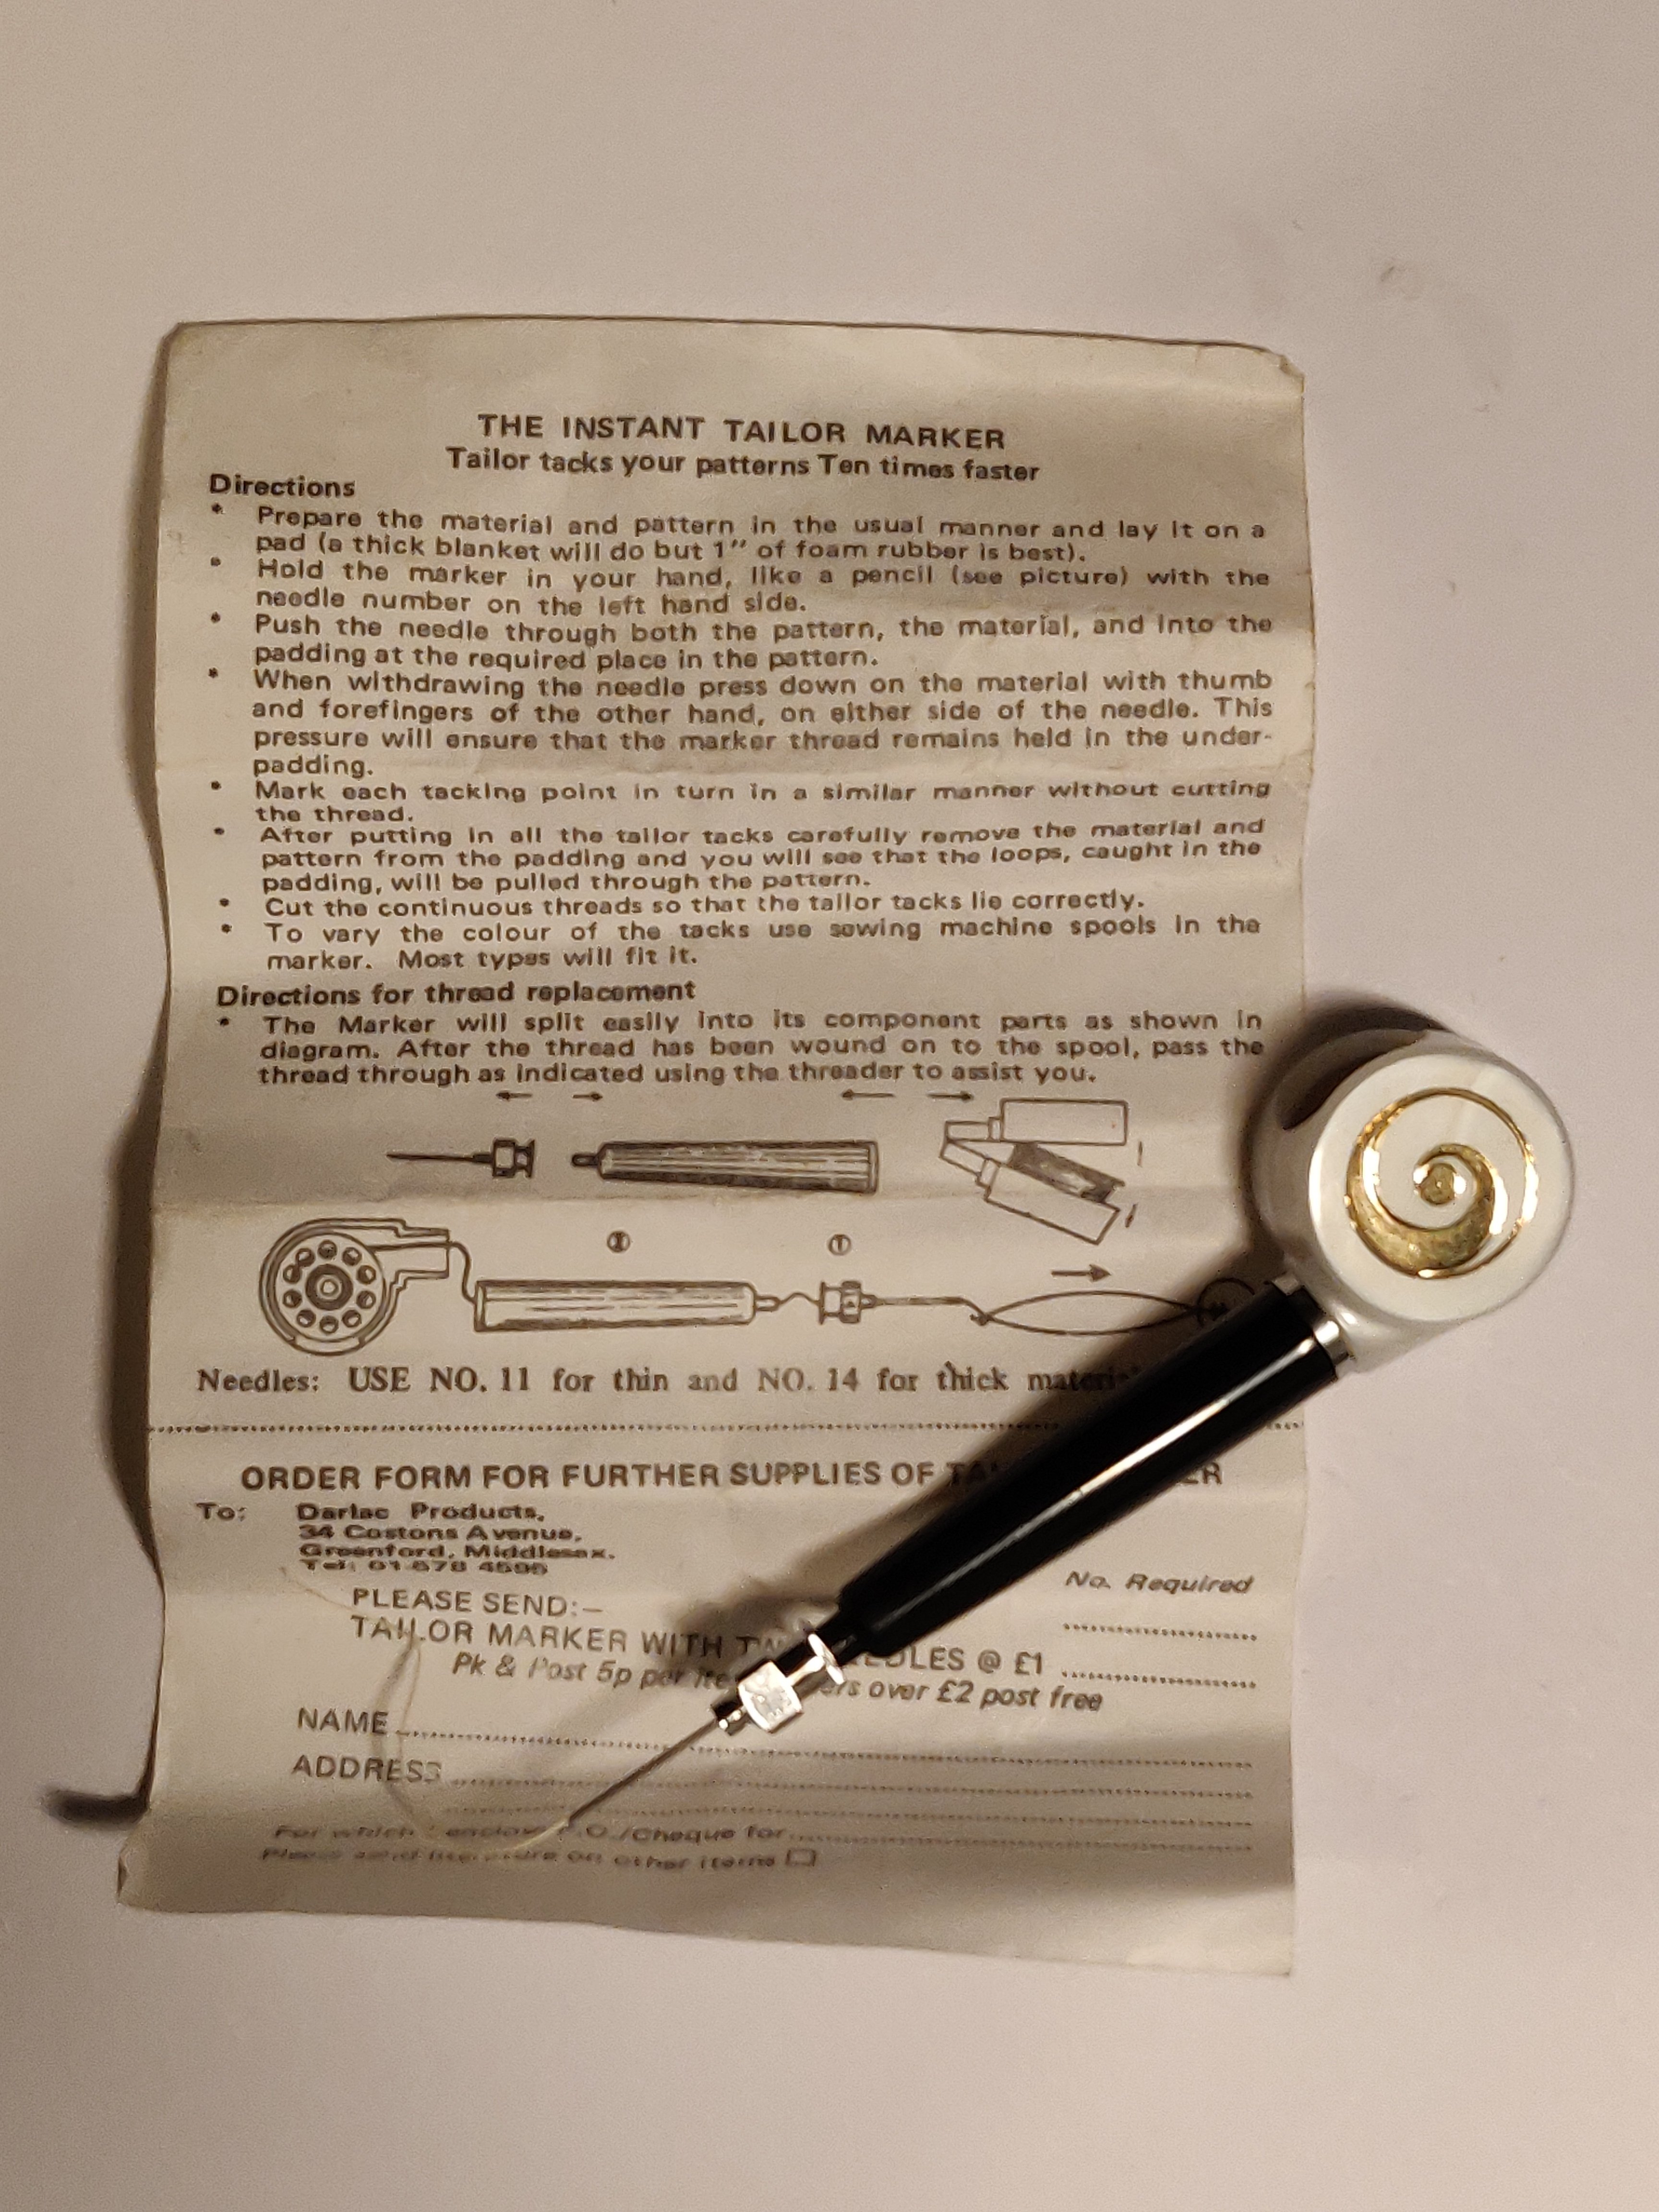
It’s called the ‘Instant Tailor Marker’ and it has a hollow needle. The thread is wound onto a normal sewing machine bobbin (which sits in the round housing at the end of the tool), and is threaded through the hollow needle. To make the tailors tacks you poke the needle through the layers of fabric. The instructions say to use a piece of foam behind the fabric. You push the needle in and out of the fabric and the thread catches in the foam. When you pull the fabric away from the foam it releases the thread, and then when you open the layers of fabric you can snip the tacks between the fabric, et voila tailor tacks all done!
I don’t necessarily use a piece of foam because I don’t always have one to hand and I find if I put my hand behind the fabric and pinch the thread each time, it works just as well.
This afternoon I cut out a dress which needed quite a lot of tailor tacks, (its got a princess seamline and I find tailor tacks help get this sewn smoothly). So I used my Instant Tailor Marker – and I thought I’d share this little gadget with other sewers.
Where I would otherwise have had to hand tailor tack or use my sewing machine – which is of course another option- I could use my Instant Tailor Marker instead.
I have been using snap-on feet on my Bernina 730 and 1030 machines for years with the aid of a clip-on adaptor screwed onto a low-shank Bernina adaptor. This combination allows me take the adaptor apart and use the low shank adaptor to attach low shank feet, such as a ruffler.
Bernina feet, whilst clearly the best option, are exorbitantly expensive and I can’t justify this cost for some of the more exotic feet that I may only use for part of one project.
Through the years I have also acquired a Bernina clip -on adaptor with a metal lever at the back with which to ‘clip’ the clip-on feet to it, which is also brilliant at the job but obviously lacks versatility as it doesn’t allow for low shank feet to be used.
Recently I bought a set of 48 (? I think), clip-on feet to expand my collection at a reasonable price, and another ‘Bernina style’ clip-on adaptor which has a red plastic lever at the back rather than a metal one. Now for the weird bit.
I used the knit foot and then the cording foot from the new set, both with the combination adaptor, and all was well. Then the next time I sewed, I attached the rolled hemming foot to the machine using the adaptor with the red lever, and the needle smashed into the foot. Not having used this foot before, I thought the foot was a fault, and so, being in a hurry I sewed the hem with the standard foot instead.
Today I attached the knit foot to the machine, and picked up the adaptor with the red lever as it was at the top of the box in which I keep the clip-on feet. Lo and behold, when I started to sew (with a straight stitch), the needle collided with the centre plate of the foot and smashed! I was confused, this foot had worked last time, what was the problem! Having forgotten which adaptor I had used last time I spent some time fiddling around checking what could be wrong with the machine. Then I thought about it a bit more, and realised I’d most likely used the combination adaptor as this is always stored in the actual machine’s own accessory box. I swapped the adaptors, and sure enough, no collision and no broken needle.
A little analysis and test-driving was needed, and after re-checking it seems that the red-lever adaptor positions some clip-on feet too far forward, so that the machine needle hits the centre plate of the foot. I haven’t tested all the clip-on feet with both adaptors yet, but have written big notices one the storage box, machine and accessory box to remind myself to use the combination adaptor with the knit foot and roller hem foot, and to check any others carefully before starting to sew.
Making up knitwear can be quite a chore, and using a linker makes it a lot quicker. Linkers make a chain stitch, which is extensible so will not burst the seam when the fabric is stretched.
Domestic linkers can be operated by hand or have a motor. The most common make in the UK is the Hague linker, which is blue, and made in the UK by Hague. It can used on a table, or mounted on its own stand. When joining large pieces whilst working a table you have to be careful that the pieces don’t drag as the dial revolves as this is likely to effect the stitch formation and make the machine heavy to use. Using a stand means that larger pieces can hang down and revolve with the dial.
Hague type linkers make the stitch on the outside of the dial where the needle is positioned, and the chain on the inside where the looper is situated. A linker is a usually circular, and has a dial of spikes radiating outwards. These are called ‘points’ and as with a knitting machine, the number of points per inch is used to describe the gauge of the linker.
Linkers have large eyed, usually curved, needles and are designed to be used with a similar weight yarn to that in which the garment has been knitted, e.g. a linker with 5 points to the inch will take yarn of similar diameter/count to that used on a domestic knitting machine. The linker in this video has more points per inch than one intended for use with domestic machines; it is probably a 10-12 point model.
Linking different gauges of knitting
Obviously its not possible to have a linker for each of your different machines, or for hand knits, but the good news is that you can use a linker for different gauges of knitting. If the stitches are wider spaced than the points, spread them out so that not every point has a stitch; the chain will carry over the odd empty point. If the stitches are closer together than the points, it is a little more difficult as you have to double them up on the points, and to frequent doubling can lead to a gathered seam, so I wouldn’t recommend using a domestic linker for finer than 8gge knitting.
Before starting, hold the knitting up to the dial (remember that the circumference of the dial is smaller at the inner end of the points, where the stitches are made), and estimate how often you need to add a space, or double-up on a point. Make a note of this, and put the stitches up onto the points with evenly spaced gaps or double stitches.
Linking tips and troubleshooting
If the garment is knitted in a fancy of fluffy yarn, I recommend linking with a smooth, strong yarn of a suitably matching colour instead.
The tension of the chain stitch can be adjusted with a thumb screw, and it is important to use this adjustment to achieve successful linking. Put broadly, over-large and/or missing loops indicate loose tension, and skipping, dragging and stiff operation indicates too tight, but the only way to get it right is to practise on scraps of knitting prior to sewing the garment.
In very rare circumstances the timing of needle and looper can become disrupted, and it is impossible to get the linker to make stitches; the needle may break or bang into the looper, or the looper may be totally out of synch with the needle thrust. Although it is possible to adjust this yourself, unless you are very experienced with the machine and understand how the stitches are formed, I recommend sending the linker to Hague for repair.
Preparing your knitting
When preparing knitting for point-to-point linking the last row of main yarn knitting is not bound off; the stitches are left ‘live’. Before removing the knitting from the machine, 10-20 rows of ‘waste’ yarn are knitted, then the piece is knocked off the machine without binding off. When choosing ‘waste’ yarn, aim for a strong colour contrast in a yarn that is slightly thicker than the main yarn. A thicker yarn will open the last row of stitches, making it easier to insert the points, and a contrast colour helps the operator pick the correct row of stitches to catch onto the points. Try to choose smooth waste yarns; fluffy ones may leave contrast colour fibres when the waste is removed.
More detail about the video example shown above
The video above shows how to point-to-point link a double thickness, folded collar around the neckline of a garment. The collar in this example has been knitted across the needle bed of the knitting machine, with ‘live’ stitches left at both start and finish as follows:
cast on with waste
work 10-20 rows waste
change to main yarn and knit the number of rows required for the collar outer depth e.g. 20 rows
knit a loose tension fold row if you want one
knit a second series of rows equal to the inner depth of the collar, e.g. 20 rows
change to waste yarn
knit 10-20 rows
remove the knitting from the machine
See ‘Preparing your knitting’ for how to work the joining rows between main and waste yarn to facilitate easy linking.
Putting the knitting onto the linker
Before starting to put the collar and garment on the linker, check whether your linker makes the stitches inside or outside the dial, and position the piecs accordingly. In my example, the stitches are on the outside, the loops inside.
Put the open stitches of the inner edge of the collar onto the points as described in the video, (wrong side facing in this example), and then put the garment neck onto the points (right side facing the operator in this example). Finally fold the collar over the top of the garment neck edge, and catch the open stitches onto the points – make sure to align the inner and outer stitches so that the collar is not twisted.
Sew through the three layers, and pull the end back through the last chain to secure the linking. Remove the garment and unravel the waste yarn back to the main stitches. Take care on the last row, and if any stitches have been missed, catch them with a pin or a strand of waste yarn. I find those little safety-pin stitch markers very useful for this on domestic- machine knits.


 Sewing towards the Wonder Clips – I’m using a walking foot in my Bernina 1030 in this photo.