Singer 401g

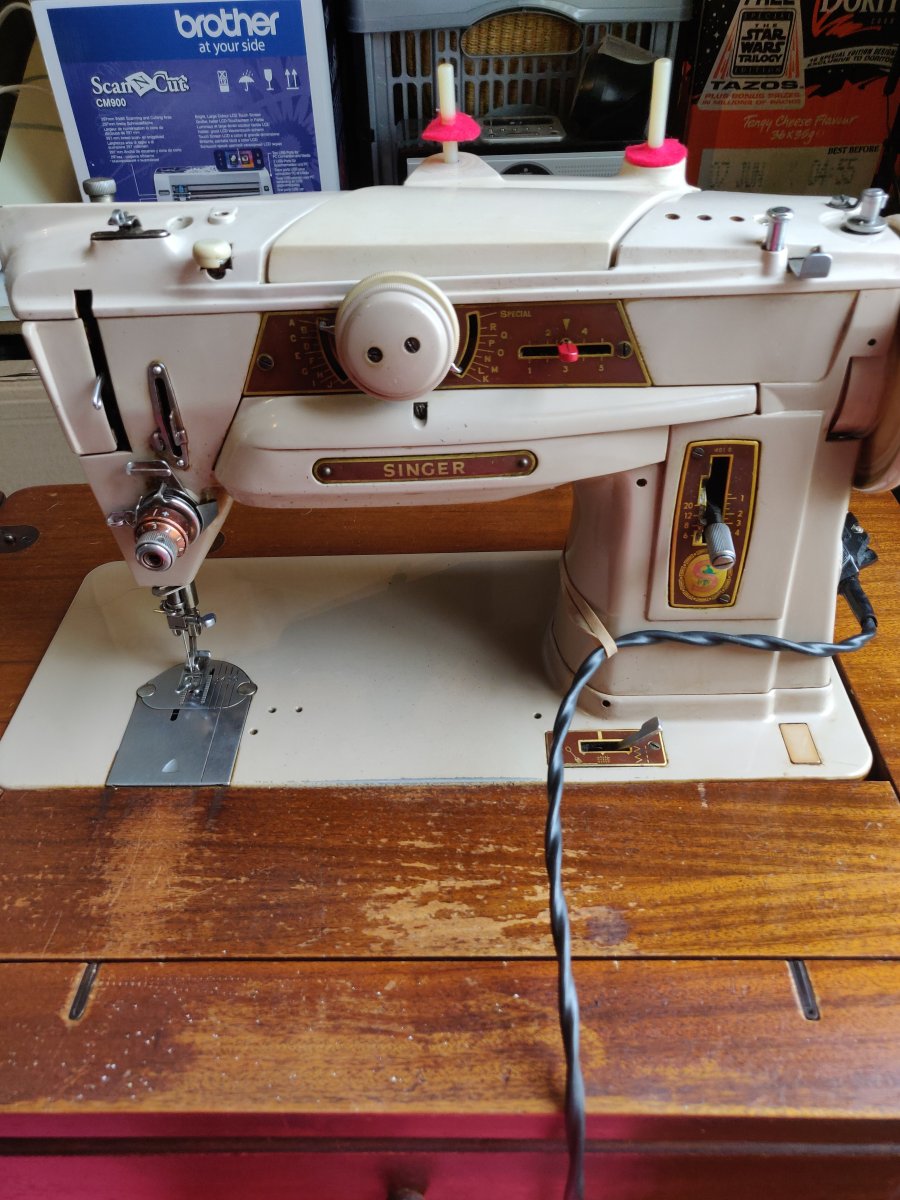
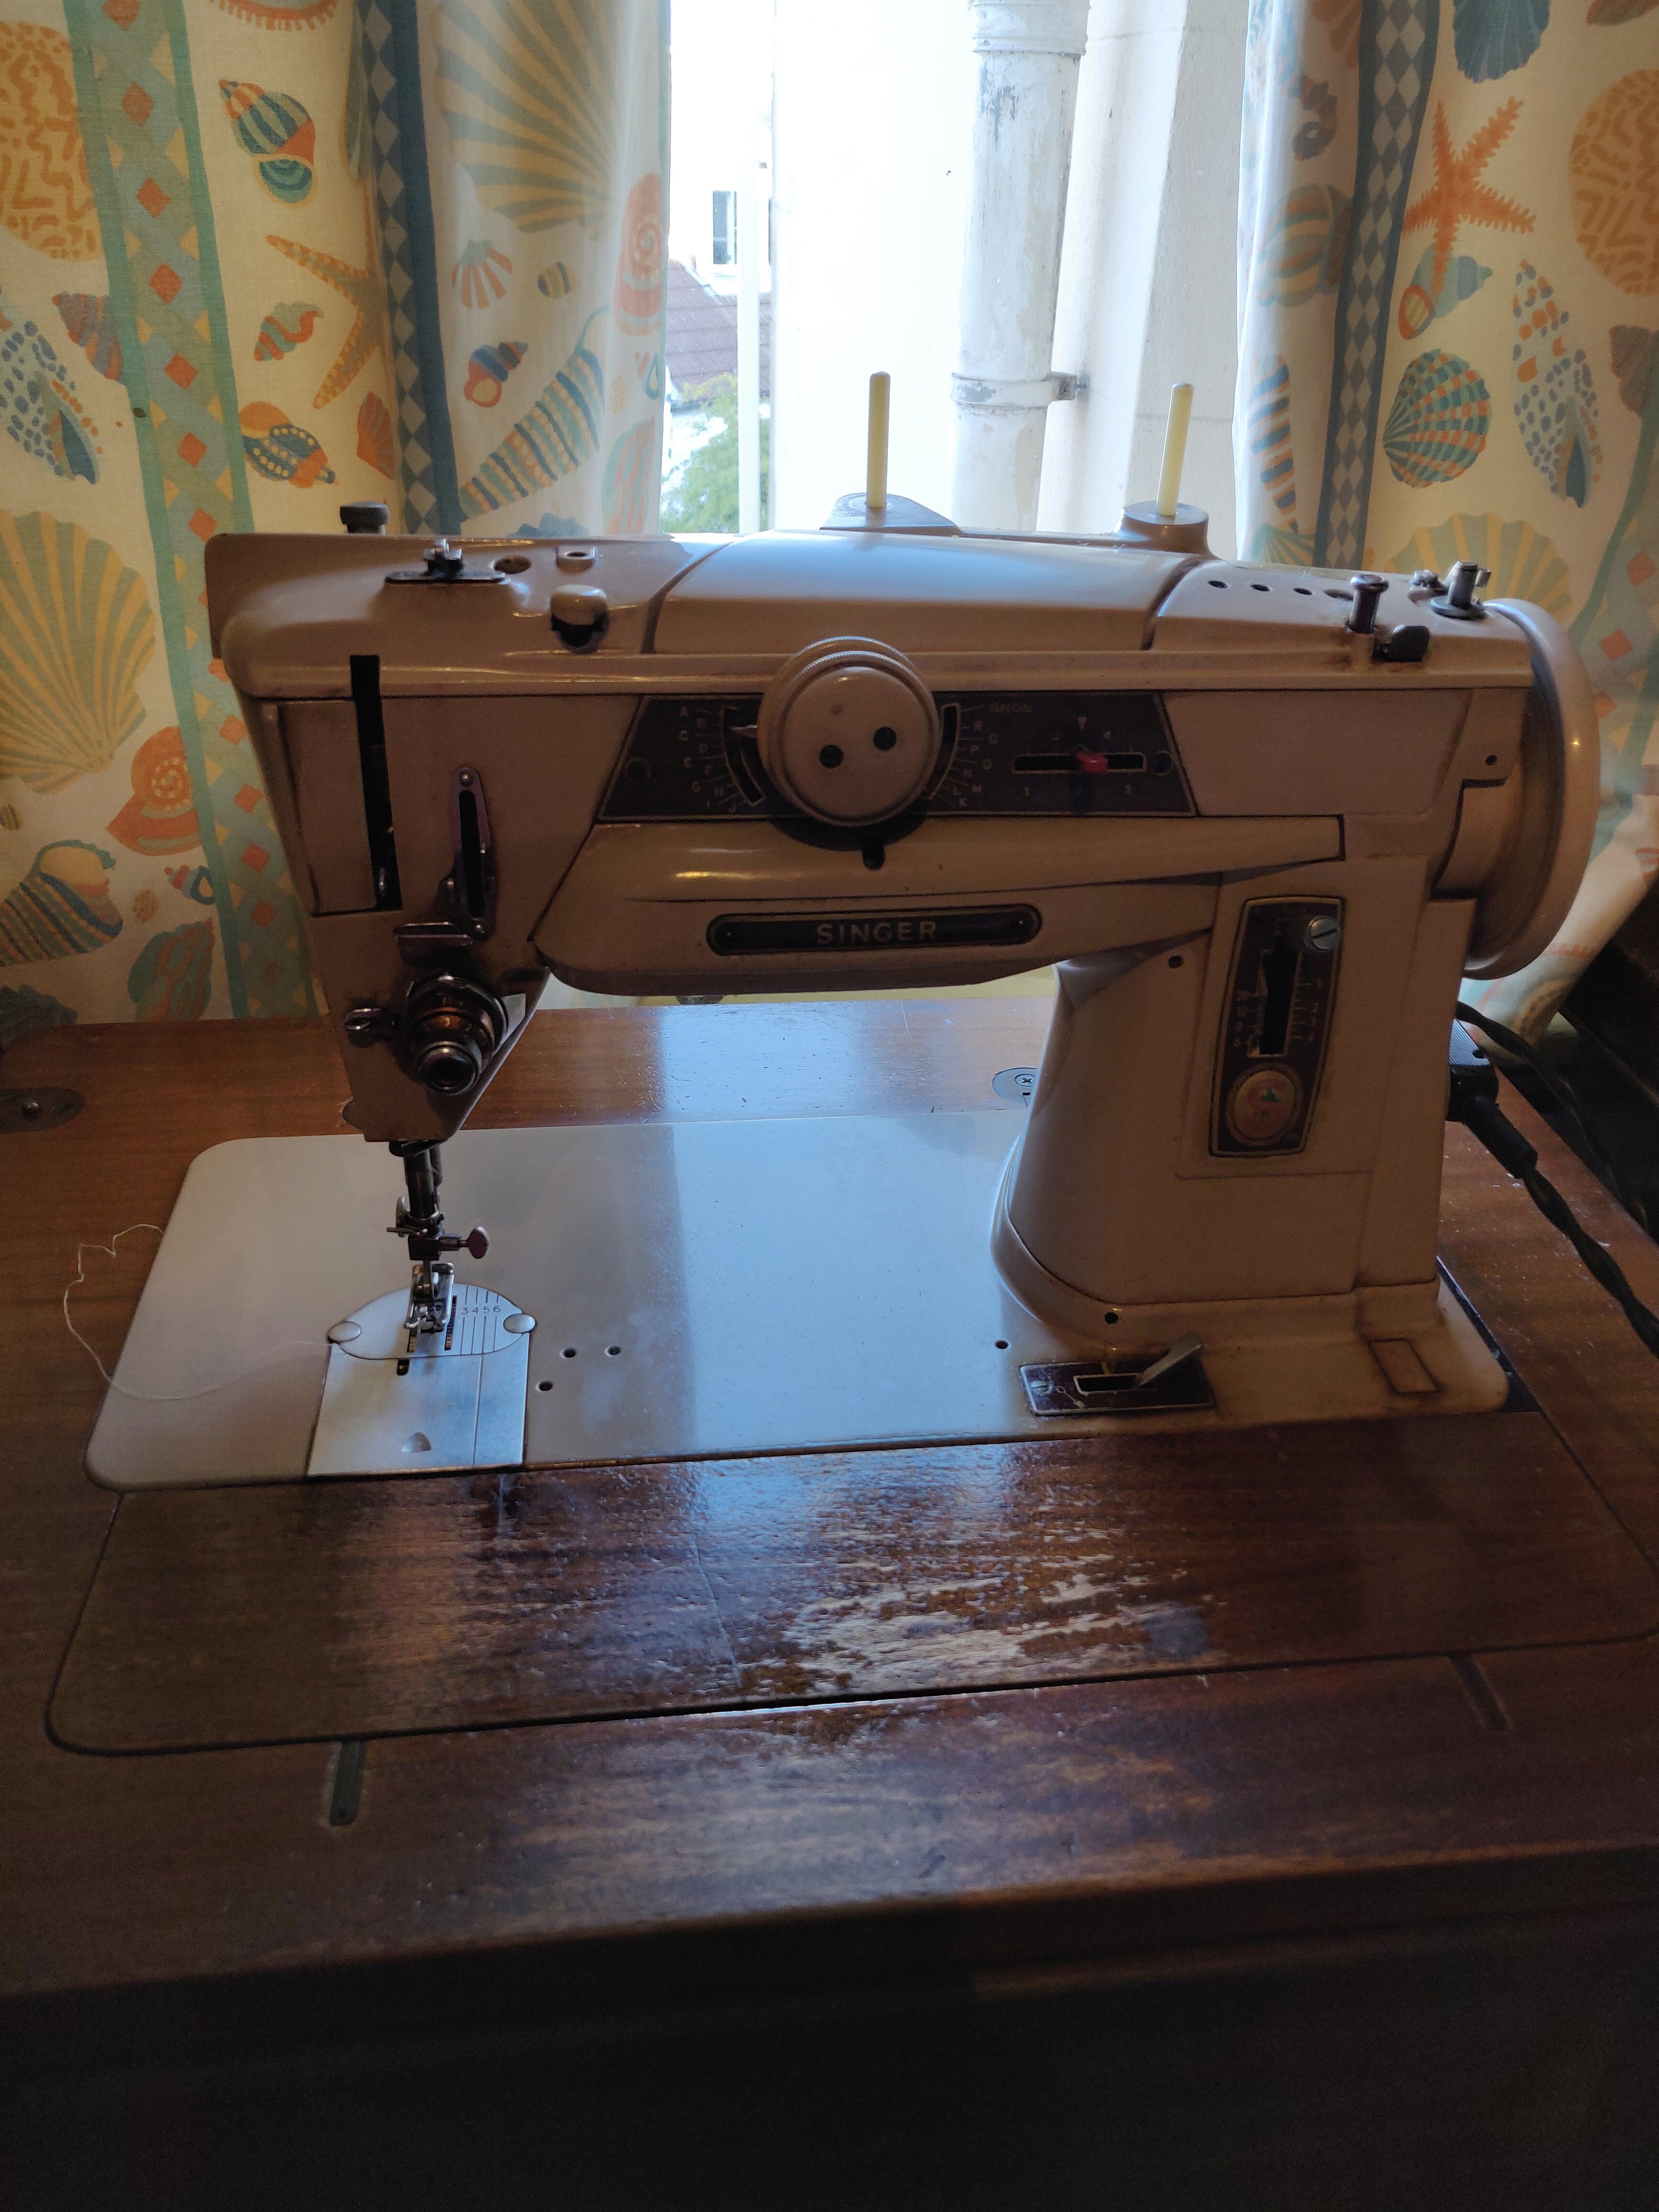
A while ago I posted about this new acquisition. I’ve not been able to use it much recently as I have two knitting machines up. I’m busy writing my latest book on machine knitting which has to take priority.

Before going any further I must point out that the machine now had been rewired and has a new for pedal, so is not as precariously wired as in the photo any longer.

However, I need to plant out my tomato plants and have to make grow bags for them, so it out came! I’d forgotten how great it is to sew with. It went through six layers of hessian without batting an eyelid. The big ‘but’ was that I had forgotten it’s little foibles.

When start a seam on my Bernina I go forward, back and then sew the seam. Singer-babe is different, she needs special measures. To prevent that worrying sounds of jammed threads in the bobbin and a jammed feed, I’ve learned to drop the foot 1cm or so into the seam, sew backwards and then go forward. The manual clearly explains this point, but who reads manuals? Once I remembered this, all went well.

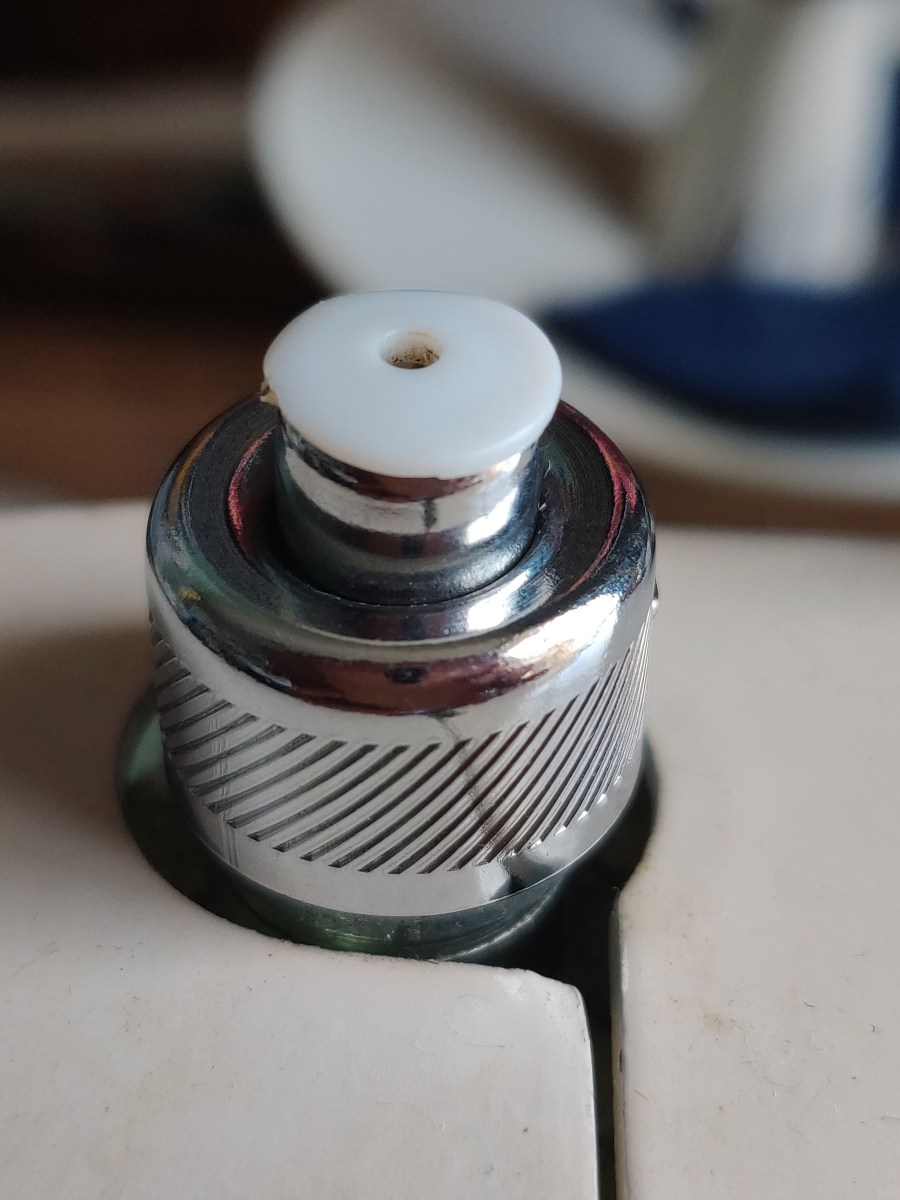
I’m still annoyed that I can’t get her to use metal bobbins. Plastic ones were in the box when I got the machine, and I really dislike these. So I invested in several metal ones to fit, but they don’t work well at all. I’ve adjusted bottom and top tensions to try to get a good stitch, not nothing works. So it’s back to the plastic ones before they all go out the window.

Anyone else have this problem, or have any advice to offer?

UPDATE. May 2021


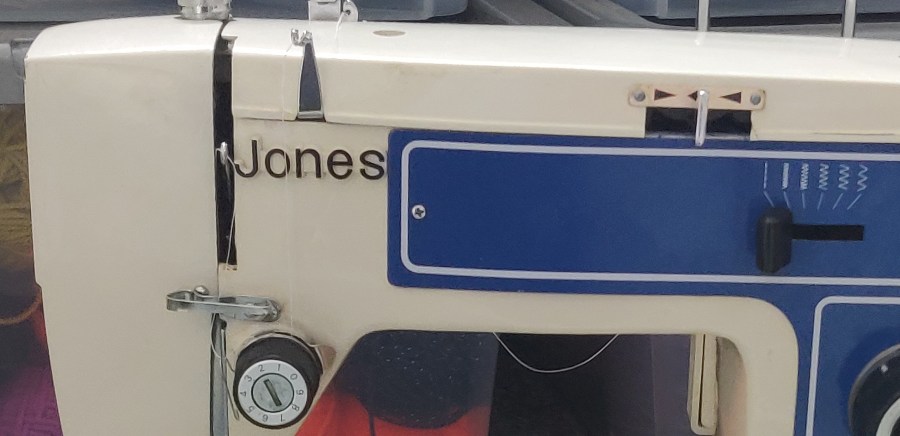
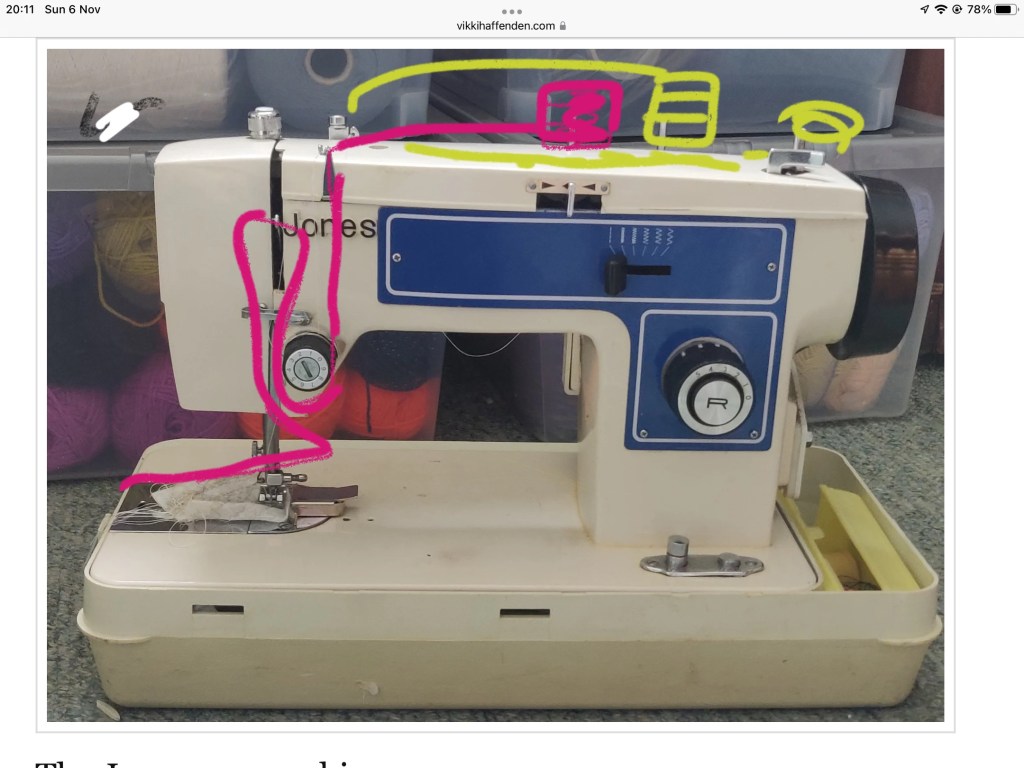
I the problem I was having with the bobbin was that the thread was not looking over the bobbin, but catching around it instead. I found a video by Andy Tube on You Tube which explained how to check the thread gap on the bobbin case, which prompted me to check mine. Oh yes, it was way out.

I can see how this happens; the black spring that holds the bobbin case in place has a tempting little finger that looks as if it should be used to lift the spring up. BUT DON’T. That is clearly one of the ways it can get out of line. So with the help of a feeler gauge and Andy’s helpful video I think I have largely fixed the problem.

Andy suggested that the bobbin case might be worn, and that also might be contributing to the thread dropping underneath. So I have ordered a new one. After all, it is probably 50 years old, ( this machine was made in the late 1950 early 60s. Maybe it’s had a new bobbin case in that time, but maybe it hasn’t!

I still haven’t solved why the zig zag stitch missed sometimes, that is my next challenge.

UPDATE July 2021


Ok another update.

I think the zig zag daily is because the needle arm is slightly out of line. Another Andy Tube video shows how to fix this, so that my next challenge.

Mini mannequin

I’ve wanted a half-scale mannequin for several years, but have always been unable to justify spending the money. I made my own full-sized body double, and several other mannequins for my research, so have lots of experience making real-size ones, but wasn’t sure how to start with a half-scale one.

Luckily I happened upon Leila’s website Grow Your Own Clothes, where she has a great tutorial about making your own half-scale mannequin. I then saw that she has a pattern for a sewn and stuffed on on Etsy. I thought that would be a bit weird, but having taken a good look and having done a lot of work on fitting clothing to the body I realised I could make that! I bought the pattern – thank you Leila for putting it out there, and assembled the materials. https://growyourownclothes.com/2015/08/06/mini-stuffed-dress-form-pattern/

Yes it is fiddly, and you need to concentrate. There are lots of little pattern pieces that have a tendency to blow off the table if the window is open, so I don’t think its something to take on if you can’t leave things out to work on unless you are very well organised. Do read the whole thing through before starting so you get the gist of what you are going to do. The tips and hints given in the pattern are extremely helpful and the instructions are very comprehensive and easy to follow.

The sewn shell, ready for the base to be put on

Its really important to be as accurate as possible cutting out and sewing the seams. I managed to be reasonably accurate, but can see where I could have done better.

Its a very clever design with a central panel to hold the shape better and a pole insert.

Stiffing is quite a challenge. I can again see where I could improve, and may unpick the base and rework this at a later date, but I am to excited to do this now. I luckily had a sack of carded polyester wadding that I used, but stuffed the shoulders and some other areas I felt might benefit from the behaviour of the fibre with wool that I carded myself. I might re-stuff with all wool – or at least do the next one with wool

Partly stuffed, with the base in place now.

At this point I was a bit frazzled and had burned my finger on the mini-iron and stabbed myself in the palm with the point of a very sharp pair of scissors, so I decided to call it a day. Today I completed the mannequin and am thrilled with the result.

The suggested stand is a cardboard one, but I have just broken the top of a wooden lamp, and realised that this would make a great stand.

The lamp base and dowel that will make the stand.

I am pleased, but as I say I am my own worse critic, so can see all the things I wish I had done better. I plan to make another one from the pattern to perfect it. For the moment I am chuffed though.

Presser foot pressure

I’ve been having problems with adjusting the foot pressure on my Jones 125 machine. I’ve not seen one like it before and couldn’t work out how to use it. Today I’ve had 3 broken needles and I traced this to the really strong pressure on the foot. My Bernina 1030 doesn’t have this adjustment so it’s not something I work with much.

The pop darner for pressure adjuster on the Jones 125.

Then I lucked upon this webpage https://aspenleitervacuum.com/under-pressure-the-adjustment-you-didnt-know-you-had/

Before reading this I’d been twiddling it, popping it up, trying to unscrew it and seeing no difference. After reading this helpful page, it seems the Jones has a ‘pop darner’ style pressure adjuster. The central core pops up when you push down the outer ring, and then you depress the central core in increments to achieve the pressure you want. I imagine the name comes from popping it up to take pressure off when darning (or free embroidering) on the machine. Suddenly it all makes sense. The 3/4 position is so much better for what I am sewing today than all the way down, where it was because I couldn’t work out how to adjust it.

Probably common sense to others, but not to me!

Thank you to the kind person who took the time to write about the different methods of adjusting foot pressure, and for such a clear explanation.

Another new sewing machine – my Singer 401g

I have been toying with the idea of buying a Singer slant shank machine for a while, and during lockdown I took a punt and bought one reasonably local on eBay. Not the smartest move you might say, sight unseen and all that. I spent quite a time scrutinising the photos very carefully, read up about the machine, and asked lots of questions of the seller. Call it a treat to myself.

Updated with some photos just now, 16:00 4th July

Above, as it arrived, a bit grubb

And below, after a good clean up

Finally I went to collect it – social distanced collecting methods in use and no stopping en route. Its outside is a bit grubby, but its working and has all its accessories down to the lint brush and set of screwdrivers. Its obviously well used, it was owned by a dressmaker before, but I would guess not used for several years. However, its got service labels and having all its accessories indicates to me that it was well cared for and valued. It came in a drop down table, which was perfect as wanted one in a table, but not a massive cabinet.So far I’ve opened it up and cleaned its insides, removed as much old gummy oil – or as I can reach – and given it a thorough oil with light sewing machine oil. The double direction pattern dial was gummed up, and this gentle cleaning and oiling helped to loosen it up so that I could (very carefully) encourage it to move, and now it works freely. Its fascinating to see how the selection mechanism works, not that I am an expert at mechanics, but I can see the little paddle moving and the rise and fall of the selector post (probably the wrong name). I am itching to try out all those amazing built in patterns. I can’t right now as you will see in the next paragraph.The original clam-shell foot pedal is with it, and it did work – sporadically. After a while there was a nasty smell (reminded me of when my Bernina 1030 went into melt down, and when my Brother 950i knitting machine and very, very vintage Kenwood Chef did the same) and the machine would not stop running. Luckily the plug was close to me, so I whipped it out to the socket before any damage was done.My clever son opened the pedal and told me I should have cleaned that out (didn’t even think of it, sorry), and then he replaced a blown capacitor – he is pretty nifty at this and has a stock of electrical bits. The pedal now works – but the connection from the pedal lead to that ‘banana’ plug is dodgy. In addition some of the old plastic has broken away inside the pedal and the plug has a chunk missing which worries me. I’m not confident around electricity having had a few experiences that unnerved me, (see above). He offered to repair the lead and plug (he thought Sugru) and will in time, but I decided to order a replacement so that I could use the machine until then. I will compare them to find which gives the best speed control as some reports say new ones are not as sensitive.The motor seems OK, and my son will clean it at some point. So far the machine has displayed a lovely straight stitch – equal if not better than my Bernina 1030, and far better than the Jones 125.I did hanker after a Singer 411g or 431g but I think the 401g will satisfy me. It was only the chain stitch of these I wanted, but reading about it it sounds to require lot of fiddling to get it right and so that do you leave the machine set up just for that? Seems a waste to me, so I’ve let that wish go for the moment. I also think I remember that my Janome Coverstitch machine will do chain stitch, so maybe that is something to explore. I’m not even sure why I want chain stitch – I’m just a machine nerd (maybe?).Want this space for more chats about the Singer 401g that has joined my machine stable. Its going to be sewing frontline masks once the new pedal arrives.

Ode to an old Jones sewing machine

I’m doing quite a lot of sewing at the moment, so to supplement my Bernina 1030 I bought an old machine on eBay – not a modern one, an old second-hand 1980s model (my guess), very cheap and local pick up only. It’s a Jones, (later these were rebranded Brother), built like a tank and weighs a ton as the machine itself is all metal.

Its a Jones model number 125 with TUR 2 written on the motor at the back. I can’t find any info online about this machine, so if anyone has a manual or other info that would be helpful if be most grateful if you’d contact me.

The main problem was that the plastic case is degraded so the bed machine has dropped below the top edge of the case which means you couldn’t open the bobbin case, so that needed a bit of attention.

The Jones 125 machine

I have it several hours of TLC; opening the machine top, checking, cleaning and oiling everything. The bobbin and shuttle hook had all sorts of thread wrapped around it but that was easy enough to take out, clear and oil. Then I had to sort out the bobbin tension that was wildly awry.  the light bulb had blown, and I will replace it with an LED version.

There was no manual with the machine just a foot pedal, a plastic need extension and some spare bobbins – which for the price I really didn’t mind. However someone had put the needle in with the hole from front to back, like my Bernina, when actually it should have been in so that you thread it left to right. Its been a while since I’ve used a machine which threads like that, so it took me a minute or two to work out why the bobbin thread was not being picked up. Once I put in a new needle that faced left or right it picked up the bobbin thread no problem. 

Going back to the bobbin and case. The machine has a side facing bobbin in a vertical shuttle that is accessed from the top, so it’s not as easy to get to as a front loading one. Because the bottom case in which the machine suits is degraded and the plastic hinges have broken, the machine has dropped below the level of the case-edge, making it hard to reach the bobbin. I’ve stuck some shims in the sides of the bottom case which have raised the machine bed so that the bobbin plate will now side open. This also means the bed extension will now for correctly. The machine is in one of those classic Jones and Brother flowery carry-cases and although the bottom case plastic is a bit fragile, this seems reasonably sound.

Unlike the Bernina the Jones has adjustable pressure on its presser foot which takes a bit of getting used to. Now I’ve got it sewing it’s working fine.

What’s nice is that the feed dogs will drop for free embroidery if needed. It has good stitch length and a nice wide zigzag, so does the face mask job perfectly. 

Having got it sorted out I prefer to keep the Jones threaded for the masks and my Bernina for my personal sewing. OK, I’ll admit it, I’m a machine nerd! 

I think the Jones is also a bit of a consolation prize to myself; I’ve bought myself a vintage Singer slant shank machine which I’m really looking forward to getting, but I can’t collect it because of Covid.

The Jones is a great everyday all-purpose robust machine. I do get fed up with those people on eBay who are selling old machines as ‘heavy-duty’ and ‘semi industrial’. There are industrial or domestic sewing machines, but none that I know of were ever sold originally as ‘semi-industrial’. I agree that some modern machines are a load of rubbish, plastic and not really got for purpose, not that only a few – believe me I have seen some in the course of helping people with their machines. 

I’ve always preferred older machines, having owned a hand cracked Singer and a treadle one (I am filled with regret that I didn’t have the storage to keeping these), an Elna Supermatic (why oh why did I get rid of that?), a Singer Touch and Sew, and then a Bernina 730 (still got that one)  and an Elna TS (had to go for lack of storage again). 

Even the Touch and Sew would sew through loads of fabric, and I did like the pattern cams of that and the Supermatic. I think the slant needle slant shank machine I have just acquired probably won’t go through that many layers of fabric because the needle may possibly deflect? I will have to wait and see! 

So now it’s back to my sewing.

Someone has asked how to thread the machine, but as I no longer have the machine I have drawn onto the photo. Also see my post about adjusting the presser foot pressure. Search ‘Jones’ at the top of the page to find the post. I do hope this is helpful.

How to thread the machine . Pink is the top needle thread. Needle threads sideways. Yellow is the bobbin.

DIY cloth face mask – free pattern and instructions

I organised an online face-mask-making workshop yesterday, and the links below are to the instructions and pattern for the mask we made. You can read more about making different types of masks on my DIY mask making page. If you just want to get stuck in, please use the links below to download the pattern and instructions and make cotton face masks for your family and to donate to key workers. The pattern has an opening to allow a filter to be inserted.

Duck-bill scissors for trimming seams

I’ve just made a boiled wool dress with to stitched seams. These needed to be trimmed to reduce bulk, which have me the chance to try out these duck-bill scissors I’d bought at an exhibition. The wide blade is supposed to prevent accidental snips into the main fabric, and enables you to get close to the stitching line.

These worked well, and are nice and sharp. A successful purchase!

I’m not sure if this is the accepted easy to use these scissors, but it worked for me.

Quick to make T-Shirt tunic

In a flurry of energy today I made a T-shirt tunic out of some of my fabric stash. My stash is a pile of fabric that hunkers down in the corner, offering me enticing glimpses of exotic colours, textures and exciting new projects before my guilt makes me go and do the hoovering.

So today I said ‘hang the Hoover, dump the dishes, it’s time to SEW!’. And I did!

This is my variation of The Makers Atelier ‘Boxy T-Shirt’ pattern. I’ve lengthened the whole T-Shirt into a tunic, and made the back a little longer than the front. They advise using stretch interfacing to stabilise the shoulder seams, neck, cuffs and hem, and luckily I had some to hands – that’s the beauty of being a fabric hoarder.

The Makers Atelier patterns are easy sized and they encourage you to be inventive when using their patterns. I cut between the medium and large to get the fit I wanted. I considered altering the pattern by adding bust darts but am now pleased I didn’t bother. In a fabric with less drape that might still be a good idea for the future.

This cotton print Jersey fabric has been tantalising me from the depths of my stash for a few years. It was a remnant, so only just over a metre long and never quite enough for most things I considered. It had been expensive as it’s really good quality fabric so I didn’t want to waste it on something I wasn’t going to be happy with. All of which meant that it’s lain there waiting for its moment.

Now it is finally made-up into this tunic I am very pleased with it; this will be going on holiday with me. The Jersey won’t crease too adult and I can dress it up and ring the changes with linen trousers, Capri pants, leggings and even skirts I think. Plus it will work on the beach. Win-win I think!

It took me about 4 hours to make including cutting out the main fabric and interfacing, (oh and finding the interfacing which I had put somewhere totally illogical). The making was interrupted by the ‘incident of the bloody overlocker’ – when there was a ‘bang’ and the machine light went out. Well yes, I did panic, but it turned out that the bulb had gone ‘pop’ and blown the fuse of the overlocker at the same time. So it was easily repaired thank heavens. I hate it when my machines break.

Finishing off called for the coversew machine. I could have topstitched with a double needle on the sewing machine, but why have a coversew machine if you don’t use it? Threading it up is a bit of a pain but it sews a lovely hem, especially when the fabric is interfaced, so it was worth the bother.

I have a glow of achievement as I sit here blogging.

Using Clover Wonder Clips when dressmaking

Today I’ve been sewing a jersey dress, and the fabric is a double-sided tubular jacquard which has very fine yarn loops that are easy to pull. When I was cutting it out I found that the pins points were catching the fine knit threads, even breaking one and making a hole so I had to move the whole pattern around – not much fun! I usually weight the pattern pieces and don’t pin, but this fabric is over stretchy for this, hence the pins.

So now I’m sewing-up the dress, I’m testing out using Clover Wonder Clips rather than pins to hold the seams together. These clips have made joining the seams very easy and seem to be a really good addition to my equipment. They have a flat back and a curved jaw with a ridge at the point that grips the fabric securely. The flat side makes it very easy to slide the clip under the fabric without disturbing it. On this flat side they also have measurement lines marked out to help keep a straight seam.

I’ve already used them to hold knitted pieces together when hand sewing them and they work extremely well for this, there are no pins drop out onto the floor for the dog to tread on!

I also used the little ones to clip long yarn tails (I keep them long to use for sewing-up), to both hand and machine knitting whilst I work. Yes I could use binder clips or bulldog clips or clothes pegs for this, and I still do, but I find the Wonder Clips grip more firmly and they look a lot nicer. They’re also not as heavy as the binder clip so don’t drag the knitting down.

Overall I’m really pleased with the way they work, and now have three sizes to work with. Their bright ‘jelly’ colours cheer me up on a grey day!

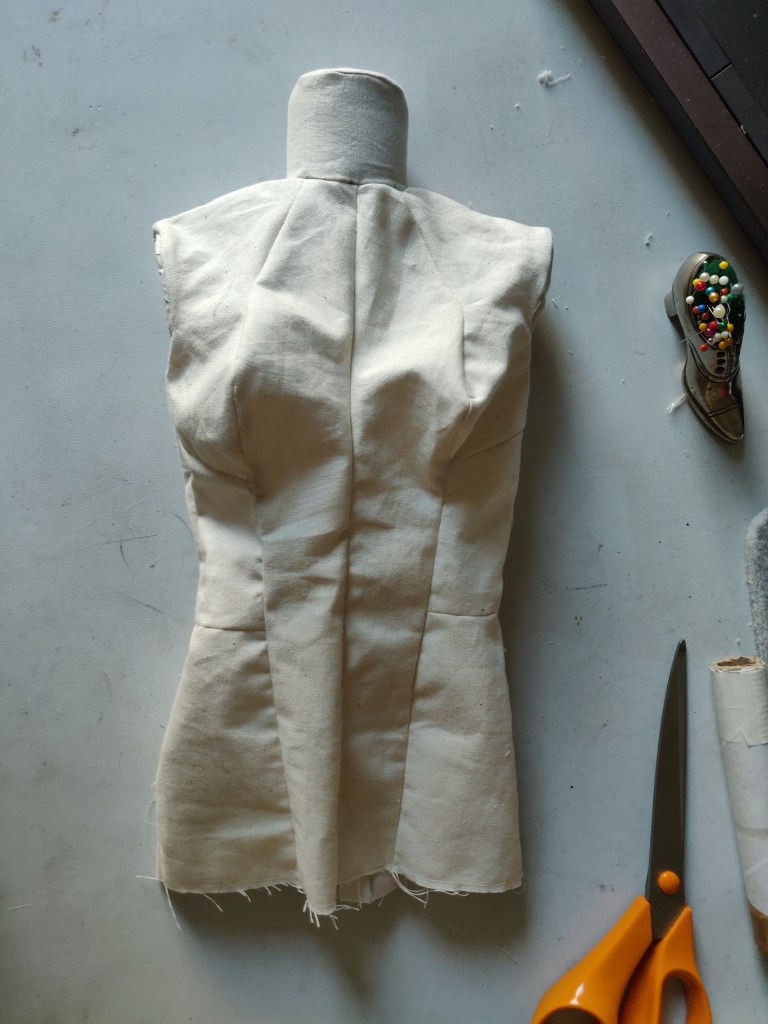
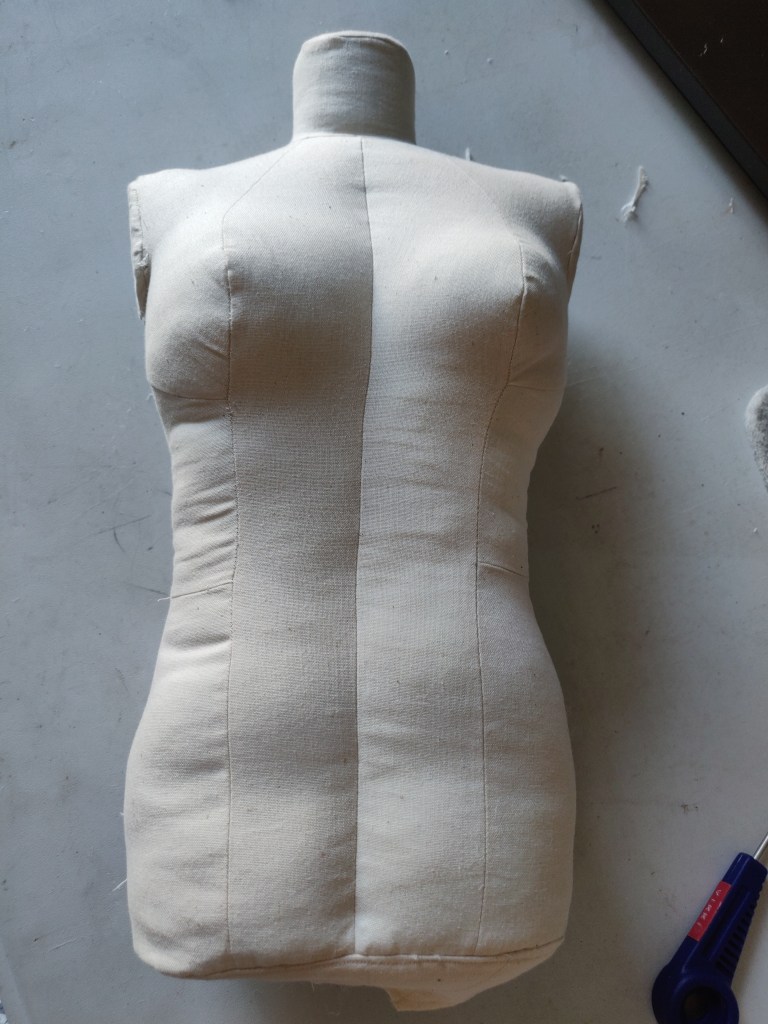
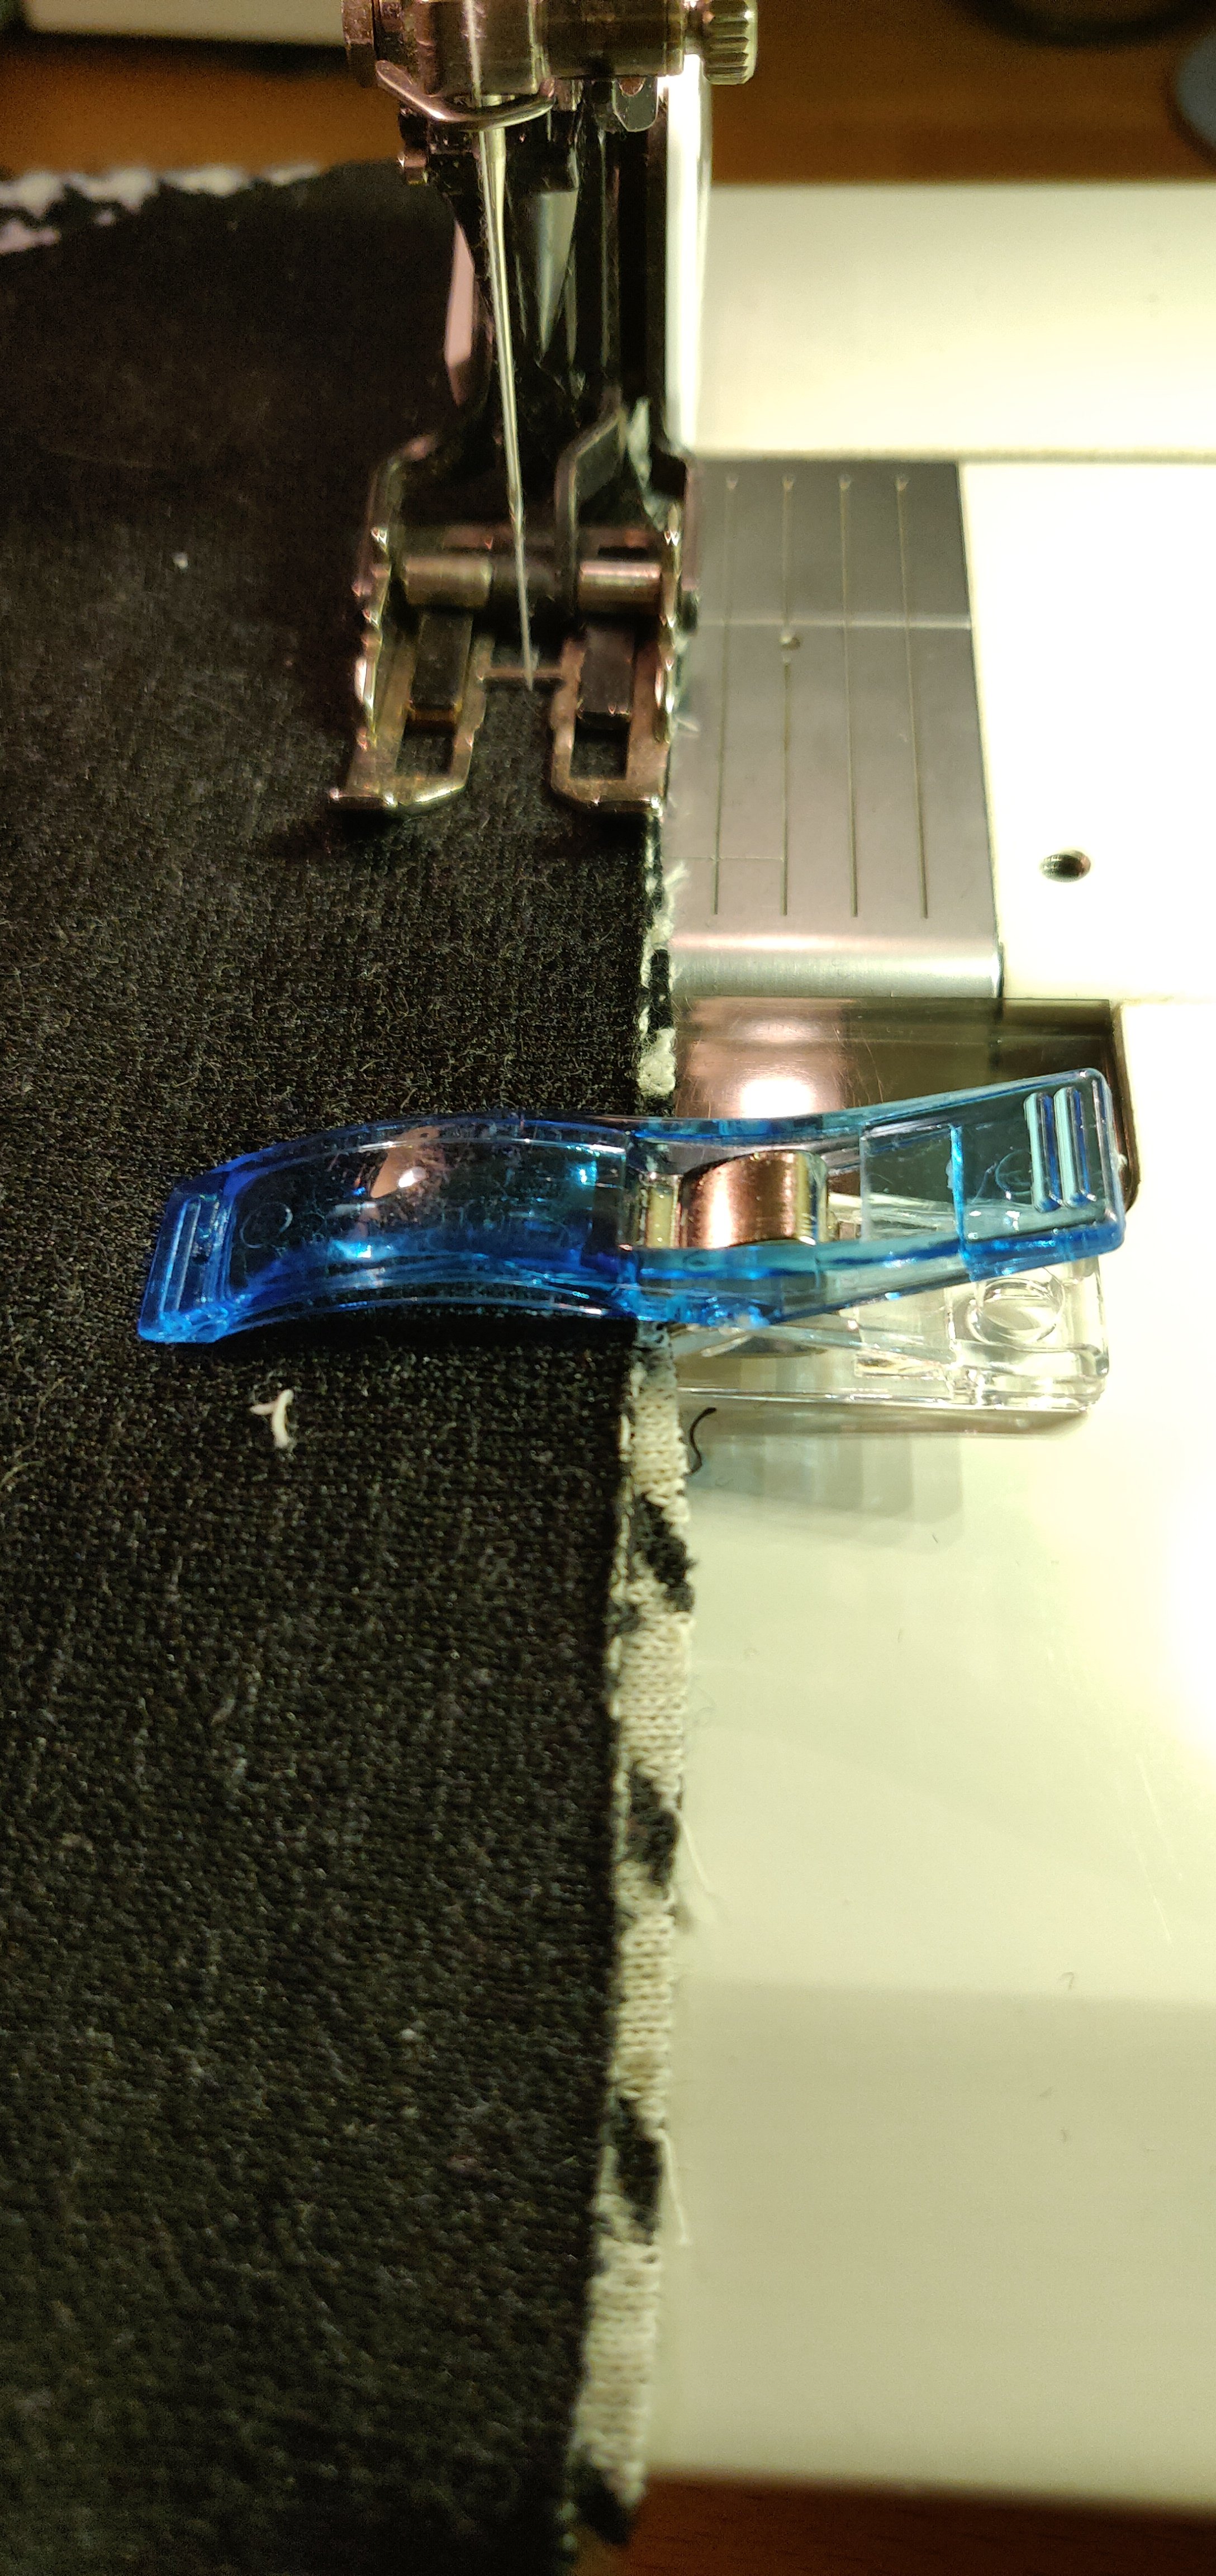
Sewing towards the Wonder Clips – I’m using a walking foot in my Bernina 1030 in this photo.