You can read my post written at the time about this experiment, (as far as when things went a little off track after making the starter dough) in my other post ‘Raisin Yeast Experiment – 1’.
One major breakthrough for me during the process described in this post is to understand that using percentages and weights rather than measurements like cups, (as used in a lot of bread recipes) makes far more sense to me, but each to their own.
With the need to be creative and feel secure during the COvid-19 lockdown I, like so many others, began to bake. As there seemed a scarcity of dried yeast, not to mention the disappearance of all flours from the supermarket shelves, (shame on you hoarders – I bet you haven’t baked a single loaf) I decided to try making my own yeast. I’ve made sourdough before, and found bread made in this way to be easier on the digestion than faster risen breads. In fact, I grew a great yeast-based sourdough starter dough and kept it for several years, but somewhere during those child-rearing years I lost it, or let it die, who knows?
To learn how to make the yeast from scratch I trawled the internet and found that you can use various fruits, and even nothing but flour and water. The raisin yeast version sounded nice, and apparently has a great taste, and I had raisins in the cupboard, so that decided it. I might try an apple version next as that also has reviews.
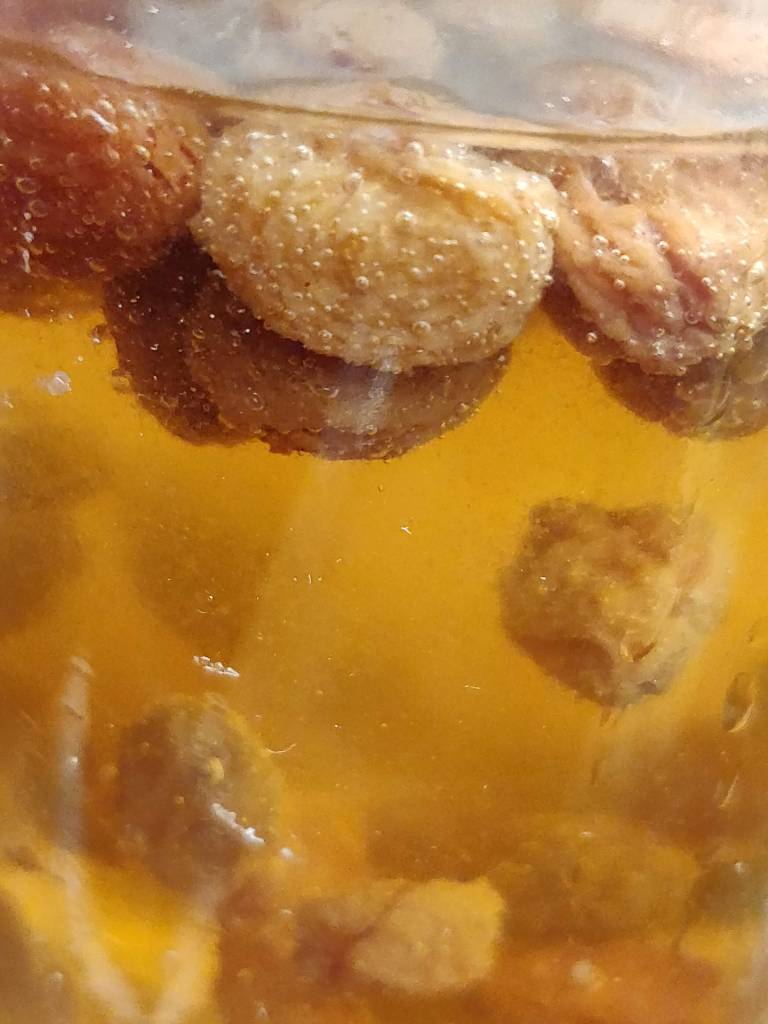
- I started with 3 tbsps dried raisins which I put into a lidded glass jar.
- I added 3 x their volume in lukewarm water
- And then 2 tbsps sugar
I then put the lid on the jar and sat it in a warm place, (I put it above an under-counter fridge that creates some warmth).
Swirl it around daily, the raisins will eventually float, and little bubbles will form around them and on the surface. I found this took over 2 weeks in the UK winter months, but would take less during the summer I think. I also re-fed it with 1 tbsp sugar part way through which seemed to help. I even took the lid off and put a muslin over it for a few days to try to encourage some natural yeasts to enter. I’m not sure what worked, but eventually the bubbles grew in their numbers. The liquid is what you want, that is the yeast water.
I started another complete jar when the first one seemed to stall, but for some reason (or raisin), that one foundered and grew white mould on the top – a really bad sign, and began to smell rank, so it went in the compost bin. I’d followed even more stringent advice making this one; boiled the water to remove the chlorine and used organic raisins, but the first one made with tap a water and rather old supermarket raisins worked best.
So there I was, 2 weeks into the raisin yeast experiment, chomping at the bit to make some bread. Once the bubbles seemed really active and smelled lovely and yeasty, I realised I had to make a starter dough, but how to do this and much to make was my next challenge. At this point I went back to the internet. Well, there was too much choice, and so many of the recipes are specific to how they made the starter etc, so only work in their way, or the highway.
After much soul-searching I decided on 150g flour to 150g of raisin yeast water – 1:1 seems to work a lot in the early stages of sourdough. This is what it looked like at the start.
I strained off 150g of the raisin liquid and saved what was left (including the raisins). Because I hate throwing anything away I topped the jar up with lukewarm water and another 1 tbsp of sugar and put it back on the work top. Its still bubbling happily away. If the temperature increases beyond 28 degrees C I think I will put it in the fridge to prevent it over doing itself. Not much chance of that in April in the UK, even with the exceptional weather we are having this Easter.
Update: the raisin yeast is still in the fridge and has been fed with a few tbsp sugar. Still found strong several weeks later. I’ve used it once to enliven the starter.
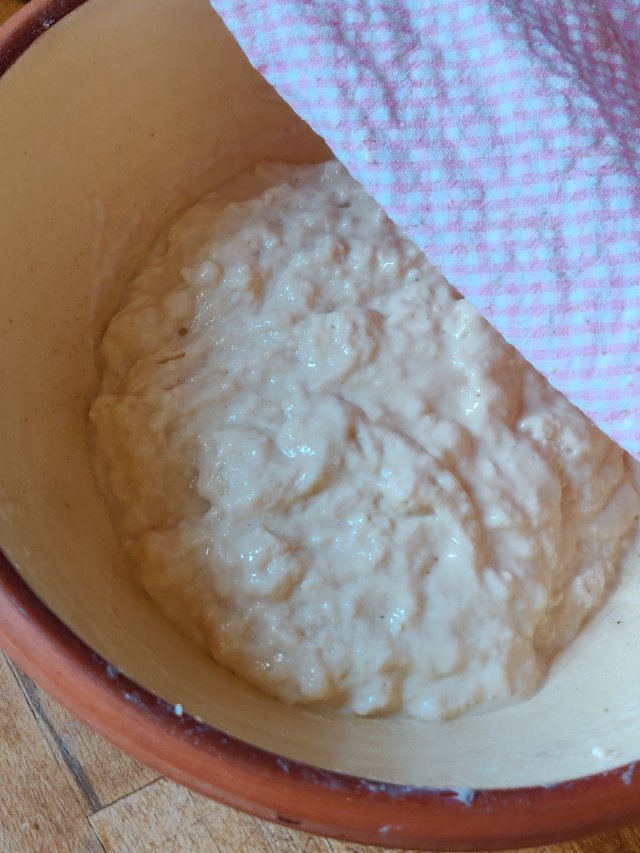
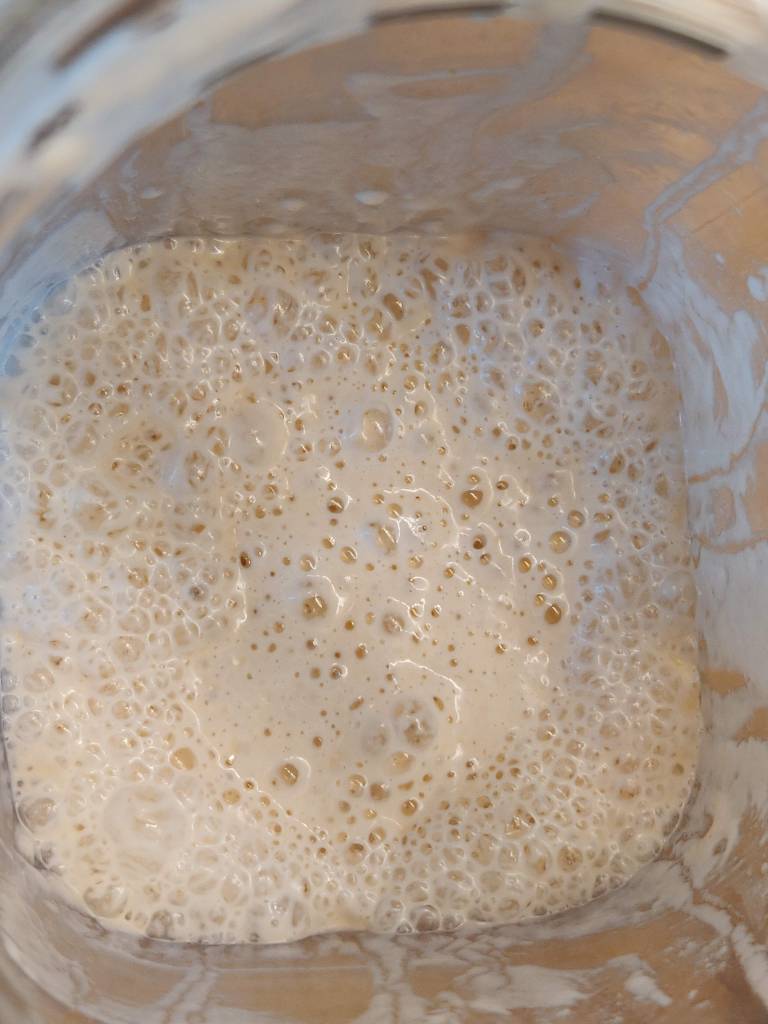
First starter dough when first made 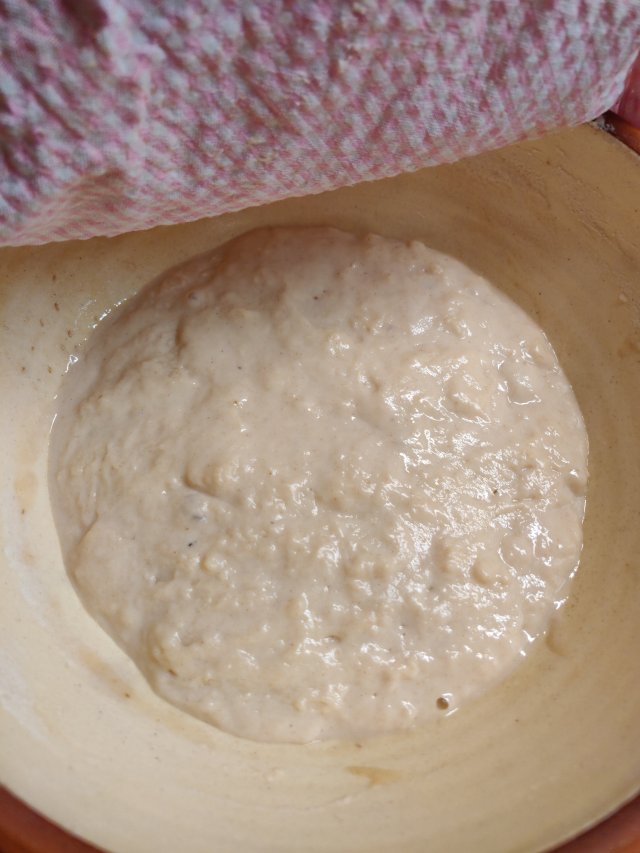
First starter dough after 5 hours
My first starter dough was now made. It looked a bit dull, but I trusted in nature, and left it to ferment for 5 hours. 24 hours later it was still the same size, with a few bubbles on the surface; not promising.
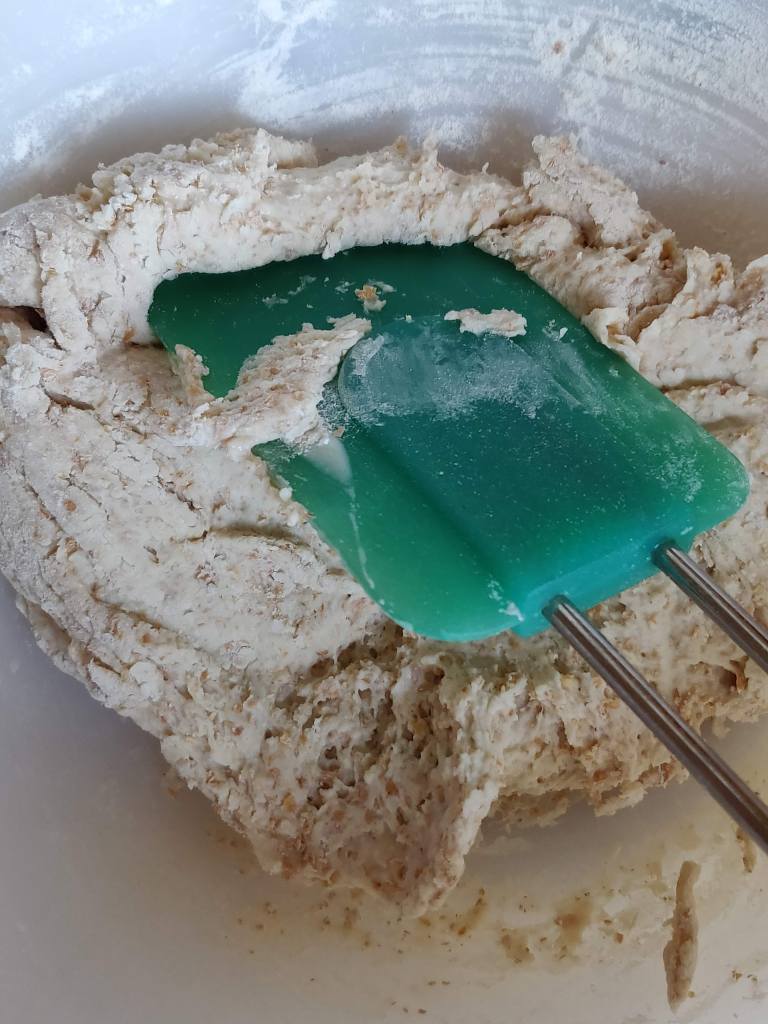
I refreshed it with 90g starter and 90g water (the amount was off the top of my head), and after another 24 hours it was a bit more lively – but it wasn’t a rave, it was also more than I needed. Now, this is where I went a bit mad, and misread all those complicated instructions I had found. I launched straight into ‘the bread dough’, missing out ‘the levain’. Part way through weighing the flour I realised I’d made a mistake! Damn, I now had masses of rather dry, semi-fermented dough, and no levain. With flour being in short supply, I wasn’t going to waste any of this. Creativity took control and I weighed out 250g of the starter, and then put what I calculated was the rest of the flour necessary for a 500g loaf into the a bowl, (wholemeal as I’ve only got a little white left) and kneaded the dough into the flour, adding water until the consistency matched the doughs I know from memory. It was a bit sticky and the gluten was not loving the experience, so I got out the bread machine, poured 7g of yeast from the last few precious sachets I had in the cupboard, put the weird raisin sourdough splodge into the machine along with 5g salt – oh and a tsp of vitamin C powder to help the wholemeal rise and set the ‘dough’ programme going. After the first knead I checked the consistency, which seemed a little loose, then left it to knead and prove. It looked like bread-dough when I took it out, not velvety, quite wet, but elastic.
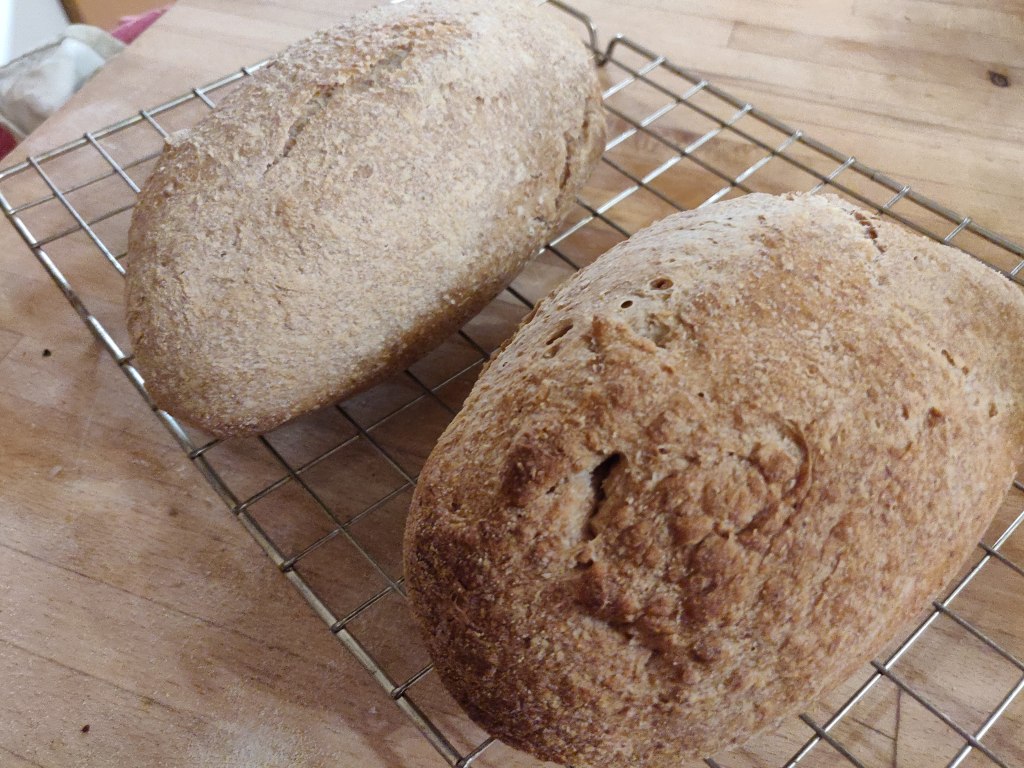
After a short knead I shaped it into a (slightly soft) bun loaf and left it under an inverted bowl for about 60 minutes to prove.
When I took the bowl off the top had risen but had a slightly lumpy surface and was beginning to crack and lean to one side. During baking it stayed about the same, didn’t tip over or anything drastic. The loaf tasted fine and was eaten in such short time that I didn’t get a chance to take a photo of it.
You might be wondering what happened to the balance of the starter dough? I decided to make a second stab at it. I weighed a fresh Kilner jar that I intended to use for the new starter, and wrote its weight on the side. This is so that when I weigh the starter I know what the contents weight by substracting the jar weight from the total. After weighing the remaining starter dough (for some reason there was 113g left, and I refreshed it an equal weight (113g) of raisin yeast water to give it a bit of a kick, and the same 113g of strong bread flour. Put it all in the Kilner jar and left it on the work top overnight. By the next day it had grown nicely and had a head of bubbles! Yey!!
Update about my starter:
It’s now several bread making sessions later. I’ve learned to feed my starter with 50-100g flour and the same weight of water. Leave it to bubble and use for making bread as described here. This leaves a remainder of starter. So I feed it again, 50g of each of four and water and pop it in the fridge where it happily suits for up to 7 days before beginning used for the next batch. It’s really strong and makes wonderful tasty bread. I’ve shared out with friends so my starter is spreading around. Yummy taste.
I was feeling a bit more in control now. I knew what was in my starter, and that it was active – without any commercial yeast in it. I also knew that I wanted to save some starter dough to keep it going.
Now it was time to bake from the new starter dough, and this time I was going to remember the levain stage.
Once again, I hit the internet, and found a useful site called The Fresh Loaf. http://www.thefreshloaf.com/
There some very knowledgeable people talk about bread, and although the maths were a bit confusing I think I got it eventually. This post by dmsnyder was particularly enlightening.
Here goes with what I learned.
To start with I didn’t realise there was a thing called the ‘Baker’s Percentage’, which is the % of flour, water and salt used to make bread dough. When you think it through there must be some rule like this underlying all bread recipes, but I’d never taken the time to do this.
Freshloaf offers the following ‘Baker’s percentage’. It is important to note that this is only a proportional breakdown of the amount of each ingredient not weight, at this stage.
| Ingredient | percentage |
| Flour | 100 |
| Water | 66 |
| Salt | 2 |
| Total | 168 |
At first glance this seems weird, there can’t be 168% in a loaf that surely is 100%, but I assume that this is because the liquid content evaporates, (I wait to be corrected here). Anyhow I ploughed on trusting that the 168 total is correct.
Once you know the Baker’s Percentage, you can work work out the amount of each ingredient based on any intended weight of flour to be used in the dough. I found this enlightening and empowering; now I can bake any sized loaf I want.
To use the Baker’s Percentage there are two approaches. The direct one, which I have labelled A, is to multiply the intended total weight of flour by the percentage of each ingredient just as they are shown, (see below). This method is easy to work with, but you will get more dough than you planned. In this example I’ve used 1000g of flour because I think this makes the maths easier to understand.
| Ingredient | percentage | for 1000g flour |
| Flour | 100 | 1000 x 100 = 1000g 100 |
| Water | 66 | 1000 x 66 = 660g 100 |
| Salt | 2 | 1000 x 2 = 20g 100 |
| Total | 168 | 1680g |
The other is to calculate the Conversion Factor by dividing the total intended weight of flour to be used in the dough by the total of the Baker’s Percentage.
1000/168 = 5.95. Therefore 5.95 is the Conversion Factor.
I’ve labelled this method B. When using method B you will end up with the amount of dough that you originally planned to make.
| Ingredient | percentage | for 1000g flour the conversion factor is 1000/168 = 5.95 |
| Flour | 100 | 100 x 5.95 = 595g |
| Water | 66 | 66 x 5.95 = 392.7g |
| Salt | 2 | 2 x 5.95 = 11.9g |
| Total | 168 | 999.6g |
From these two tables you can see that the two methods will make different amounts. This is fine if you are not baking commercially, either will make nice bread!
One of the Freshloaf examples is for a person wanting to wanting to make 500g of dough, so the calculation is this:
500/168 = 2.98. This 2.98 is the Conversion Factor.
As in method B shown above, you multiply each ingredient by this to calculate how much of each is needed for the final dough, (see below).
| Ingredient | % | Conversion Factor | weight to use |
| Flour | 100 | x 2.98 | 298g |
| Water | 66 | x 2.98 | 196.68g |
| Salt | 2 | x 2.98 | 5.9g |
| Total | 168 | 500.64g |
If you are not making a levain, then thats it, you can go ahead and make your dough using these weights of ingredients.
If however you are making a levain (as I was), there are actually two calculations to do, the first for the total as shown above, and the second in which you subtract all the ingredients you have put into the levain (starter included) from the total weights. The remaining amount of each ingedient is added at the final dough-making step. You would have to do this whichever way you use the Baker’s Percentage, A or B.
I couldn’t find the equivalent to the Baker’s Percentage for how much levain to make, so I made my levain using 150g starter, 100 g water and 112g flour ( 62g strong white and 50g strong wholemeal flour). This was very dry, so I added another 30g water (total of 130g water now) which was much better consistency and meant that my levain weighed in at 329g in total. I mixed this all together and put it in a bowl on the heated propogator pad.
Why did I choose those weights? I decided that I wanted to aim for 600g dough (to make two small loaves) so I worked out the total weights using the Baker’s Percentage and Conversion Factor for 600g. I decided I wanted use around half my starter to make an active dough and then added what seemed a reasonable proportion of the other ingredients, and it seemed to work.
The conversion factor is 600/168 = 3.57
| Ingredient | % | Conversion Factor | weight to use |
| Flour | 100 | x 3.57 | 357g |
| Water | 66 | x 3.57 | 235g |
| Salt | 2 | x 3.57 | 7g |
| Total | 168 | 599g |
The levain on first mixing 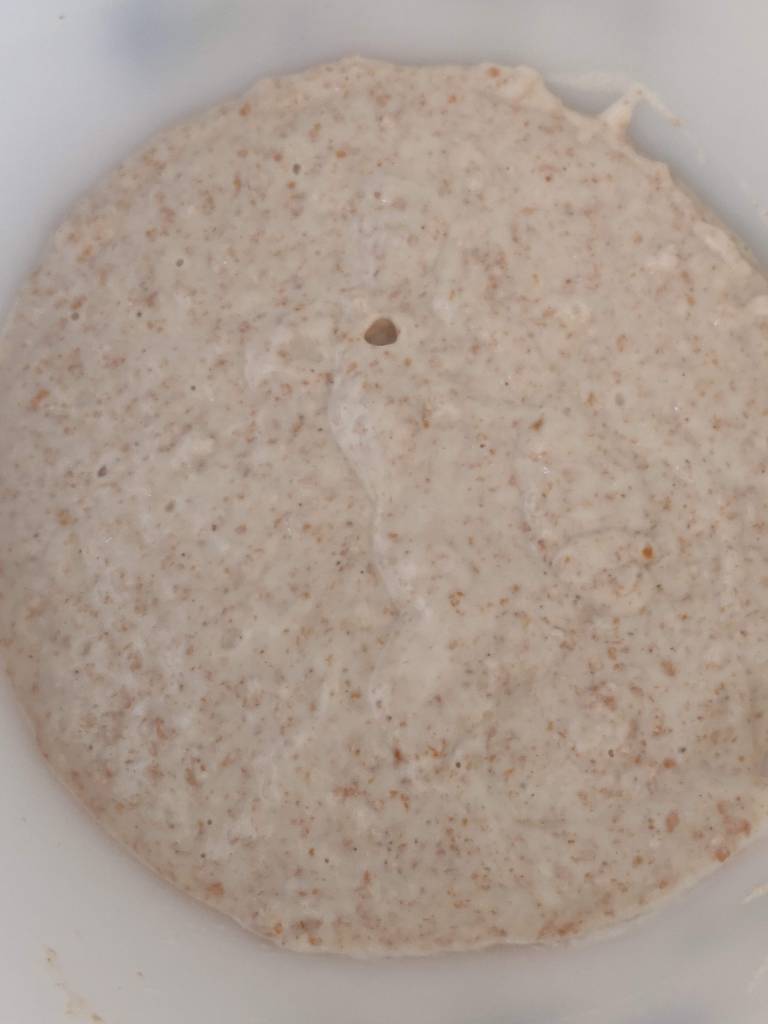
The levain after extra water added
The table above is for the total amount of dough, but of course I had already used some of each of these ingredients (apart from the salt) in my levain, so I had to subtract what I had already put in the levain from these totals.
| Ingredient | % | Conversion Factor | total weight | levain | remainder |
| Flour | 100 | x 3.57 | 357g | – 112g | 245g |
| Water | 66 | x 3.57 | 235g | – 130g | 105g |
| Salt | 2 | x 3.57 | 7g | 0 | 7g |
| Total | 168 | 599g |
Once my levain had doubled in size – about 4 hours after making it – I added these ingredients, plus a tsp of vitamin C powder and kneaded the dough with the dough hook in my antique Kenwood Chef for about 15 minutes. I made a bit of misjudgement and added another 25g of water as the dough seemed quite stiff. This resulted in a rather wet dough so I ended up adding another 20g flour during kneading. The salt was added late in the kneading stage.
The outline order of making was as follows:
- Make raisin yeast water.
2. Make starter dough.
3. Refresh starter dough.
4. Make levain (also called sponge or preferment)
5. Make bread dough.
Repeat Steps 3-5 as often as you want, keeping the starter dough on the work top and refreshing it every day if you bake every day, and in the fridge for up to a week if you only bake once a week.
The timing is critical other wise you end up cooking the bread late at night, or not having the dough ready until the day after you intended to bake.
My timing on the first batch of bread made solely using raisin yeast, described below, was as follows.
Day 1. Night before I intended to make the bread, refresh the starter doughr with 100g flour and 100g water. Leave it to bubble on the worktop. I thought that this would mean I had a 50% hydrated dough, but actually I think this is a 100% hydrated dough – this is still not clear.
Day 2. 9am. Make levain (150g starter, 100 g water and 62g strong white and 50g strong wholemeal flour).
Leave for 4 ½ hours to double in size, (I used the propogator heater mat).
2pm – Make bread dough
Prove for 4 hours until double in size.
7pm – Knock back gently and knead for briefly, shape into loaf (this timing allows for an hour between 2pm-3pm to weight, make and knead the dough).
7.55pm – Put the oven on to heat.
8.15pm – Bake the bread.
I did find a lovely blog https://www.theclevercarrot.com/2018/03/troubleshooting-your-sourdough-starter/ that gave me confidence to wing it a bit. This blog gave me the tip to prove my dough on a heat pad – I’ve got on I propagate seeds on, so they shift sideways to allow the bread on now and then. Thank-you for that.
So that has been my adventure in raisin yeast sourdough so far. I still have to unravel the mystery of what hydration my starter dough has. But thats for another day. Meanwhile I am enjoying eating my bread.