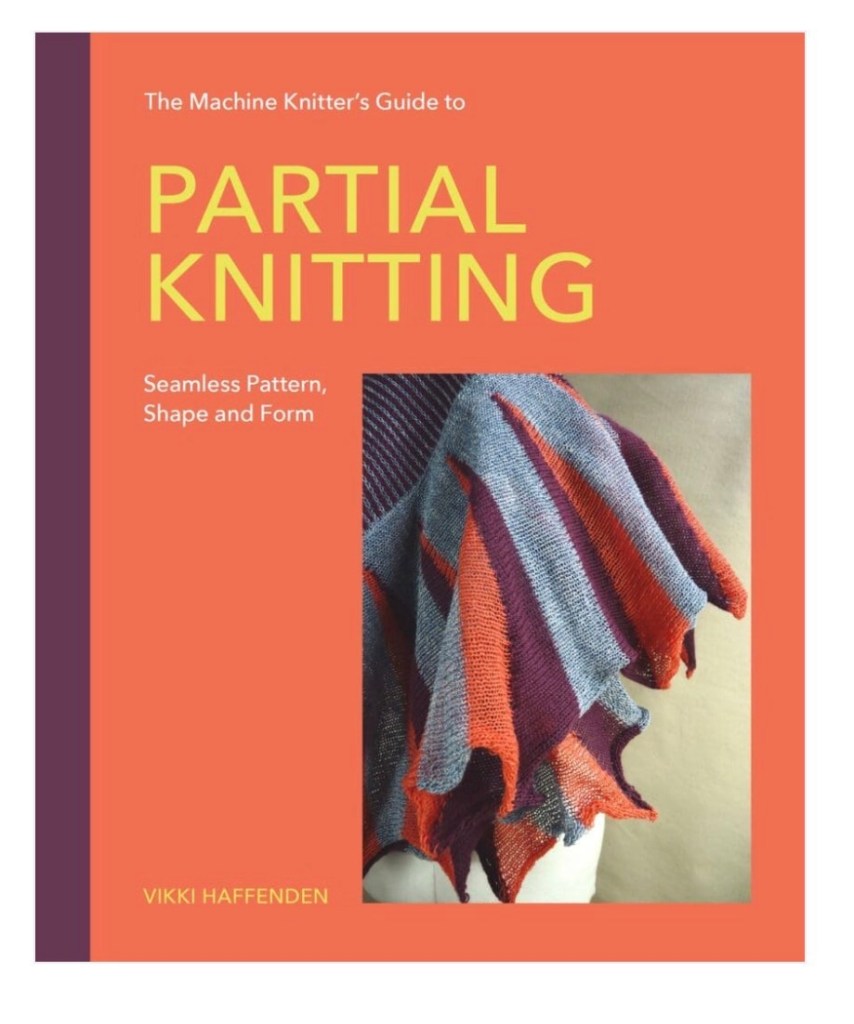
‘The Machine Knitter’s Guide to Partial Knitting: Seamless Pattern, Shape and Form’, is available to pre-order in the UK from Crowood Books, and online retailers. In the US it can be ordered from Blackwells.
Learn how to control short rows and create fab effects with this fascinating technique.
I’ve always been fascinated by short rows, or partial knitting as this technique is also called, so when the opportunity came to write a whole book about the technique I was super excited. The book opens with some interesting information about short rows to whet the appetite, the first chapter is about the absolute basics, so is ideal for people who have not worked with short rows before. The chapters progress through the different ways of using short rows; shown with examples, diagrams and written instructions. Some also have half scale sample patterns for practising the techniques which include more advanced uses, such as 3d shaping.. There are step-by-step instructions and each chapter builds on the knowledge of the previous chapter. The book ends with a chapter of patterns exemplifying the techniques covered throughout the book.
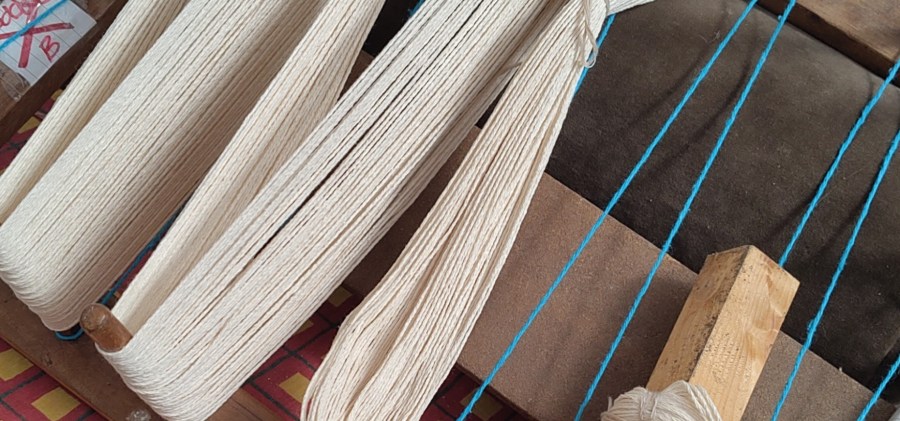
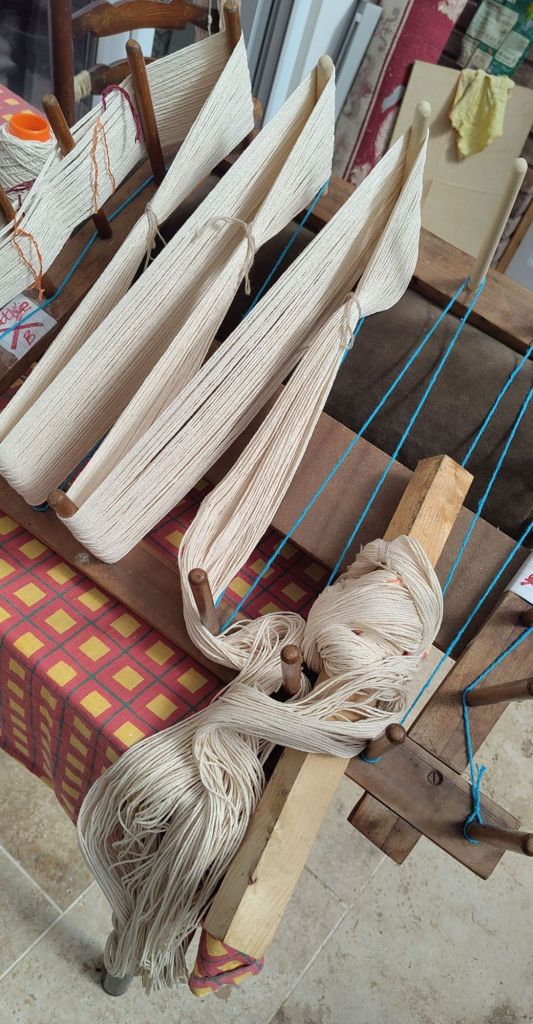
It’s taken me a while, but I have finally made the warp which I will use for testing out my new (to me) countermarch loom.
It’s taken me a while as we have building work going on in the house so I am moving from room to room to escape the chaos. I finally ran out of places to go, so ended up in the conservatory which is HOT. Lots of short breaks needed.
I am in two minds about what to weave. My heart says a fleece rug – I have two in bags in the shed, but my mind says ‘ do you need a rug,?’ What I really need is more tea towels, since my son burned a hole in one of my hand woven ones.
The loom has got an 8 dent reed and I am using a thickish cotton and making a sectional warp because my warping board pegs won’t take more than 80 ends of this. I’ll thread it up as a twill and let myself be guided by the spirit of the day I start to weave.
Winding the warp of the warping board onto a kite stick, as recommended by Peggy Osterkamp
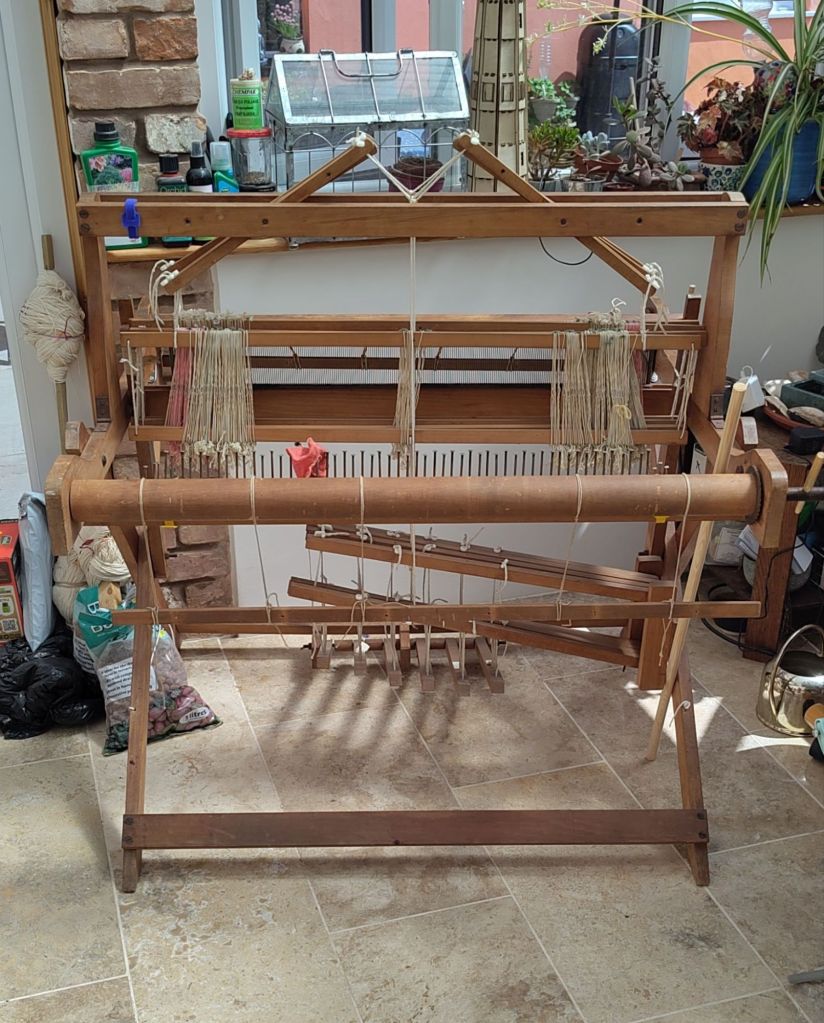
The loom waiting for the warp. I know I’ll be whining about back ache quite soon…
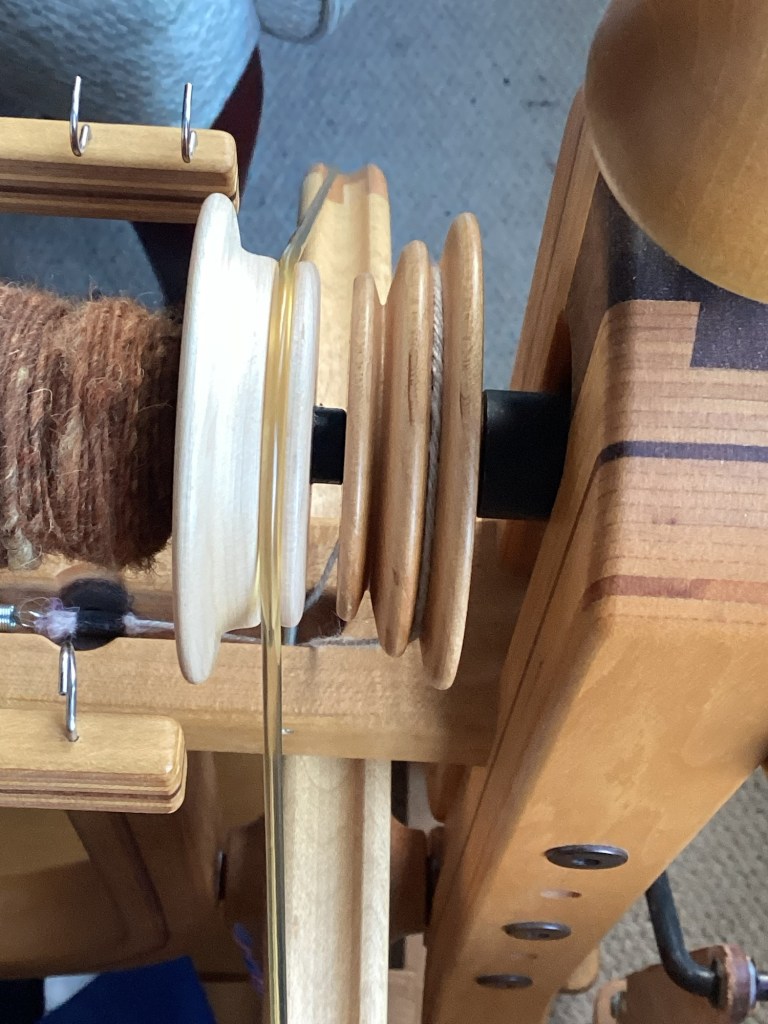
Yesterday, a friend who I think has more spinning wheels than even I have, brought an older Louet wheel along to the monthly meeting of the Brighton Textile Arts Group. She didn’t know the model, and I still haven’t found it online, but that’s sort of irrelevant as it’s the Irish tension that caught my eye.
I have learned from many texts and posts online that ‘Scotch’ and ‘Irish’ don’t really relate to geographical origins. I also understand that ‘Scotch’ and double drive are both flyer-led and ‘Irish’ is bobbin-led (literal and more accurate descriptors), but the terms Scotch and Irish tension are in common use so I will stick to them here. In flyer led systems the wheel drives the flyer around the bobbin, and the bobbin is braked by either the brake band or the second loop of the double drive band. In bobbin led systems the bobbin is driven by the wheel so spins constantly, but the flyer, which feeds the yarn onto the bobbin is braked by either a leather band at the front (as on the Louet) or by using a brake band. In both systems, the spinner restrains the yarn from being pulled through the hooks/flyer and onto bobbin as twist is introduced in to the fibres and then releases their hold to allow the yarn to be drawn onto the bobbin. Both systems rely on some slippage of the bands, which is something I have not fully understood as yet, and am not sure is really necessary, but fascinating all the same. So far I am not sure how the difference in circumference of bobbin and flyer whorl affect each other in Irish tension as they do in double and Scotch tension systems. Another interesting thing to spend time testing out.
I learned to spin on a Westbury wheel, which was a gem of a wheel. My Mother bought it in Glastonbury as a kit – she was so excited, and my Dad built it for her and stained it dark walnut – not a fashionable option today, but it did look charming. The Westbury has both double drive and Scotch tensions, but I only used the Scotch option as we really didn’t understand the double drive. After this there was a gap in my spinning and Mum didn’t carry on with it for long, so that wheel has long gone, (something I really regret).
My interest in yarn design endured, but was industrially focused, so it was quite a few years later that I resumed hand spinning. I now prefer double drive but have several wheel which are switchable and value the flexibility this gives me. So that I can share with you, these are a Wee Peggy and a Schacht Matchless and an Ashford Traddie that I have converted to double drive but which still retains the option of Scotch tension. Of these the Matchless is a recent purchase, chosen after trying lots of wheels over longish periods of time, (hence my collection of wheels) and is my absolute favourite. It is a dream to spin on and has double treadles and a central orifice which is super ergonomic; I find single treadles can make me twist and lead to back and hip ache nowadays so can’t spin for too long on these.
So let’s get back to yesterday and the Louet wheel. Which is a sweetie I have to say. I like Louet wheels, (and of course own one) because they are so thoughtfully designed and this was no exception; sturdy with a central orifice and an onboard Lazy Kate, all made in lovely wood – very nice apart from the rather high treadle position. I’ve not used the Irish tension system before and so was keen to try it. I didn’t actually shove her out of the way, but hovered and green-eyed it and eventually asked if I could have a go. Generously she gave me fibre, and left me with it, saying she found it quite a challenge to be able to control what she was spinning, although I thought her samples were soft and pretty even. However, she was right!
After a while I managed to set the leather band so that the fibre wasn’t ripped from my fingers, and could start to spin. I found that very little tension was needed, which I am not sure is normal. We inspected the tension band, orifice and brass bearing and whilst the band didn’t look worn at all, the orifice outer was a bit sticky and the brass bearing seemed a bit rough. We cleaned these as best we could with what we had to hand which helped a little, but probably a gentle swab of alcohol on the orifice outer and brass would be a good idea.
Once it was going I was really surprised how different the Irish tension felt to the two other systems, and can see why it is good for thicker yarns because of its pretty intense pull-in. Plus I imagine it is great for plying. However I managed a reasonably even singles that was indeed thicker than I usually spin double drive, so that sort of proved it to me.
Being an equipment squirrel I immediately wanted an Irish tension wheel. So imagine my joy when I found that my Matchless would convert to Irish tension! In my excitement of first owning the Matchless I tried both double and Scotch tensions and have been using these both since then, but I clearly forgot that it has three tension modes. I’m not sure it tells you in the manual, but you simply swap the drive bands over. The wheel drive band goes on the bobbin, and the Scotch brake band on the flyer whorl. I have set mine with the larger bobbin whorl to the back with the medium flyer whorl, there may be better arrangements but I have yet to try these out.
The result felt very similar to the Louet, with the brake band needing hardly any tension, so maybe that is normal after all. I found starting needed care so that the fibre doesn’t pull away too rapidly, but once going it went well. It might be me, but most times after I moved hooks the pull-in became stronger, then settled down again. This must be because the smaller circumference of the bobbin to start with pulls the yarn in faster. Because of this I can see why a Woollee Winder type system might be useful with this tension system, but I am not tempted due to price. The hooks will do me just fine and I really don’t like the sliding hooks on any make so far.
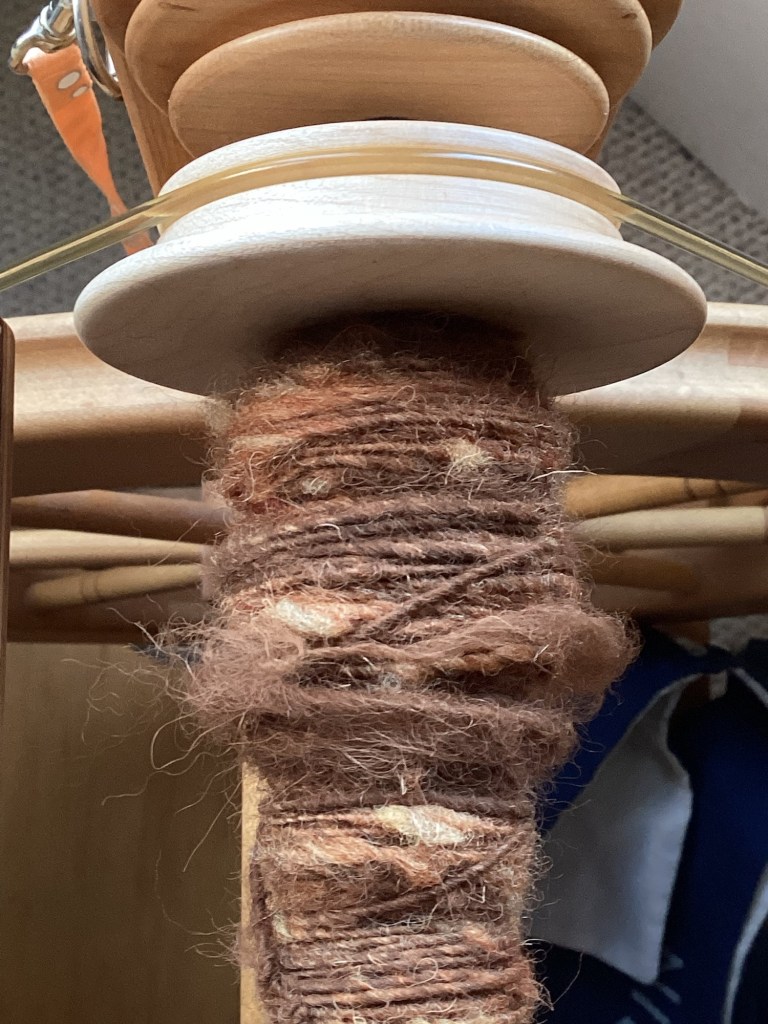
As you will see in the photos, the singles I spun are nothing to write home about, but its early days for the Irish tension set-up. The fibre is onion-skin dyed Lleyn blended, (rather poorly because I was in a hurry) with rust coloured Alpaca, then taken as tops off the drum-carder.
The Irish tension set up on my Matchless. The drive band is the one I use for Scotch tension – I have a cotton one for double drive. They both stay on the wheel tucked underneath. I am wondering what will happen if I put the brake band on the smaller flyer whorl? The Lleyn was deliberately left with nepps to create a textured fibre, and the way the onion-skin dye has taken differently on the nepps enhances the texture. Roughly blended with the Alpaca – ‘do what I say not what I do’ is the underlying message here! I think I will ply with a finer singles made from undyed Lleyn for a tweedy final yarn.
Although I promised myself not to get any more fleece until I had emptied my cupboard, I’ve cheated . Well only a bit. Over the winter I have used a lot up, but not all of it!
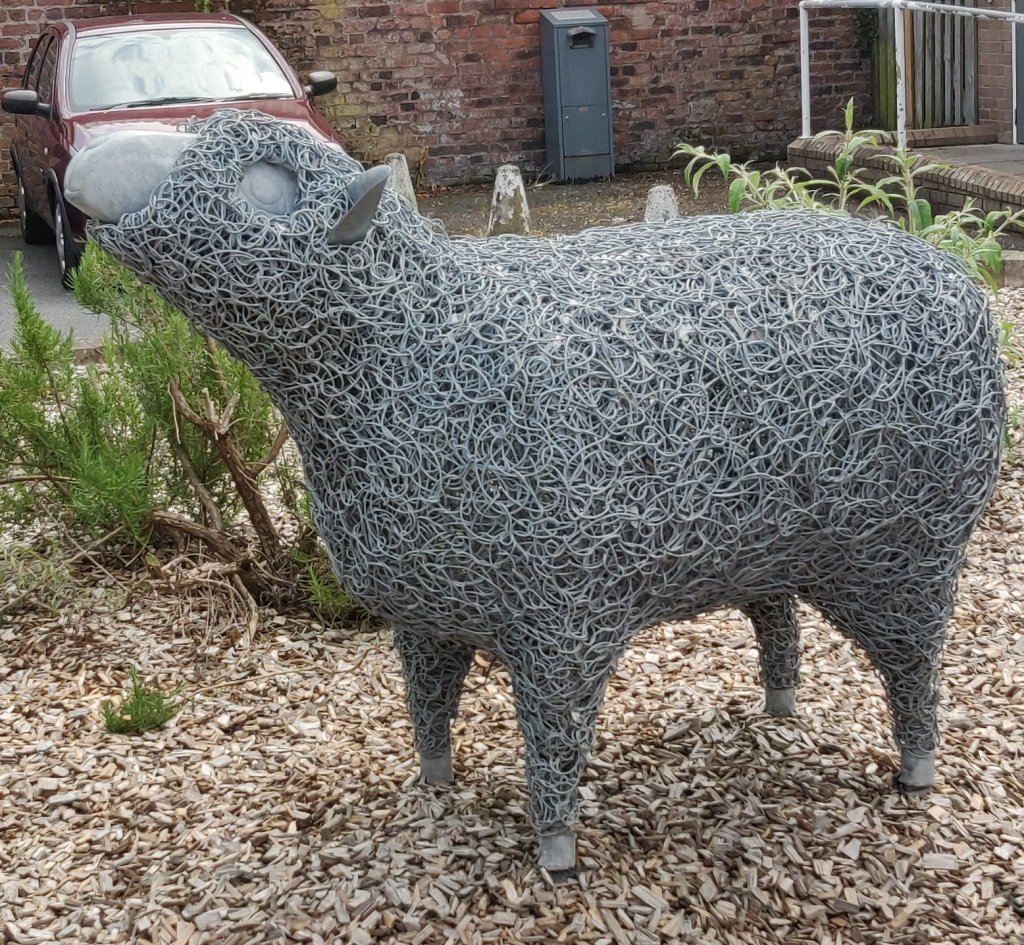
Having been to Herefordshire and seen the Ryeland sheep sculpture in Leominster I read up about the Ryeland breed and wanted to try a fleece. From what I understand the Ryeland was one of the breeds that can from the Romans crossing their imported Merino sheep with local British breeds. This is probably why they look like Teddy Bears with dense fleece. This breed was instrumental in the success of the British wool trade in the Middle Ages and after, which laid the foundations for wealth in Britain, especially in Herefordshire. Fascinating stuff!
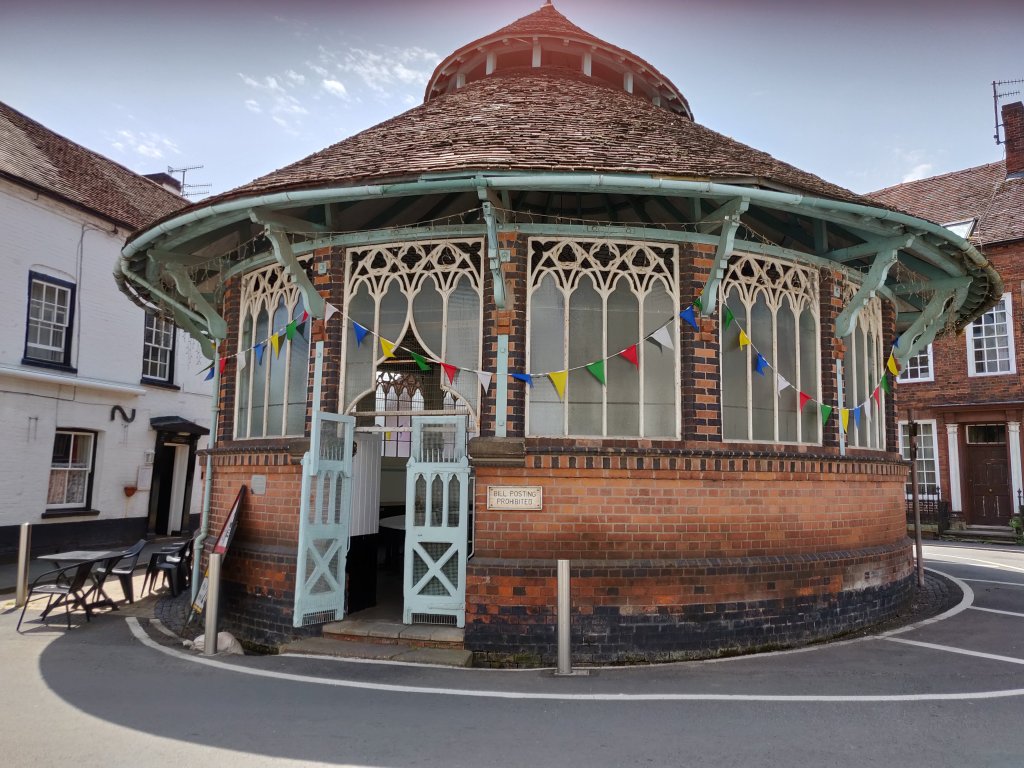
The Old Market hall. Tenbury Wells.Sculpture of a Ryeland sheep in Leominster.
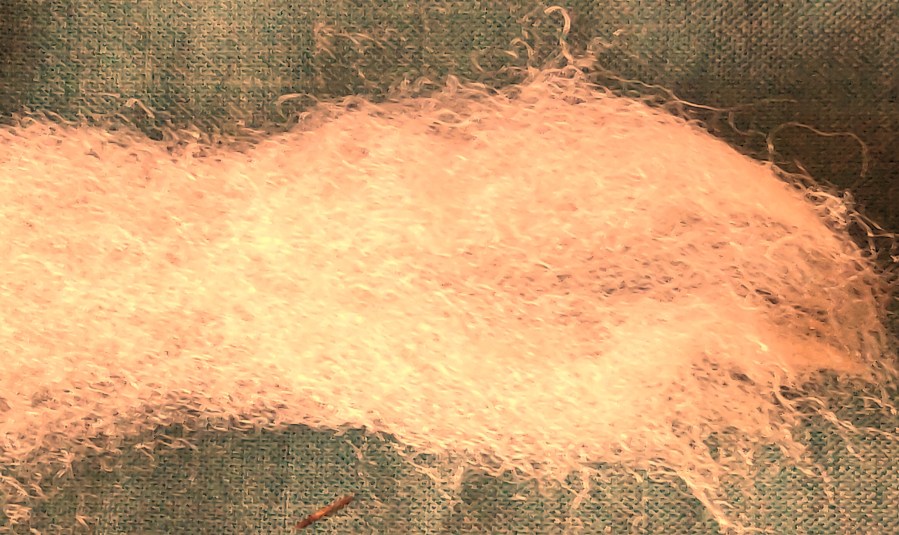
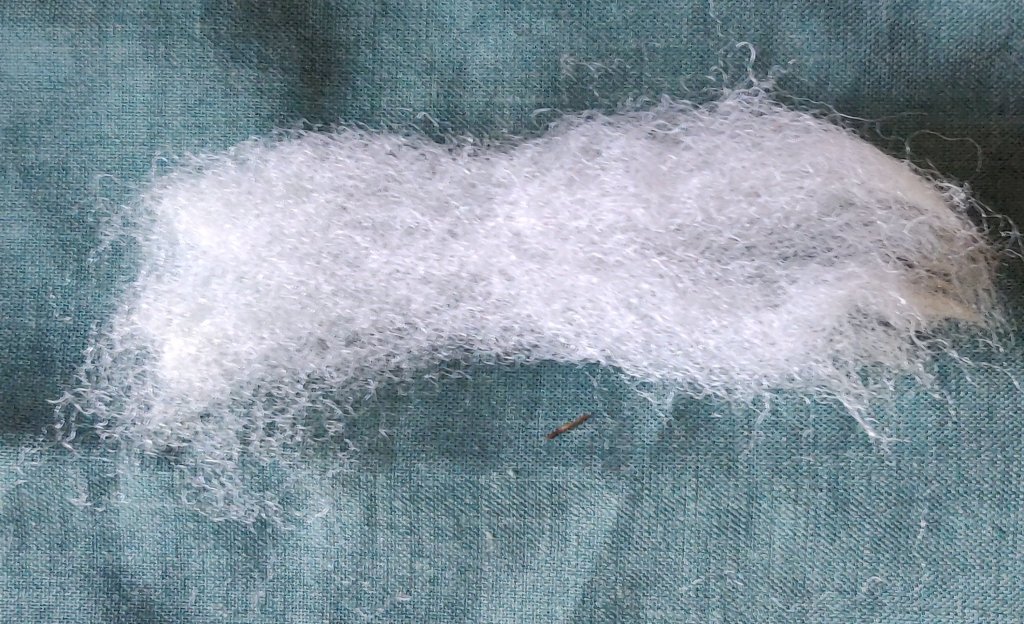
The long and the short of it is that I now have a Ryeland fleece to play with. I sorted out today and have started to wash it with promising results. Not to much VM, but a bit yellowed – the name for this escapes me right now, is it ‘yoked’? I’m guessing its last years crop.
You can see a staple in the photo, and i’ll post once I start spinning. I plan to spin Long Draw, ply and then to dye it.
Washed Ryeland staple. Its about 3.5 inches when straight, but is quite crimpy. Yummy.
I’ve had a number of different colour hand dyed carded batts sitting waiting for me to find inspiration. They are all from fleece I have scored and carder myself, so are a mix of Shetland, Suffolk and Texel, with maybe a little Alpaca blended into some of them. Some are in 200g amounts, some less. I’d got a bit stuck about how to use them until I saw a useful tip by Anna from my spinning group that she has put on YouTube.
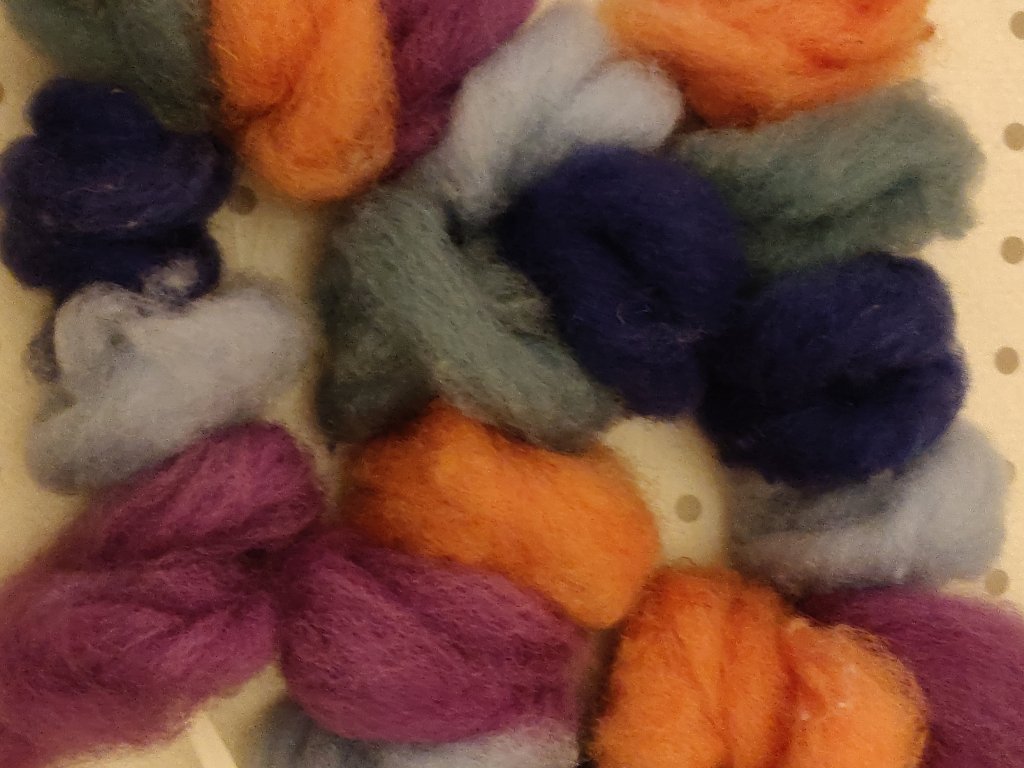
Before you start, select a group of colours that work together. After a designing session during which I wrapped different colours together, I chose five: orange, pale green, mid blue, pale blue and lilac.
Anna used a combination of hand dyed and commercial roving, but the principle is the same with your own carded batts.
1. First of all split the roving/batt into the required lengths, (I just used the whole length of the batt of my drum carder).
2. Then split each length lengthwise into 4, (or more, depending on the thickness of the roving/batt).
3. Next, lay out the colours lengthwise, next to each other in the order you want to spin them into yarn. Test this beforehand to see how they mix throughout one repeat of a yarn, and if this works for your chosen outcome, such as knitting.
4. Repeat the colour sequence three more times so you have a table full of ‘stripes’ of fibre. If you have more than four lengths let colour, carry on until all are used up.
5. Now this is the clever part. I have hand spun colour changing yarns before and got the sequence wrong because I put it all away in a box between spinning sessions. To keep the sequence do the following.
6. Take a metre + long length off ribbon and tie a pencil or empty pen across one end. This is your fibre-stopper. Tie a hand-sized loop on the other end. This is your distaff.
7. Starting at one end of the ‘stripes’, wind each length off fibre into a loose roll and slip the looped end of the ribbon through the centre hole. Carry on doing this, working methodically through the fibre lengths, keeping the colour order as mapped out in your ‘stripes’.
8. You will end up with a ‘necklace’ of colour ordered fibre rolls on the ribbon. Tie the ends together to stop the fibre sliding off.
The dyed fibre arranged on the ribbon distaff before spinning
Now to can put them in a box and they won’t get muddled. To start spinning, simply lift the necklace out, untie the ends, and slip the loop over your hand. It acts as a distaff and will hold your fibre nicely as you spin each colour.
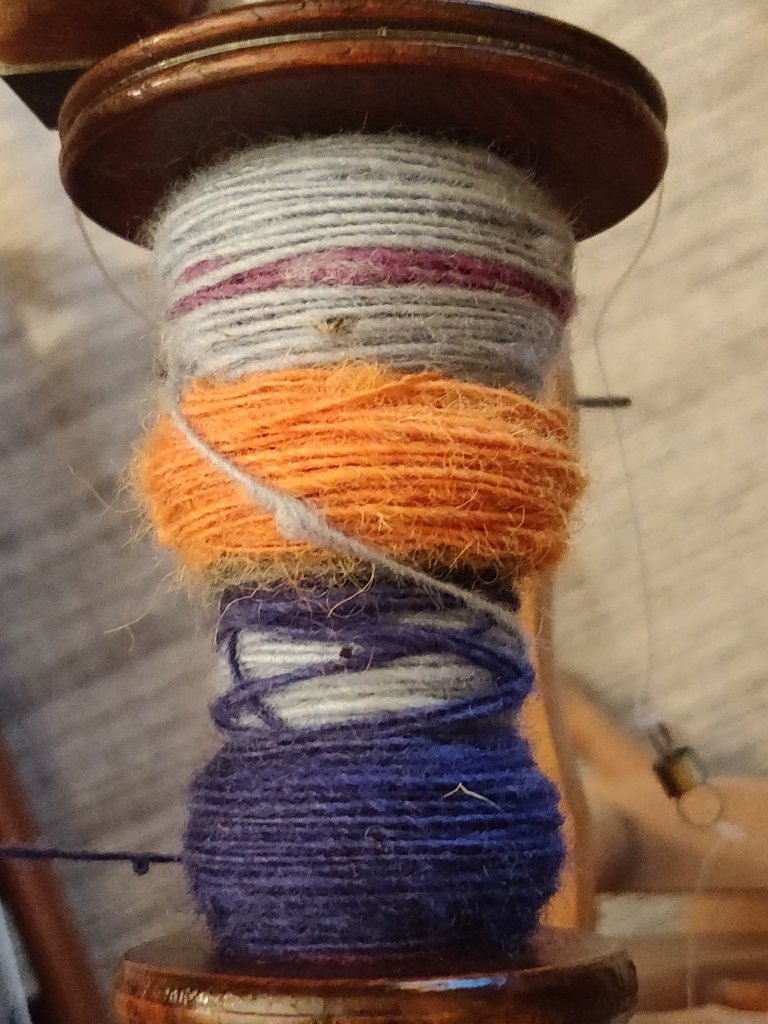
Spinning the lengths into singles
What a great tip!
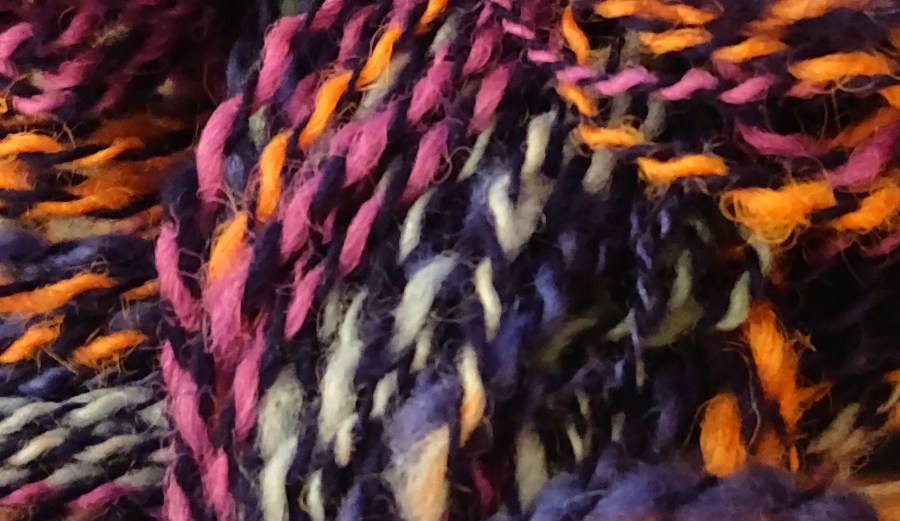
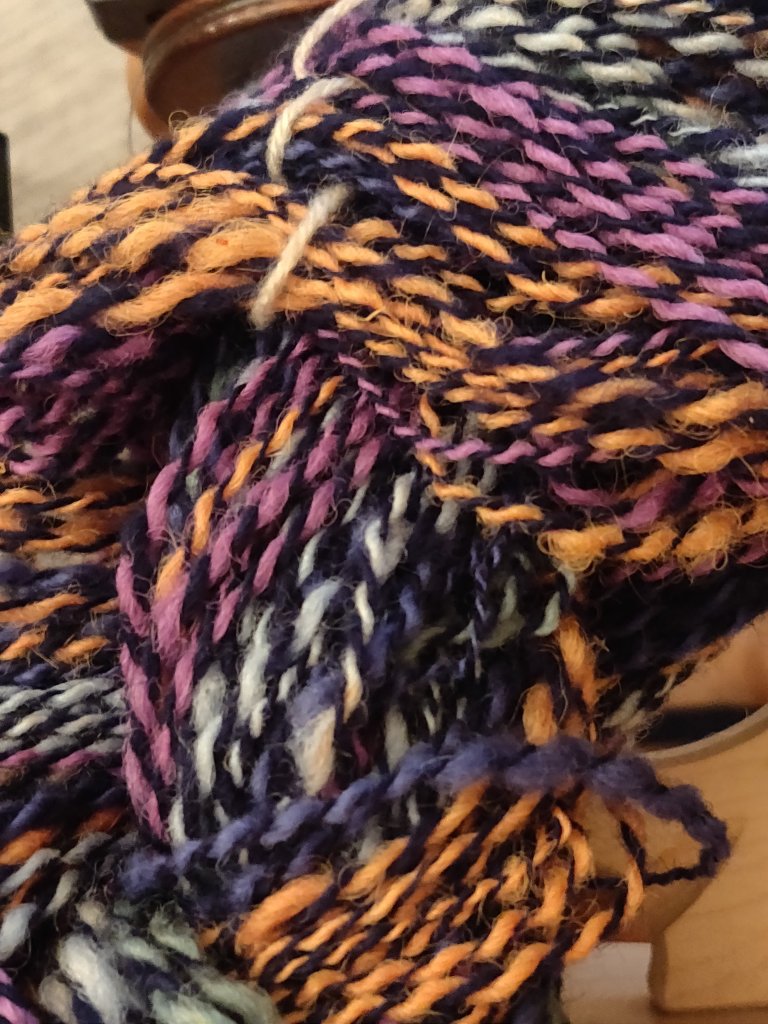
I plied the colour changing yarn with a single spun made from navy blue Corriedale. This made a lovely marl yarn that to me resembles stained glass windows. I can’t wait to see what it looks like knitted.
Today I finally completed a top-down jumper I started last December! I bought the main 100% wool yarn in Hereford, and the stripes are worked in two odd balls, one Noro and the other Icelandic. I’m looking forward to hearing it next winter.
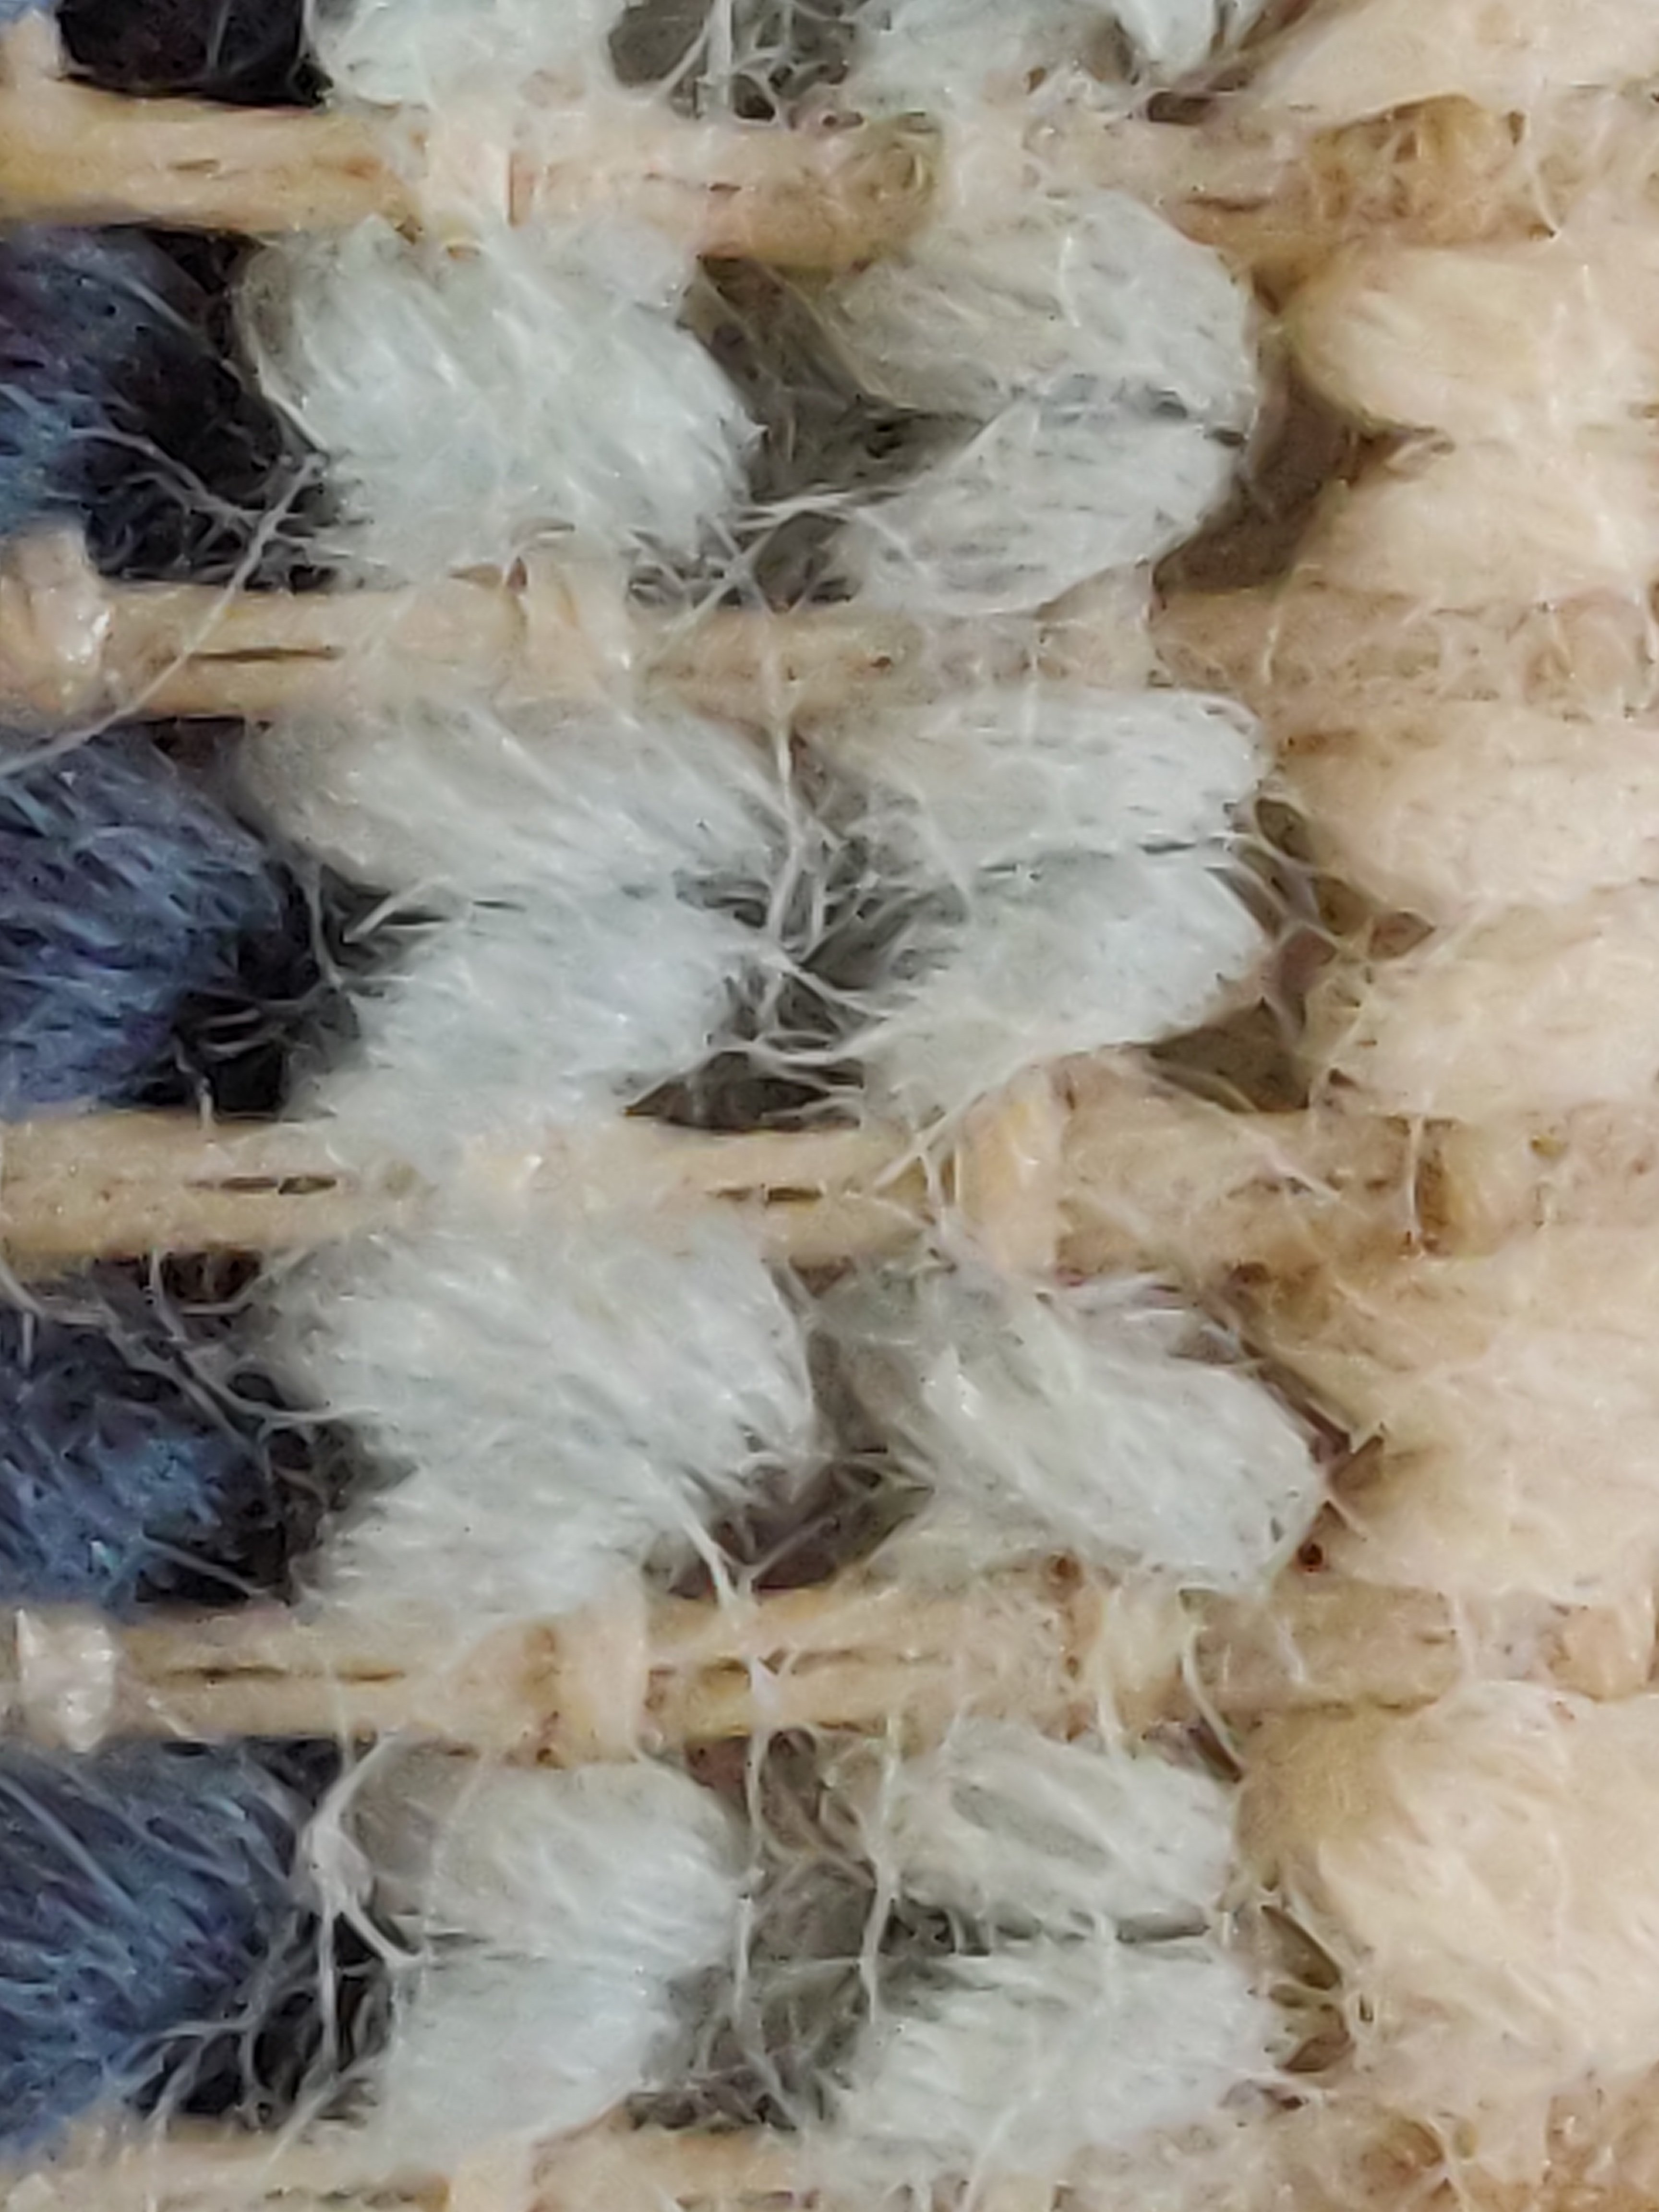
After several years of picking it up and doing several rows and then forgetting it, I have finished going the rug. Yesterday I coated the back in dilute Copydex glue to lock the loops in place. It was a truly messy job. The Copydex was old and so had some lumps I had to try to avoid. It also send to set almost immediately unless I mixed it into the water very quickly. However this generic solution beat paying the high price of the recommended latex backing product.
The Copydex liquid dries clear.
Is saw this idea suggested on a blog and it seems to have worked fine. It took a while to dry though, so I think I diluted the glue to much. Finally, by this morning it’s safe to move, and hasn’t run into the front pile as I feared it might.
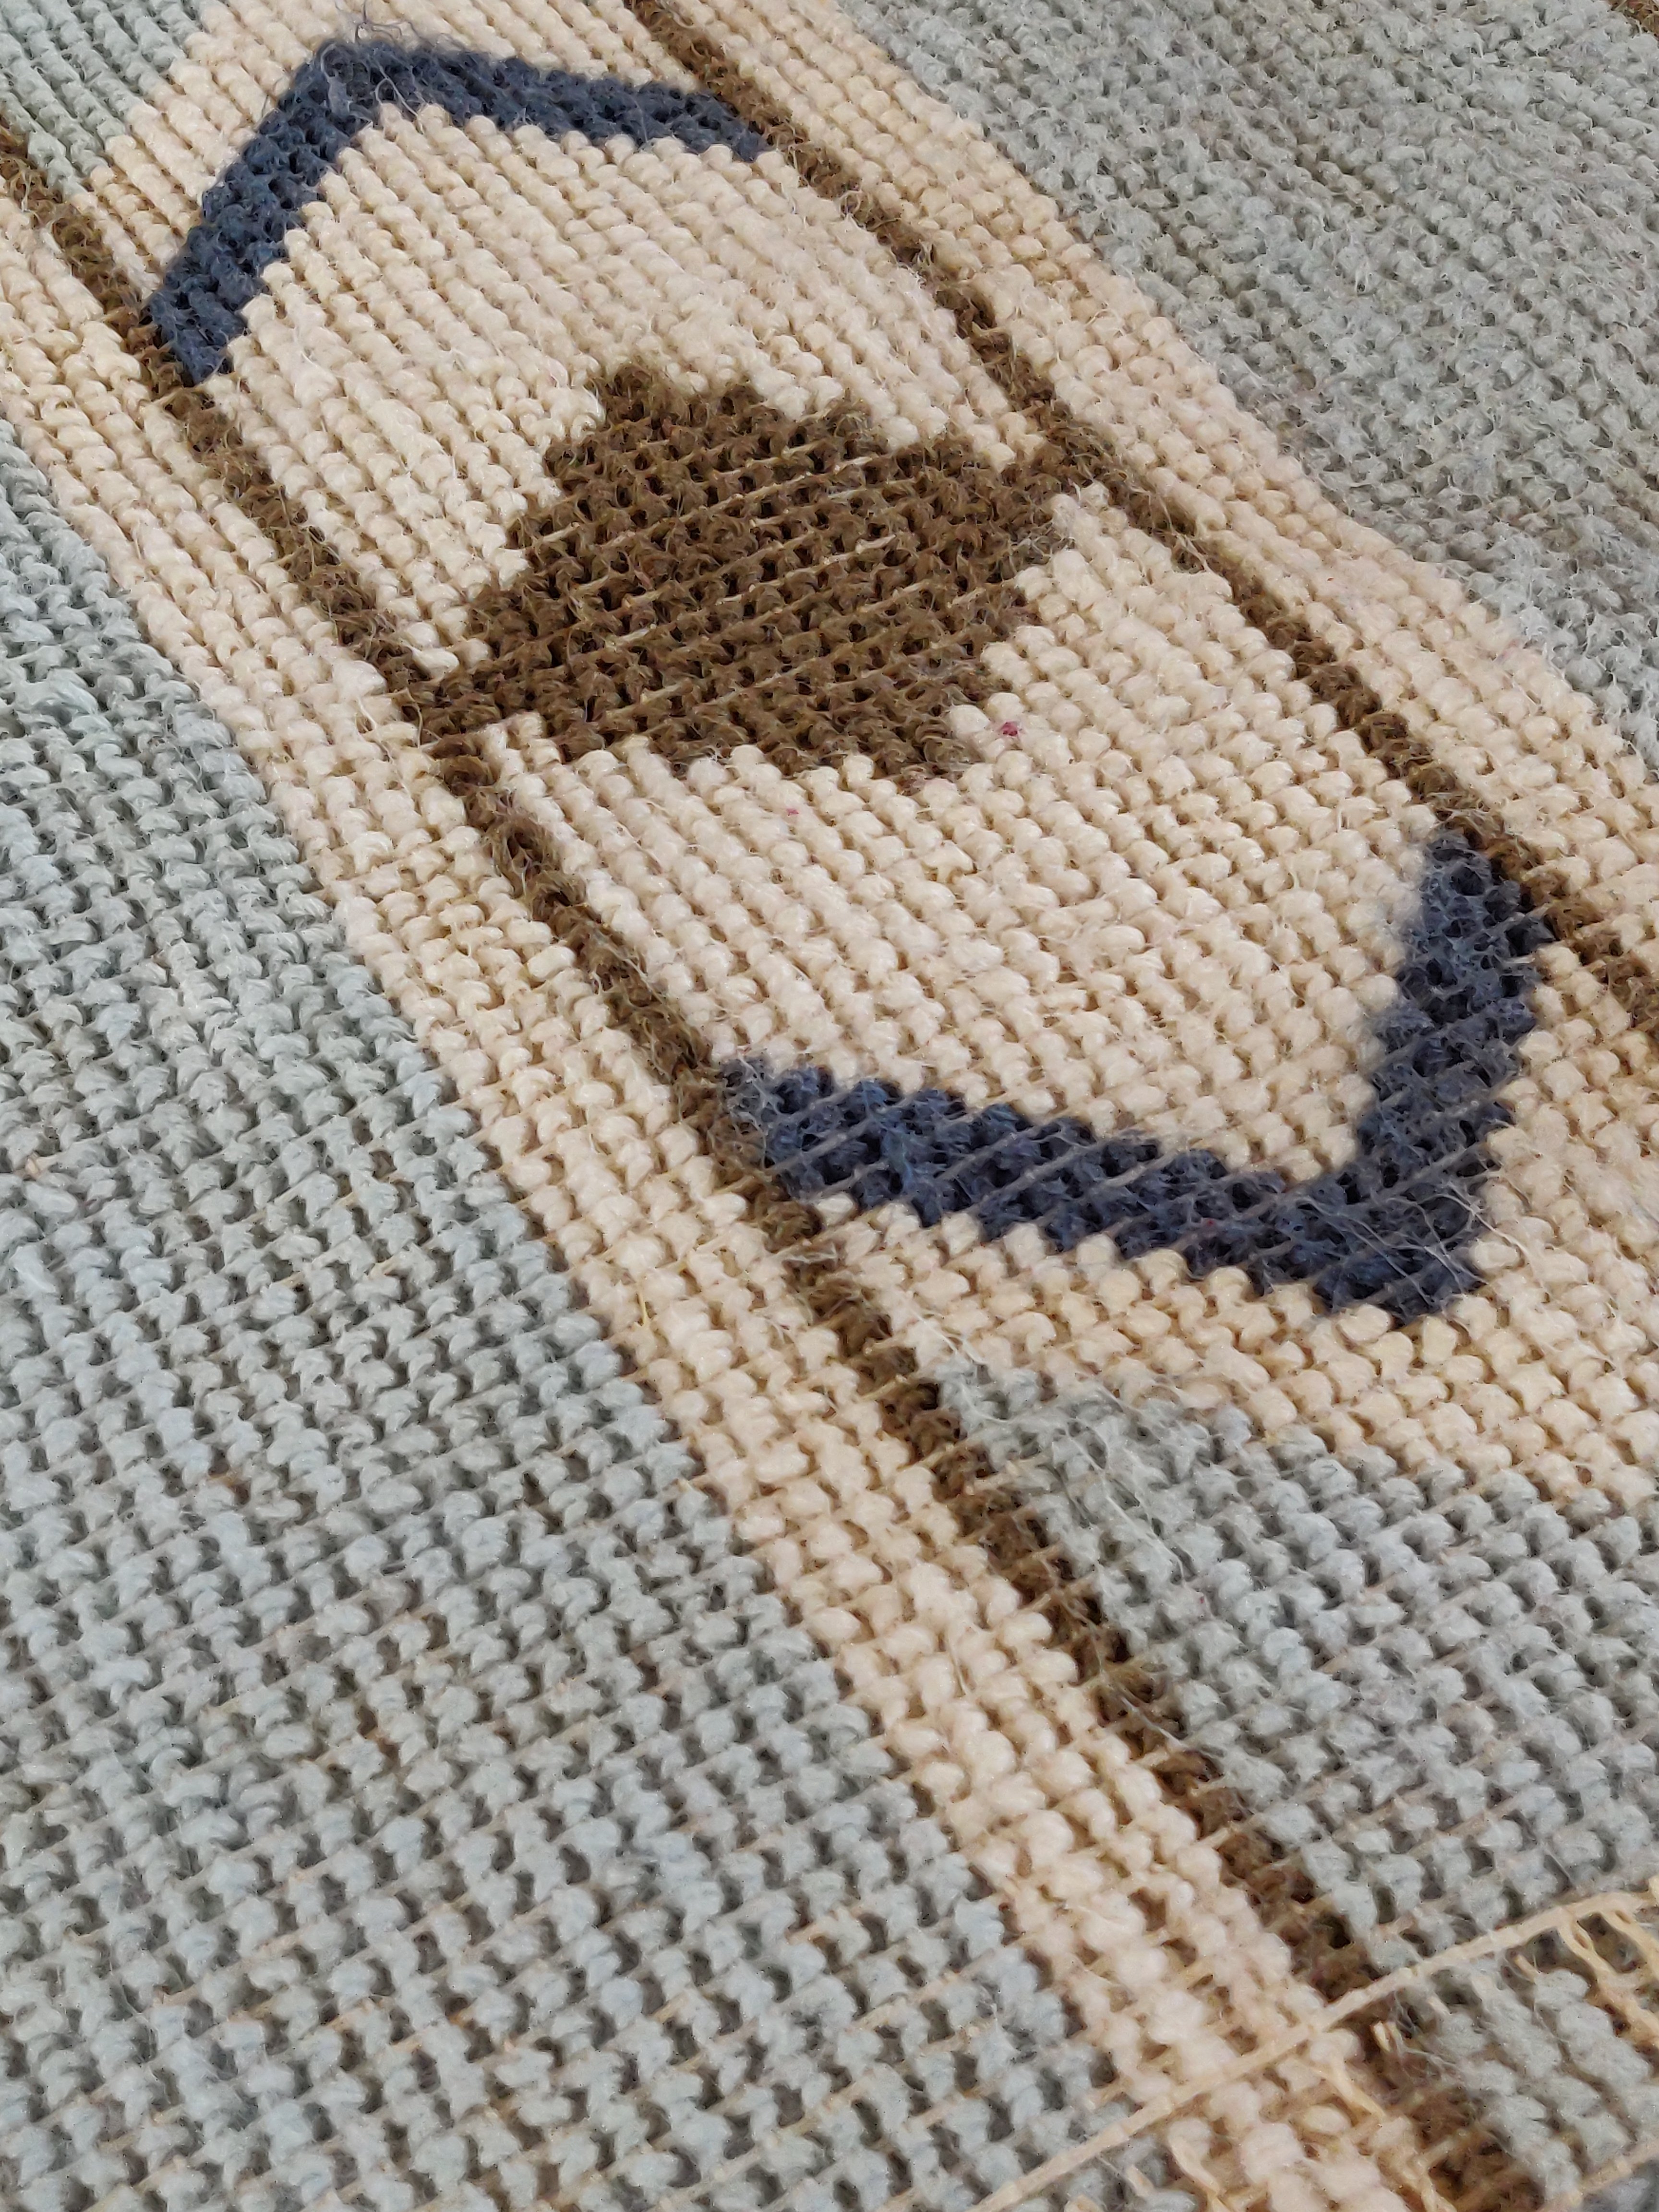
The back after it has dried
I have to see on the edging tape and then it’s done. I considered adding a Hessian backing but decided it might spoil the overall softness of the rug. I also wondered if friction with the rough Hessian might draw the wool fibres through to the back.
I’ll see how it wears. I can back it later if necessary.
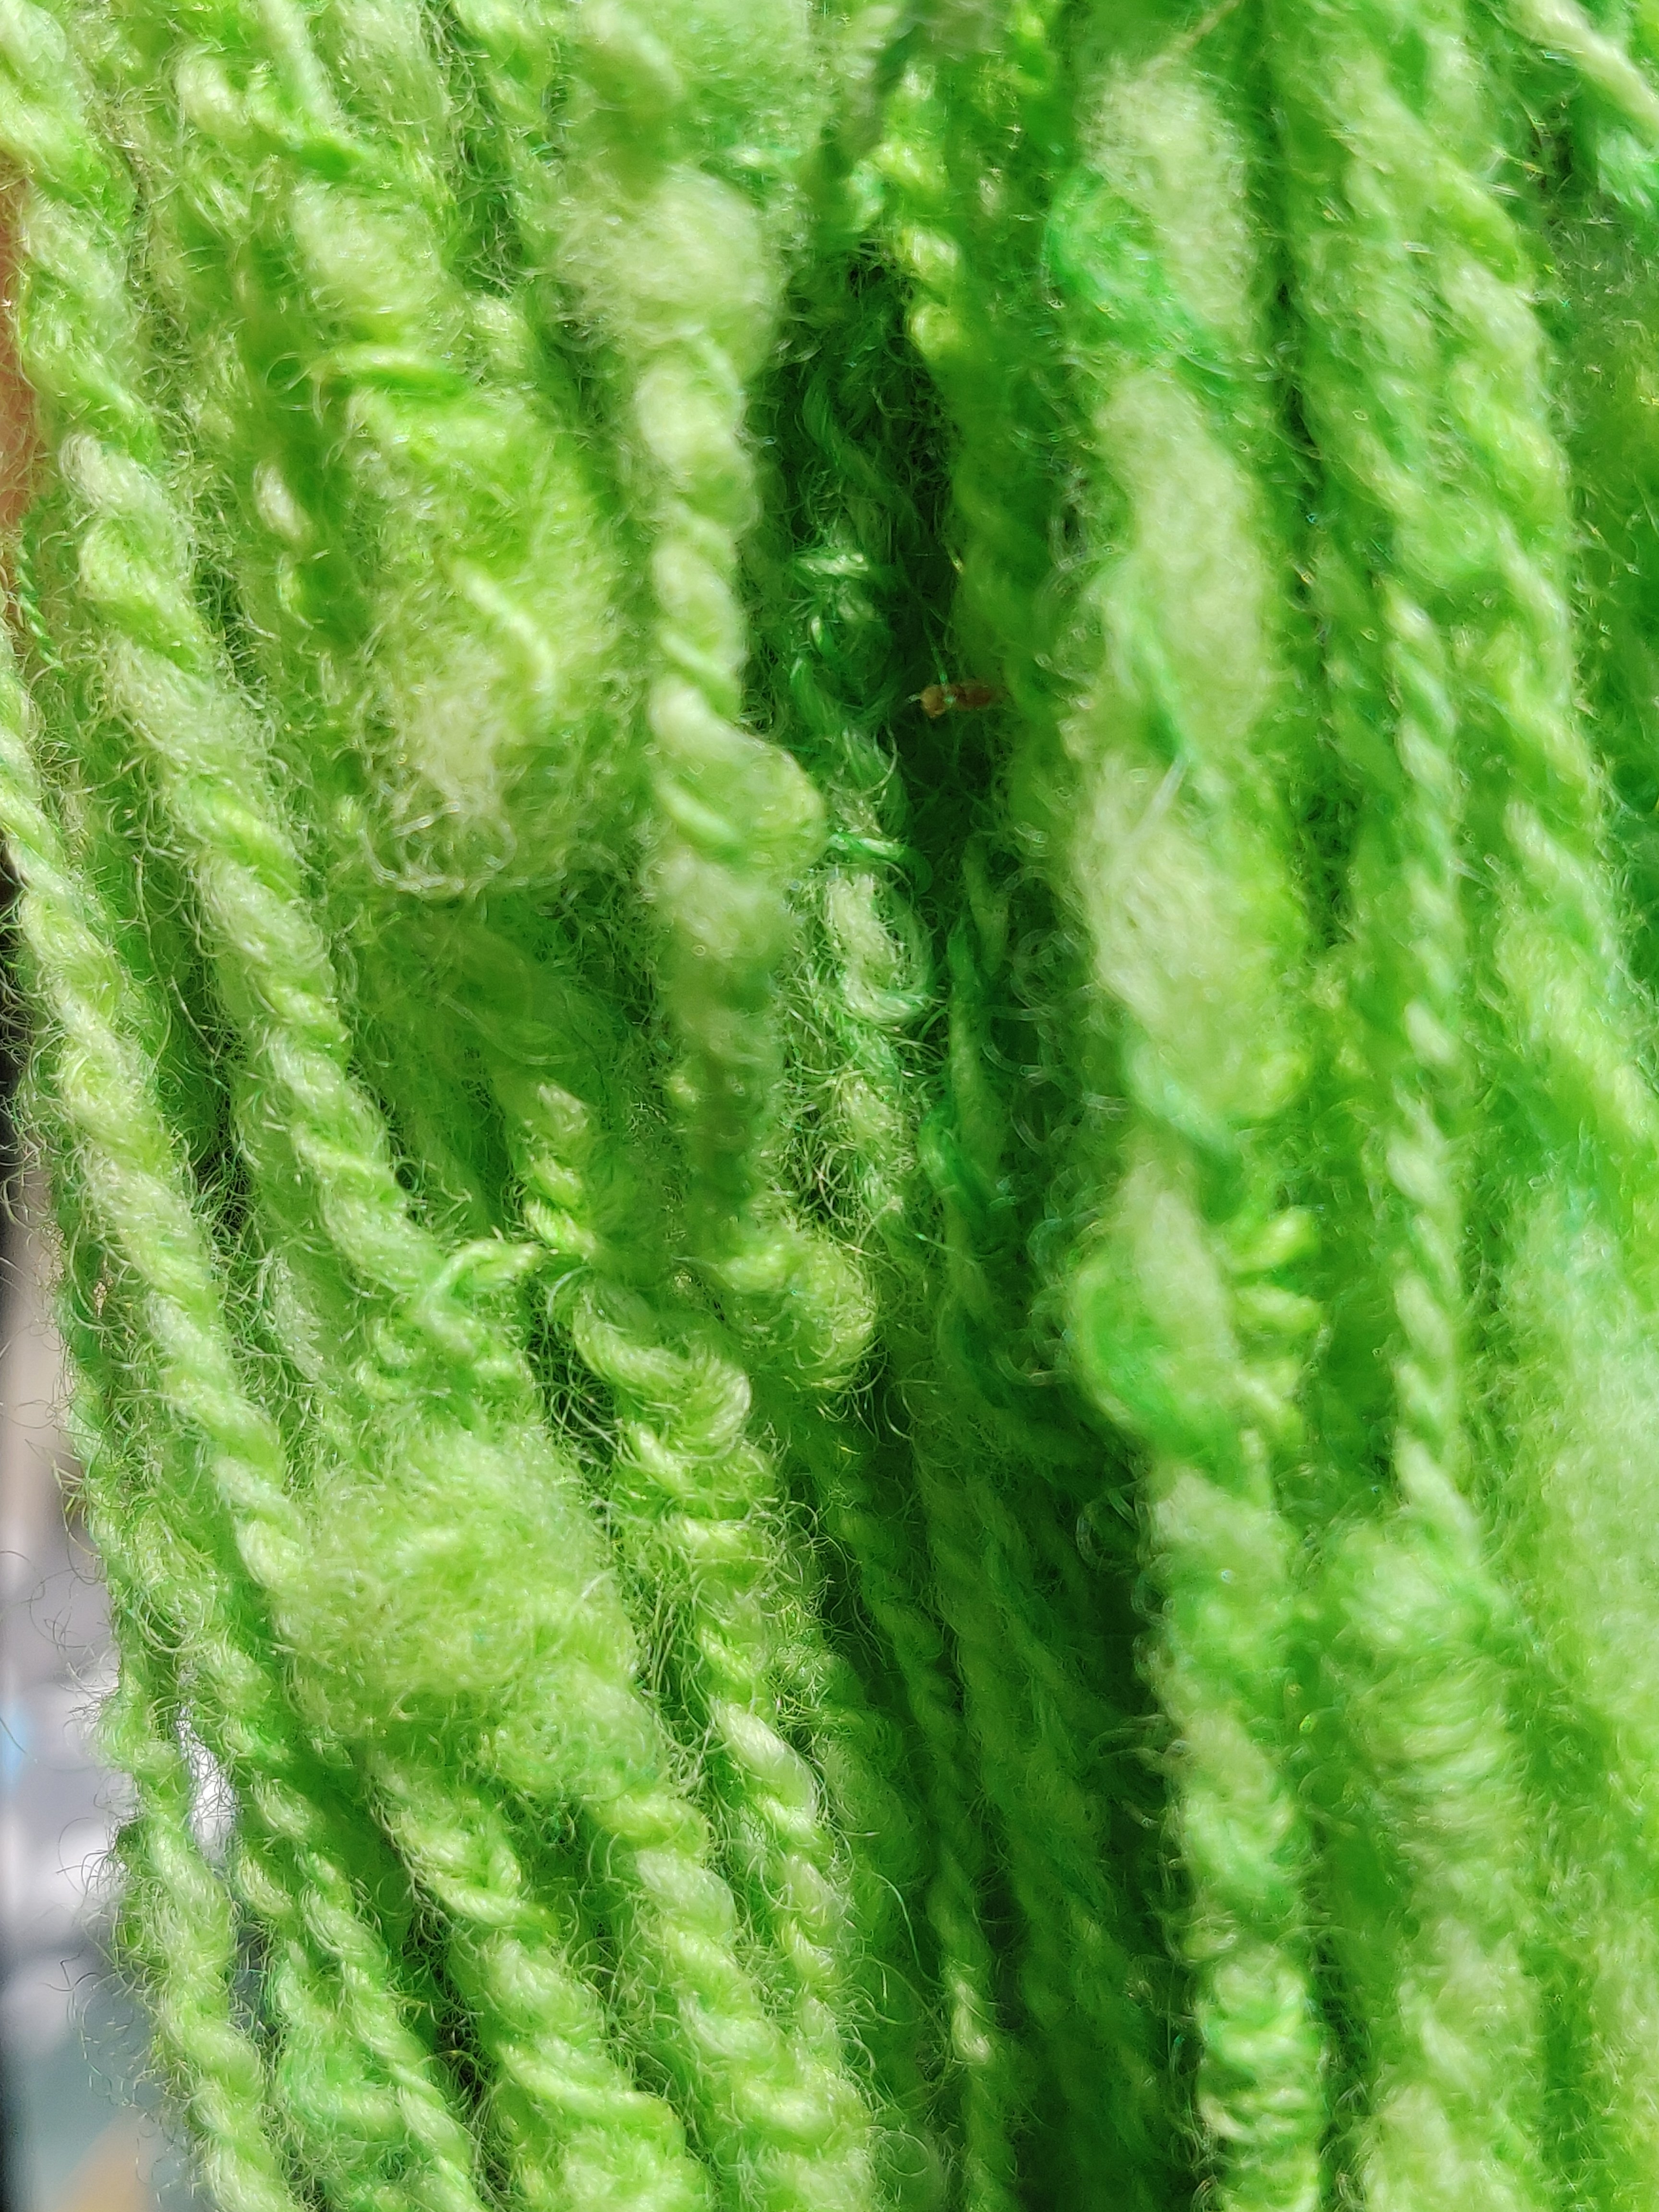
Today I wanted to dye some of my hand spun wool yarn a bright green. No natural dye I have would do this, and I didn’t have any green acid dye, (or any acid dyes at all), so I decided to use food colouring. I already knew that food colouring works as a fibre dye but did not realise that it was an acid dye, (thank you Google) so works best on wool, silk and other protein fibres that will dye with an acid dye. Acid dyes are not acid, but they require an acid such as vinegar or citric acid to attach themselves to the fibre.
Initially I’d intended to use liquid food dyes but discovered I have either thrown them out or someone had used them up, so had to resort to the paste colours I used to use for sugar flower modelling. These seemed to work fine and are quite intense, if a little harder to dissolve, (I had to squash some lumps against the side of the jug). I may use them again as they are just sitting in the cupboard at the moment.
So to prepare the yarn I soaked it in a mixture of one part vinegar to two parts water for about 30 minutes. This did two jobs at once, soaked the fibres to remove trapped air and added acidity. I could have added vinegar to the dyebath instead.
Meanwhile I put some water to heat on the stove and mixed the bright leafy green I wanted from my stash of food colouring dyes.
I mixed the food colouring paste with hot water in a small jug, and added a teaspoon of salt, (this helps to level the colour and increase its take-up), stirring them well until the liquid was clear, then added this to the pan of water that was warming on the stove.
When the dyebath was ready I removed the hank of wool from the vinegar and water soak, gently squeezing it to remove excess liquid, and immersed it in the dye. The temptation to stir the yarn into the dye bath is always with us, so I gently prodded it below the surface and walked away and left it. It took about 20 minutes of gentle simmering, turning the yarn very gently once, to achieve the colour I wanted.
Because I liked the colour so much I decided to dip a second hank quickly into the dyebath so I got very pale green and then, having rinse it to check the colour, I trailed half the hank into the dyebath again and let it stay in there until it became darker. This gave me a dip dyed, ombre yarn in tones of the same green.
Post-dyeing rinses brought the brightness down a little on both hanks, but overall I was pleased at how little colour came out. I rinsed quite hot; wool can take high heat and won’t felt, as long as you don’t agitate it or put it straight into cold water. The important thing is to have the rinsing water at a similar temperature to the dye bath. Wear gloves to protect your hands during these hot rinses. To save energy you can slowly decrease the temperatures through the rinses. Never let the tap run onto the wool or it is likely to felt.
Because it was a lovely day today I hung the hanks out in the garden to dry, but you can spin dry them as long as you put them inside a mesh laundry bag or a calico bag.
Both yarns were handspun with a bouclé effect. The dip dyed one took the colour less well partly because it was from a different fleece, and partly because it should really have had an additional scour before going into the vinegar soak.