
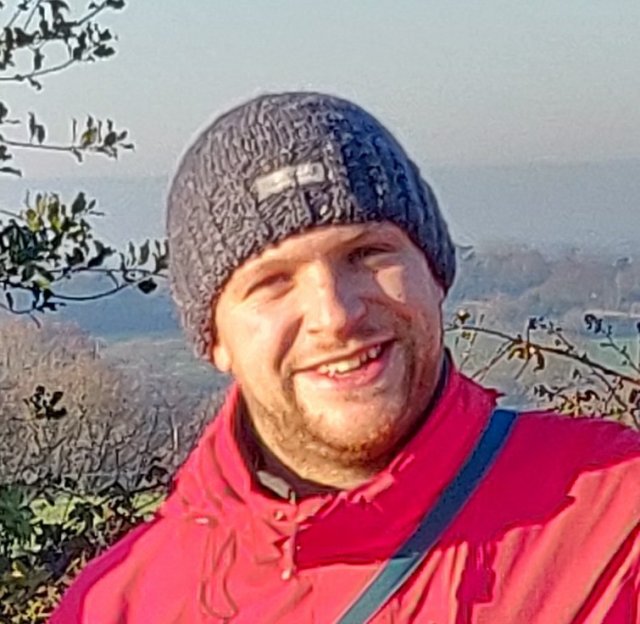
OK, I know it’s now mid January and this is a post about a Christmas gift but I’ve only just got around to finishing it off and getting it online. This is the story of knitting the hat worn in this photo.
December 2018…
I’ve started a beanie hat as a Christmas gift. Its in yarn from my stash, a rather nice airforce blue tweed 90% wool 10% acrylic blend Aran weight yarn. I dithered about the acrylic content I have to say, as I believe one’s toil is best rewarded by natural fibres, but the the colour (and having the yarn to hand), won the day.
The brim should work out to be around 7cm (3″) deep, and I’m going to knit it in a 3 row 2×2 cabled rib, with the shaped crown in stocking stitch. The pattern has been designed for a 61cm (24′) head circumference.
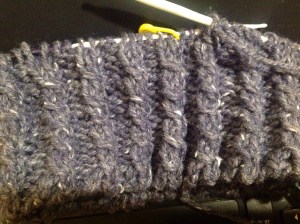
Gosh that doesn’t look very blue, more grey, must be the light. The rib shows though.
The cabled rib is worked on a 3.5mm circular needle, and the crown on a 4.5mm circular needle.
I have a set of those lovely interchangeable KnitPro needles, which means the world is my oyster when using circulars, but because the yarn is quite dark I have decided to use a white Prym triangular pointed circular so its easy to see the stitches. These are also comfortable to work with, and have a strange knob on the point that I quite like.
So far I have cast on 80sts (has to be divisible by 4 for the 4 stitch rib repeat) worked 2 rows rib and 6 repeats of the cable, and then 6 rows straight rib. I used the 2×2 alternate rib cast on recommended by Woolly Wormhead. Its not as stretchy as I had hoped, but looks good. Any stretchy one will do though, don’t beat yourself up about it.
How to work the c2b cable on the rib: Either use a cable needle, or work them as follows: slip the two knit stitches one-by-one knitwise, then insert the left needle from the right into the front of these stitches and slip them back to the left needle. This twists the stitches. Knit them one by one.
How I knitted the hat:
Cast on 80sts, using a stretchy cast on.
Join the round securely in your favourite way; for example work the first stitch, and pull the yarn to tighten the join before working the next stitch, or before working the first round slip the first stitch of the cast-on onto the point of the right needle so that it will be knitted at the end of the first round.
Mark the end of the round with a stitch marker.
Round 1 and 2: (k2, p2) to end.
Round 3: (c2b, p2) to end.
Repeat round 1-3, 5 times.
Round 16-20: (k2, p2) to end.
Round 21: purl.
Move the marker up to the current row.
Now you have the option to work all the stocking stitch in purl, and replace the knit decreases with purl versions, or if like me you find knit faster than purl, this is what I did.
Slip the last stitch to the left needle, and take the yarn to the back between the stitches then slip the stitch back so that the yarn is caught around the stitch. Invert the knitting and working in the opposite direction to former rounds, work the rest of the crown as knit stitches.
Round 22: knit
Continue working as Round 22 until the work measures 20.5cm from edge of rib.
Now to do the shaping.
I worked the first and every fourth round as a decrease round as follows.
First round,: k7, k2tog (70)
Second and third round: k all.
Fourth round: k6, k2tog (60)
Fifth and sixth round: k all.
Continue in this sequence, knitting one less stitch between decreases until 50 stitches on needle. Then work decreases on every second round until 20 stitches remain, finishing with a knit round.
Break yarn leaving a 40cm tail. Thread yarn onto a darning needle and slip the open stitches onto the darning needle. Draw the stitches in and secure the yarn end.
