
Category: yarn
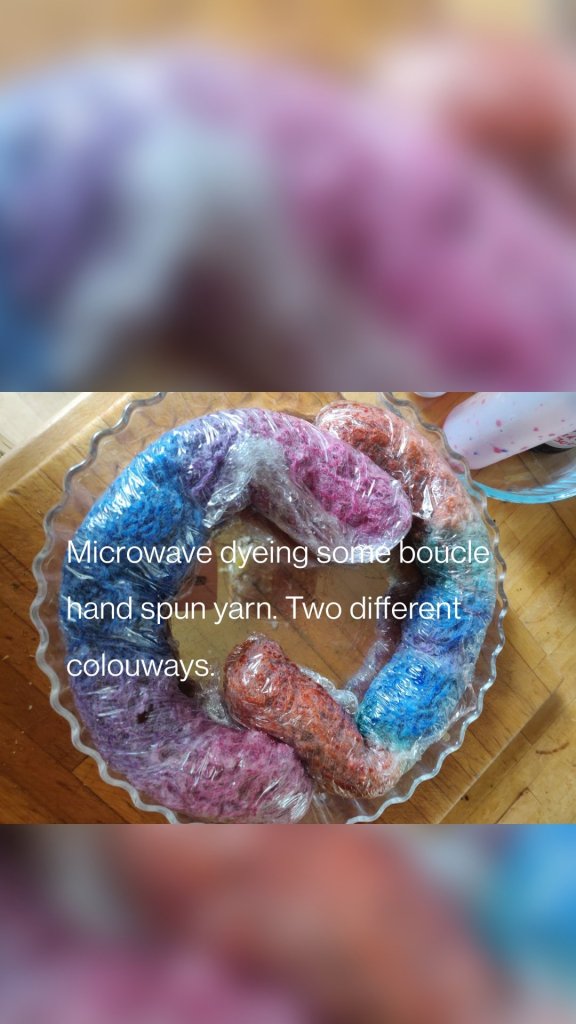
Fancy yarn workshop; spinning boucle yarn
Yesterday I had a fab time at a workshop learning to spin fancy yarns. We only managed boucle and slub but that was so rewarding. The workshop was organised by the Brighton and Hove Textile Arts Group and hosted by Spring Farm Alpacas in Fletching West Sussex. Ann Dishman led the workshop and provided Blue Faced Leicester tops, still various and other threads for us to spin with.
Although I have spun both types of yarns before, I learned a lot and really enjoyed having four hours in which to practise the techniques. I also found out that Ann had been taught to spin by my spinning hero, Mabel Ross, which made me extremely envious.
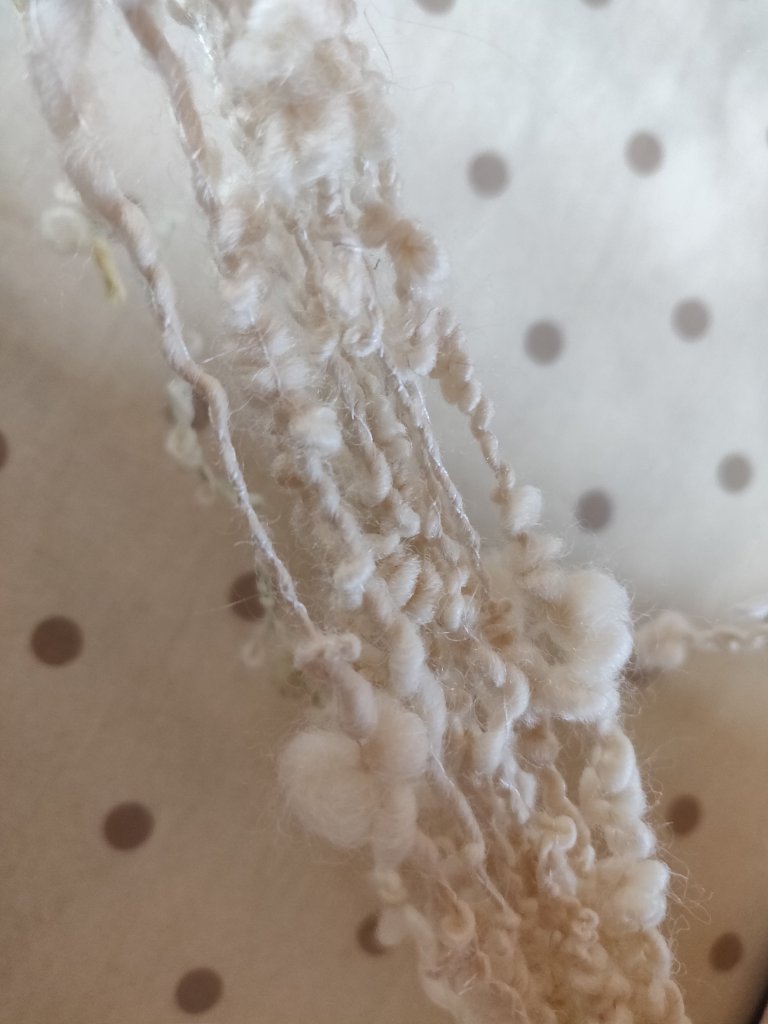
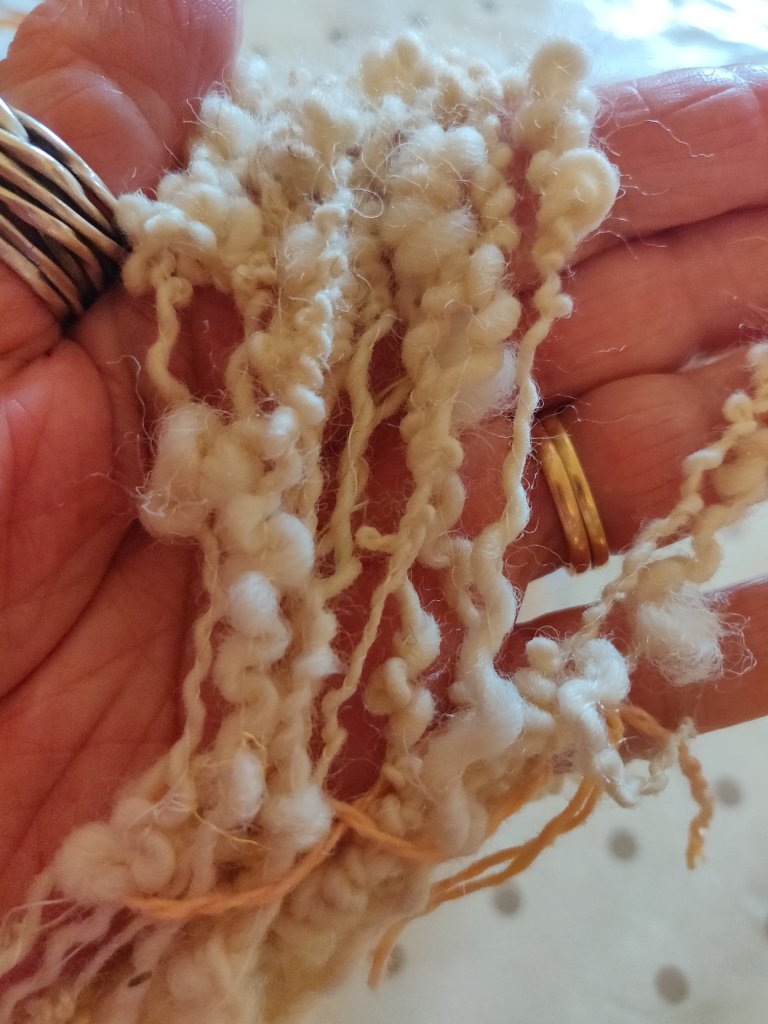
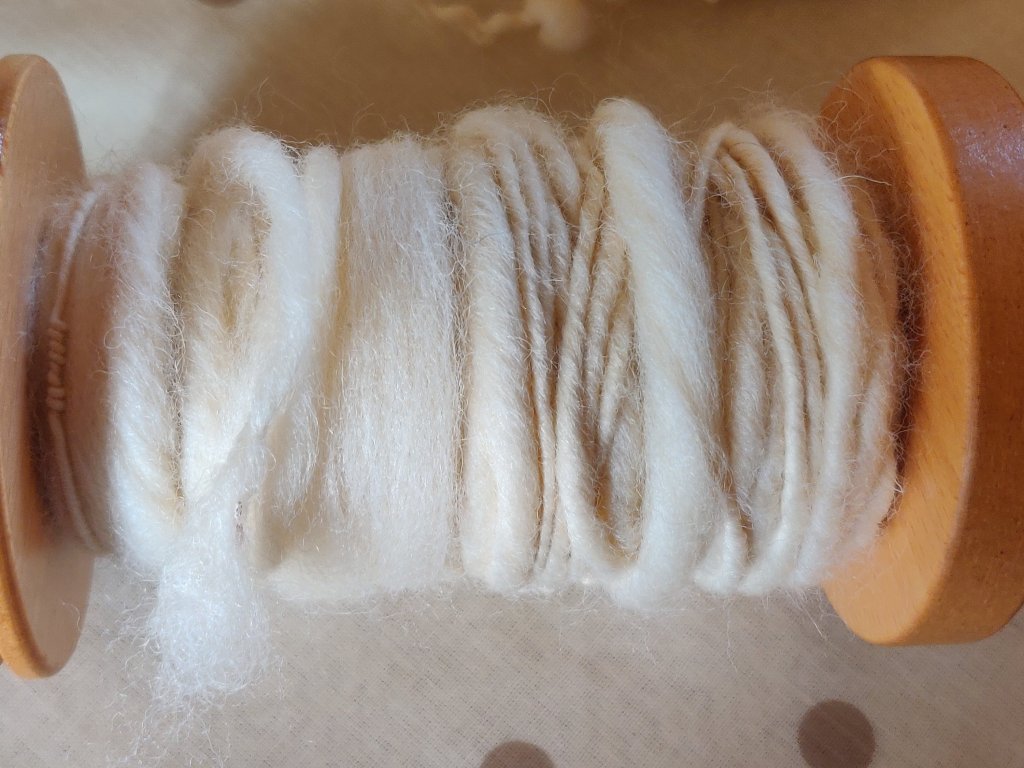
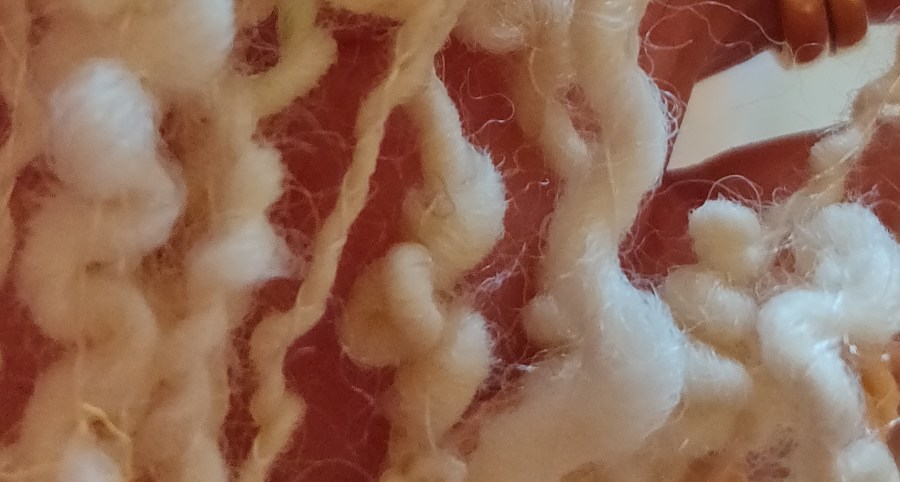
Unwashed soft slub; Blue Faced Leicester singles with a fine industrial wool binder.
I took my Louet Victoria travel wheel and at usual she spin well and reliably, it was the user who made the mistakes!
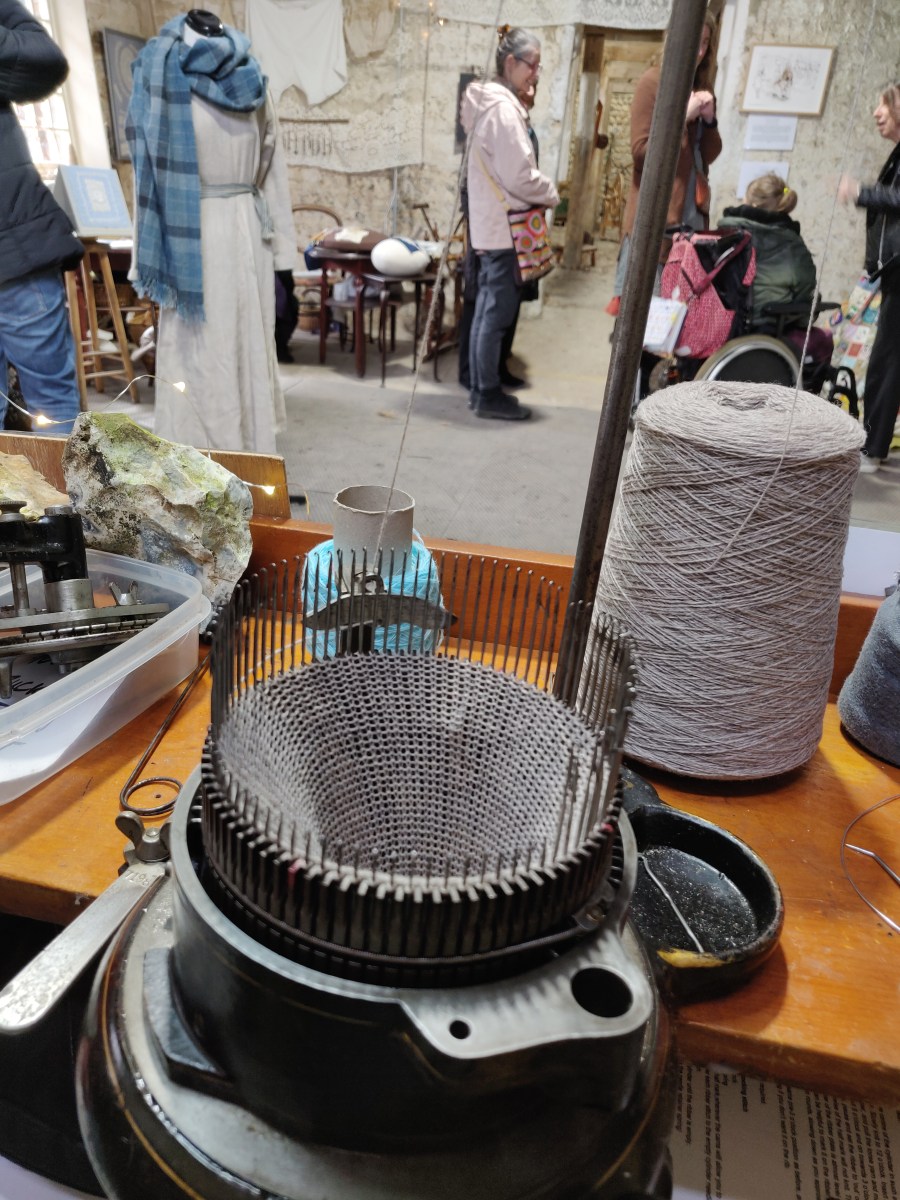
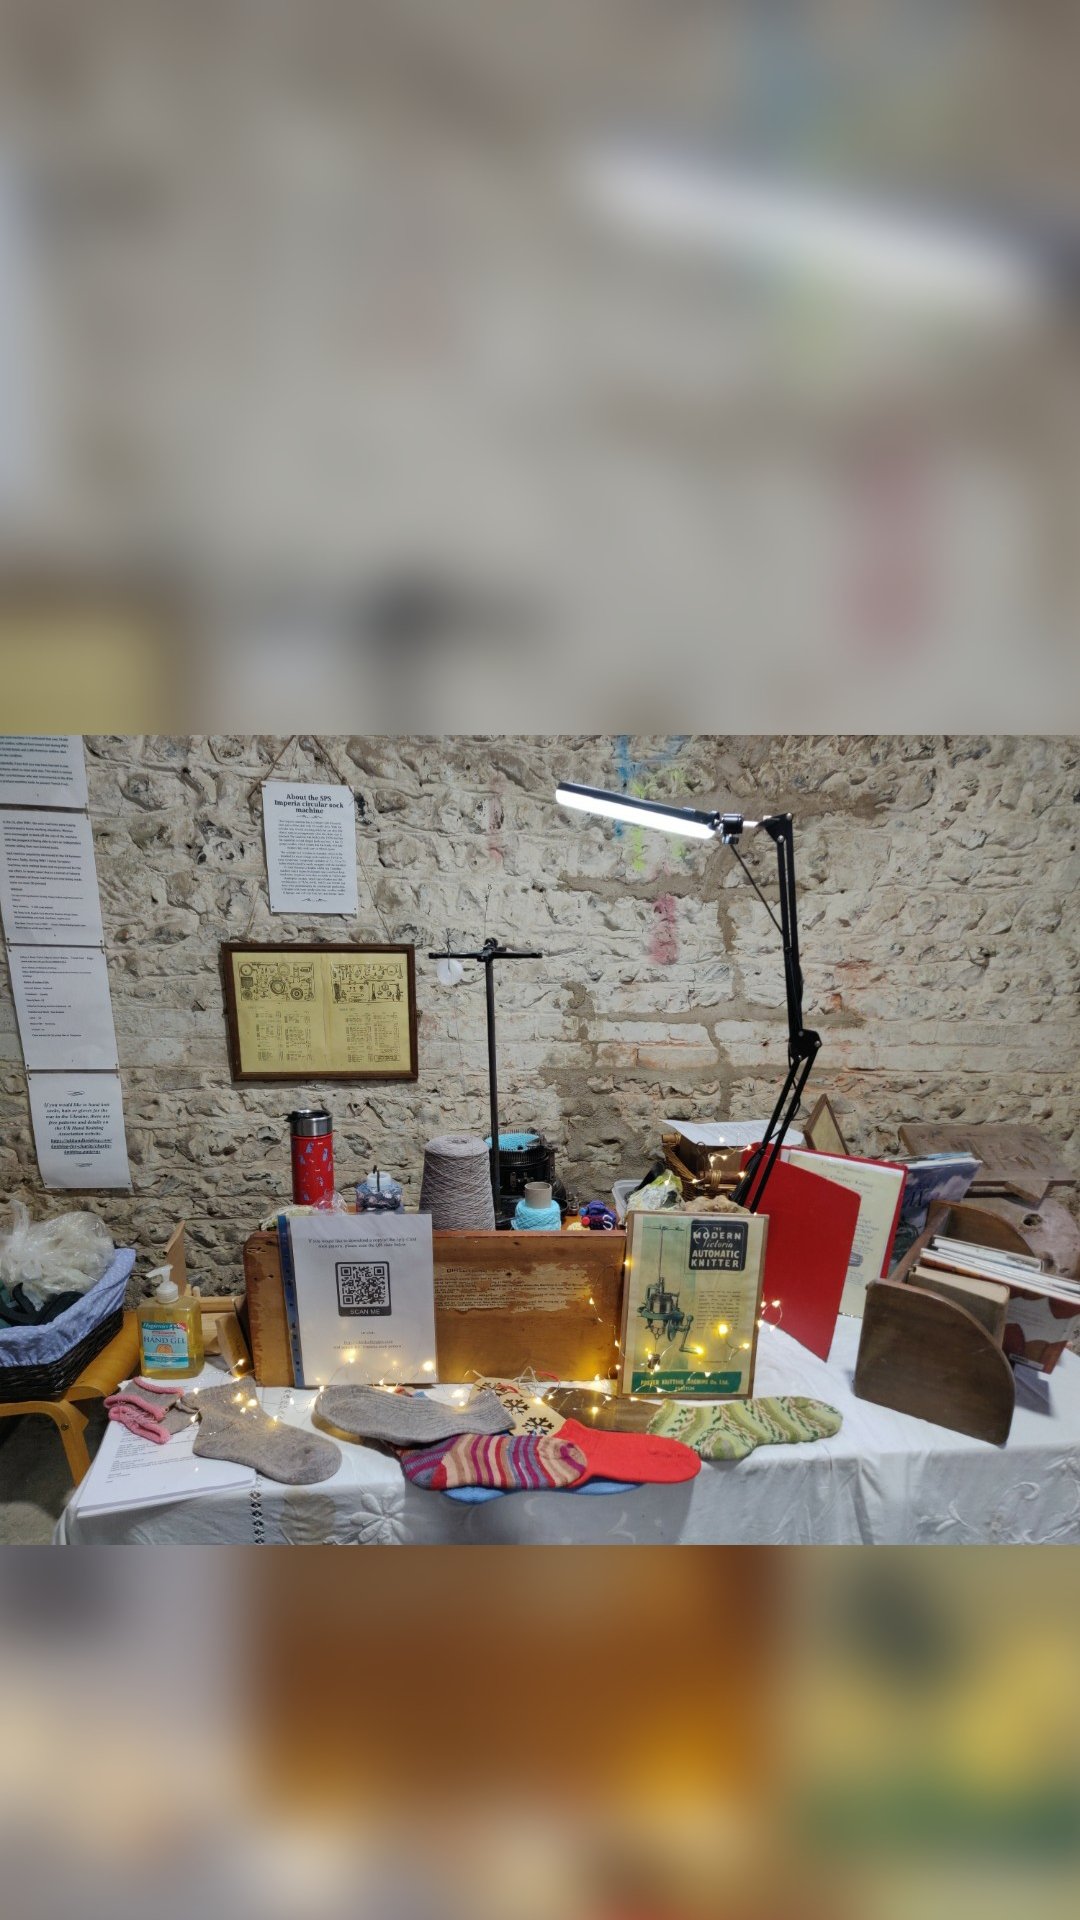
Seamless machine knit socks
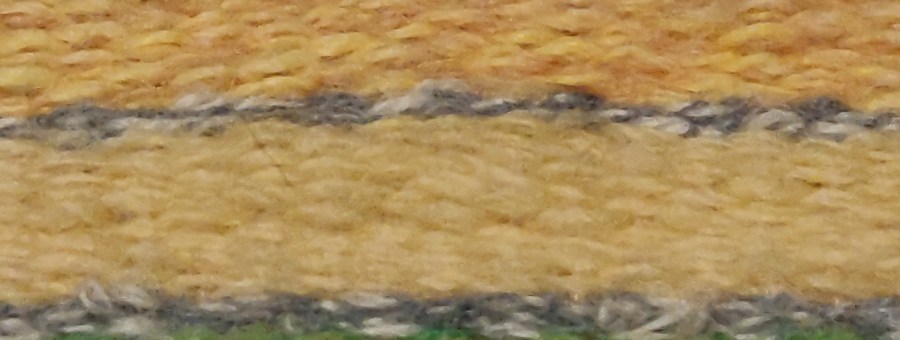
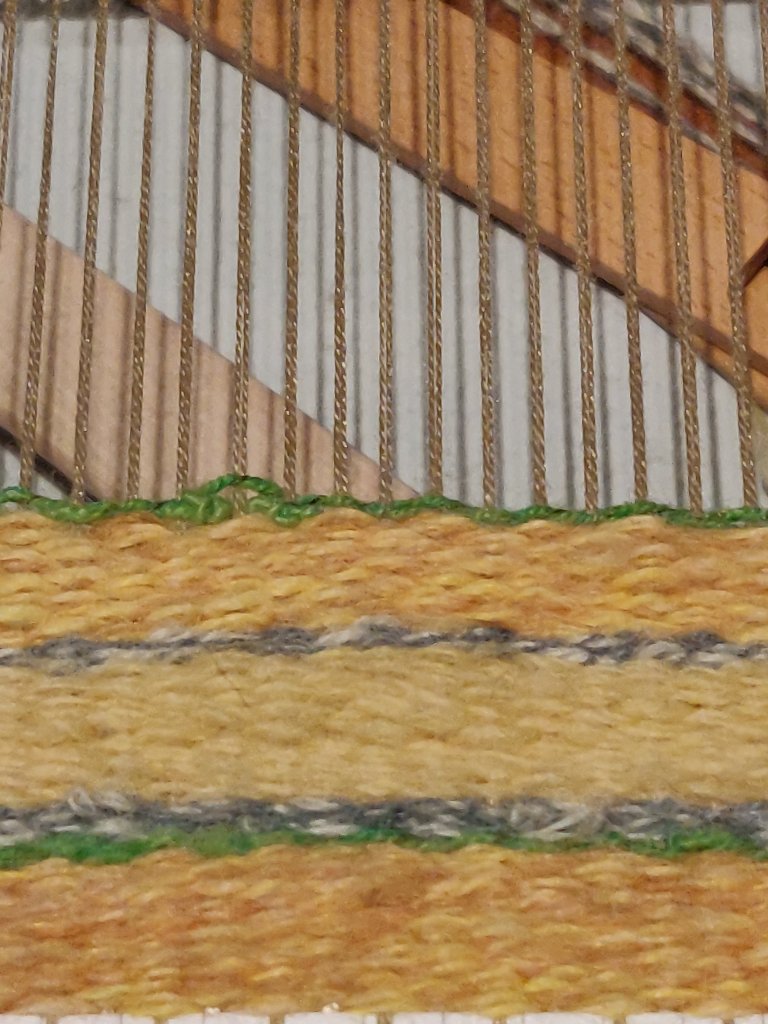
This was taken at Traditions in the Making, a Heritage Craft event at Stanmer Park, Brighton. With lots of volunteers from local community textile group Woolly Umbrella, alongside the CSM there were demonstrations of flax processing, lace making, weaving, inkle looms, wool fibre preparation (hand and drum carding), embroidery and wool and flax spinning.
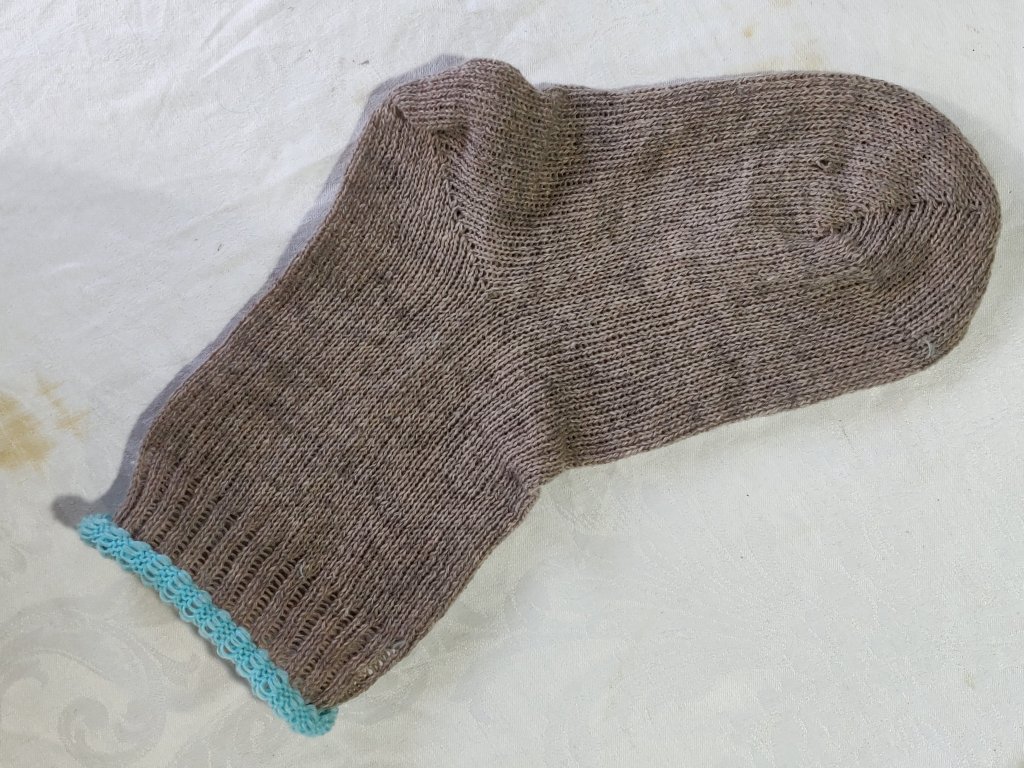
The CSM is an Imperia with an 84 slot cylinder and gm here I am knitting a sock in traditional 3ply sock wool; no nylon. This was the nearest we could get that was most like the wool probably used originally on the machine. Although I have knitted on it with hand spun I felt that demonstrating required enough concentration without the worry of irregular yarn!
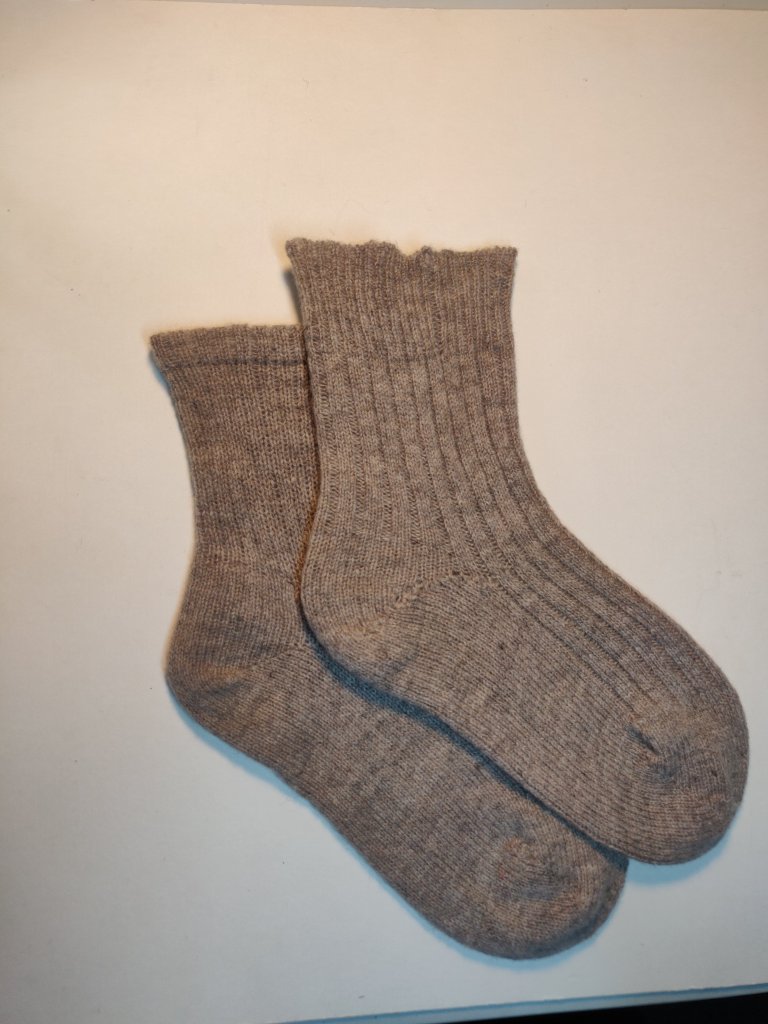
In a brave, but foolish, moment I decided to try a toe-up sock at one point. It wasn’t too bad at all, and I am quite pleased with the result.
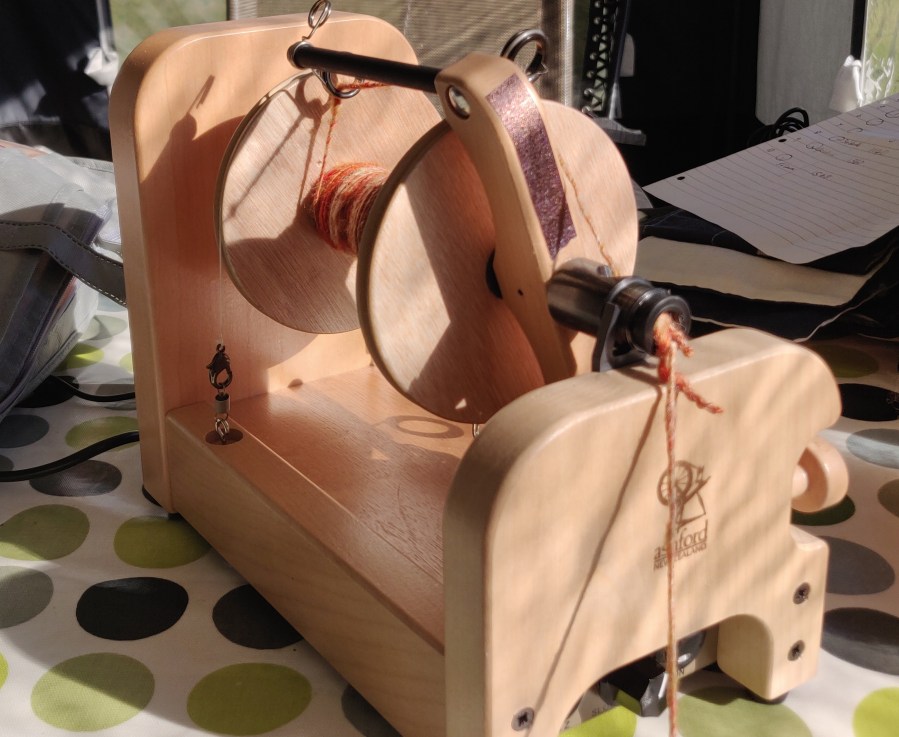
Battery pack for Ashford E-spinner 3
I’ve just spent about an hour fiddling with the battery pack that came with my E-Spinner. The E-spinner was secondhand and was still unassembled and the battery never been used – the battery pack is not an Ashford one. I thought the details of the battery pack might be useful for anyone looking to buy one of these for their E-Spinner 3.
Super Rechargeable Li-ion Battery, YSN-N12V
Input: 12.5VDC
Output: 12VDC 3800mAh, (this is the DCin/out outlet, a round plug that leads to the E SPinner power plug when being run on battery).
Other output is: 5VDC 6800mAh – (the usb outlet).
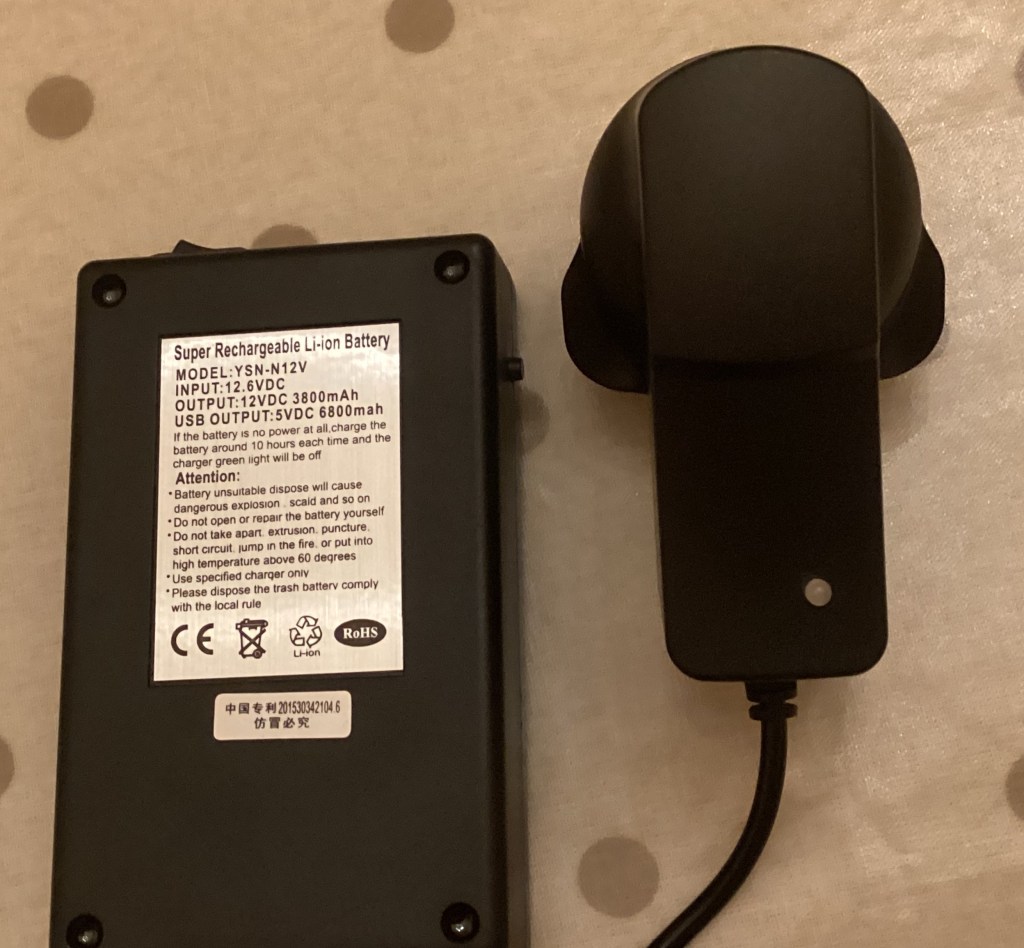
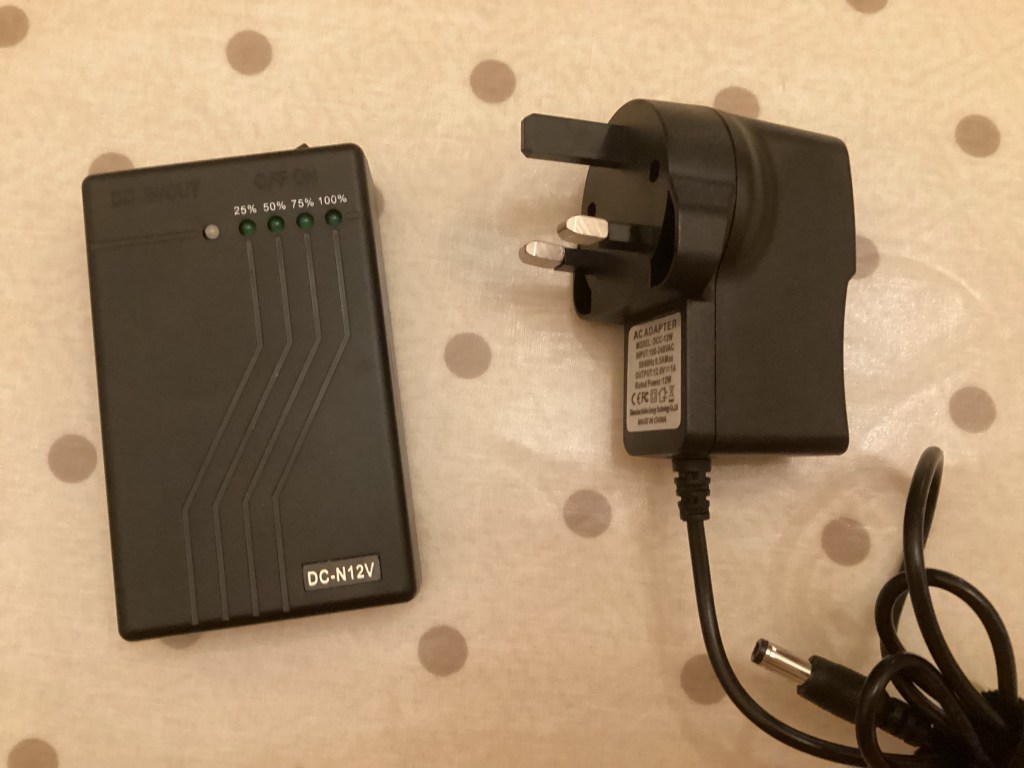
In my excitement I charged it rather haphazardly, but it has been working fine with the spinner. When I came to recharge it I found that it was not indicating charging as explained in the manual. However, a useful review on YouTube enabled me to understand what was going on. There is another lead with the battery, a round pin on one end (that is the same size as the outlet, and a much thinner pin on the other end – no idea what that is for). The lead from the battery to the E-spinner has the same sized pin on each end. It may have been purchased separately from the battery pack?
Basically the instructions were confusing about the charging process. The led on the plug the goes into the wall outlet is supposed to be red when the unit is plugged in to charge, and turn green when it is charged. The unit also must be switched on at its own on/off switch whilst charging, (if you leave it switched on when not in use it will discharge). The battery pack has five green lights on the top, one to show the pack is charged and four others labelled 100%, 75%, 50% and 25%. Nothing is said in the instructions about these, but trial and error showed that pressing the unlabelled button on the left side of the unit indicates the amount of power remaining in the unit using these lights.
I couldn’t find the battery pack on eBay or Amazon but did find it on AliExpress.
I found the same battery pack on aliexpress
I have used the battery for about 4-5 hours spinning before it needs recharging, so am really pleased with the unit. I have also bought the cigarette lighter plug connection so that I can use it on the 12v in our caravan. May be overkill as the battery is working well so far. The battery takes about 8 hours to charge.
Updated September 2025
Having been browsing I have found several posts about the battery for the E Spinner 3. Because mine does run out sometimes, I decided to purchase a second one and found this TalentCell one recommended on FB at a reasonable price so have taken the plunge.
Here is a link to the post on the Spinning Fibres group about the battery, which includes how to trim the plastic on the plug if it is too big for hole on the E- Spinner.
The details of the battery are : TalentCell Rechargeable 12V 6000mAh/5V 12000mAh DC Output Lithium ion Battery Pack – Portable Li-ion Power Bank with 12.6V Charger, Black.
I can give no guarantees that it will work, and have no affiliation to any of the companies named here.
I will post again if this does not work…
Another addiction: weaving on a rigid heddle loom
I haven’t really woven on a loom since I was a student at college. I have a Spears toy loom which I used for one project but the width is limited and the heddle is quite fiddly to work with. What I really wanted to do was to find a technique that uses up my small bits of handspun yarn my experiments and my texted handspun that I don’t think looks very good in knitting.
The Spears loom is actually quite good, and is very much like using a rigid heddle loom but with the shortcomings mentioned earlier. So I was really pleased when a friend offered to lend me 15 inch rigid heddle loom that she had in her attic. This now gives me the extra width and also the heddle is much easier to manipulate.
And so my weaving adventure has begun. Kindly she put a viscose thread warp on it for me to get me going and I’ve used this to practise using some acrylic DK yarn I had to hand.
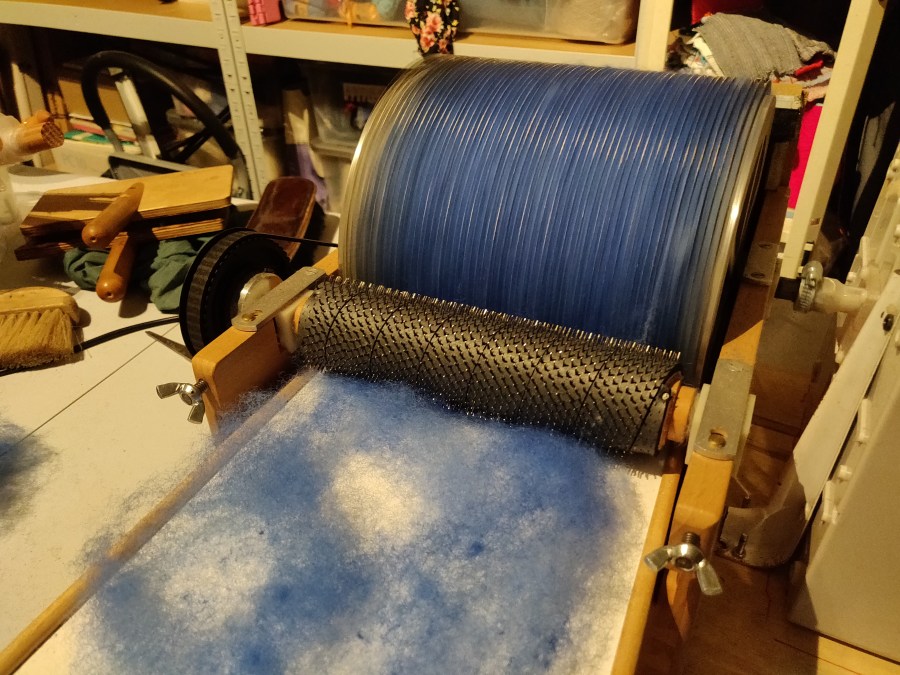
The joy of a motorised drum carding machine
Follow the link below to read about how my old drum carder has got a new lease of life. This modification makes it so much easier to achive high quality carded fibre.
https://vikkihaffenden.com/spinning-yarns/motorising-a-drum-carder/
Top-down knitting resumed
Back problems have meant I need to avoid computers and knitting machines for a while, so I wanted a hand knit project to work on. Digging around on shelves, ( I can’t get at my stash boxes at the moment) I found a bag of knitting I had forgotten about. Inside was the first few rows of a top-down sweater. I remembered how long it took to work out the pattern, (yes I did it myself) and how carefully I chose the yarn. The notes with the pattern are dated 2013, which says volumes about my engagement with larger hand knit projects!
Luckily the moth had stayed away, thanks to ziploc bags, and I haven’t used the balance of the yarn for something else. This seemed a perfect opportunity to get on with my long-lost dream jumper.
I knitted a top-down jumper last winter with good results. Although it has dropped quite considerably due to the stitch I used, do is more a dress than a number. I like the method because you can check the shoulder fit, which is so important, and adjust it before embarking on the larger areas. Monte Stanley wrote about top-down knitting and as I am interested in integral knitting, I find the technique intriguing
I had obviously found fault with the stored knitting because there is an separate neck and shoulder be sample threaded into waste yarn in the bag. On reflection I seem to remember it was discarded because of the shaping finish rather than size. I will unravel it if I need the yarn later on, but at the moment it is useful for reference.
It’s knitted in DK alpaca/wool/silk blend yarn on a very pretty warm stone colour.
I’m using a 4mm circular needle from the KnitPro convertible system. These are very versatile so am using these for this project where they are separate ‘tubes’ to work on. Being able to change the length of the cable means it’s easy to work narrower sleeves as well as the larger circumference of the body.
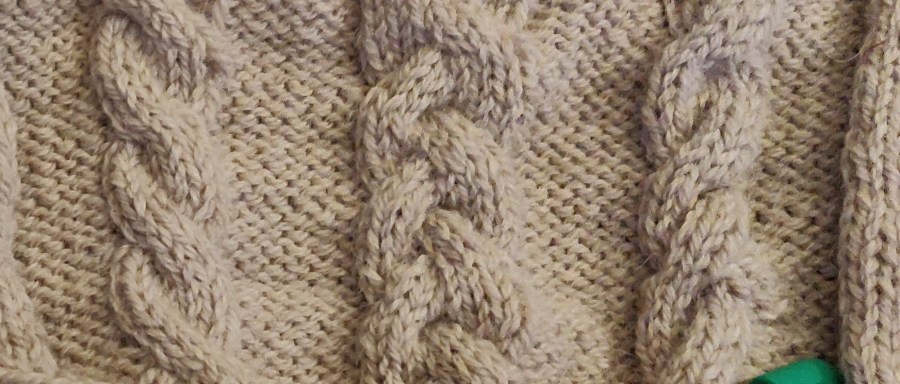
The design is a raglan sleeve, generous fit jumper with cable panels running up front and back. Shaping is worked fully fashioned along the raglan ‘seam’ lines using lifted left and right increases. My initial sample was not fully fashioned, and clearly the fully fashioning makes a much nicer finish.
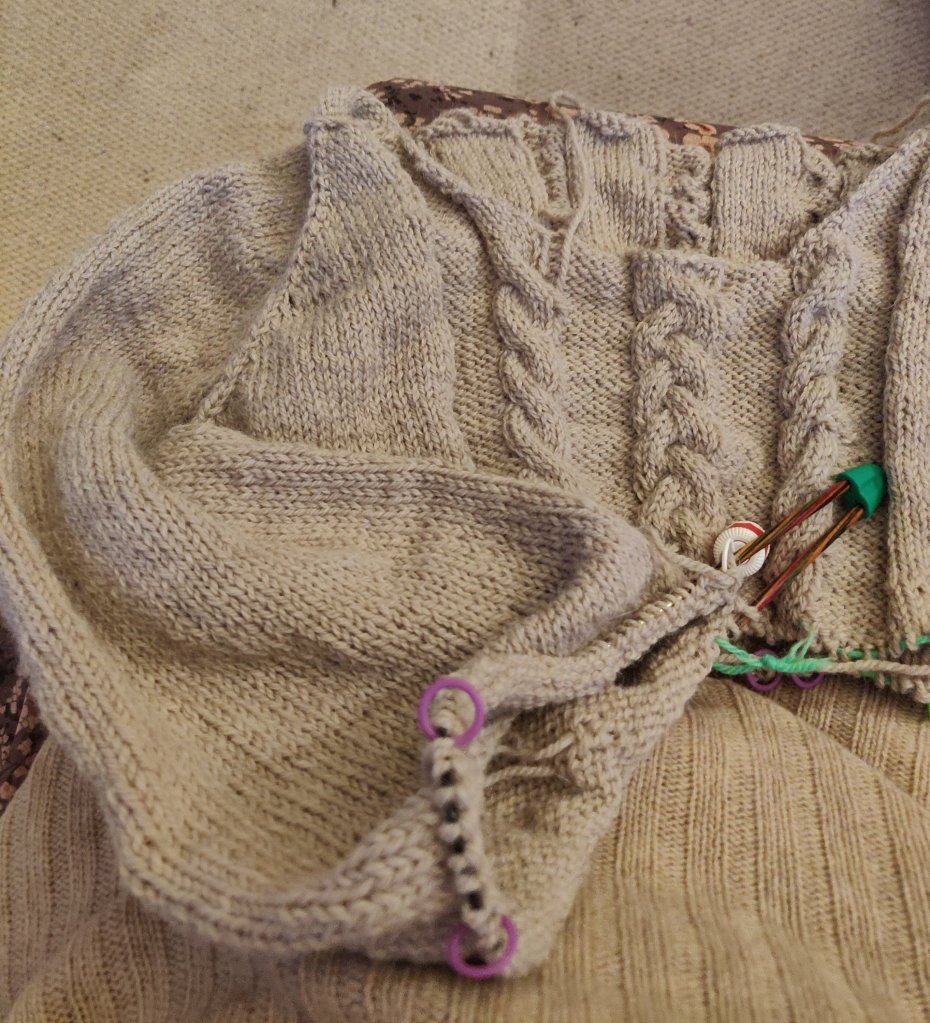
I’ve just finished one sleeve, (stocking stitch) with fully fashioned decreases along the underarm ‘seam’, and the fit seems good so far.
Working out the pattern was quite complicated even though I used Designaknit for the basic silhouette. It was easy enough to invert the shapes, but then I had to combine them in-the-round. Some maths later I had a picture in my head, and the numbers to match it on paper. I worked out the positioning of the cable panels manually because it was important to have plain stocking stitch for the raglan shaping.
If I get the next sleeve done I might even got to finish the cable front and back before 2025!
Update : OK, it’s now the end of December and I have completed both sleeves and am part way down the body. So far I’ve used one bag of yarn, (500g) and anticipate using another 200g, making the jumper quite heavy!
The body is slightly flared, just enough so that it’s not a straight tube shape. The increases are worked down where the side seam would be, and at the outer edge of the outer cables every 11th row.
Update January 2022
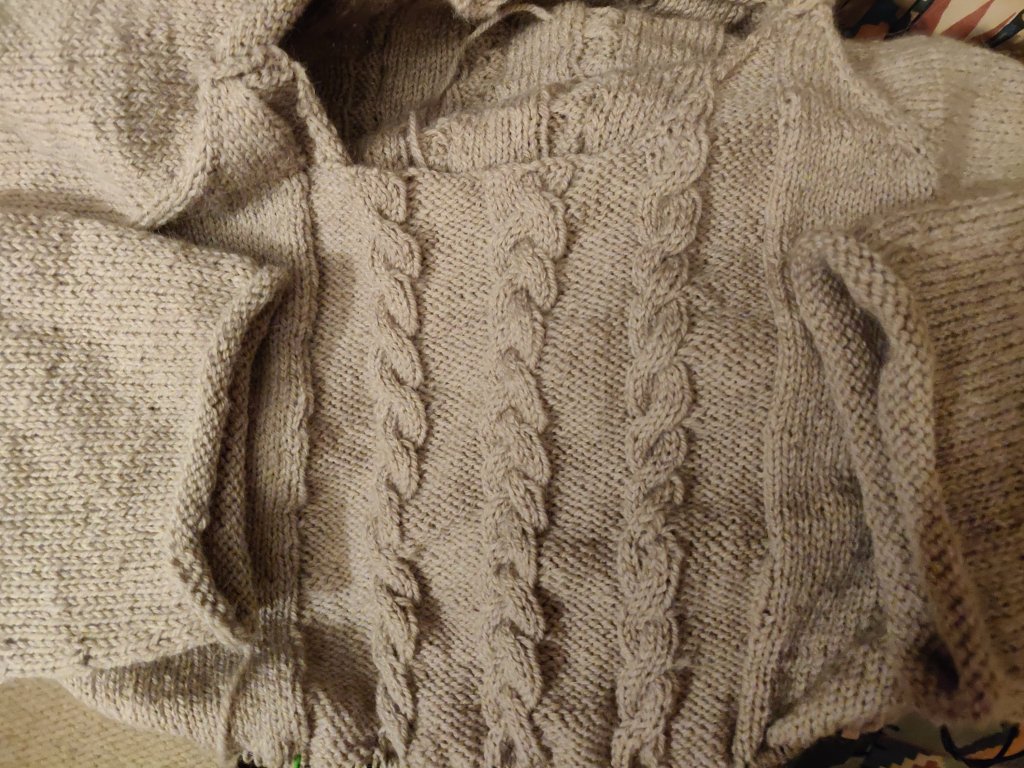
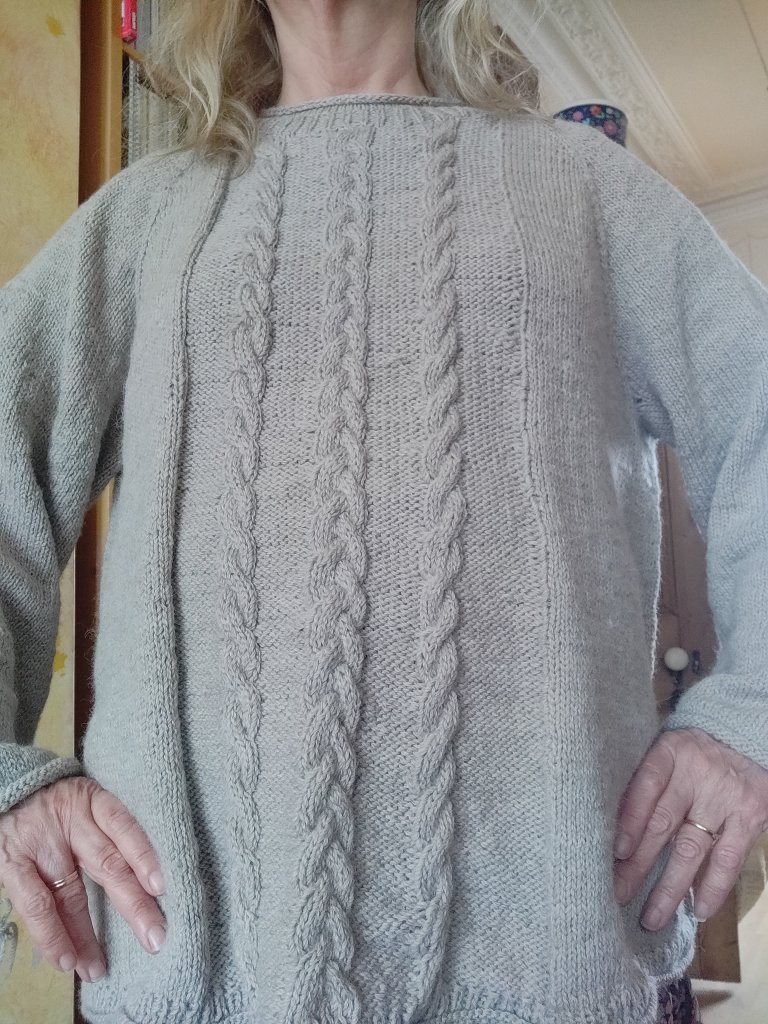
The jumper is now complete! First blocking fine, now test-wearing before sewing in the ends. Then I shall wash so that it matches the revision swatch and the stitches even out a bit more. Something I noticed whilst knitting was that although this is a lovely yarn it has a tendency to leave fine fibres on the needle so the stitches catch. At first I unpicked and reknitted some stitches, thinking I had miss-knitted the stitches and it took me a while to realise what was happening. Gentle tugging releases the fibres and opened the stitches, but from the tension swatch I can see that washing will even the knit out.
The neckband is a single rib with a rolled edge. The neck band was picked it up into the neckline so is integrally knitted which has a tendency to stretch on top-down sweaters. In the past I have sewn take along the back neck to stabilise the neckline, but Roxanne Richardson on her YouTube channel suggests making a line of crochet slip stitch along the back neck instead. She also suggests using this solution along raglan seams.
Because it’s knitted top down, seamless I’m going to watch the raglan ‘seams’ to make sure they doesn’t drop. If the jumper does start to drop I will also work a crochet slip stitch in the back of the seams to stabilise them.
I’m just hoping the weather stays cool so I can continue to wear my new jumper.
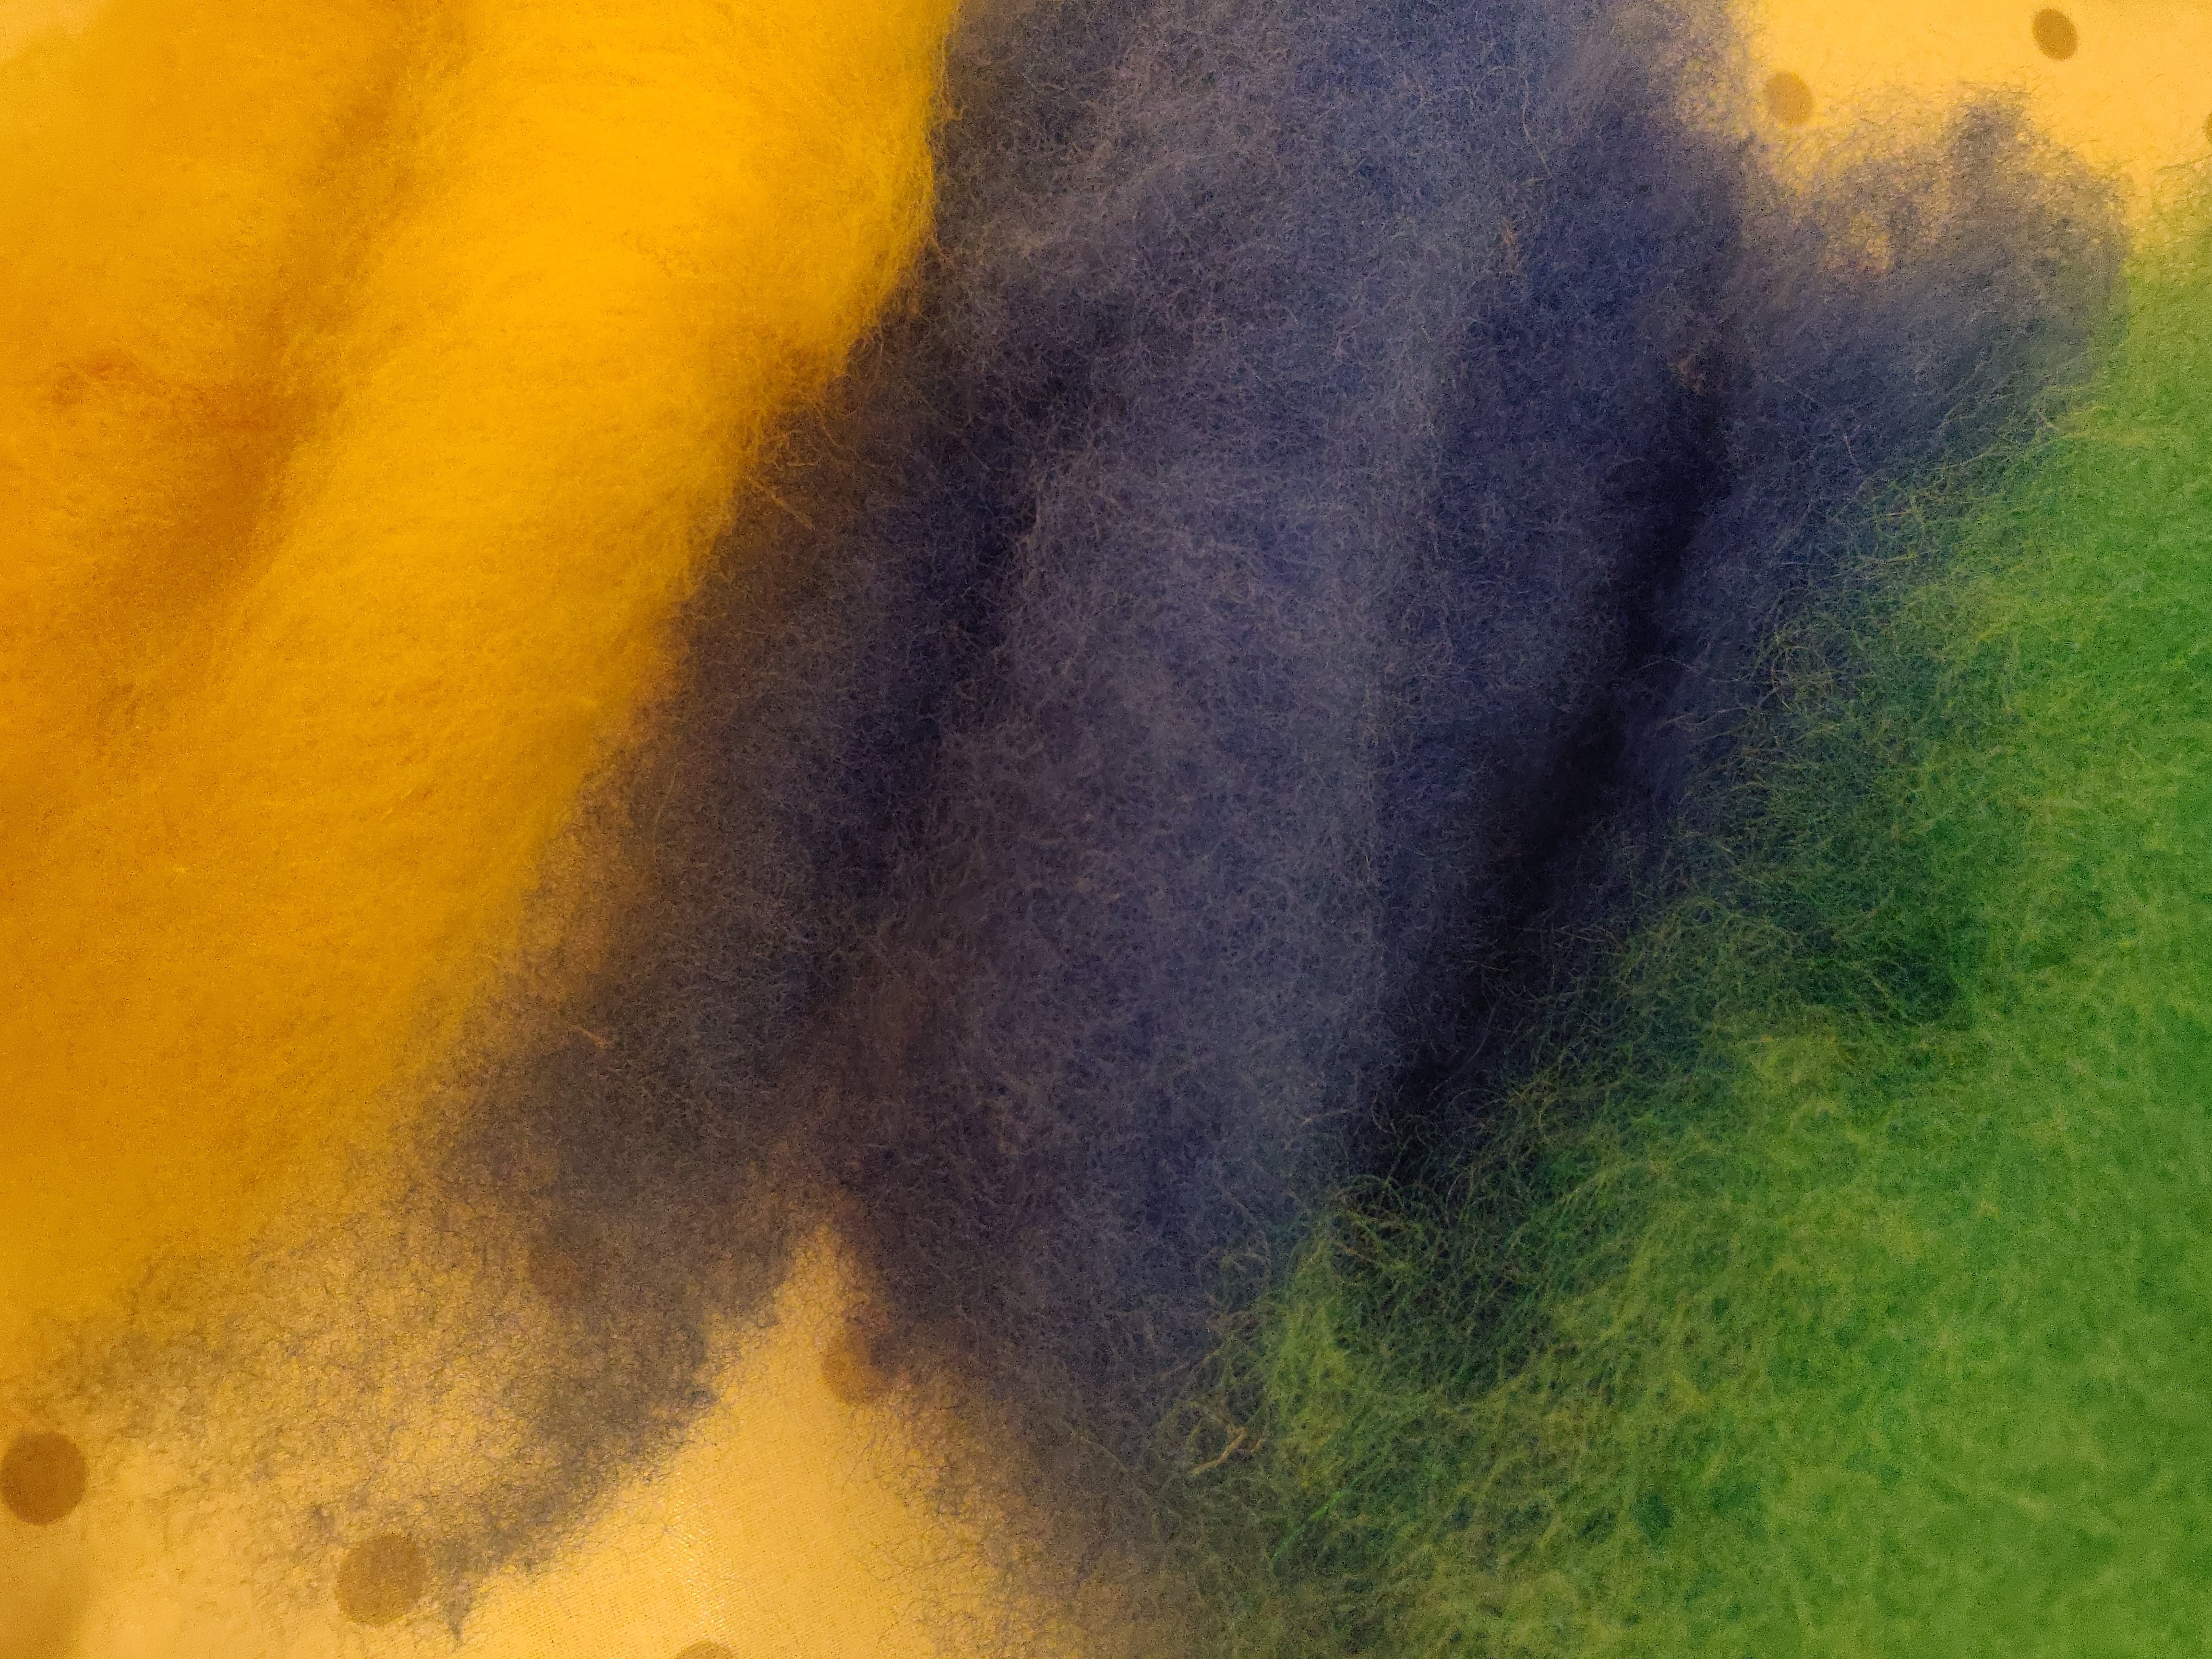
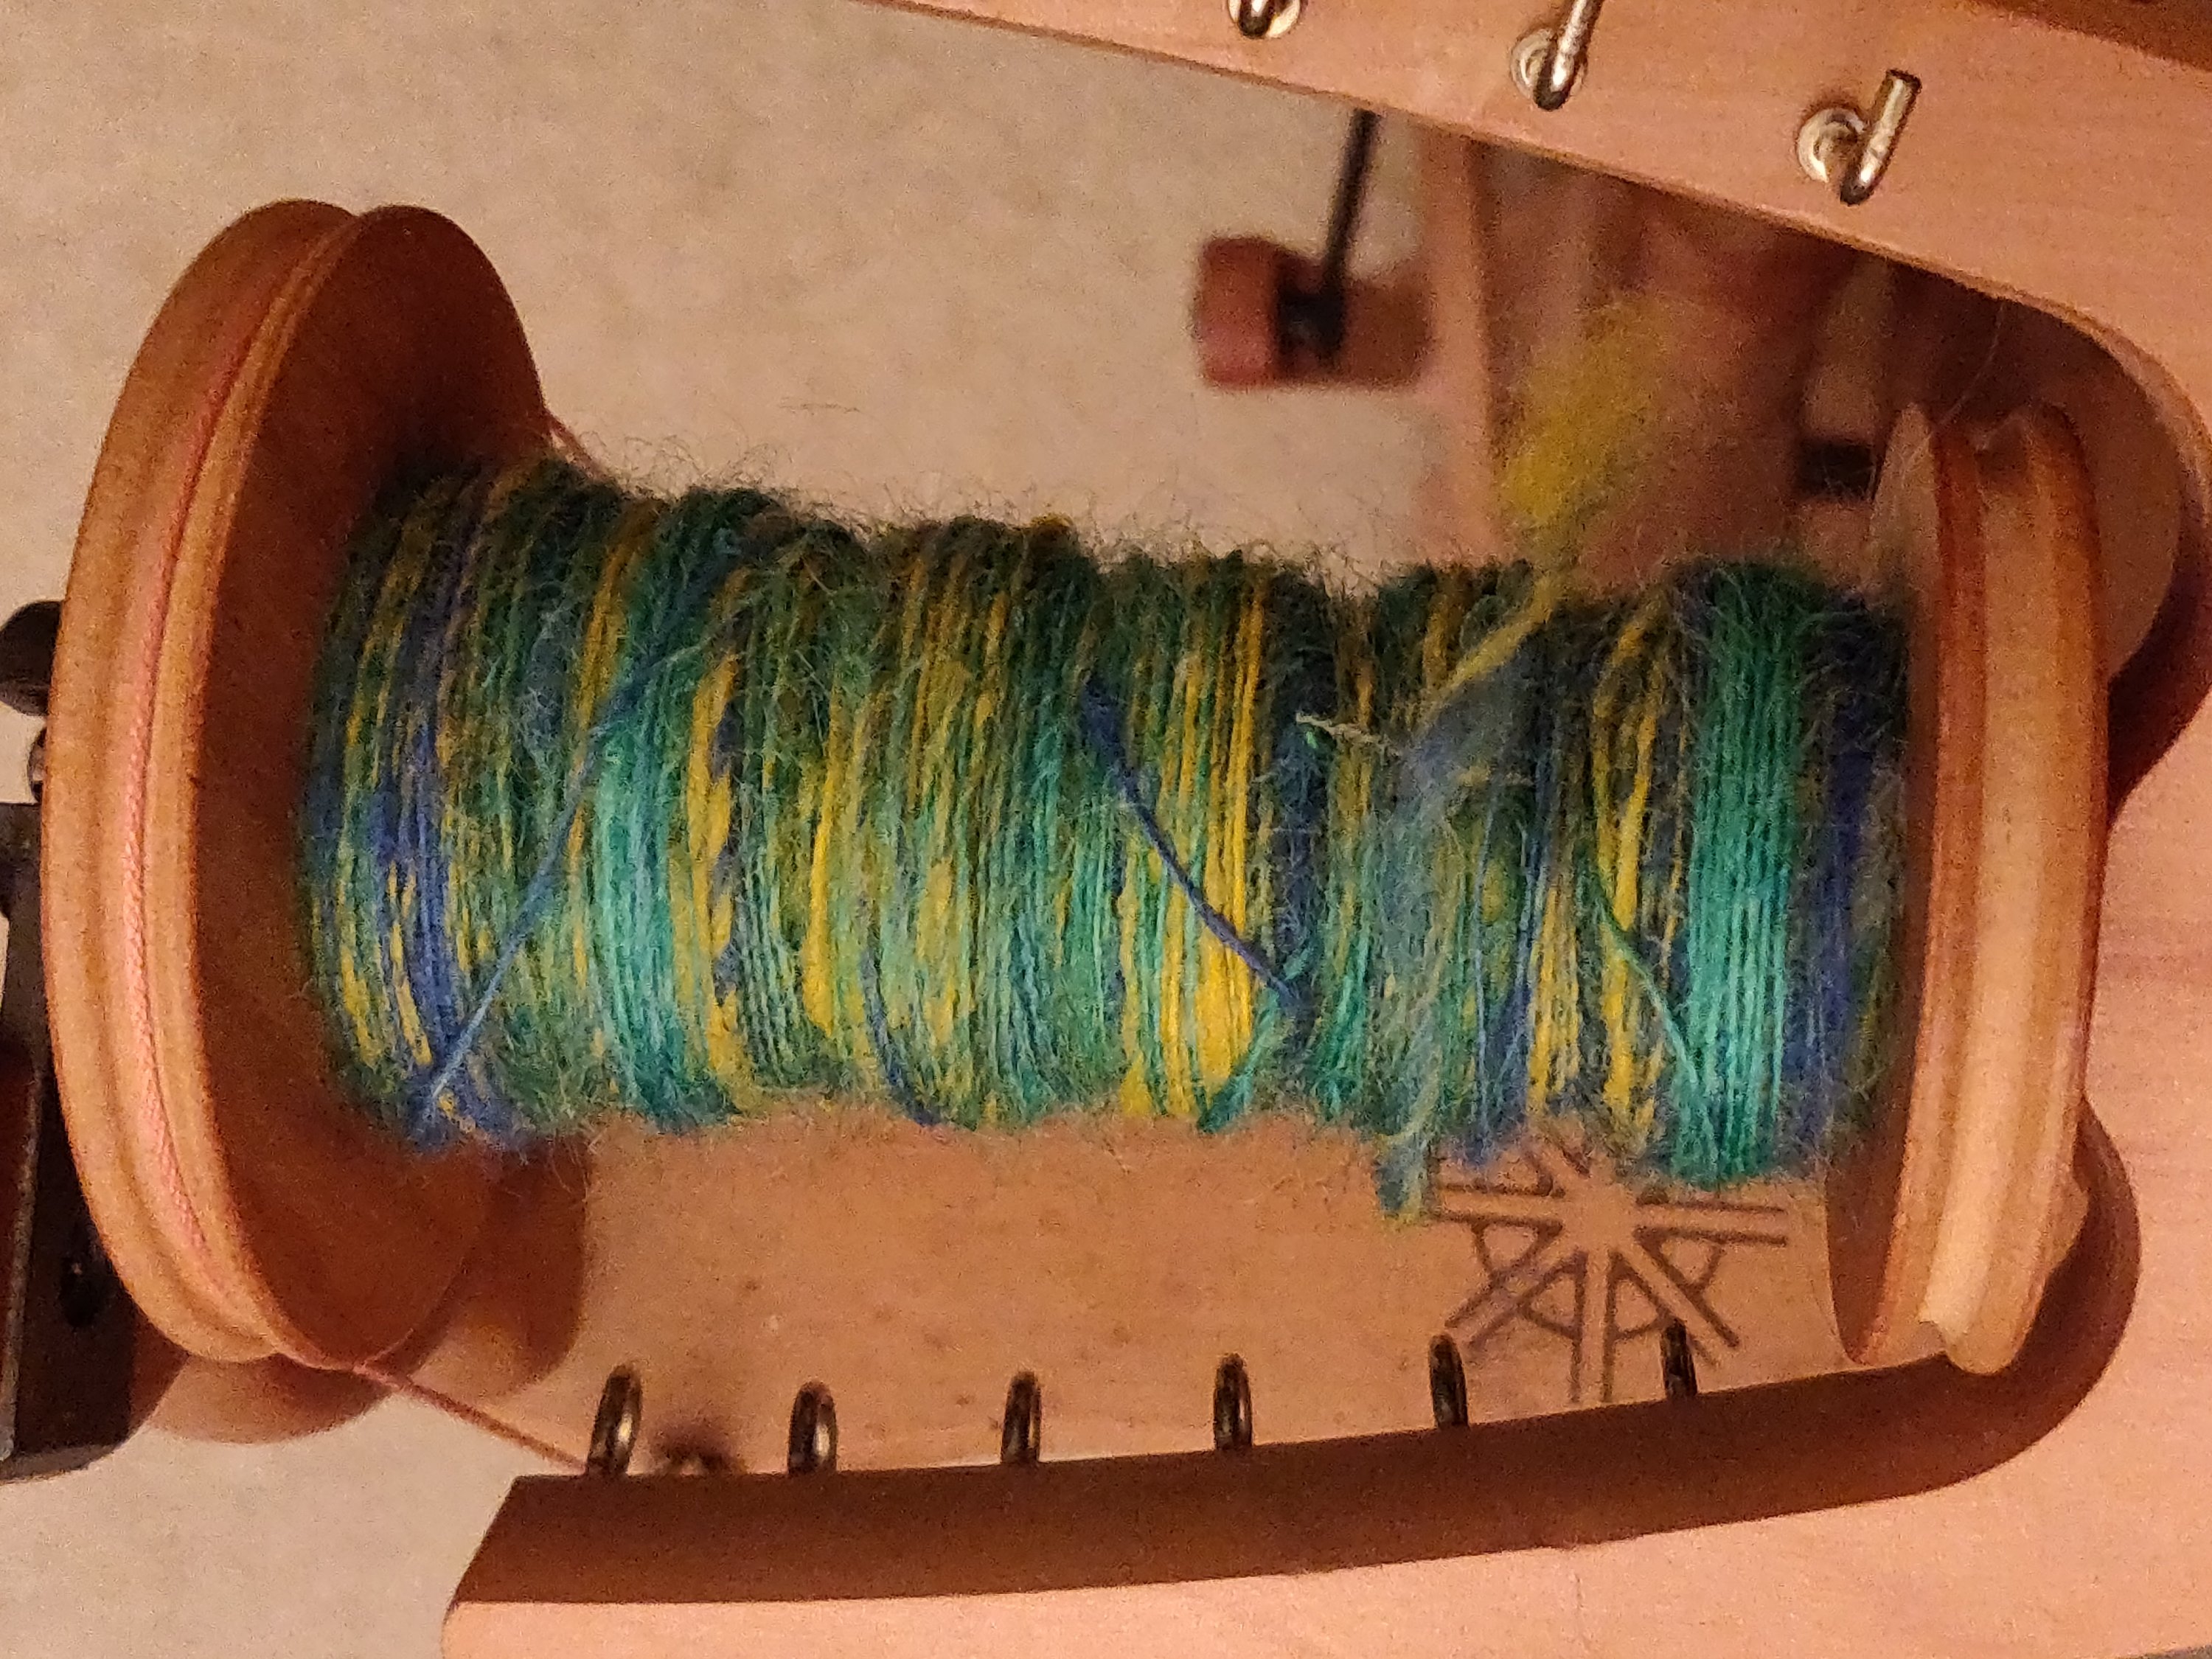
Blending board fun
A happy hour or so spent hand carding hand dyed fleece, whilst watching tv. Then using my home made blending board to make the next batch of rolags to spin more of my ‘Greenfinch’ variegated singles.

Spinning a balanced yarn
The fleece I am working with is not brilliant, but I am using it to practise making a balanced, soft spun woollen yarn for knitting. To do this I read up on Mabel Ross’ method, and with a little tweaking to suit my preferred yarn handle, it worked!
Mabel Ross worked it out for us and it is quite logical really. You do need to know your wheel’s ratios, work consistently with your draft and count your treadling to start with, so if thats not your style, don’t go there.
I was aiming for around 2tpi in the finished yarn, but actually increased this a little after the first samples.
The equation is to do with spinning the singles at the tpi you want and then plying them to get the final tpi you want. Its really helpful to remember that if you spin your singles Z, when you ply them S you will be unwinding some of the single’s twist. (update- I have subsequently spun some yarn at a much higher tpi using a 1:10 whorl that has come out soft after a similarly balancing plying method. Maybe I’m getting it…)
I worked backwards from my 2tpi goal.
For example: I was working with a 1:6 whorl, therefore one revolution of my wheel would turn the bobbin 6 times. I was spinning ‘Z’ twist with a long draw of 12″.
First of all I needed to know how many treadles to the 12″ draft would give me the tpi I required. Yes I know I’ve muddled metric and imperial, but it still works.
Number of treadles = (required tpi x planned draft length)/ divided by wheel ratio (which i know will be 6)
tpi of my singles = tpi of my plied yarn divided by number of plies
II reckoned that if I want 2tpi in the plied yarn, I needed to spin the singles at around 4tpi.
The equation I worked with using MR method to find out how many treadles I needed to a set draft length was:
tpi = (wheel ratio x treadles)/divided by draft length.
Go back to the earlier question of how many treadles?
Number of treadles = (required tpi x planned draft length)/ divided by wheel ratio (which i know will be 6)
which came out as
tpi (4) x draft (12″) = 48/6 = 8.
So 8 treadles using the 1:6 whorl to a 12′ draft should give me 4tpi. in my singles…
Well I wrote this post a while ago, and since then have done some spinning. It was not successful, way to soft and loose spun for my taste, but a balanced yarn – no twisting and it knits without bias.
I upped singles tpi a little and also the ply by a smaller amount and the yarn improved. and stayed balanced! A lesson learned.
