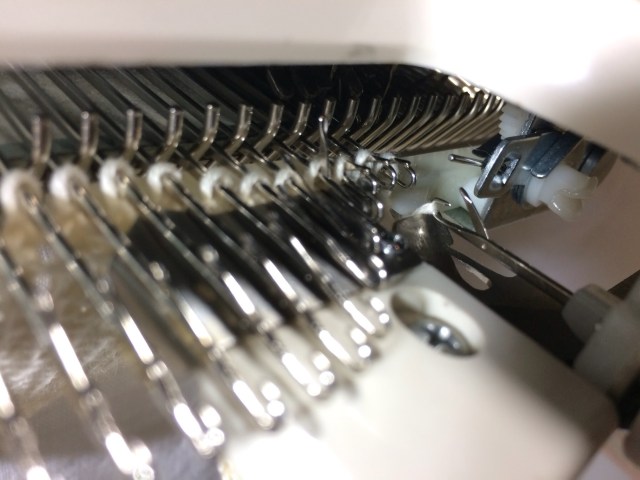
i have just received my pre-publication copy of ‘Translating between Hand and Machine Knitting’, it was waiting here on my arrival home from holiday. It’s a great welcome home present.
Here are some sample pages. 

i have just received my pre-publication copy of ‘Translating between Hand and Machine Knitting’, it was waiting here on my arrival home from holiday. It’s a great welcome home present.
Here are some sample pages.
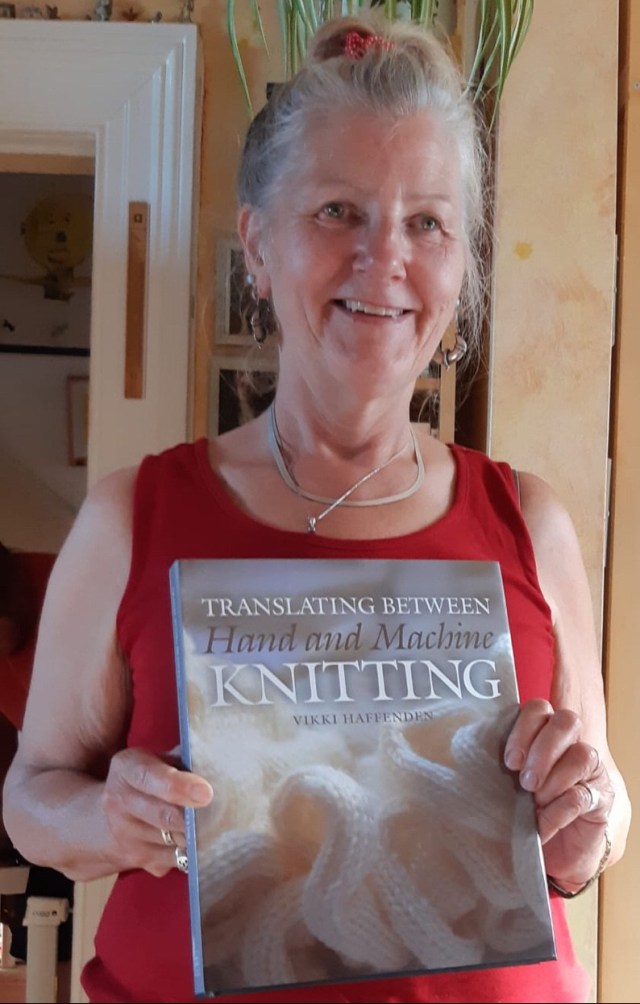
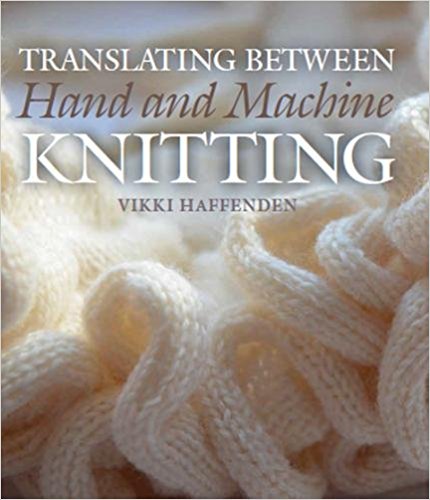
A pre-publication glimpse of my new book, Translating between Hand and Machine Knitting.
 To be published by Crowood Press in summer 2018, this book is lavishly illustrated with clear step-by-step instructions on knitting techniques, stitch structures and fabric constructions.
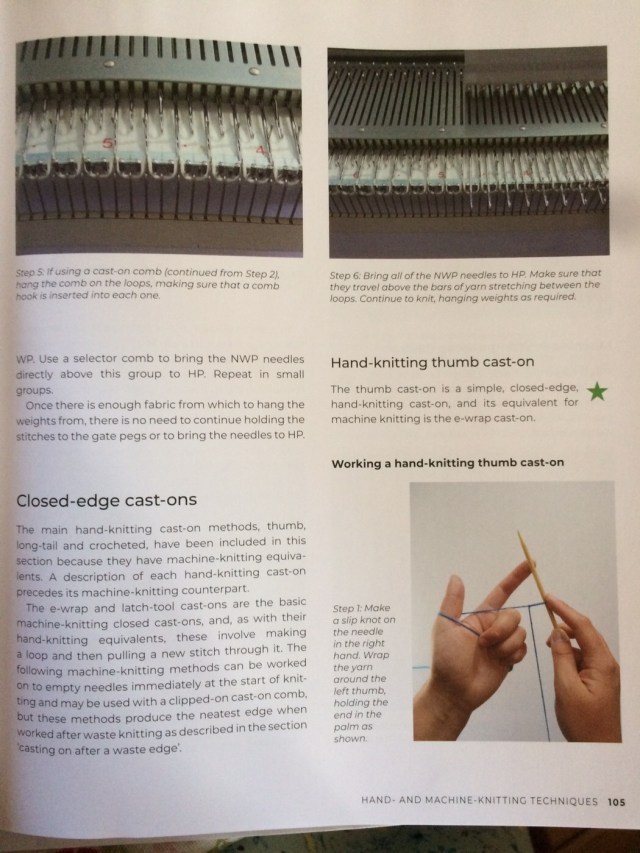
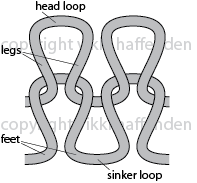
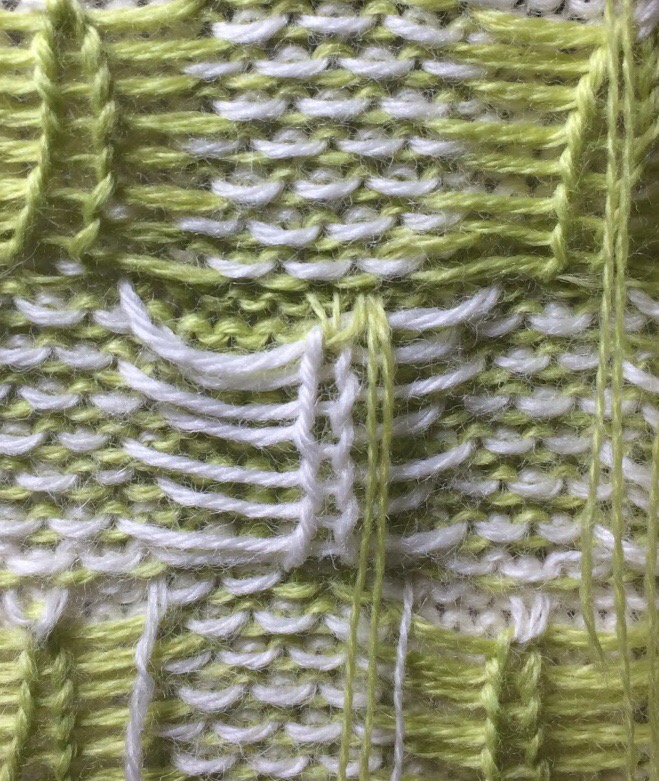
Unlike many other knitting books, this one explains why knit stitches behave in certain ways, and how to achieve effects using combinations of stitches. Each stitch construction is analysed and explained with diagrams and examples, for example tuck stitch (in hand knitting this is known as broiche stitch) is clearly illustrated so that the route of the yarn is tracked, and effects on vertically and horizontally adjoining stitches can be seen. Fabrics made with this stitch in both hand and machine knitting are illustrated, explained and compared and contrasted in both methods of knitting. The most suitable method is highlighted and pros and cons of methods discussed.
The constructions of textural and colour effects are explored and described by hand and machine knitting methods. There is a whole chapter explaining how to knit a hand knitting garment pattern on a machine, or vice versa, and how to subsitute yarns between both methods. Examples and illustrations support every step, and shortcuts and hints and tips are scattered strategically throughout the text.
I am proud to say that my book has been written with the primary aim to enable the reader to take control of their knitting and create exactly what they want in both knitted textiles and knitted garment shapes.
It will take pride of place on any knitter’s book shelf, sitting next to The Knitting Book and Knit Step-by-Step. Preorder on Amazon
A number of years ago I invested in a walking foot for my Bernina sewing machine. It wasn’t cheap, but it does a wonderful job. The walking foot makes sewing stretch or very light fabrics a breeze and matching checks and stripes a dream, but it wasn’t cheap. Its also wonderful at preventing puckering and when matching seams.
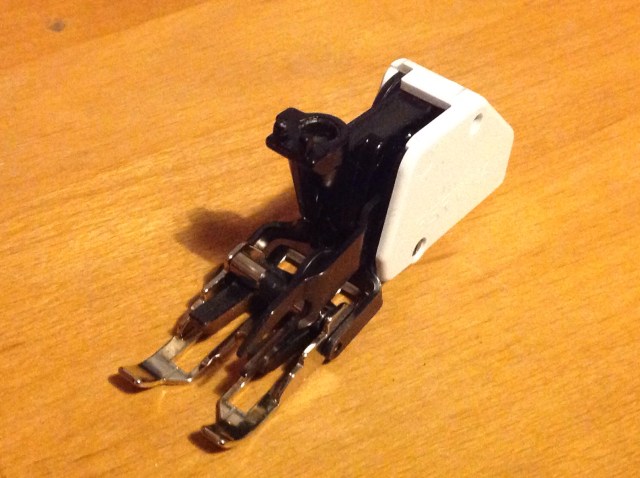
Last week I saw something called a ‘knit presser foot’, and thought it was interesting – mainly because the foot itself is smaller than the walking foot so I thought it might be easier to use in tight spaces.
The knit foot I bought is a clip-on foot, but provided you already own (or purchase), a Bernina adaptor for clip-on feet thats not a problem. These adaptors cost anything from £7-£15, depending on which one you opt for, and where you buy it. I have bought a couple from eBay and the most recent one from Austins. The eBay ones are made up from a Bernina low shank adaptor and a low shank clip on adaptor screwed together. A slightly kutcha solution, and with more potential for wobbling and misalignment, but they work OK in general. The Austin’s one is a single piece adaptor, which on the whole I prefer, but both have their uses.
I am also an impatient sewer, and it looked a bit easier to fit the knit foot for a quick seam. Its actually still a fiddle, very little difference in time needed fitting the knit or the walking foot I would say, once the adaptor is installed.
The knit foot itself came as part of a set of feet, some of which quite frankly I have no idea how to use. My enjoyment of this set is amplified by the wonderful names of some of the feet, ‘Iron opens the mouth to’, and ‘If you don’t speak iron’. Yes they are embroidery feet, but much prefer these names.
Finally I was ready to test out the knit foot. I am impressed, it does a pretty good job of sewing stretch fabrics and matching checks; I’ve not tried it on slithery or slinky fabrics yet, or thick knits rather than jersey.

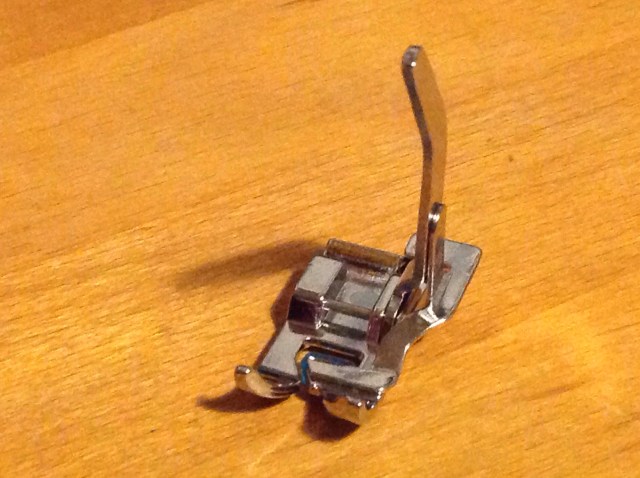
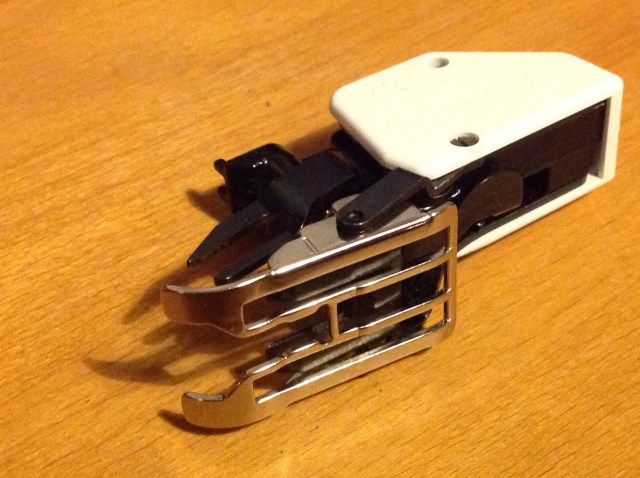
The key feature of the foot that you notice first is the arm that fits over the needle clamp. This works in a similar way as the arm on the walking foot; it reduces the pressure of the foot on the fabric as the needle raises and lowers. In the knit foot this is a little more obvious than with the walking foot. Underneath the knit foot a small (blue in my case) soft plastic bar grips the fabric and as the pressure is released on the foot, this gripper feeds the top fabric through the foot in synch with the raising and lowering of the foot.
The Bernina walking foot I have has black firm rubber bars that grab the fabric, feeding the top fabric through as the foot lefts of the fabric. Some brands of walking feet have teeth rather than rubber bars. I think this was the mechanism on a low shank generic walking foot I bought many years ago that, despite an adaptor, did not work well with my Bernina, and was a pig to install each time. I think I still have this, so may try it some day on my non-Bernina machine.
Both feet equalise the feed of the top fabric with that of the bottom fabric as it is fed through by the feed dogs underneath the machine. In overlockers (sergers) a differential feed prevents puckering in stretch and very fine fabrics in a slightly different way, but still controls the way in which the fabric is fed through under the presser foot.
Stitch length makes a big contribution to successful use of the knit foot. Shorter lengths work best for me. You can use a double needle in with either foot. My walking foot is limited to a shorter stitch length for reverse stitch at start and finish.
These two feet so far have seemed pretty equal, but I like the knit foot for being small and easier on small pieces. It is also easier turning corners and sewing curves with the knit foot than with the walking foot. If I want a perfect seam I will however use the walking foot, because I trust it more through my experience of its reliable consistency in use.
Time may change this evaluation, but if you want to try sewing stretchy fabrics or matching patterns etc, for the price, a knit foot is a good investment. If you use it a lot, maybe think about a walking foot on your Christmas list.
I arrived at work yesterday and immediately dropped an open gel pen onto my new white linen shirt. Why does this always happen when one is wearing light colours, and especially if an item is new?
So I dabbed it with water, and spent the day trying to hide the mess with my hair. Once home I searched the internet and straight away found Ask Anna, a great site the gave the perfect instructions to remove the stain – I couldn’t believe it, its gone. So simple. A combination of Surgical Spirit and white vinegar dabbed on with cotton buds, a rub of salt and its gone! Thank you so much Anna! See the full instructions at;
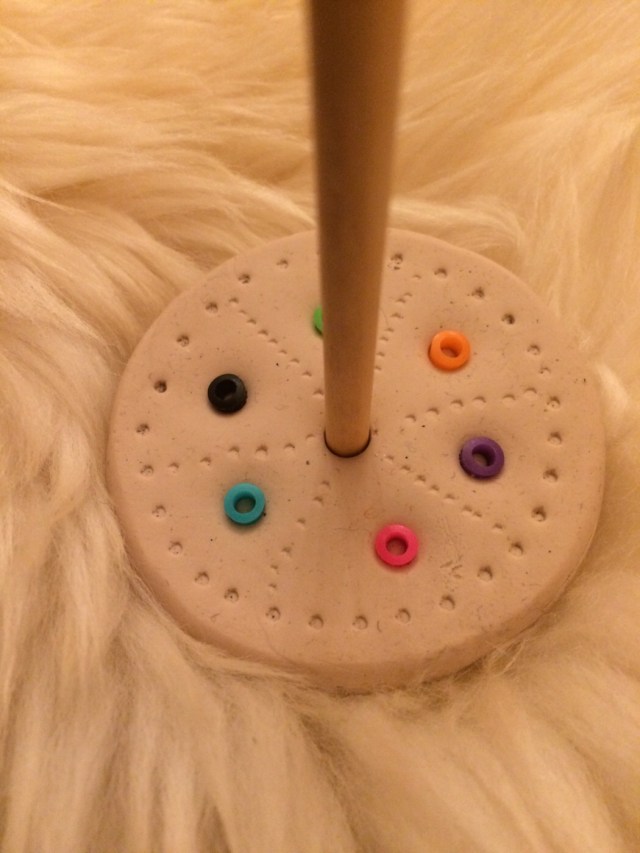
I will be running a hand-spinning workshop with the first year knitters next week. We have a couple of spinning wheels, but I have found it most successful for the students to work individually with drop spindles and take turns in the wheels. I make spindles as it gets costly to buy 12 or more of these. The ones this year are made from 50g air-hardening clay and dowel or chopsticks and decorated with beads pressed into the clay. To seal them I’ve painted them with PVA paints. On some the central hole was a little big, so a bit of glue has secured this, and a rubber band underneath. prevents any slippage.
Last year I used Fimo. This made lovely whorls, but was expensive. I found this year’s air hardening harder to work with, but that may be because I added a thicker outer ring to the whorl to improve the mechanics of the spin. I read this on a spindle-making blog, and it works. Just looks messier. I will try one in Fimo next. 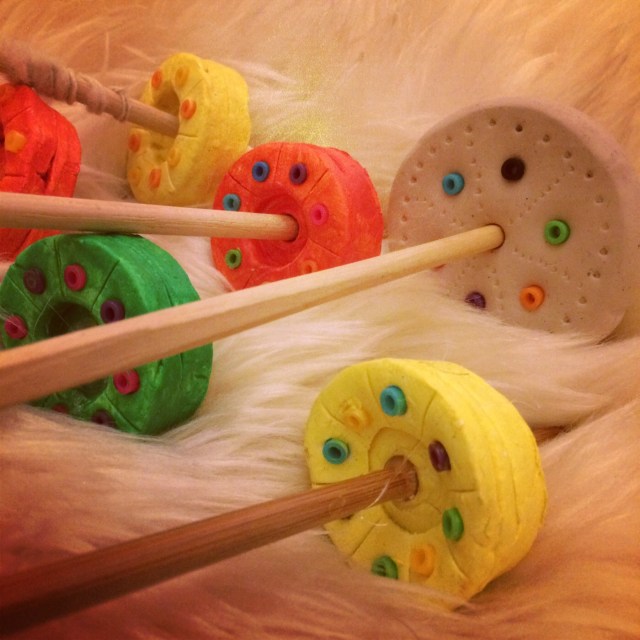
Top: all the spindles. Bottom: the Fimo whorl.
Today I cut out 28 Scabies mites – only need to sew them up now.
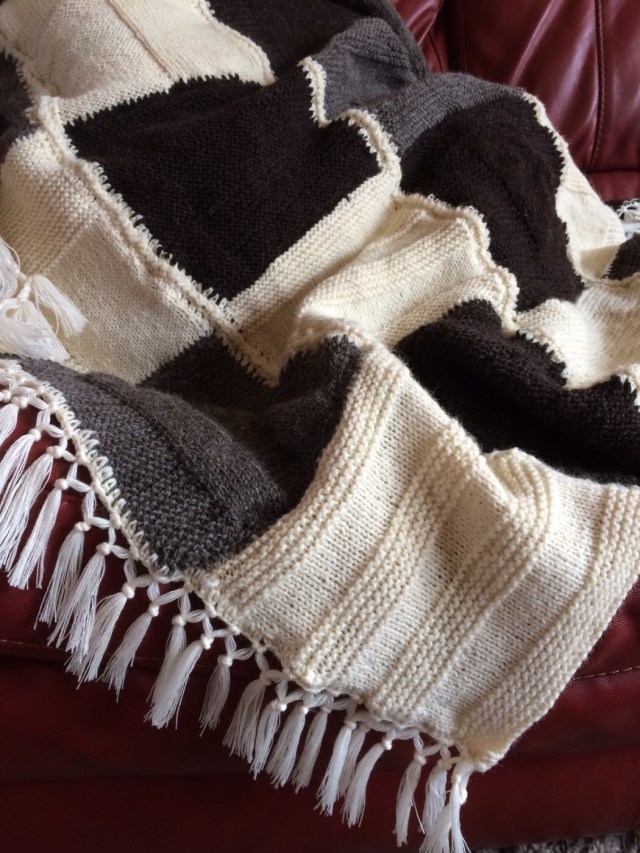
Having worked on this on-and-off for about two years I have finally finished a hand knit blanket. Worked in modular squares it was ideal for travel knitting, so has been around a bit en-route to completion. The yarn is from West Yorkshire Woollen Spinners and seems as if it is going to wear well. There are three repeated garter stitch pattern squares interspersed with plain garter stitch squares in three natural colours. The squares are joined with hairpin crochet and the blanket is fringed in a finer wool yarn with a knotted fringe.
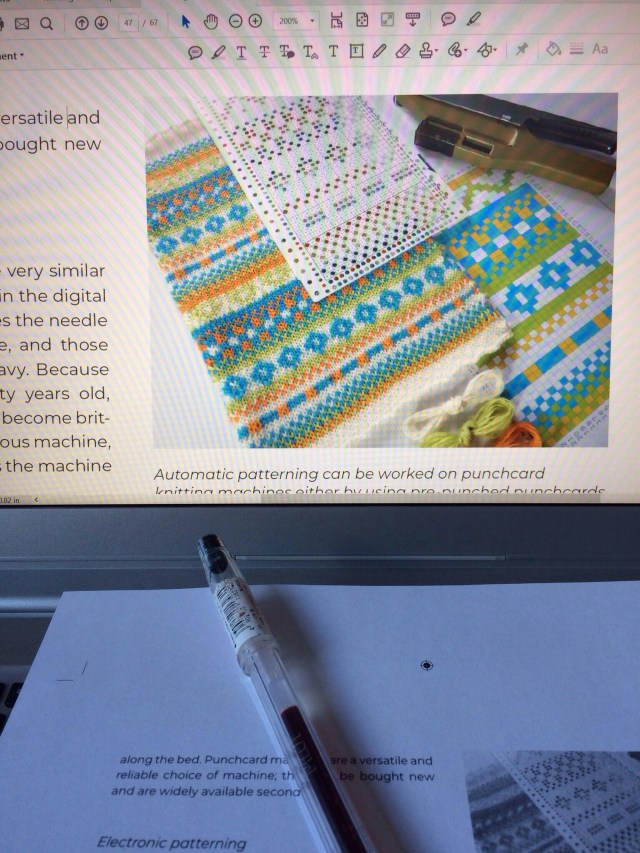
This week has been a whirl of checking the final proofs of my book, Translating Between Hand and Machine Knitting, which will be published by Crowood Press in the summer.
If you have a knitting machine, you will know that this will be one of very very few books that have been published about machine knitting since the 1980s…so look out for it!
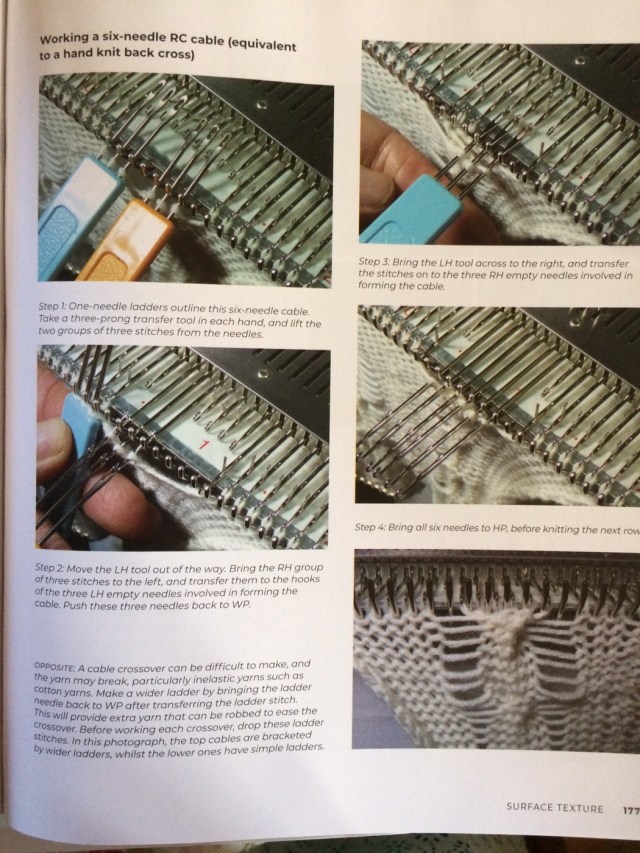
In it I explain how to work all the stitches that can be knitted using a punchcard: slip, tuck, fair isle and knitweave as well as cables and manual techniques. The book also compares and contrasts how to knit these stitches by hand and machine, which method is best for which technique and why you might like to experiment between the two methods.
 Find out how to work this, and many other useful and creative techniques in, ‘Translating Between Hand and Machine Knitting’, available next year.