A Giant Sphere

I have reposted these articles by Ms Premise-Conclusion on my blog because I thought this was a wonderful piece of technical work. The formula is so useful and well explained, making the principle easy to understand.

If you visit the website you can download template patterns for ‘ideal’ crochet spheres, squares and rectangles. These don’t do all the maths for you, but give you the tools to create the shapes in your chosen yarn and hook size.

mspremiseconclusion's avatarMs Premise-Conclusion

A little while ago, I got a comment on my Ideal Crochet Sphere post, requesting a pattern for a giant crochet sphere. Too cool! It’s taken me a while to get around to calculating the number of rows required (especially since I had to extrapolate the size based on smaller spheres that I’ve made), but I think this will work.

So, here are the patterns for 60 row (~10 inch) and 85 row (~15 inch) spheres.

Since there are so many rows, I haven’t included how to space the increases nicely for each row, so I’ll leave that up to you, should you attempt it. For each row, I’ve written it as follows:

Row i: Increase by N (X stitches total)

So, for Row i, you have to work N increases as evenly as possibly into the row so that after you’ve completed the row, you will have X stitches…

View original post 62 more words

An Ideal Crochet Square

I love to see such detailed technical knowledge shared so generously – thank you

mspremiseconclusion's avatarMs Premise-Conclusion

Whenever I look at the completed projects section of my Ideal Sphere page on Ravelry, I love how people have incorporated it into a huuuuge variety of projects! For a while now, I’ve wanted to go back and make more basic shapes for people to use as a spring board. And now I am! Yay!

This is a crochet square. Now, if you crochet, you have almost certainly made a granny square before. (I think it’s one of the first things I ever crocheted while I was still learning.) This one is a little different.

SONY DSC

This square is made in single crochet and is worked in rows (from the inside to the outside). I’ve also made sure that it has the correct number of stitches in each row to make it a mathematically ‘ideal’ square. Because reasons. (Scroll to the end of this post for more geeky details.)

SONY DSC

You…

View original post 425 more words

Spinning days

Last week I hosted a ‘learn to spin’ afternoon. We had drop spindles and two wheels. Because no-one had spun before I started with lengths of commercial my sun yarn – about 12 metres each. These were used to learn the basics of working the spindle and twist direction.

After everyone was feeling more confident, fibre was introduced. This was lightly scoured Jacobs fleece with a little oil left to make it easier to spin.

Strengthened by team and home made oat biscuits we progressed to the wheels.

The Ashford single drive, double treadle Traveller was the most popular. But even that took some easing into.

Everyone got some yarn made.

We plan another soon.

Beware pin pricks

Two weeks ago I poked a pin underneath my left index fingernail, painful, but a common occurrence. I thought nothing of it. Then a week later my finger had become progressively more painful to the touch. I was away from home and didn’t have any antiseptic with me so hoped it would calm down. However the side of the nail went black and the top of my finger – above the last knuckle – became red, swollen and began to throb. ‘Uh oh’, I thought, that looks, and feels, infected.

Once home I applied Magnesium Sulphate, but eventually needed antibiotics to bring it under control. Now my finger has drained and is on the mend, but it was a silly thing I could have avoided. I did the same into my thumb over the weekend, so I was straight to the TCP antiseptic this time.

So learn from my mistake, and remember that it was only a tiny pin prick that led to all that.

Don’t scroll down if you don’t want to see the repairing finger. The bandaged appendage severely hampered my hand knitting and sewing activities and it still catches fibres when knitting as it heals.

Annoyingly this catches on everything, but I am trying hard not to pick at it.

Today is beanie day …

OK, I know it’s now mid January and this is a post about a Christmas gift but I’ve only just got around to finishing it off and getting it online. This is the story of knitting the hat worn in this photo.

December 2018…

I’ve started a beanie hat as a Christmas gift. Its in yarn from my stash, a rather nice airforce blue tweed 90% wool 10% acrylic blend Aran weight yarn. I dithered about the acrylic content I have to say, as I believe one’s toil is best rewarded by natural fibres, but the the colour (and having the yarn to hand), won the day.

The brim should work out to be around 7cm (3″) deep, and I’m going to knit it in a 3 row 2×2 cabled rib, with the shaped crown in stocking stitch. The pattern has been designed for a 61cm (24′) head circumference.

Gosh that doesn’t look very blue, more grey, must be the light. The rib shows though.

The cabled rib is worked on a 3.5mm circular needle, and the crown on a 4.5mm circular needle.

I have a set of those lovely interchangeable KnitPro needles, which means the world is my oyster when using circulars, but because the yarn is quite dark I have decided to use a white Prym triangular pointed circular so its easy to see the stitches. These are also comfortable to work with, and have a strange knob on the point that I quite like.

So far I have cast on 80sts (has to be divisible by 4 for the 4 stitch rib repeat) worked 2 rows rib and 6 repeats of the cable, and then 6 rows straight rib. I used the 2×2 alternate rib cast on recommended by Woolly Wormhead. Its not as stretchy as I had hoped, but looks good. Any stretchy one will do though, don’t beat yourself up about it.

How to work the c2b cable on the rib: Either use a cable needle, or work them as follows: slip the two knit stitches one-by-one knitwise, then insert the left needle from the right into the front of these stitches and slip them back to the left needle. This twists the stitches. Knit them one by one.

How I knitted the hat:

Cast on 80sts, using a stretchy cast on.

Join the round securely in your favourite way; for example work the first stitch, and pull the yarn to tighten the join before working the next stitch, or before working the first round slip the first stitch of the cast-on onto the point of the right needle so that it will be knitted at the end of the first round.

Mark the end of the round with a stitch marker.

Round 1 and 2: (k2, p2) to end.

Round 3: (c2b, p2) to end.

Repeat round 1-3, 5 times.

Round 16-20: (k2, p2) to end.

Round 21: purl.

Move the marker up to the current row.

Now you have the option to work all the stocking stitch in purl, and replace the knit decreases with purl versions, or if like me you find knit faster than purl, this is what I did.

Slip the last stitch to the left needle, and take the yarn to the back between the stitches then slip the stitch back so that the yarn is caught around the stitch. Invert the knitting and working in the opposite direction to former rounds, work the rest of the crown as knit stitches.

Round 22: knit

Continue working as Round 22 until the work measures 20.5cm from edge of rib.

Now to do the shaping.

I worked the first and every fourth round as a decrease round as follows.

First round,: k7, k2tog (70)

Second and third round: k all.

Fourth round: k6, k2tog (60)

Fifth and sixth round: k all.

Continue in this sequence, knitting one less stitch between decreases until 50 stitches on needle. Then work decreases on every second round until 20 stitches remain, finishing with a knit round.

Break yarn leaving a 40cm tail. Thread yarn onto a darning needle and slip the open stitches onto the darning needle. Draw the stitches in and secure the yarn end.

The Multipom

The designers of the Multipom have been kind enough to send me one of these little gadgets so that I can try it out.

This is me discussing how I fared following the packet instructions and making 12 tiny pom-poms in DK yarn. I chose acrylic yarn for these test pom-poms, because I thought that would be a good test. In my experience wool yarn, or at least with some wool in it, makes the most luscious pom-poms. They must be steamed though. This opens out the fibres at the cut ends of the yarn, plumping them beautifully.

This was my method, following the instructions that came with the Multipom.

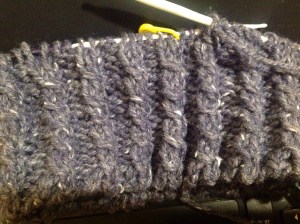
Firstly I wrapped the yarn 40 times, lengthwise around the Multipom. Doing fine so far.

Next it needed to be tied off into 12 equal lengths. Well not equal, as the end tie is closer, which was tricky. Somehow I managed to tie only 11 ties, but couldn’t work out where I had gone wrong. A ruler has been printed on the instruction sheet so it should have been easy. I put it down to me being tired!

Tied yarn on the Multipom

Tying the wrapping threads was challenging. Another pair of hands to hold the knots tight would have been helpful. The advice to use a strong thread is very sensible as you have to tug hard to make a nice ‘waist’ on each pom-pom before cutting.

Tying the knots tight enough was fiddly. Strong yarn needed, and strong fingers.

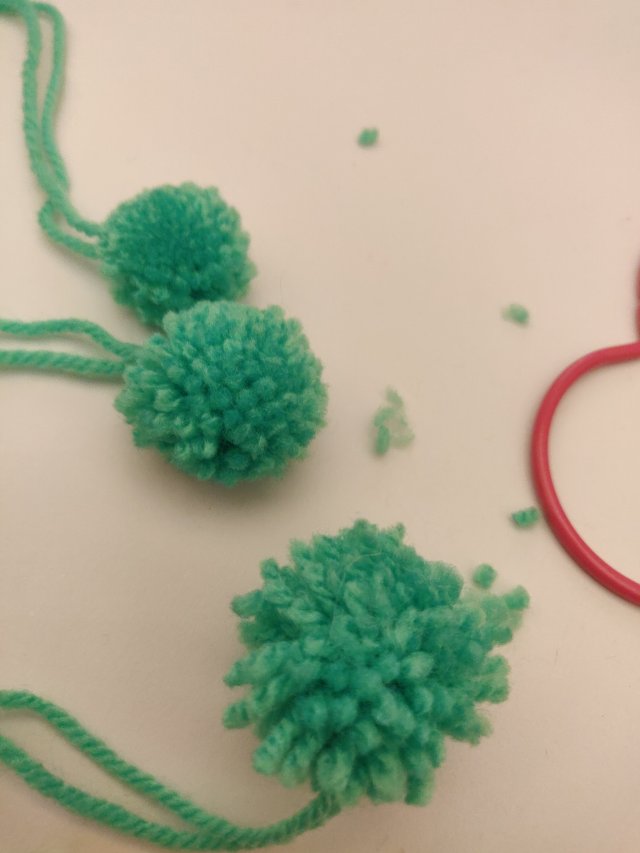
Anyway I decide to get ahead and cut them anyway. Cutting the end ones was awkward,so that pom-pom was more ragged than the others immediately after cutting.

Getting the scissors in to cut the end folded yarn was a bit awkward.

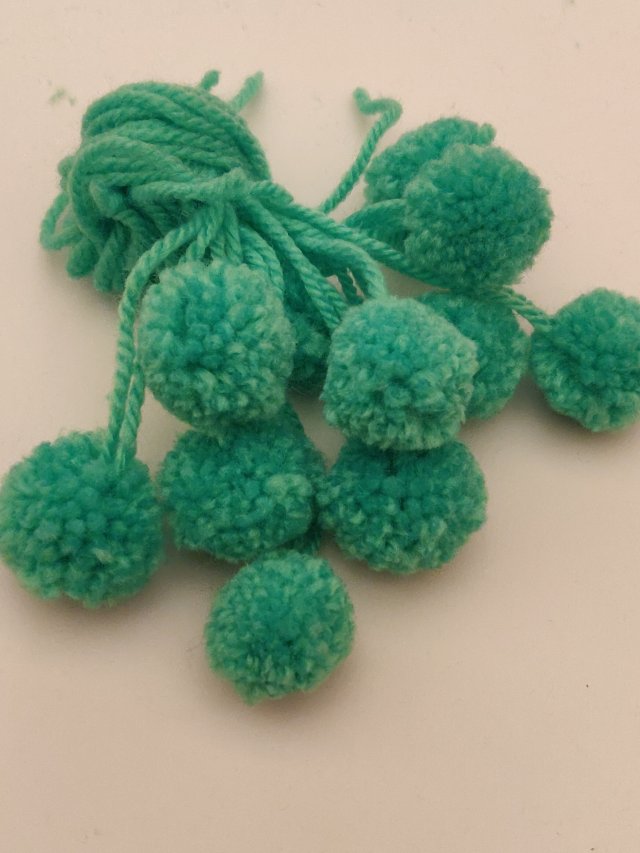
I rolled each cut pom-pom between my palms to encourage them into balls, and then started to trim them. This is where a pair of curved blade embroidery scissors would be useful.

The pom-poms after cutting but before being rolled between my palms.

Once again, a good tip is given in the instructions, ‘Don’t be afraid to cut too cut off quite a lot’, and thats what they mean Take it a little at a time and turn the pom-pom as you work; there is a lovely nugget of firm roundness inside those straggly monsters.

Trim,turn,trim,turn. And again

It took me at least 10 minutes to trim them all to my satisfaction.

Trimmed and almost done

Then I steamed them by hanging them inside an electric kettle. Do be careful if you do this. Don’t put too much water in the kettle so the pom-poms won’t get wet, and when you take them out be very very careful not to scald yourself with the boiling steam. Use an oven glove and let them cool before handing them. If they do get wet, don’t worry as this can improve their density. It just means you’ll have to wait for them to dry before working on them any further.

After steaming the outer fibres expand and fill in the shape.

So what’s my verdict on the process and result?

Is it quicker than making individual pom-poms on other gadgets?

Yes, although the trimming is a bit more arduous.

I find the yarn management much easier than when wrapping the small, individual pom-pom makers. It also avoids that situation where you are struggling to pop the two parts together, but they always spring apart again, or worse still the hinged bit pops off.

Cutting is a lot easier because you are just slicing straight across rather than inserting the blades between the plastic halves and trying to cut in a narrow space, whilst trying to hold the maker together. When using the Multipom there is the rather fiddly end cuts on the frame to deal with, but that’s only 2 per 12 pom-pom s, so pretty minimal compared to using an individual maker.

Wrapping core yarn is easier on an individual maker, as you seem to be able to get a better cinch around a circular waist, although that may improve with practise.

I haven’t tried larger pom-poms yet, but I suspect the individual pom-pom makers may give better results because trimming becomes more important to the final shape on big pom-poms.

So the Multipom gets my vote if you want to make lots of smaller or mini pom-poms, which after all is what it was designed for. However there is still space in my workshop drawer for the larger, individual pom-pom makers

Thanks once again to the Multipom team, it’s good to see innovative tools being designed to meet the diverse needs of the craft community.

Crochet revisited in a caravan

We are in our caravan. It’s a bit windy to sit in the awning even though it’s quite warm. So I decided to practise my crochet skills. I want to make an Afghan (granny square blanket) for the caravan, so tried a wagon wheel square in some rather garish DK acrylic yarn I have here.

The instructions are US terms, so I’ve become a bit stress trying to convert it UK terms.

I think I got it right.

I can’t make it in acrylic. All those hours of work that will be needed should be rewarded by working in wool, so I can’t start until I get home and sort some out.

Although the dog will sleep in it so it will have to be fully washable.

Tying a blowline knot

For years when sailing I managed not to really learn how to tie a bowline – I mean not so that I could tie one without thinking, or behind my back, or with my eyes closed as my friends could.

This summer, whilst caravanning in Scotland I tried to re-capture my rather dismal knot-tying skills, with poor results. Google-in-hand I tried and tried; the little pneumonic about the rabbit and the hole failed to click, and I vacillated between laughter and tears at my ineptitude. What I thought was a successful bowline ended up undoing itself and losing the dog’s ball-thrower. All in all a bit of a disaster.

So imagine my joy to find a page showing a different method. Its called Aegean Sailing School and makes so much sense. Aegean Sailing School how to tie a bowline knot.

So anyone with the same problem, give their method a go. I hope never to lose another ball-thrower!

Brother ScanNcut

Last week I made a bit of an impulse purchase of a Brother ScanNcut machine. A friend at a dinner party had mentioned that these existed, and I became intrigued, did a bit of web-trawling and found the CM900 on offer. So I pressed ‘buy’!

It took a week to arrive, which was frustrating, and then I had to go into work and other various things stopped me opening the box until this morning. My first test cuts were not successful, until I discovered it’s necessary to close down the handle of the knife holder! Ha ha, silly me!

After that it was a matter of testing the blade depth, based on the recommended depths, until the blade cut the paper but did not go into the mat too far. I’ve discovered that it seems to always mark the mat, but when thinking about this, to cut through its probably always going to do this.

The other thing I struggled with a bit was how to position the image and paper so that the cut is where you want it. A bit of maths and spatial understanding is needed for this, and I am still getting the knack.

The built in patterns are fine for practising on the machine, but I aim to work on the Canvas software later on today and transfer files by USB or wifi.

Editing on the machine’s screen is quite easy, you can resize, crop, flip, mirror and combine (weld) images to make your own outlines. So far I have made scallop edge with a cut out border above, not brilliant, but testing out how it all operates.

My first real cut – using an installed image, resized.
Scallop edge with a cut out border, made by combining two installed patterns

Apparently there is dust inside the lens of my phone, hence the dark spot at the top of the photos, great

Another technical glitch!

Any way back to the ScanNcut, so far I love it! Can’t wait to try other papers/cards and fabrics.