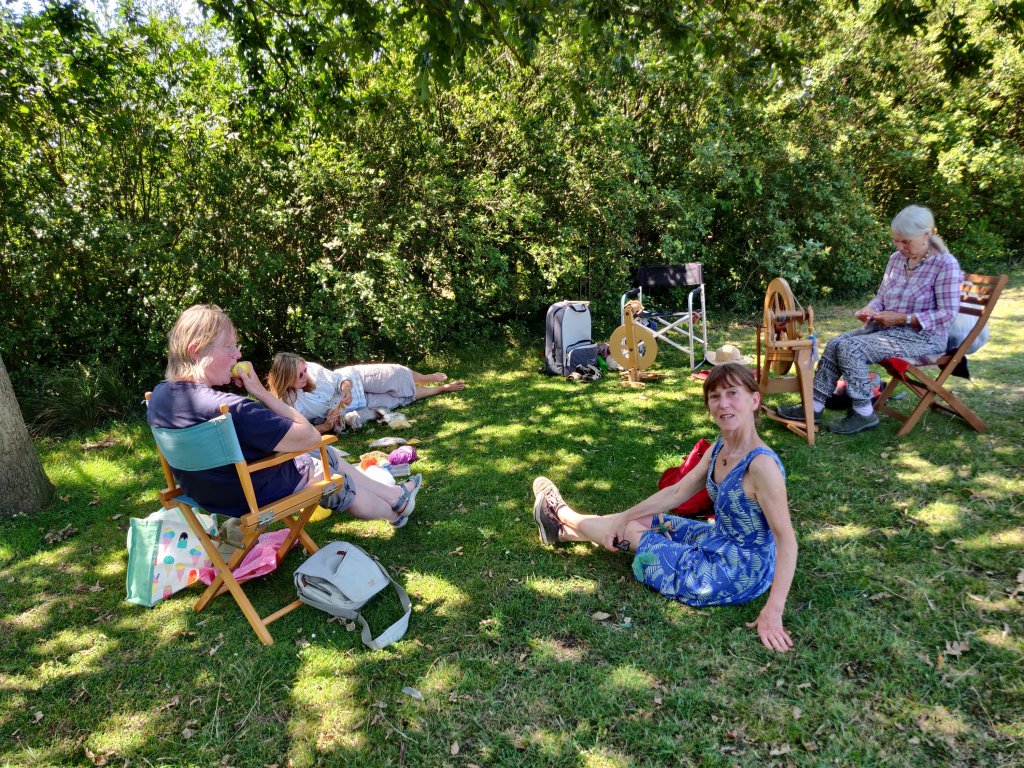
Is it risque? It’s certainly liberating. Given the restrictions on meeting up indoors, going to the park seemed the the perfect way to meet up when we can’t go to our normal groups.
This is the second one I’ve organised and it was lovely way to spend a Friday afternoon. I took my portable Louet wheel and others brought wheels, drop spindles, knitting and crochet. And a picnic lunch!
Shade was mandatory as it was so hot, and we found a generous tree that have us a shady space big enough for plenty of social distancing.
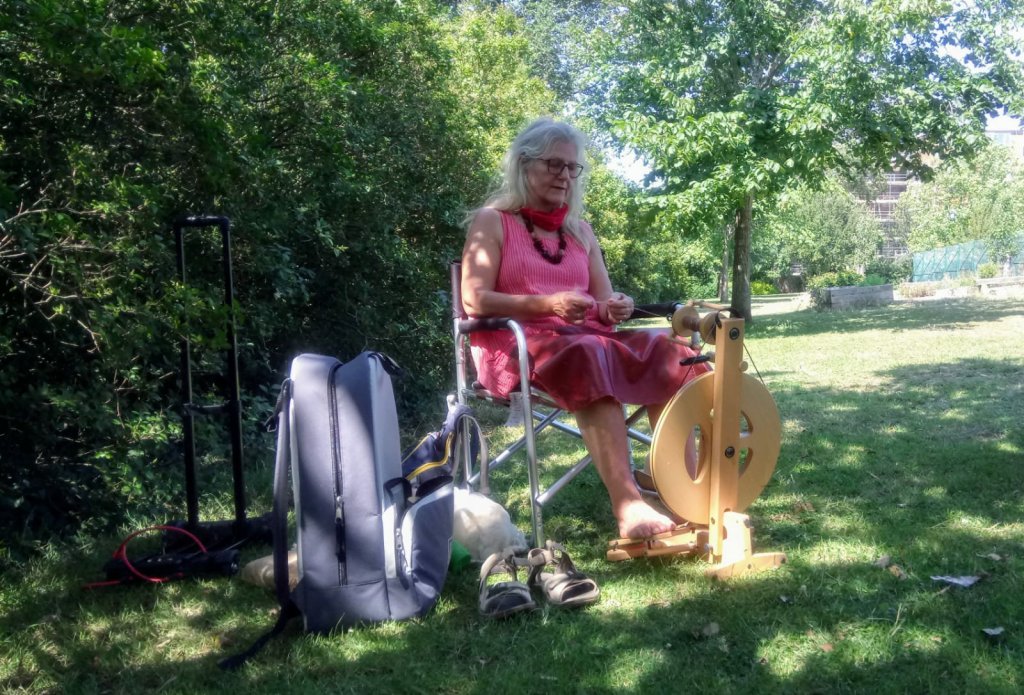
I’m taking the photo…So someone kindly took one of me
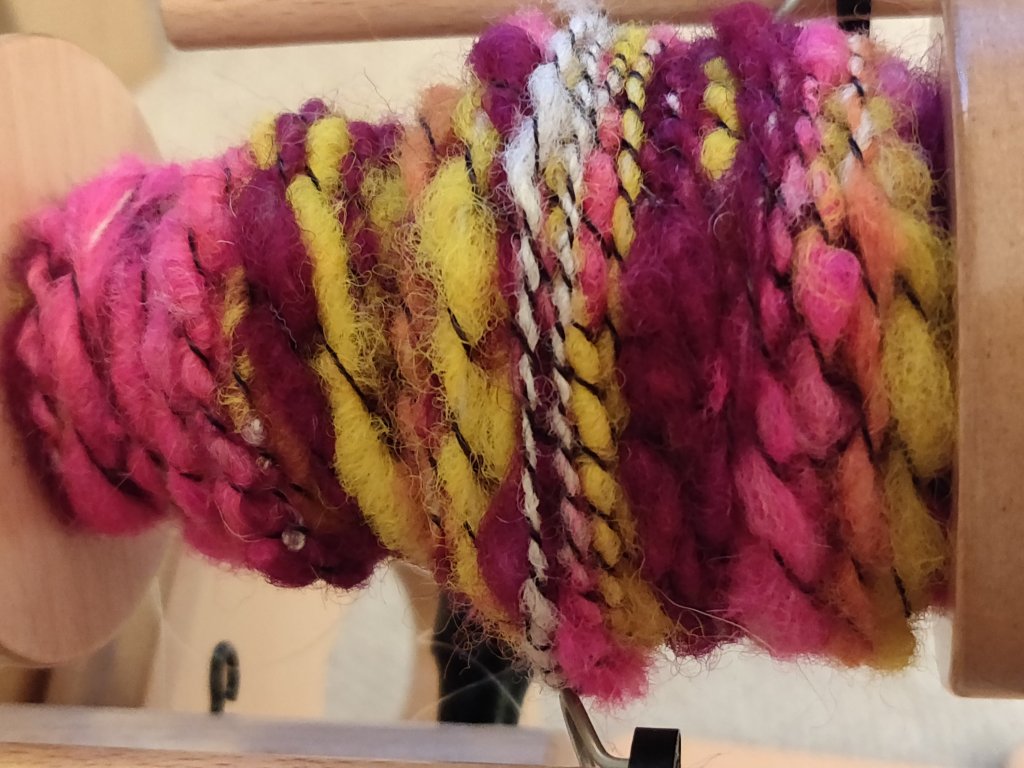
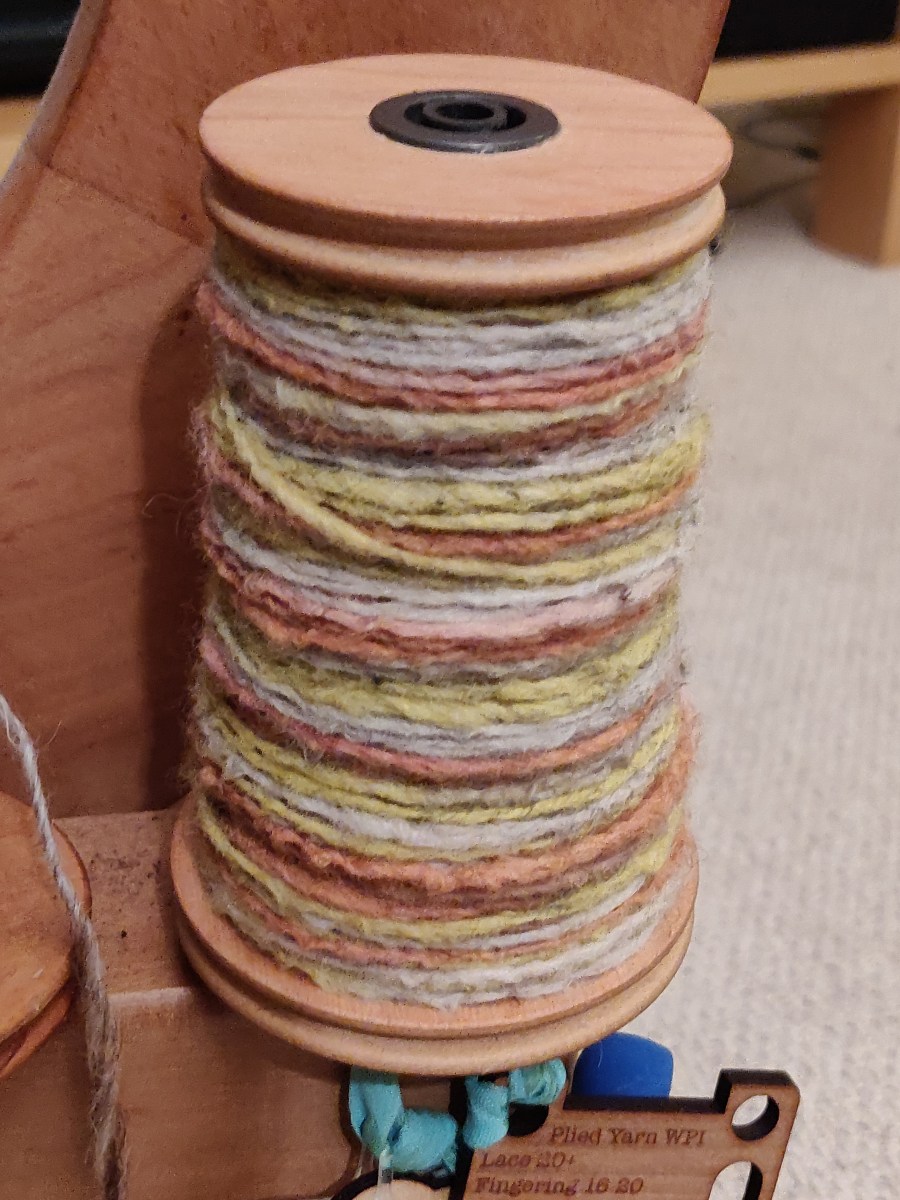
I took along a sack of stove-top rainbow dyed fleece as described on my Dyeing Wool page. It’s a little coarse, but in nicely formed locks, so I am flick carding it and spinning it quite thick for use in a rug, (maybe)?
Last week a few of us got together (safely distanced and masked), to take our textiles into the park. I enjoyed myself so much I forgot to take a photo!
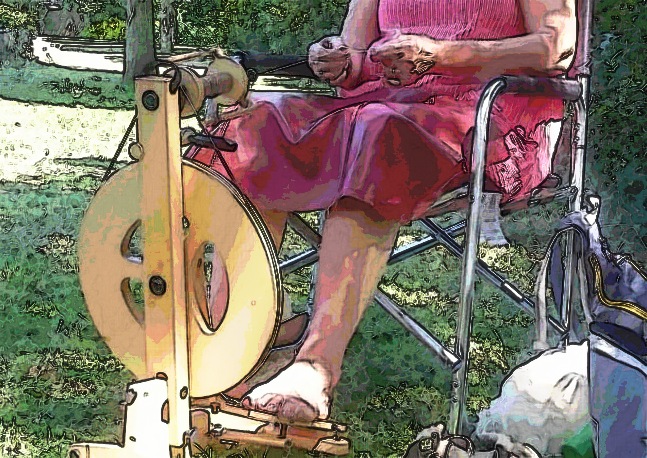
The thought of spinning outside in the sunshine encouraged me to use bright colours. So I took along some Shetland fleece I dyed a while ago using acid dyes, (I have written more about dyeing fleece with acid dye here).
I’d spun up a bobbin of Suffolk fleece that is not very exciting, so I planned to use that as the core for a bright, irregular spun, core-spun yarn to which I would add a charcoal wrapping yarn. All 100%wool. I took my folding Louet Victoria S95 wheel which is a joy to use.
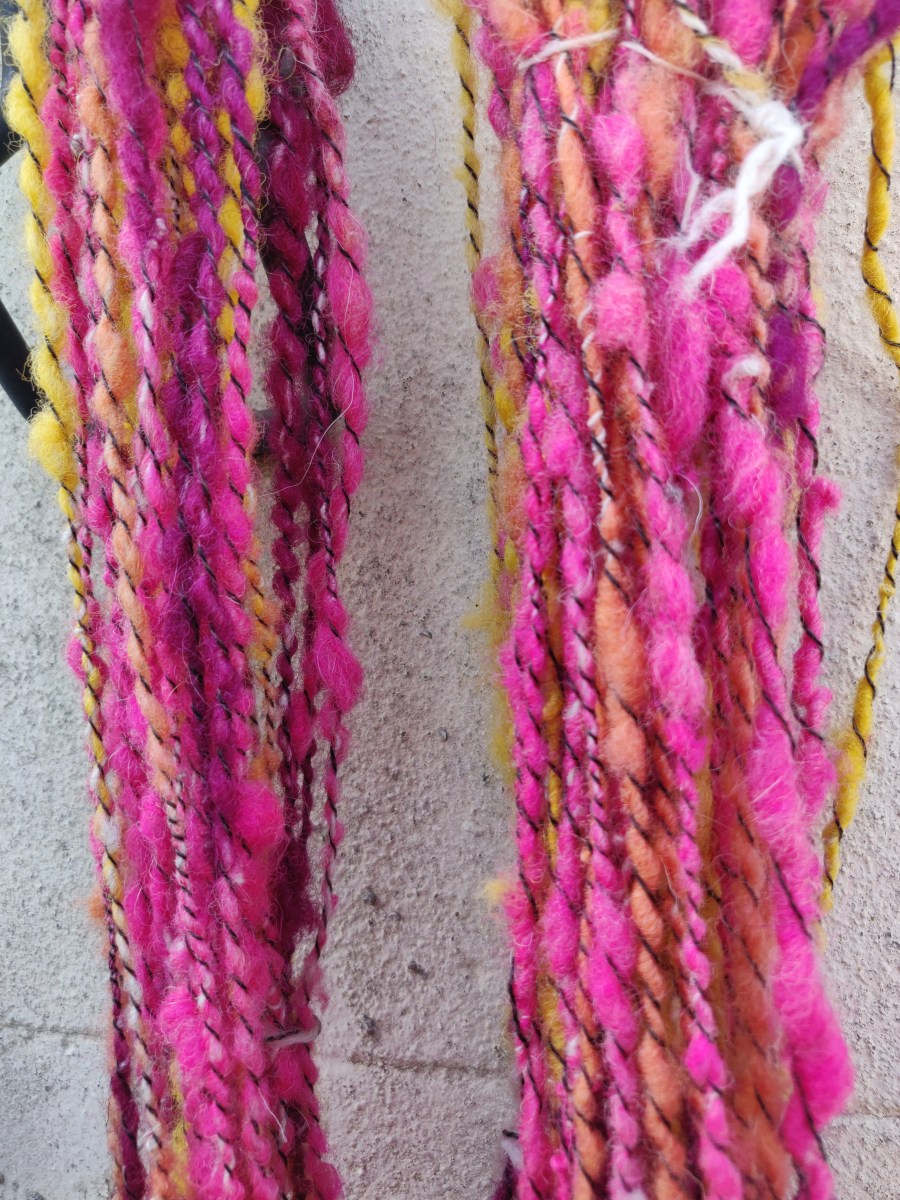
The core yarn was Z twisted quite tight. The wrapping colours were also put on Z twist, and the final charcoal, commercial yarn was S spun over the others.
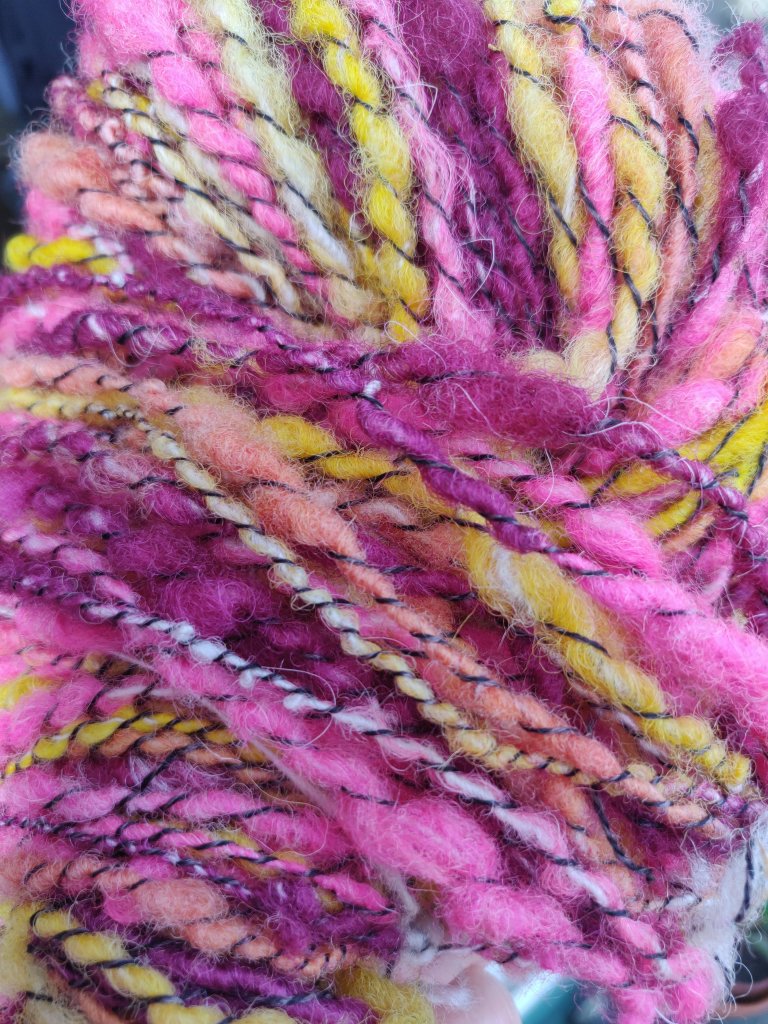
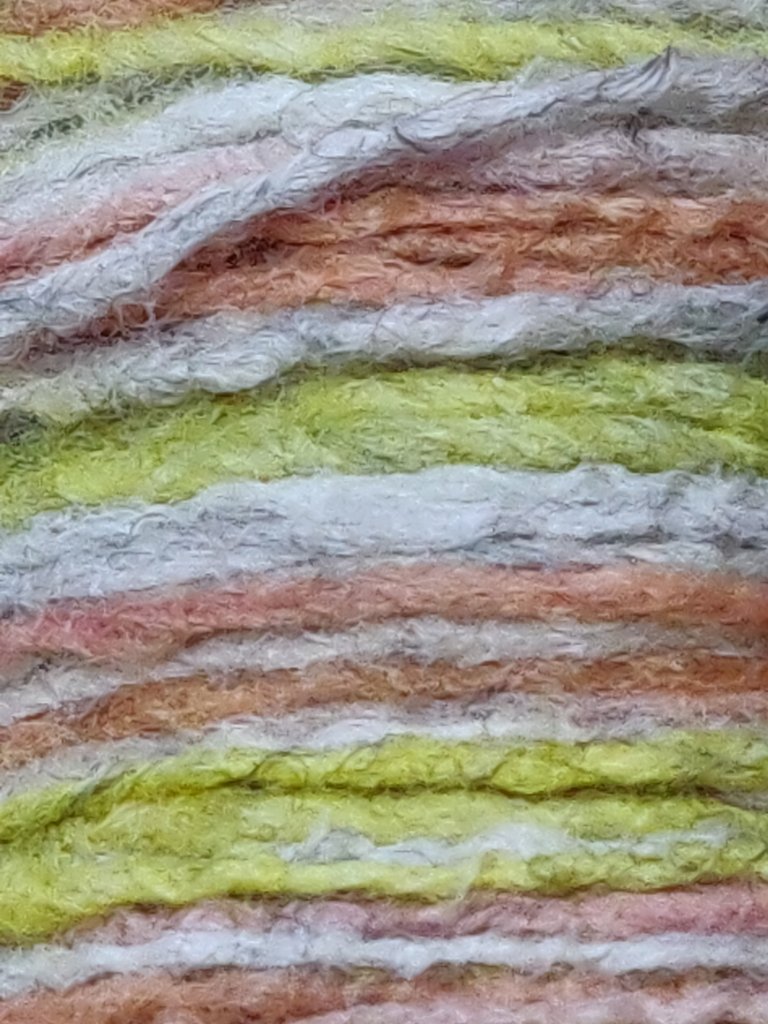
Photo taken at might, so the colours are not accurate.
After washing and drying the twist the colours hardly muted and it’s come out as lovely yarn.
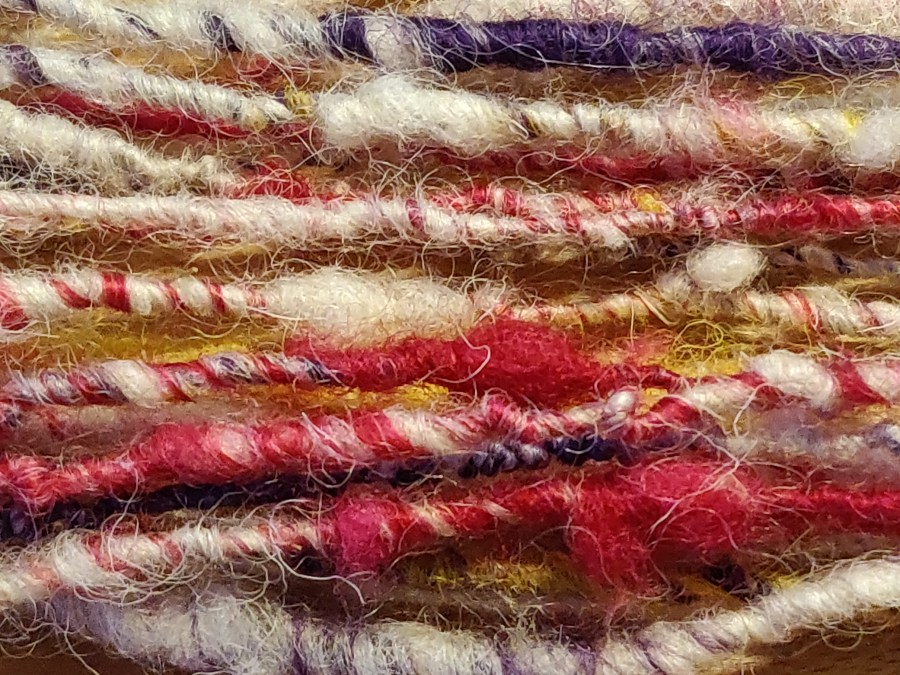
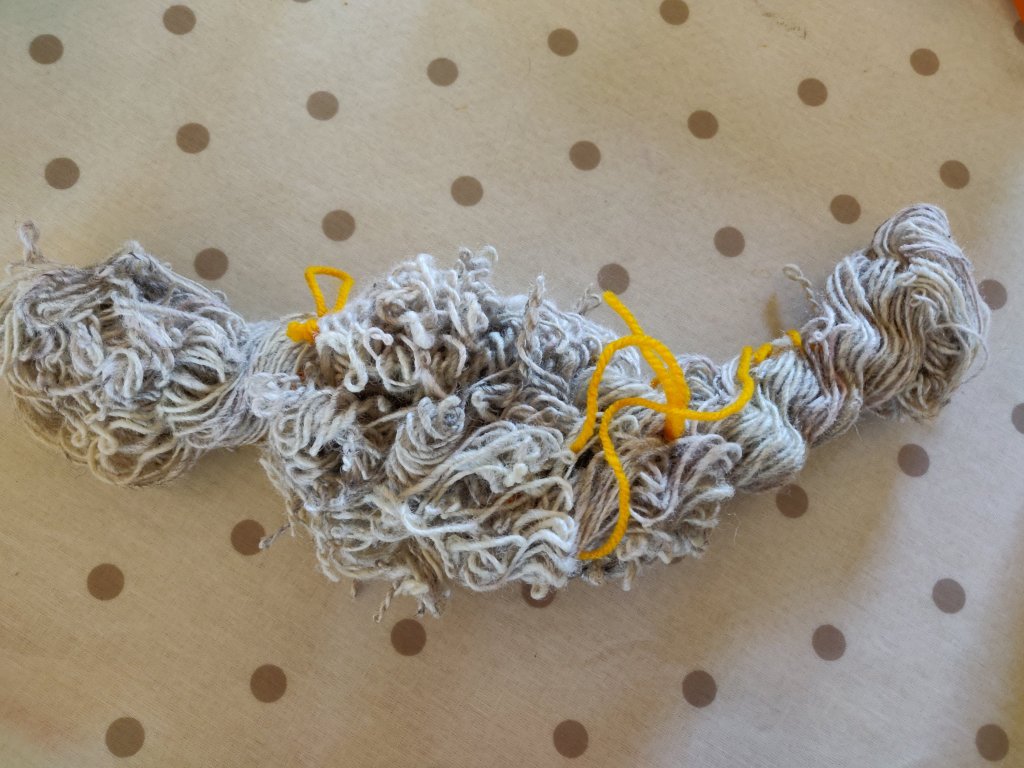
Last night I blended some rather lumpy Southdown fleece I was trying to use up with some dyed Shetland. It was just for fun – no plan involved, just testing out my DIY blending board. When I sat at my wheel – watching ‘Hidden’, I couldn’t think what to do with it. Then I remembered seeing Lexi Boeger’s method of coreless- core-spinning in her book ‘Hand Spun’. I thought the strong colours would work well against the natural if spun in this way, so I had a go.
According to Lexi the principle is to only work with a small amount of fibre at a time, and to spread the fibres wide into a trianglular web. You spin the core with the fibres at one edge of the triangle, whilst simultaneously holding the other part of the web at right angles to this so that it can wrap around the core between your drafting hand and the orifice. Its bit like patting your head and rubbing you tummy at the same time – but once I got going I enjoyed it. There were a few messy bits, which I attribute to the lumpy Southdown myself!
I love the way the colours wrap around the natural core
I’m not sure its truly core spinning, but its on the way there and I do like the effect. The yarn was very over-twisted, but after a good soak in hot water and hanging with a light weight to dry naturally it is fine now.
Due to the virus situation the workshops have been closed at the University where I work, and we are ‘remote teaching’ from now on. That is quite a challenge for a practical subject like knitted textiles.
One thing I have enjoyed over the years of teaching first year knit design students is their excitement and enthusiasm when they realise that they can make their own yarns. Normally I would be running a hand spinning workshop for them next week, but obviously not anymore. We have two spinning wheels and I take in a box of drop spindles. Cartons of fibre are pulled out of cupboards and spill all over the floor, its a lovely day with some wild yarn developments taking place. I think its a great way to encourage them to explore the raw materials of textiles, and also to introduce them to yarn design.
But sadly this year its not to be! So I decided that before they left I would demonstrate ‘pencil spinning’ using two commercial yarns. Even this simple method was received with excitement, so I have made two short videos for the students, but have shared them on YouTube for everyone and put them on here as well. Bear in mind they were made for the students, following a demonstration so I refer to this, and the focus is on making small amounts of marl yarn for hand knit design sampling.
They have taken yarns away with them, so I hope to see that they have applied their wonderful creativity to making new and colourful yarns.
Having read about this spinning technique I though I’d have a go. It doesn’t save much time as you still have to run the yarn back through the wheel, which takes as long as simple plying. It was prompted by my practise at making a ”Z’ twist fat singles’ and so I decided to over-twist this singles yarn as I practised the night before a dyeing session. So I treated it cruelly when washed it, and also in the hot dye bath as well.
As there were several colour dye baths it was too tempting not to dip-dye the hank. Firstly it went into red-cabbage allover, and then the ends were dipped into madder and turmeric.
This is what it looked like before hot washing and dyeing.And after re-spinning it’s open up nicely and is quite soft.
I’ll be trying this out soon to see what it looks and feels like as a knit.
Jacob’s fleece spun into a marl yarn and mordanted ready for dyeing
I’ve got a pot of onion skin dye ready to tie-dye a silk scarf and a skein of hand spun Jacobs marl yarn.
The yarn changed colour during the mordanting, and the cream ply has taken on a pale golden yellow tone. I think I will dip dye it to preserve this rather pleasant effect. Let’s hope the pale yellow doesn’t wash out at the end!
The scarf is already dyed in an ombre effect from grey to white, but cool greys don’t suit me; I want a warmer golden colour. The underlying ombre effect will be interesting, and I’ve tried marbles in in a pattern. I may add some eco prints on too, I’ll see what happens with the tie dye.
Rinsing the silk and wool after mordanting the fibres
I’ve rigged up a spoon and bowl into a frame to hold the hank of yarn whilst being dip-dyed.
I use a neat little induction hob from Ikea for dyeing to save energy as we have solar panels.
A steamy view of the dyeing process
The yarn was a little disappointing. I think I didn’t have enough dye material in the bath, and the silk took it up faster than the wool. However I dunked it into an iron mordant and it’s slightly saddened it into a softer yellow that blends better with the darker ply.
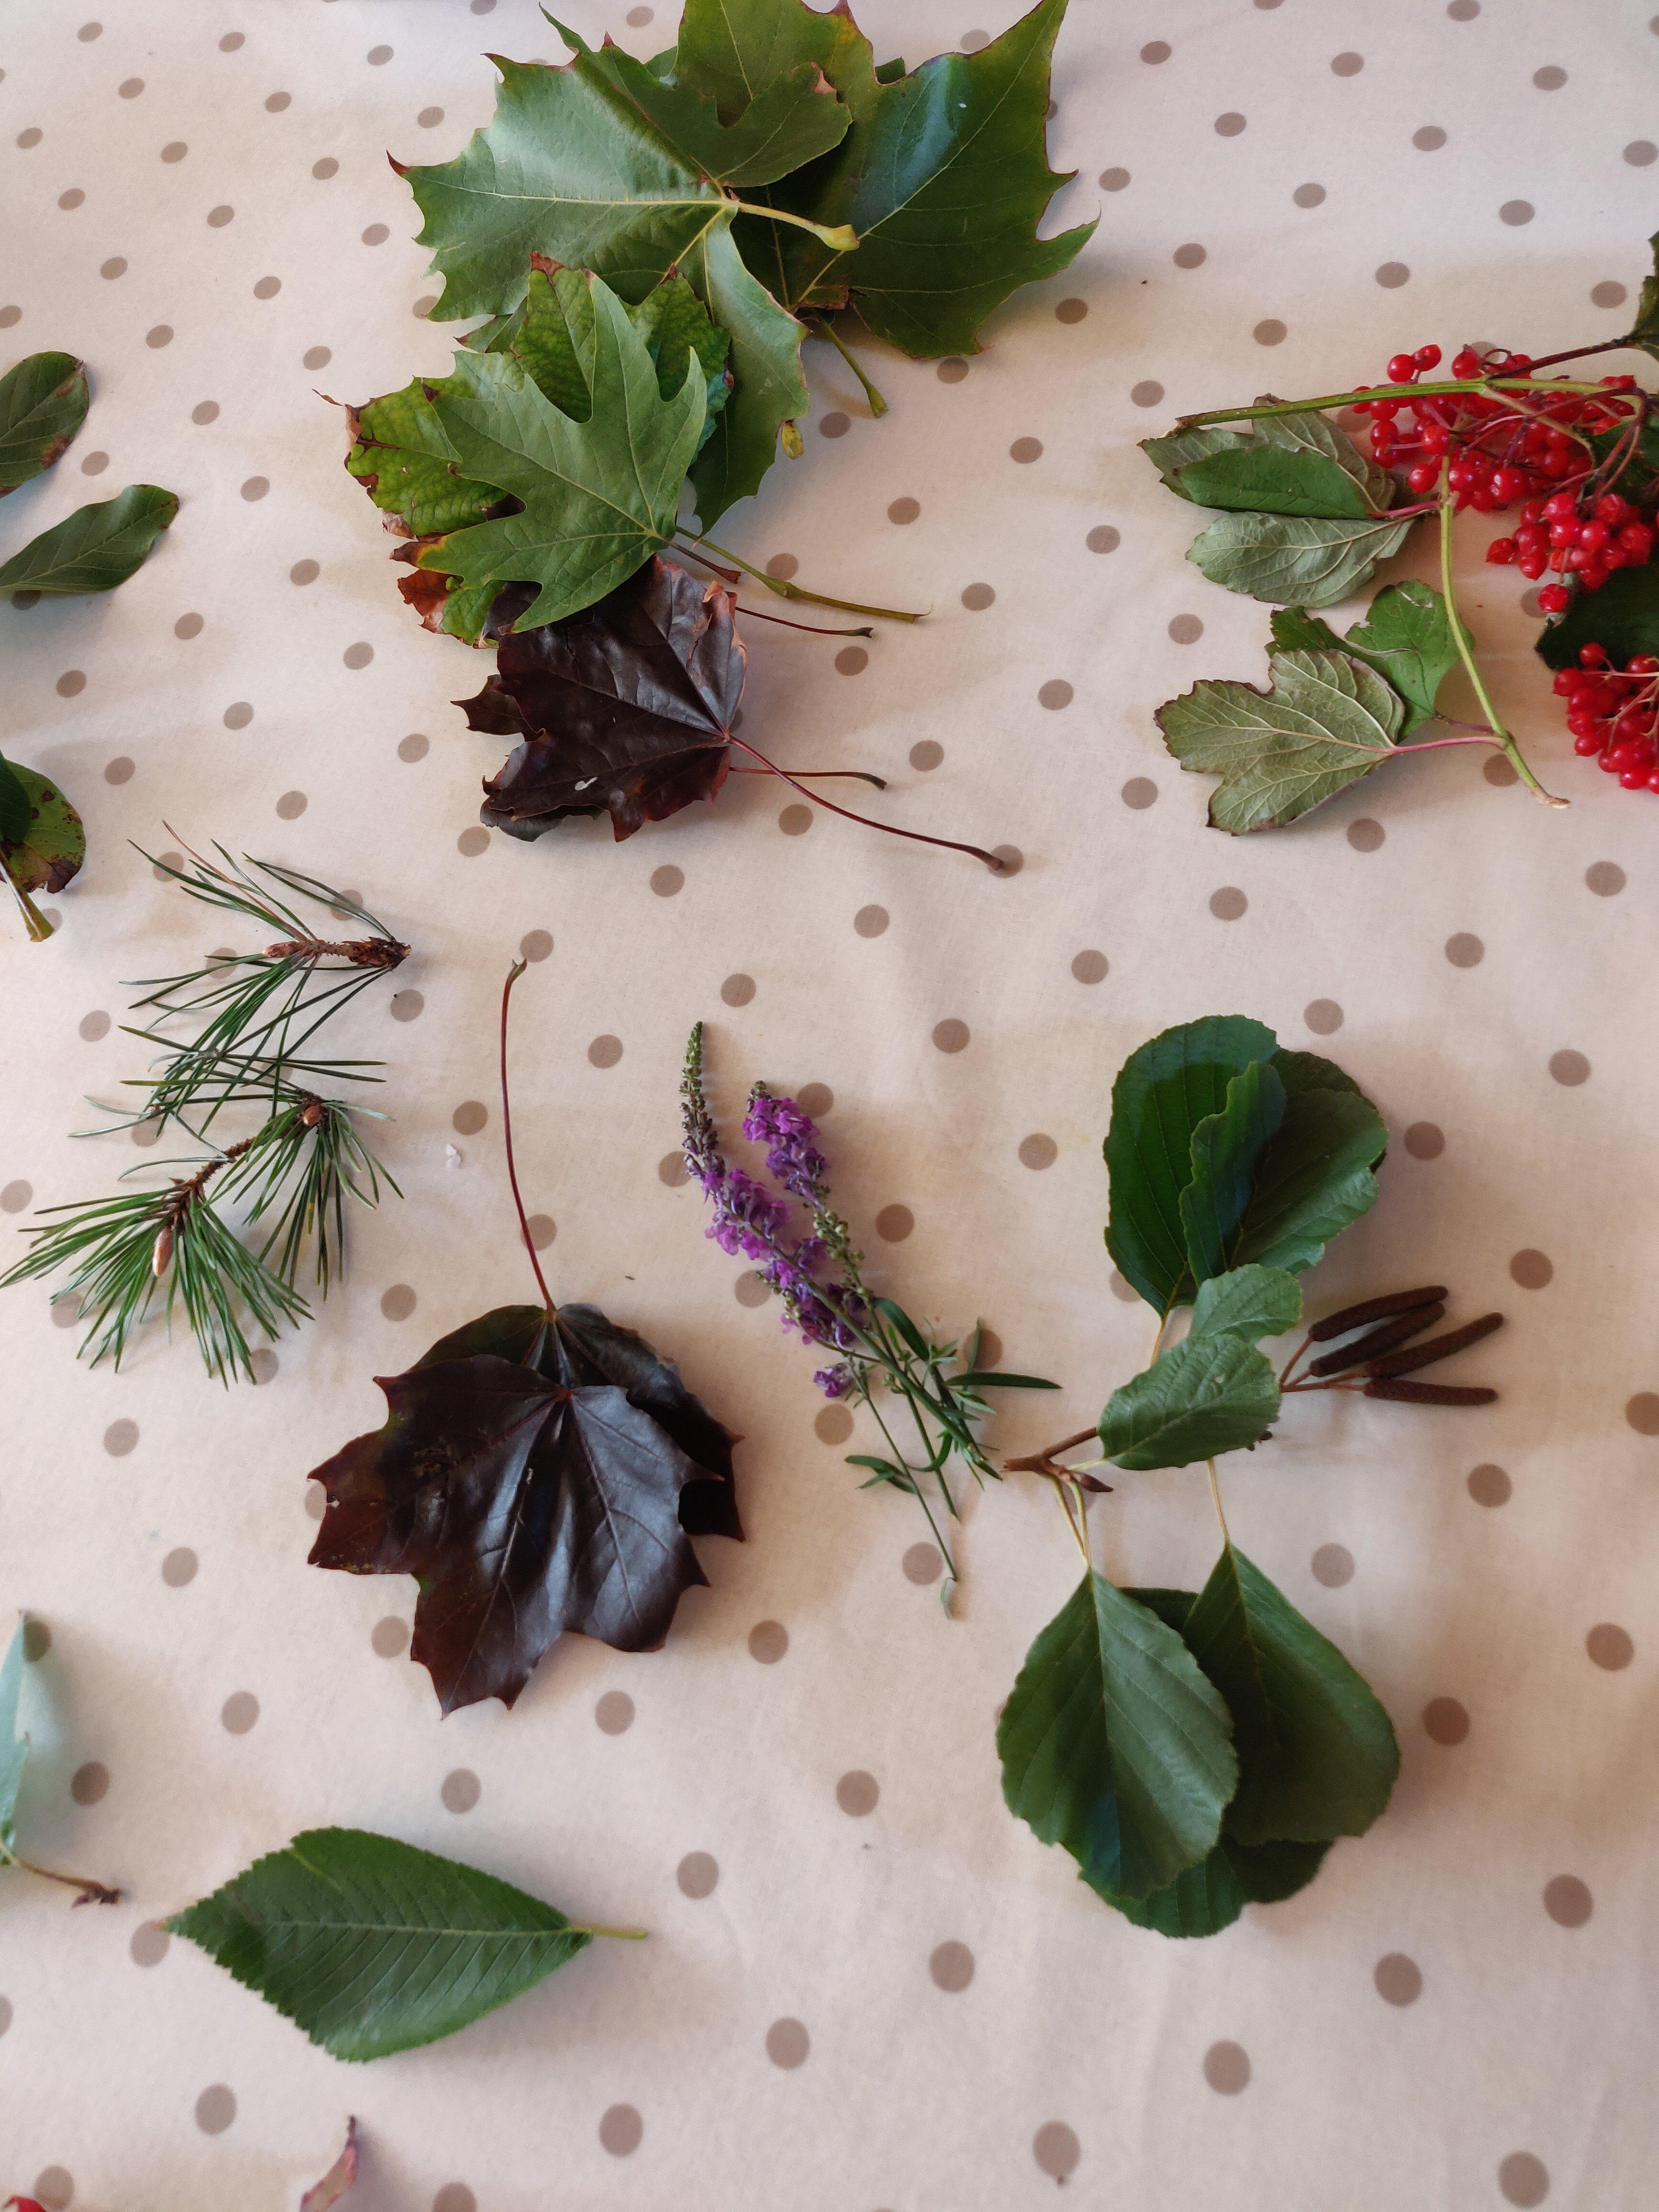
The scarf was ok, tie-dyed but wishy-washy and unexciting. So plan B, to eco print on it, came into action. During my dog-walk I collected a variety of leaves, luckily there is a small cluster of sumac and lots of Oak varieties in our local park.
My trawl of leaves, including Sumac, Oak, Maples and others
I also collected a few bunches of Rowan berries, beech and other leaves.
In my excitement I forgot to take a picture of the tie-dyed silk, or of laying out the leaves. I did that lengthwise along half of the width of the scarf, then folded it in half to sandwich the leaves between two layers. I’m not sure if this would have worked better if I had waited until the scarf had dried; I added the leaves directly after rinsing it after tie-dying.
Not having a spray bottle handy that I wanted to use for iron mordant solution, I’d already decided to soak the whole thing in the iron solution. Before doing that I folded the scarf widthwise once again and then tightly wound the folded scarf around a short length of plastic pipe, securing the ends with elastic bands. After giving the rolled packages a good soak in iron I used load of string to bind the fabric really tightly to the pipe all along its length.
Then it went into an improvised steamer for an hour. Unfortunately, because the steamer set-up only allowed a shallow water bath, I managed to boil it dry! This has mildly effected the outer layer on the underside of the pipe. It’s a bit darker.
For good measure I dribbled a bit of copper mordant on it as well. The effect was so strong that the white plastic pipe has now got leaf prints on it as well!
After unwrapping the scarf from the pipe, and following thorough wash it has come out rather well I think. Miles away from the boring grey one anyway!
George the cat approves of it as well!
George gives the finished scarf the seal of approval.
Whilst demonstrating as a member of a local textile group, Woolly Umbrella, at the Wild Chalk festival, I kept a drop-spindle of my own going with singles that I Andean plied at the end as part of the demo.
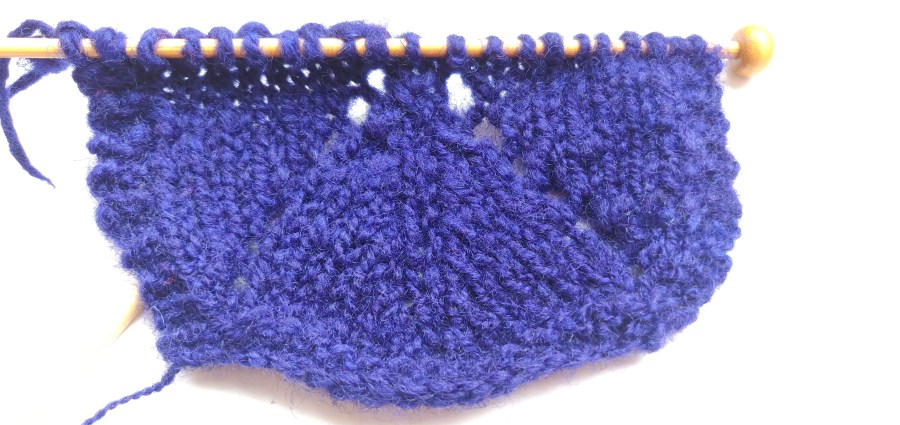
I don’t think repeatedly putting it down and restarting helped me get an even twist, or it may have been the plying, or a mixture of both, but the yarn isn’t balanced. I knitted a lace pattern with it, and the bias isn’t so pronounced as in stocking stitch, but I can see it.
For fun I added the knitted sample to a purple dye bath I had prepared to dye some other yarn, and here is the result.
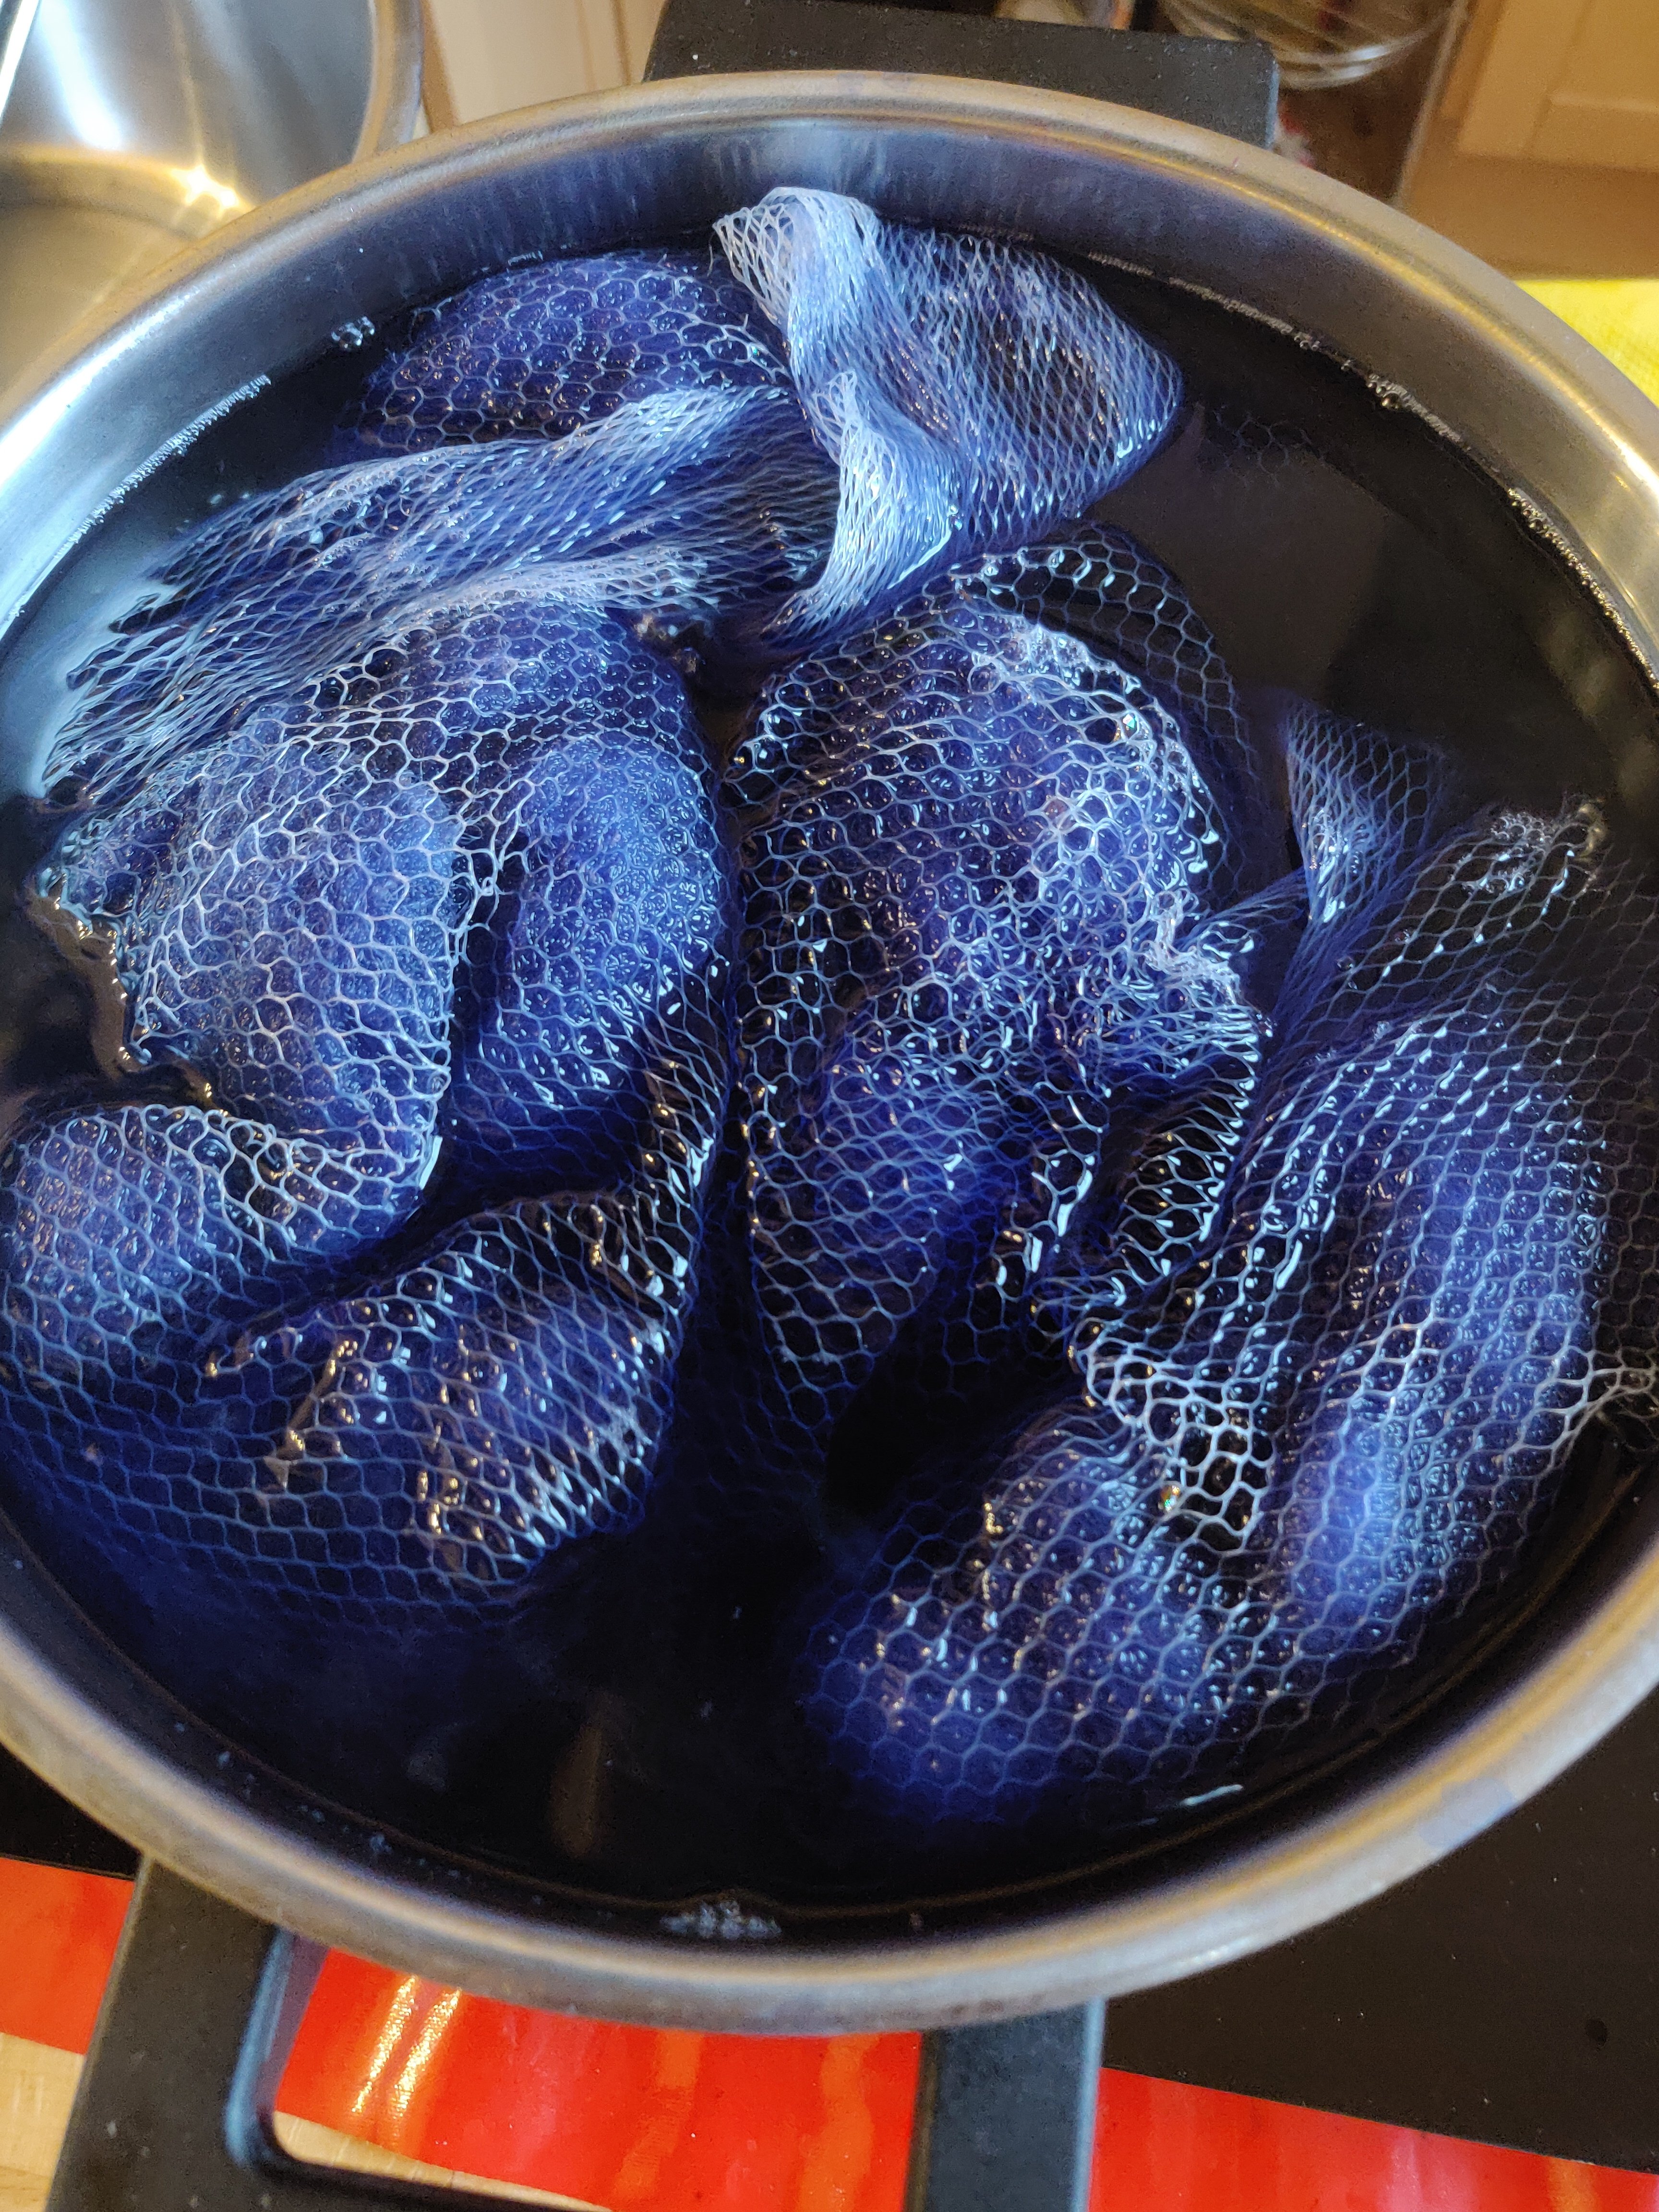
For no better reason than wanted to play with acid dyes I dyed a 58g hank of handspun Texel and Clun Forest 2 ply today. Inspired by WASPI I chose to mix a purple. If we haven’t won our pension compensation by the winter I shall knit mittens for wearing on demos.
I’m going to pop 100g of Shetland fleece that has some pink staining on the tips into the exhausted bath to hopefully give it a tint.
Half-way through the tint was looking too blue, so I added 1/8th TSP magenta to bring it back towards purple.
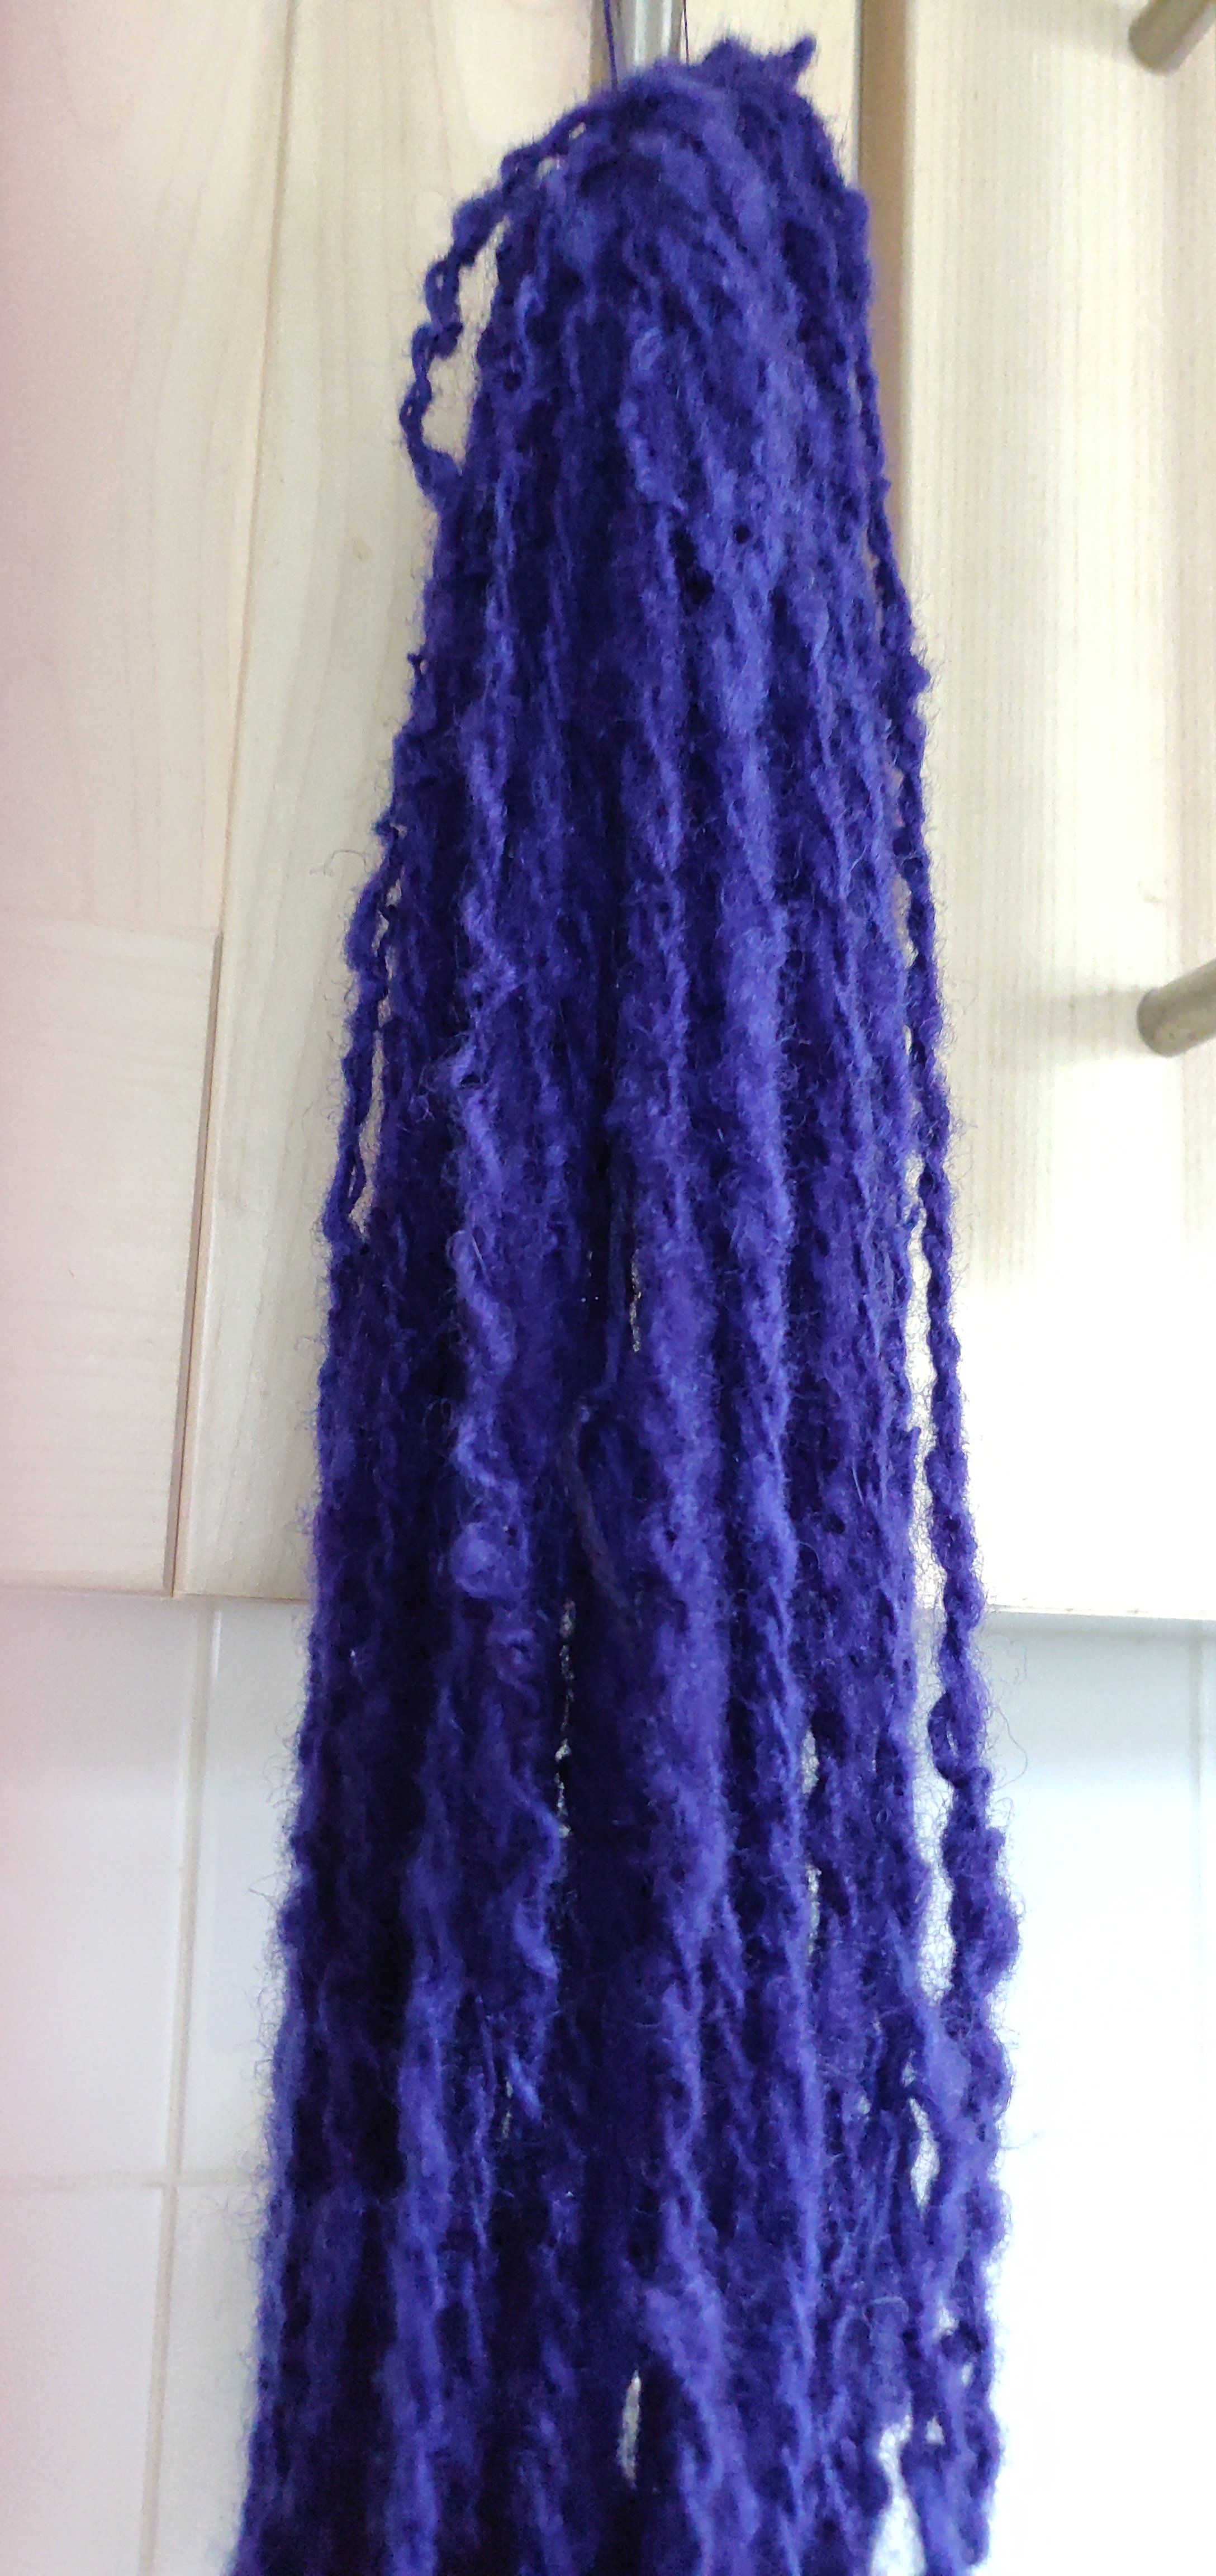
Below is the yarn, it’s still wet so it’s going to be a lot lighter when dry.
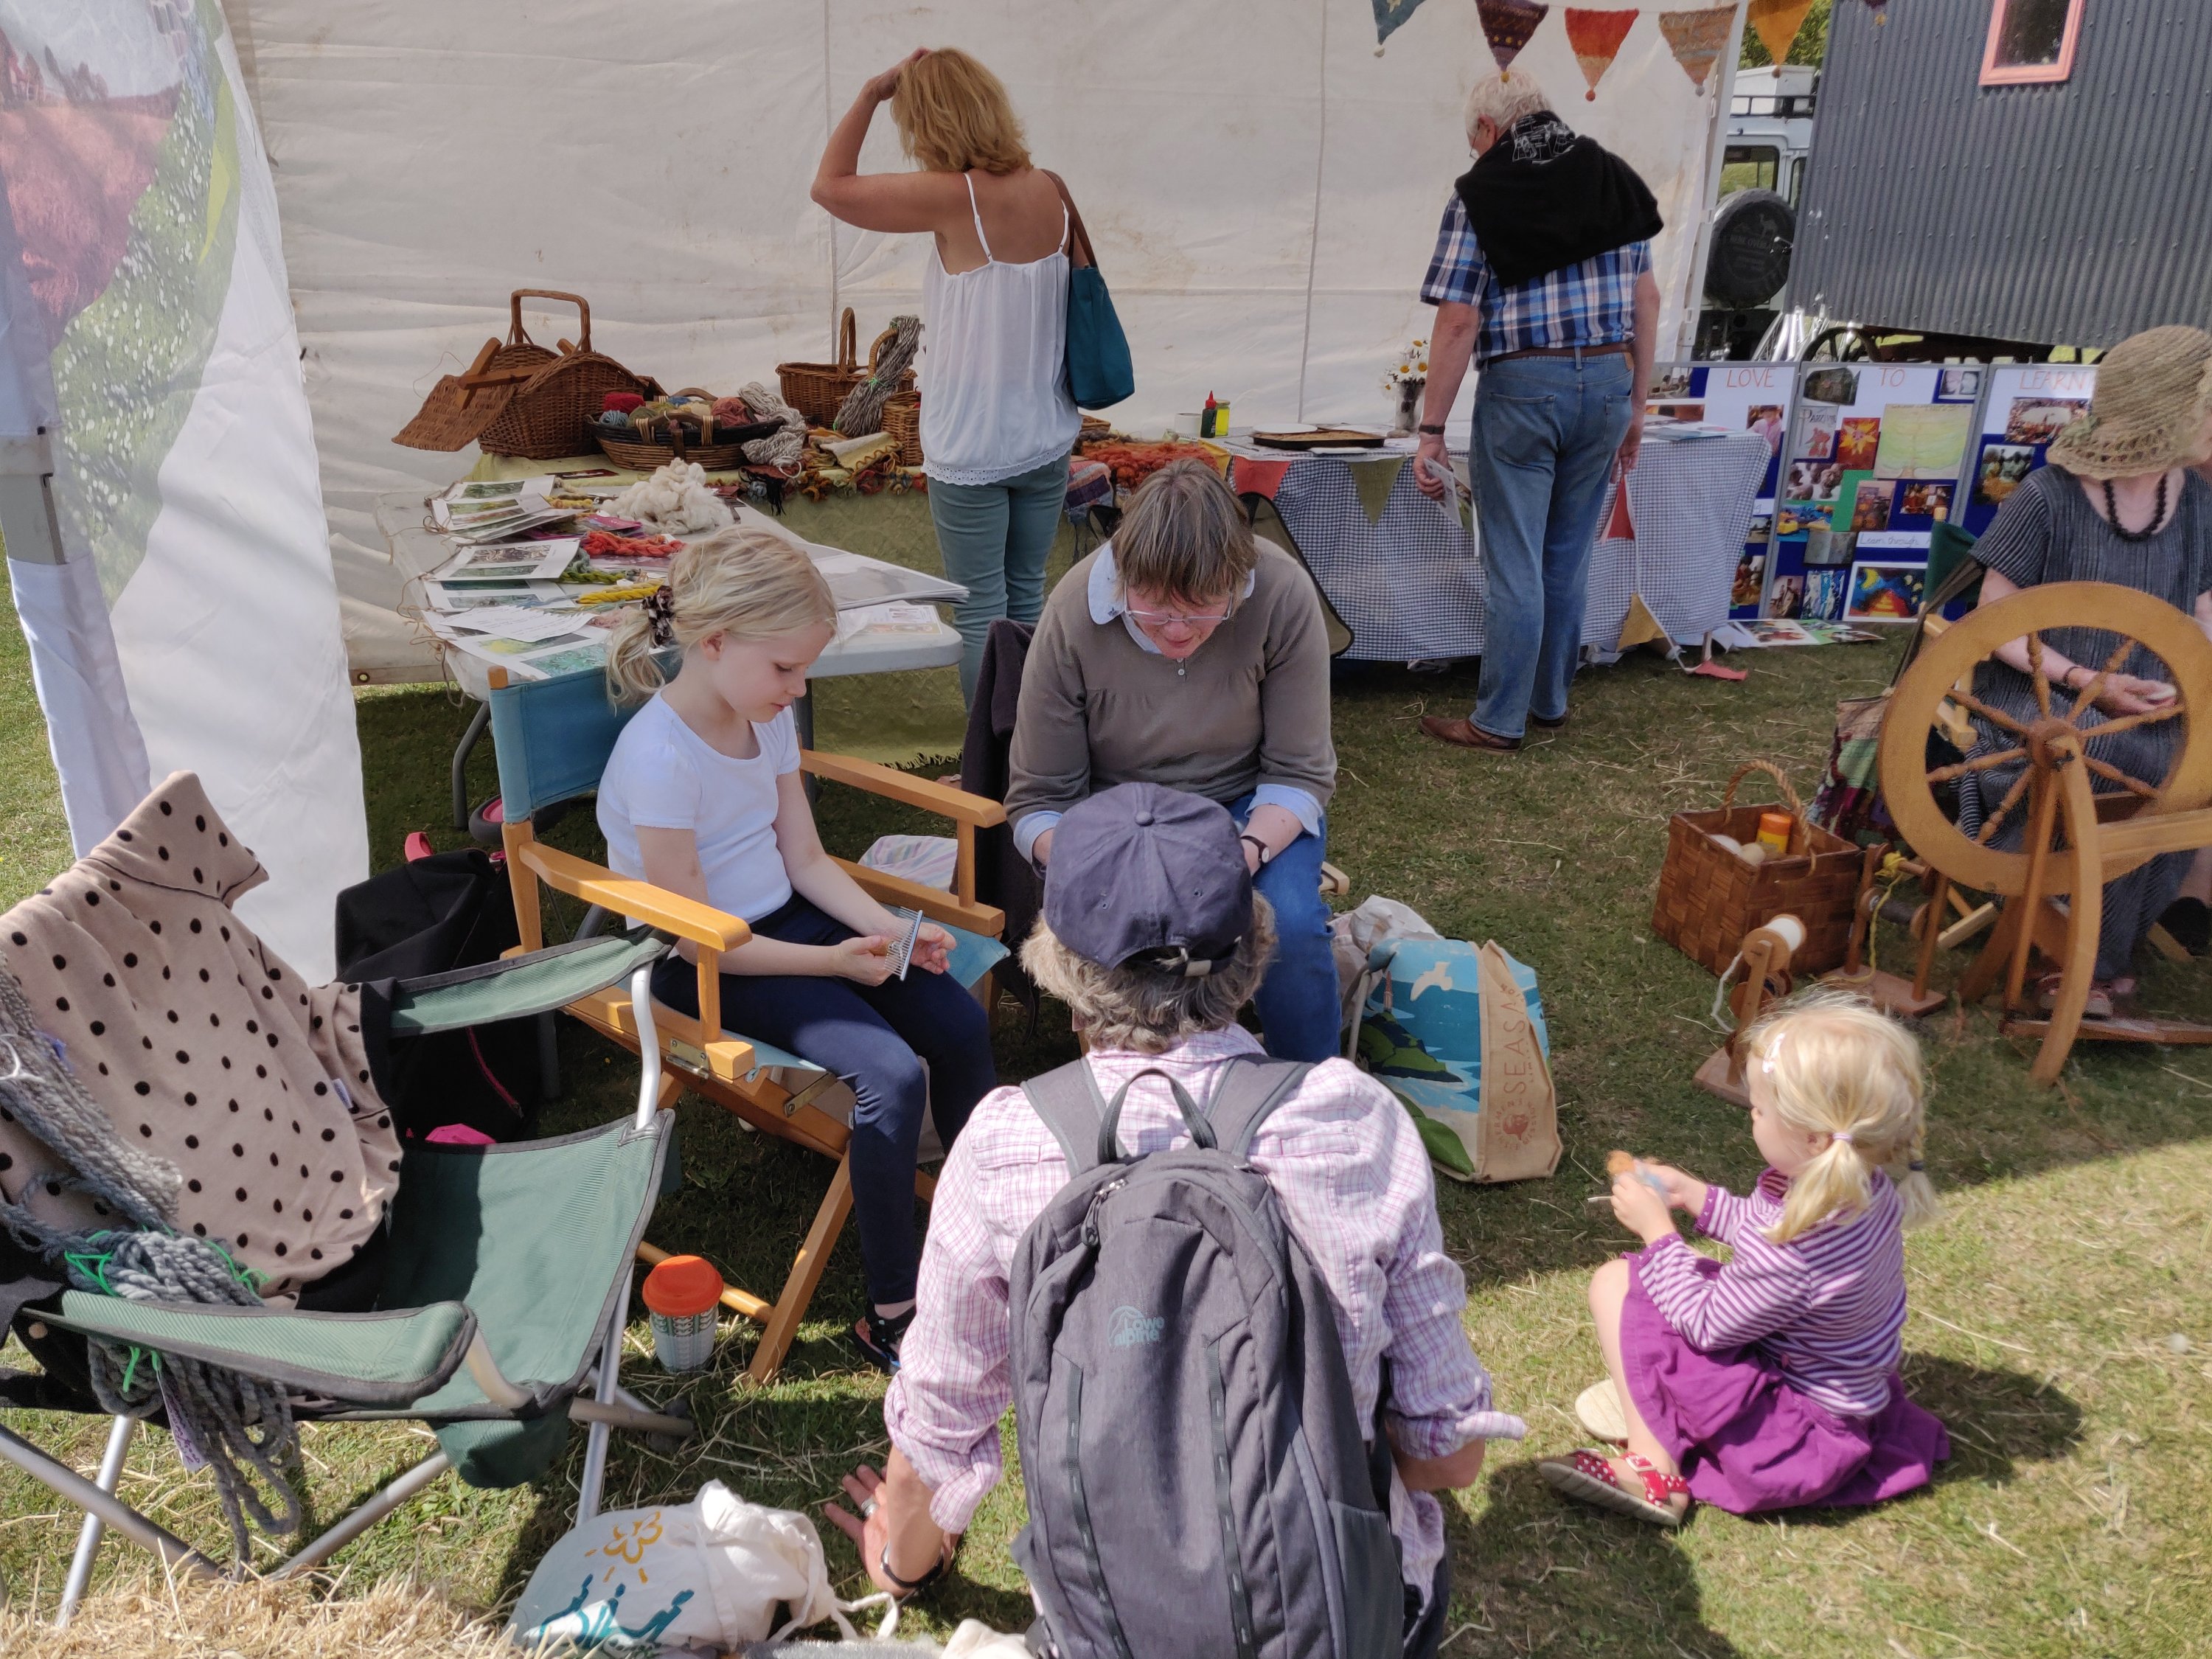
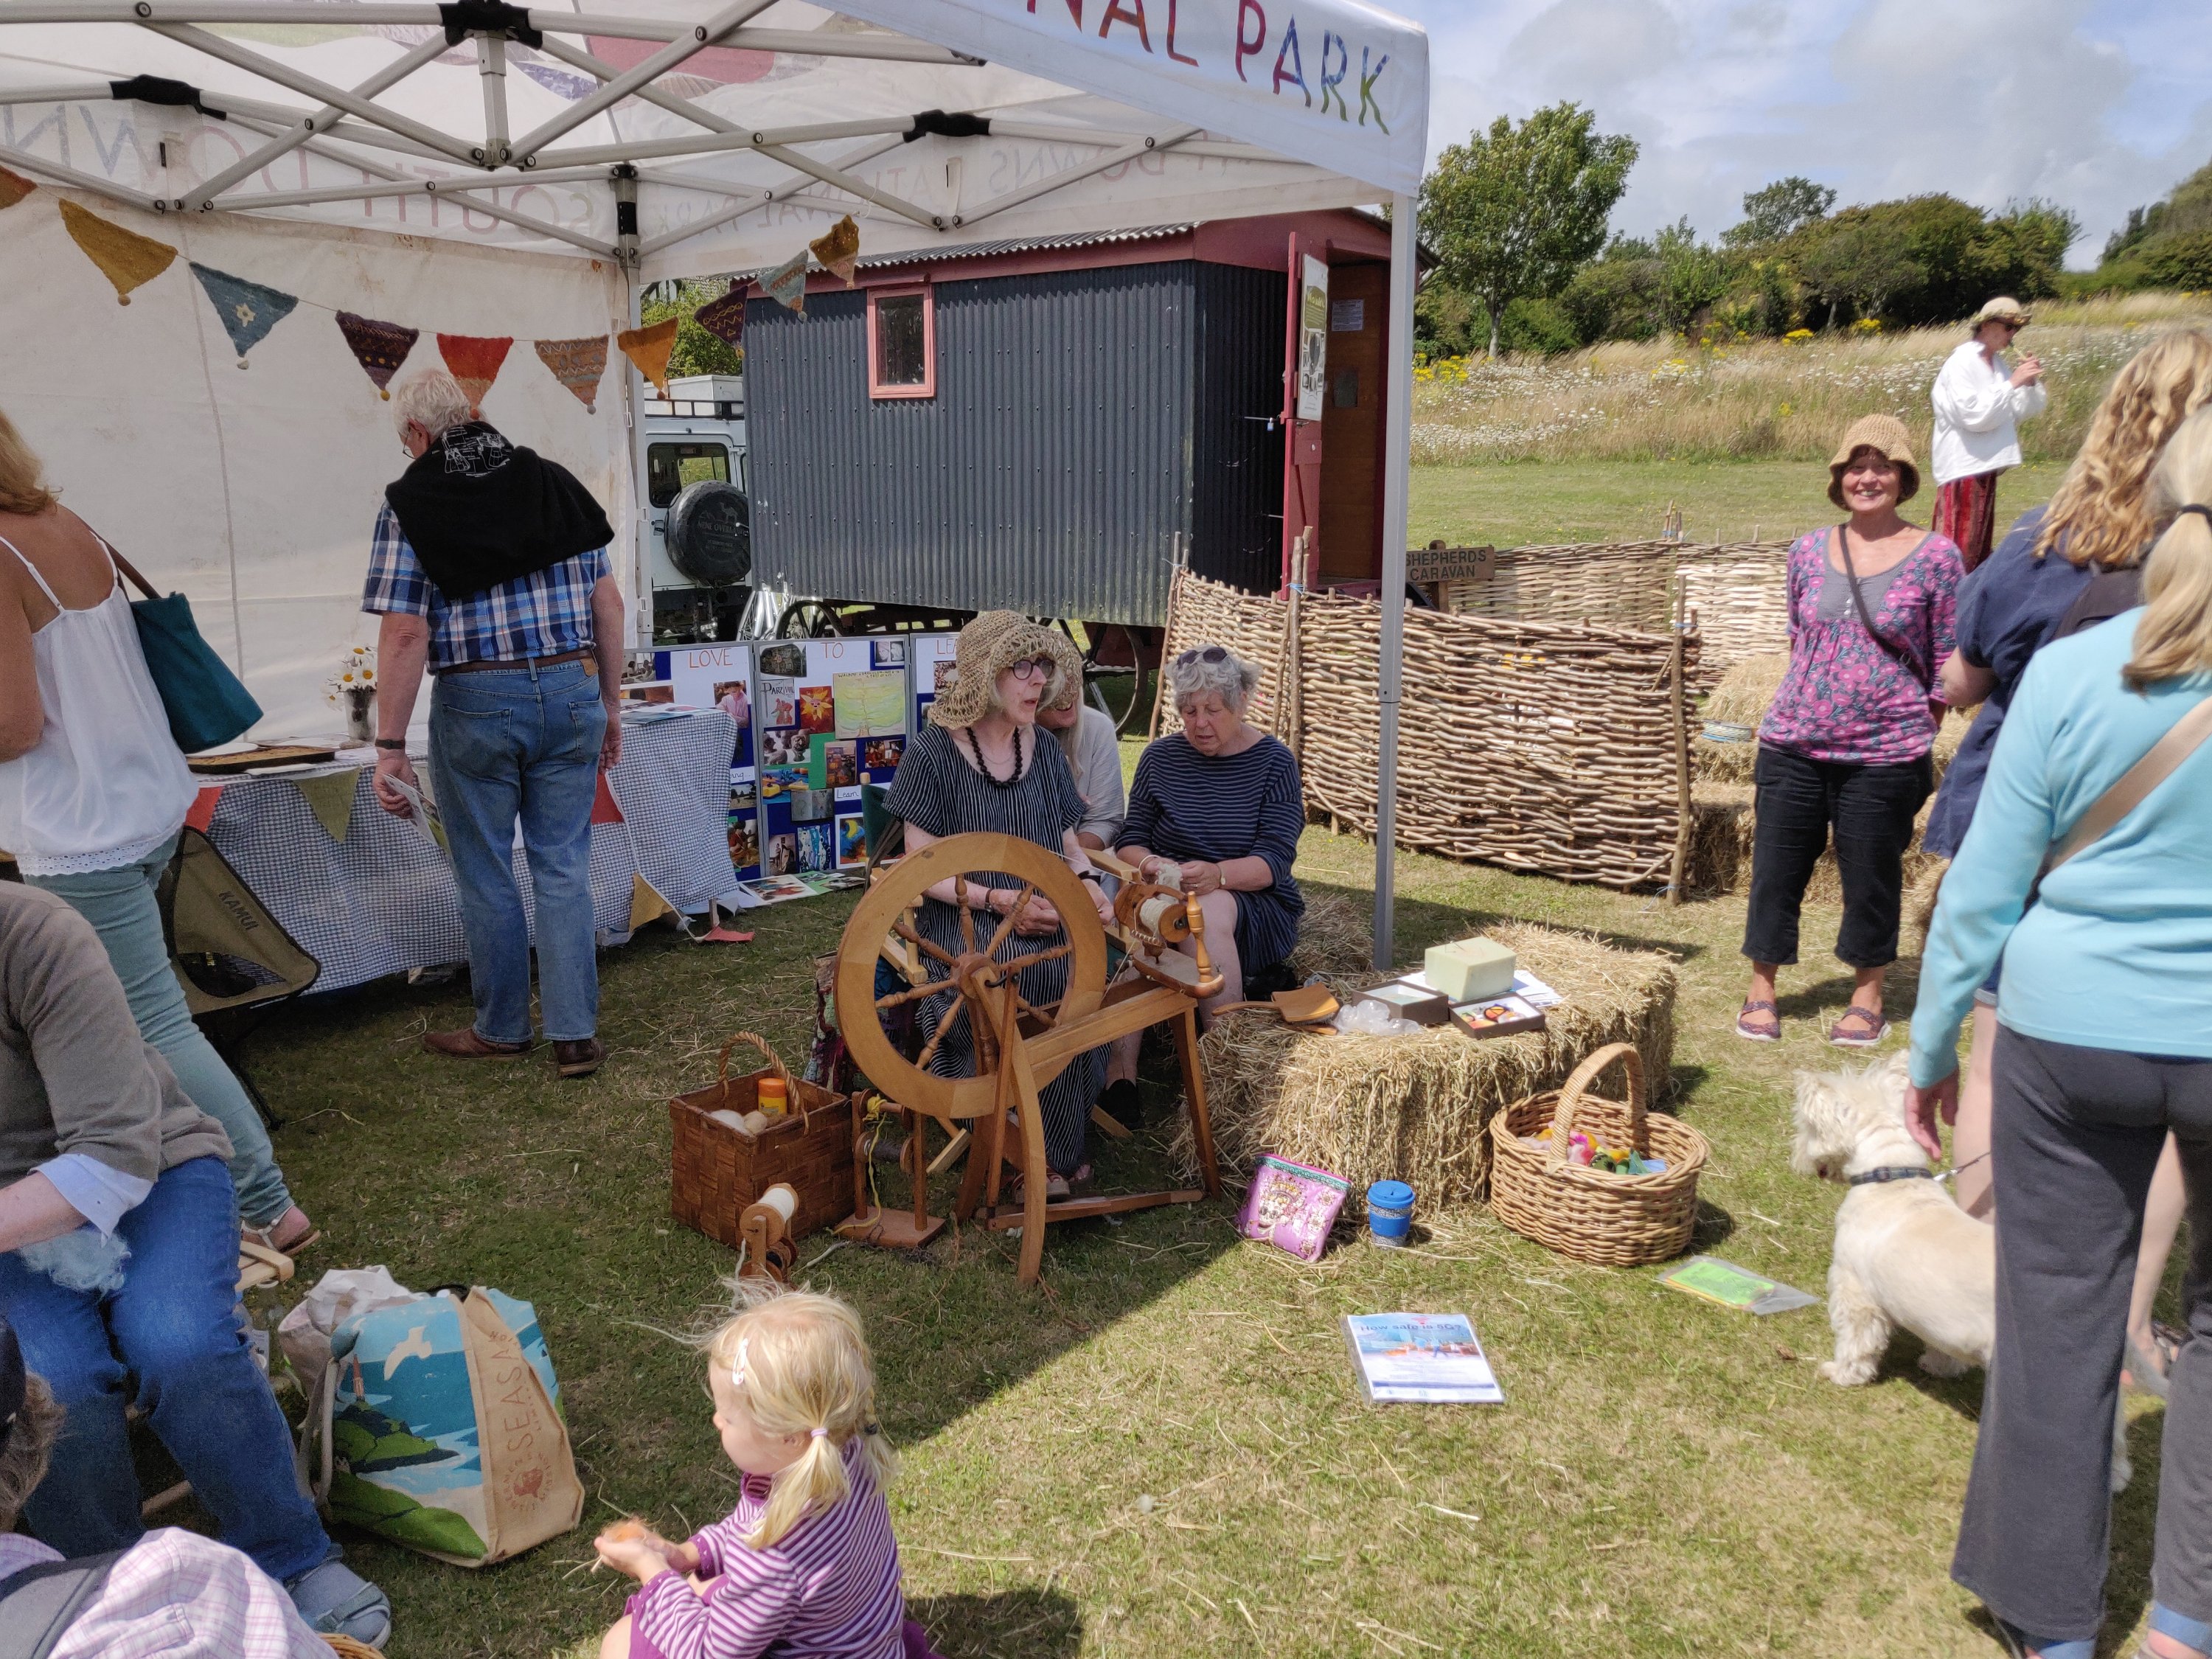
The South Downs are home to the Southdown breed of of sheep, the wool from which can be used for hand spinning. So to support the local Shout Downs national park and sheep farmers I joined several other members of my local spinning group, Woolly Umbrella, and took my skills (basic as they are) along to Wild Chalk. This free event, organised by the South Down National Park Rangers, was held in East Brighton park. Our part was to demonstrate spinning wool and encouraged people to have a go. I took along several drop spindles and a sack of washed fleece. Others brought along a spinning wheel, drop spindles and needle felting to share, plus an exhibition with some beautiful examples of naturally dyed, handspun wool. Most people were spinning the local Southdown fibre but mine, to my shame, was Texel cross Southdown.
As you can see children and adults alike really loved to watch, and most of them tried spinning from fleece to some extent or other.
I practised with a newly acquired Turkish spindle and using the Andean Plying technique even produced some reasonable 2ply.
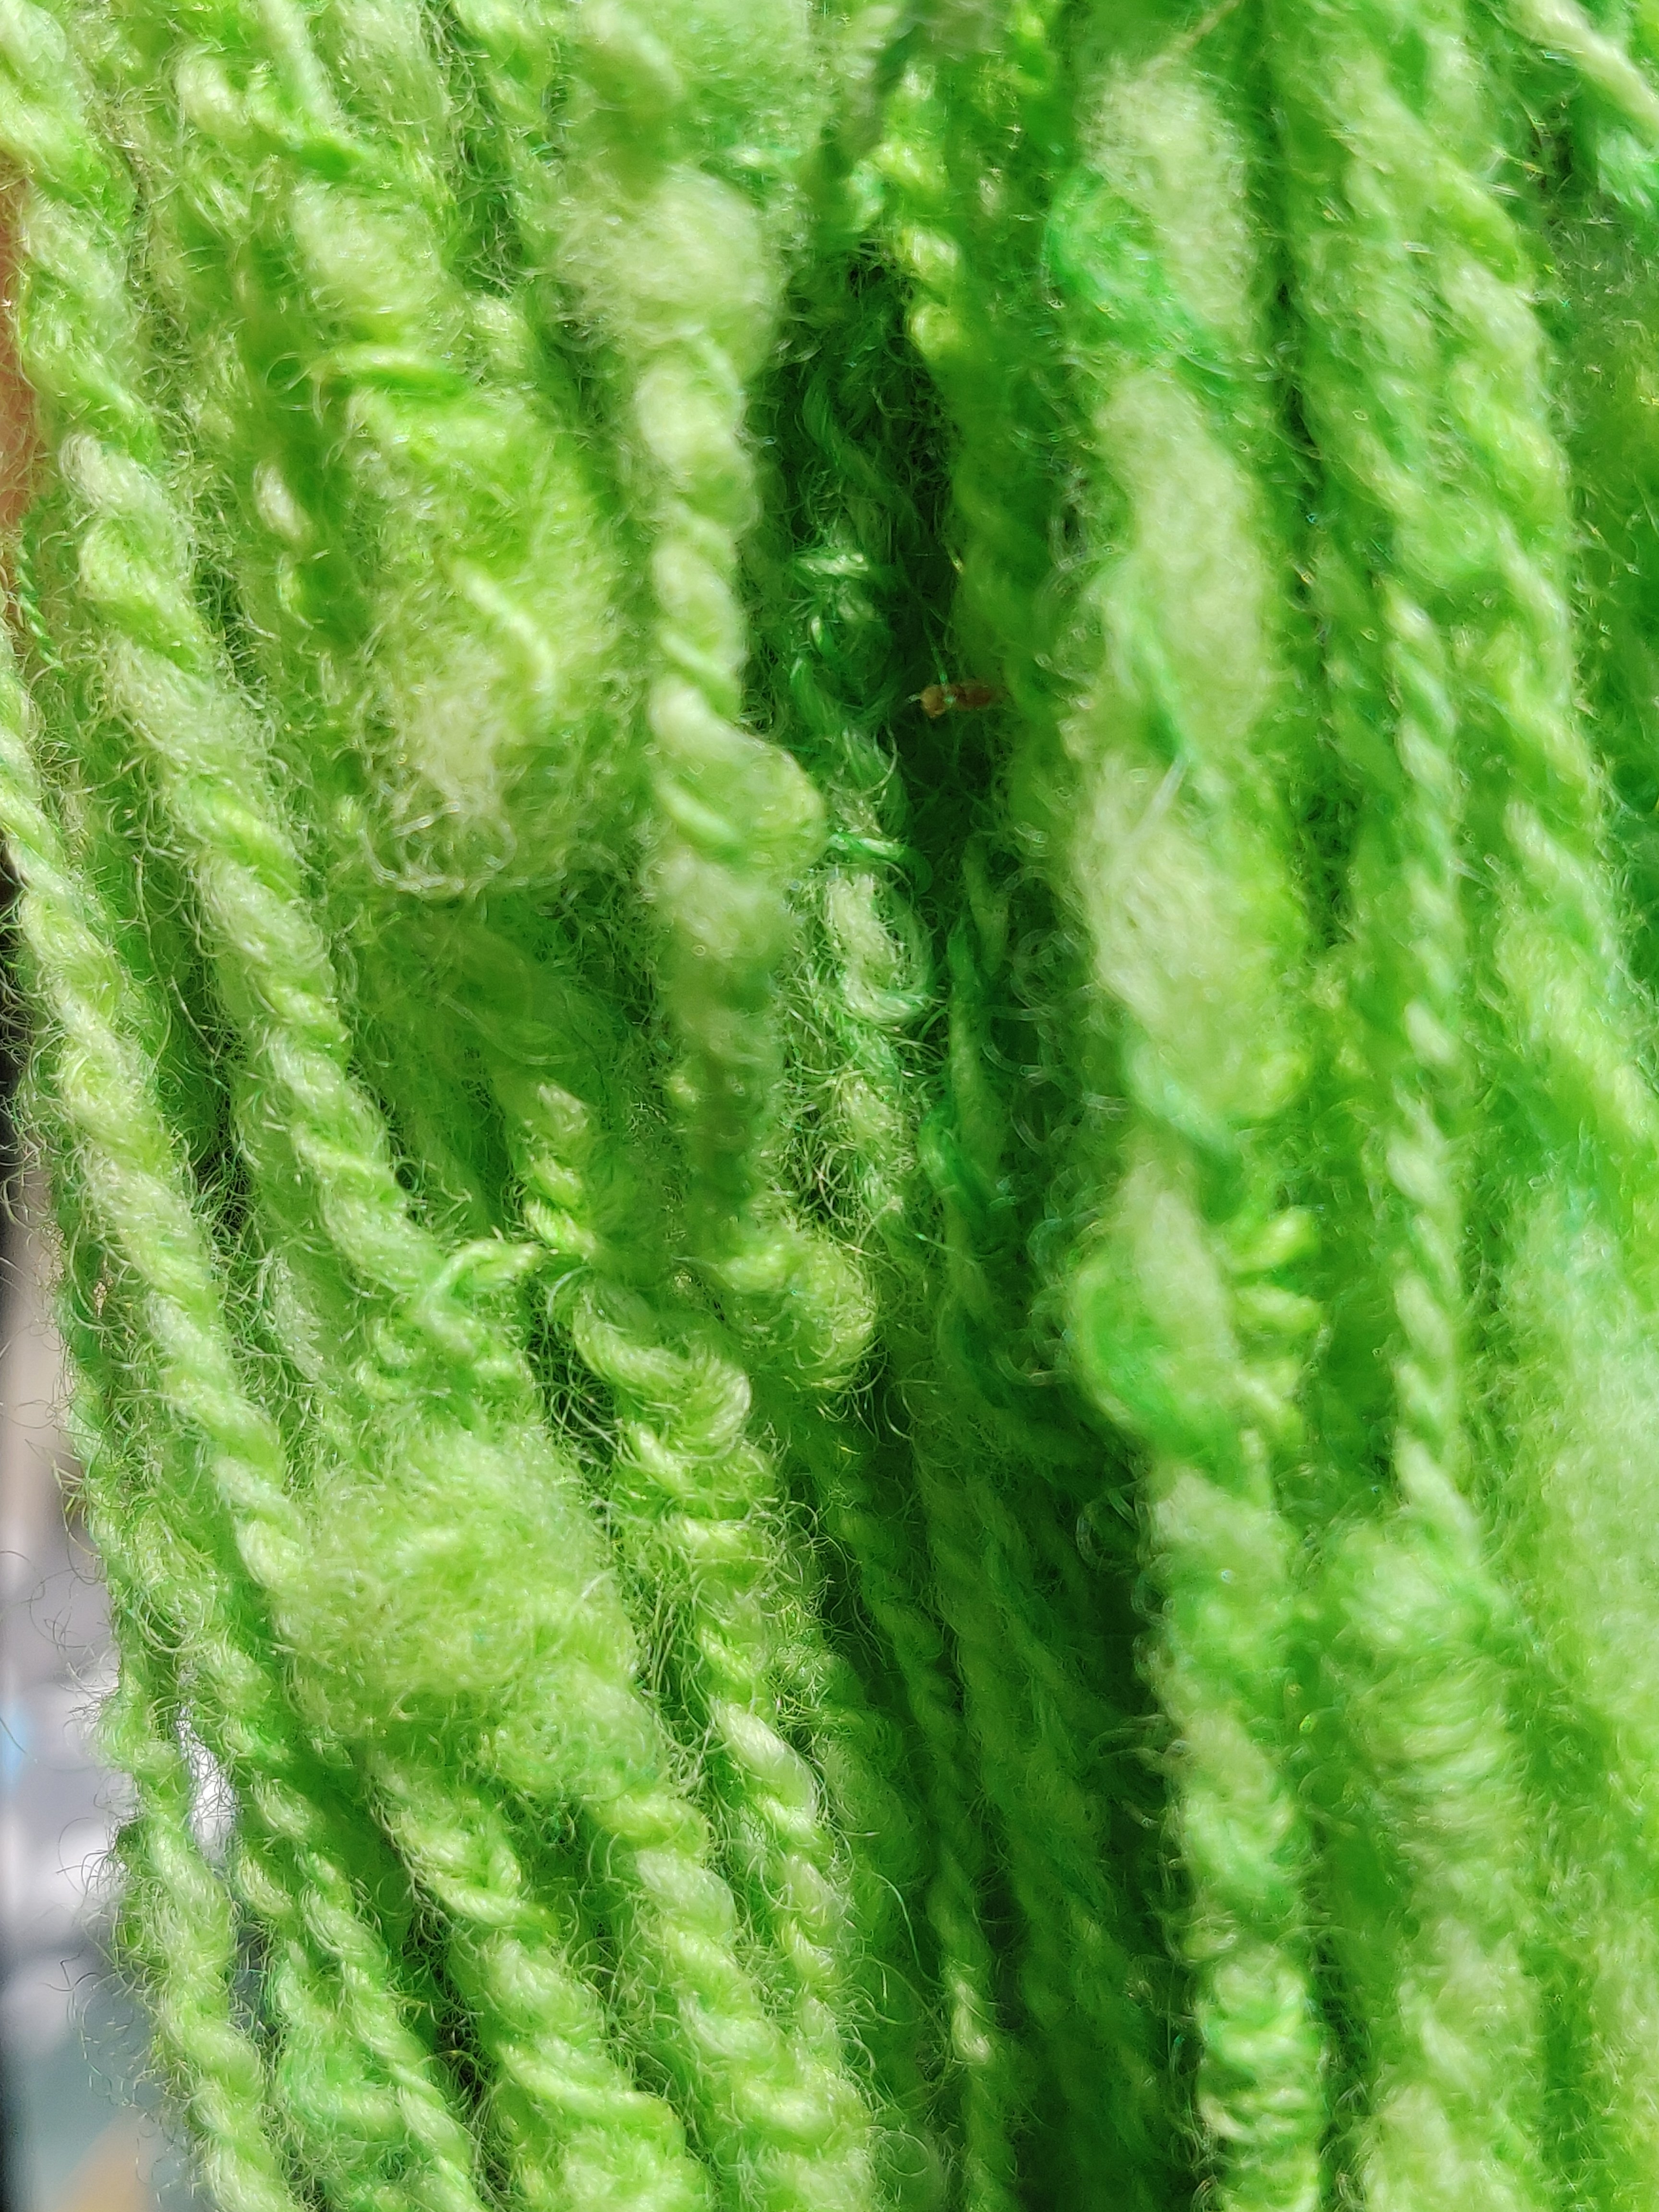
Today I wanted to dye some of my hand spun wool yarn a bright green. No natural dye I have would do this, and I didn’t have any green acid dye, (or any acid dyes at all), so I decided to use food colouring. I already knew that food colouring works as a fibre dye but did not realise that it was an acid dye, (thank you Google) so works best on wool, silk and other protein fibres that will dye with an acid dye. Acid dyes are not acid, but they require an acid such as vinegar or citric acid to attach themselves to the fibre.
Initially I’d intended to use liquid food dyes but discovered I have either thrown them out or someone had used them up, so had to resort to the paste colours I used to use for sugar flower modelling. These seemed to work fine and are quite intense, if a little harder to dissolve, (I had to squash some lumps against the side of the jug). I may use them again as they are just sitting in the cupboard at the moment.
So to prepare the yarn I soaked it in a mixture of one part vinegar to two parts water for about 30 minutes. This did two jobs at once, soaked the fibres to remove trapped air and added acidity. I could have added vinegar to the dyebath instead.
Meanwhile I put some water to heat on the stove and mixed the bright leafy green I wanted from my stash of food colouring dyes.
I mixed the food colouring paste with hot water in a small jug, and added a teaspoon of salt, (this helps to level the colour and increase its take-up), stirring them well until the liquid was clear, then added this to the pan of water that was warming on the stove.
When the dyebath was ready I removed the hank of wool from the vinegar and water soak, gently squeezing it to remove excess liquid, and immersed it in the dye. The temptation to stir the yarn into the dye bath is always with us, so I gently prodded it below the surface and walked away and left it. It took about 20 minutes of gentle simmering, turning the yarn very gently once, to achieve the colour I wanted.
Because I liked the colour so much I decided to dip a second hank quickly into the dyebath so I got very pale green and then, having rinse it to check the colour, I trailed half the hank into the dyebath again and let it stay in there until it became darker. This gave me a dip dyed, ombre yarn in tones of the same green.
Post-dyeing rinses brought the brightness down a little on both hanks, but overall I was pleased at how little colour came out. I rinsed quite hot; wool can take high heat and won’t felt, as long as you don’t agitate it or put it straight into cold water. The important thing is to have the rinsing water at a similar temperature to the dye bath. Wear gloves to protect your hands during these hot rinses. To save energy you can slowly decrease the temperatures through the rinses. Never let the tap run onto the wool or it is likely to felt.
Because it was a lovely day today I hung the hanks out in the garden to dry, but you can spin dry them as long as you put them inside a mesh laundry bag or a calico bag.
Both yarns were handspun with a bouclé effect. The dip dyed one took the colour less well partly because it was from a different fleece, and partly because it should really have had an additional scour before going into the vinegar soak.