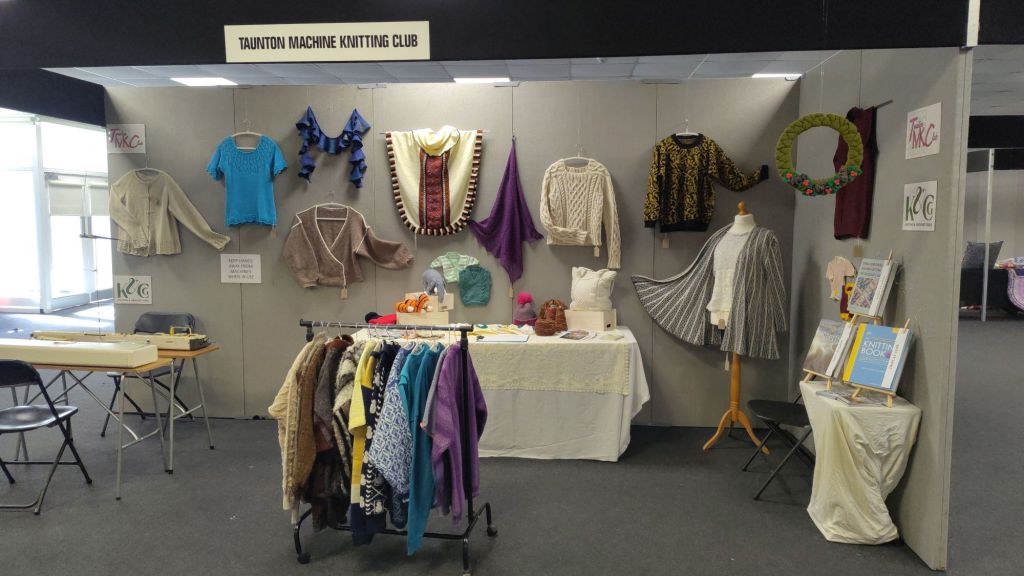
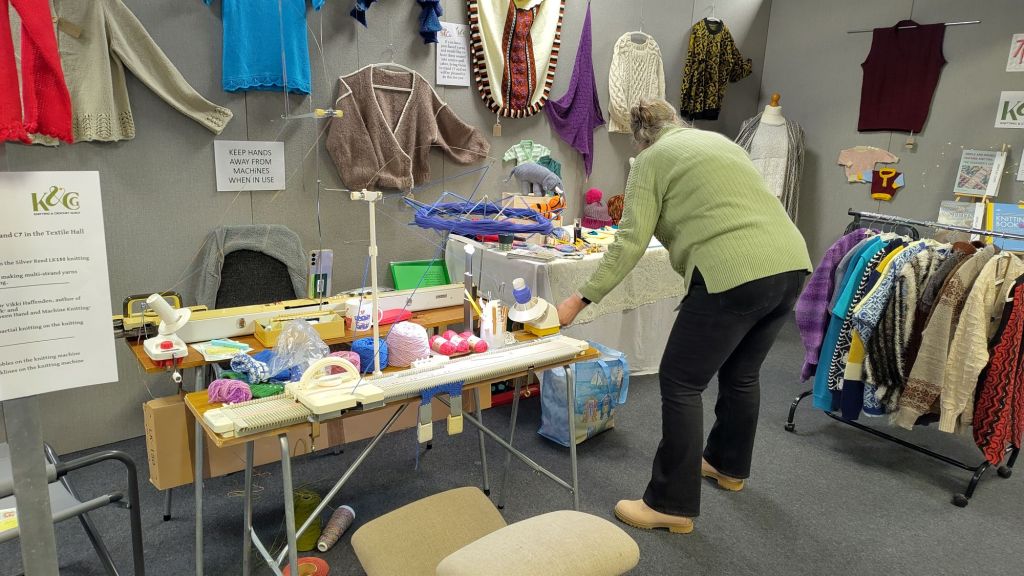
It’s been a busy day today setting up the Taunton Machine Knitting Club stand at Craft 4 Crafter’s exhibition in Exeter. The Club is pleased to have recently become a branch of The Knitting and Crochet Guild, making us part of the wider UK knitting community.
The display features work by most club members including lace, intarsia, knitweave and double jacquard. Throughout the three day exhibition members will be demonstrating different techniques such as cables, bobbles, shaping and short row knitting.
The display is finally ready, and I am not climbing a stepladder again today!
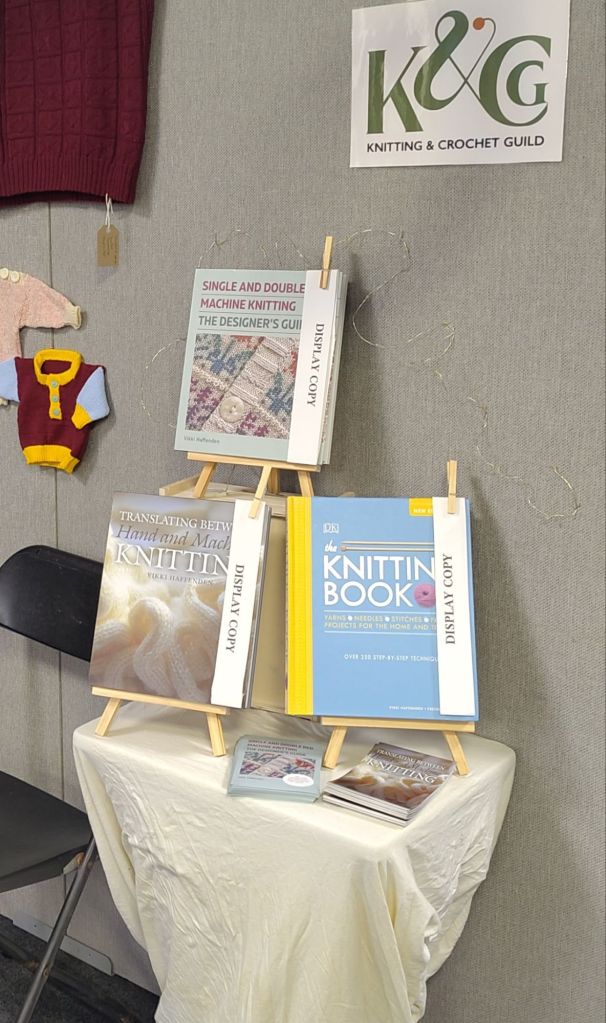
I will be giving a talk on Friday about my books, ‘The Knitting Book’, ‘Translating Between Hand and Machine Knitting’ and ‘Single and Double Bed Machine Knitting; the Designer’s Guide’.
The table will have to be large enough to fit four copies once my latest book, ‘The Machine Knitter’s Guide to Partial Knitting’ is published later this year.
Update
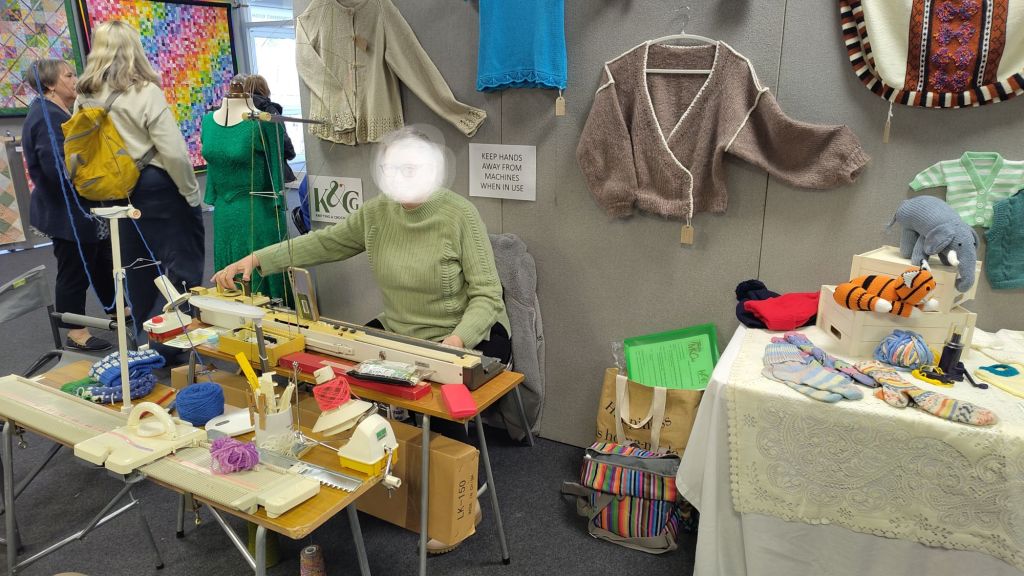
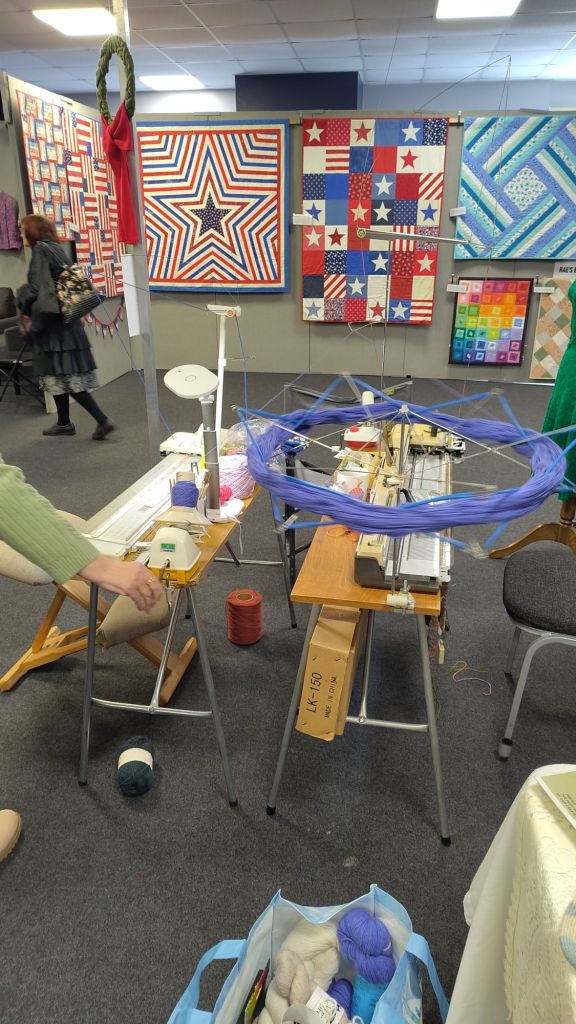
The show went really well. There was lots of interest in the club, machine knitting in general and the Knitting and Crochet Guild.
The machines were a great drawYarn winding for those who bought yarn in hanks
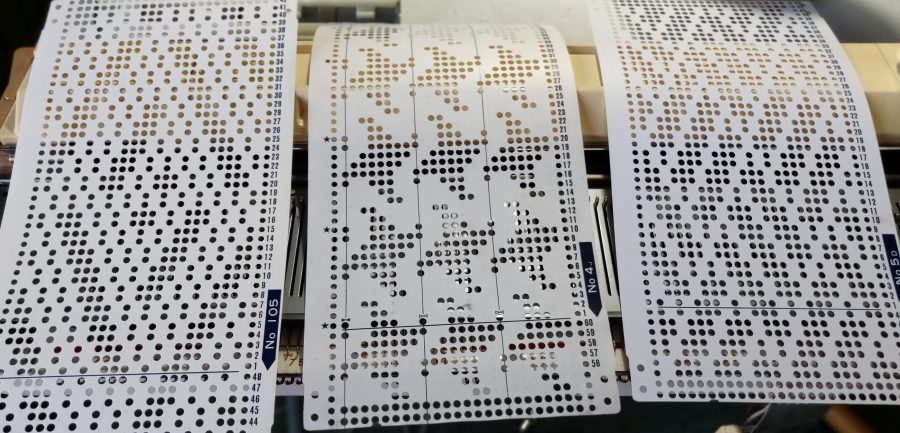
This is something I used to struggle with when first starting to machine knit, and to be honest, it still sometimes needs a bit of thinking before I get it right.
So I put some information together which I hope will be useful to others who find the holes and blanks a bit confusing. It also has some helpful ways to read what is actually being read by the card-reader, rather than what is visible above it.
Lets start with the fundamentals:
Knitmaster/Silver Reed (KM/SR) machines only knit pattern from the punchcard when the side levers are at the triangle and the pattern cam dial is set to the relevant stitch type; F, S, T etc.
Brother machines only knit pattern from the punchcard when the KC dial is set to KC, KCI or KCII, as appropriate to the machine, and when the relevant pattern cam buttons are pressed, MC, tuck, part etc…
However, on both makes the needle positions are the same
Pattern cam setting
Punched holes
Needle position
Blanks
Needle position
2-col-in-a-row
knit with 2nd colour
UWP
knit with MC
WP
tuck
knit
UWP
tuck
WP
slip/part
knit
UWP
slip
WP
On both Brother and KM/SR machines, the punchard line being selected is hidden inside the machine. Seven lines below on a Brother, and five below on a KM/SR.
Brother machines, both punchcard and electronic, pre-select needles before knitting the row. Therefore, the pattern can be interrogated by looking at the needle selection in conjunction with the needle positions listed above.
KM/SRpunchcard machines have a card reader with feelers. These are selected according to the punchcard pattern but the actual feeler action is hidden behind the carriage. The pattern line can be manually interrogated by locking the punchcard.
Its been quite a few years since I visited the page on this website which is about , ‘things I have been interviewed for’. It made me realise how time flies, and that I have not grown any younger! Things have moved on since then, but I see that the same issues are still out there. To name one, its clothing sizing. I see that AI might be the solution, excuse my guffaws.
A company called, ‘Fit Collective’ mentioned in this article on the BBC website sound like they might be working towards some solutions, but the trouble is, we are all different. Not just in our physical dimensions, but in the way we want our clothing to fit. That is a style issue, not a cutting and sewing issue.
I see so many women wearing the incorrect size for their waist circumference, squashing themselves into ‘muffin tops’ because they want to wear the size they aspire to, but the manufacturer/designer/buyer whatever, deems that their waist should be a particular circumference in comparison to that of their hips, (or even bust!). I feel for them, because I can’t fit into a size 14 with a non-elastic waist, but am a size 14 in most other places, not that that is a true designation anyway.
A pair of main-store M&S trousers I tried a few months ago had a totally different waist to hip ratio to a similar pair in Per Una, so what does that make me? If I went a size up in either, the bum area hung loose, the hips looked weird and a bit ‘jodhpury’, and the Per Una ones were still too tight on the waist. So I left them on the rail and went home and got my sewing machine out.
Ah, ‘mummy jeans’, might be the answer, but once again the waist to hip ratio is nearly always wrong for me. I have always had a big waist compared to hips and bust, and that is not uncommon. Others might have a smaller than average waist to hip ratio ,but not many women are the ‘perfect’ shape.
Have a read of the article linked to below and see if we have progressed much since 2017. I also ask you to consider the vast amounts of irreplaceable resources being gobbled up by AI. Is the application of AI really going to make us happier with our clothing fit? Isn’t more about how we see ourselves, and how we feel comfortable, something that is not quantifiable en masse, and is so, so subjective.
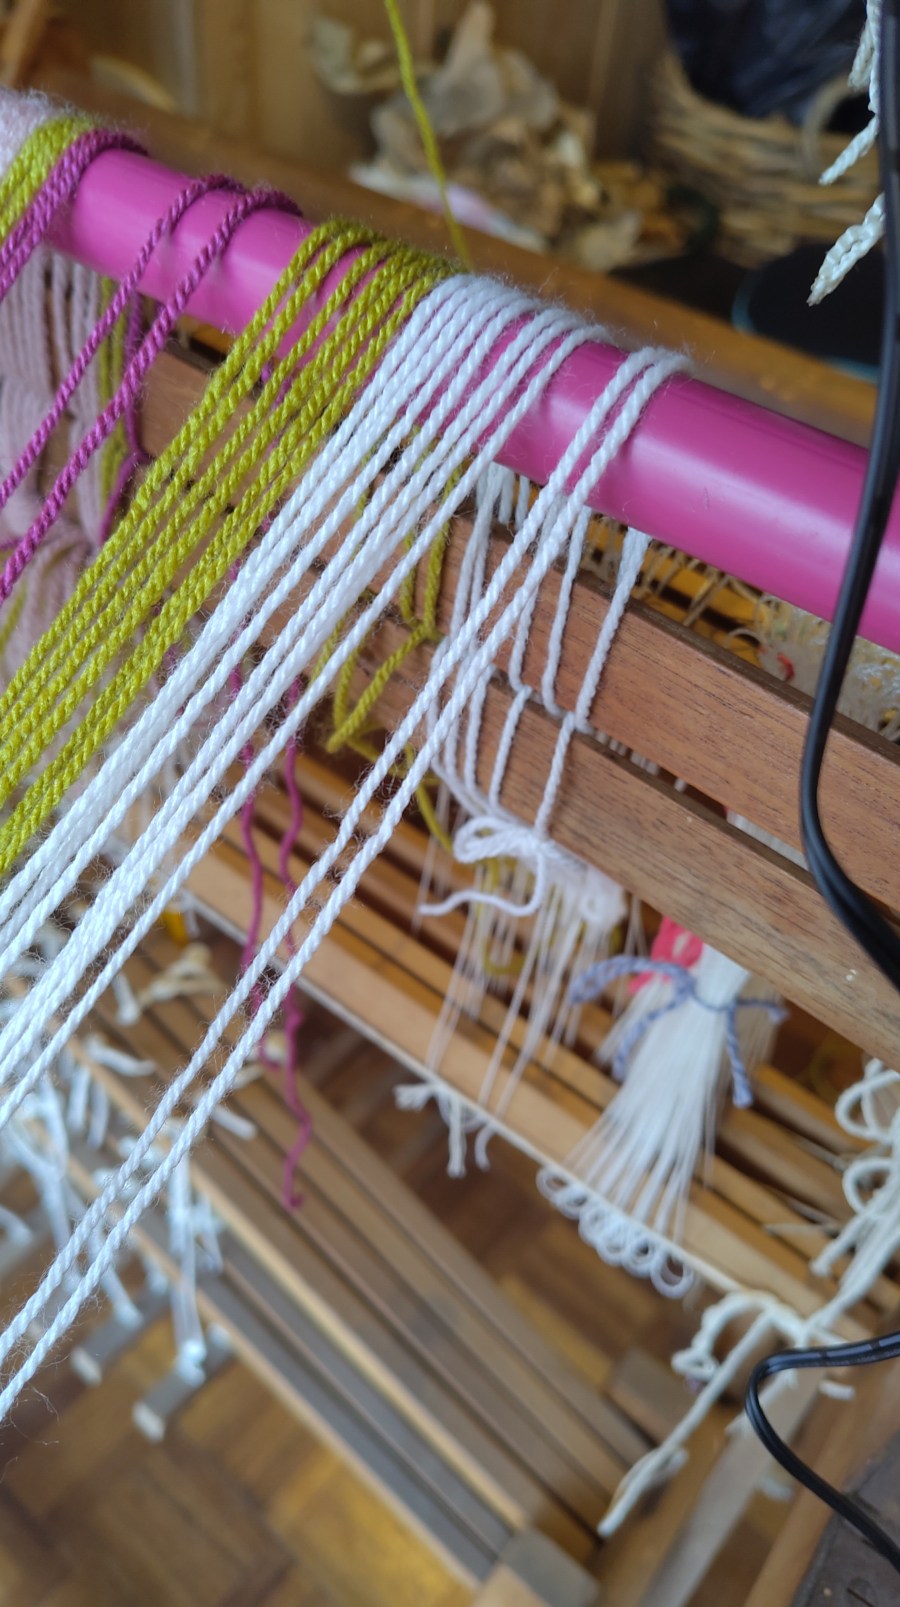
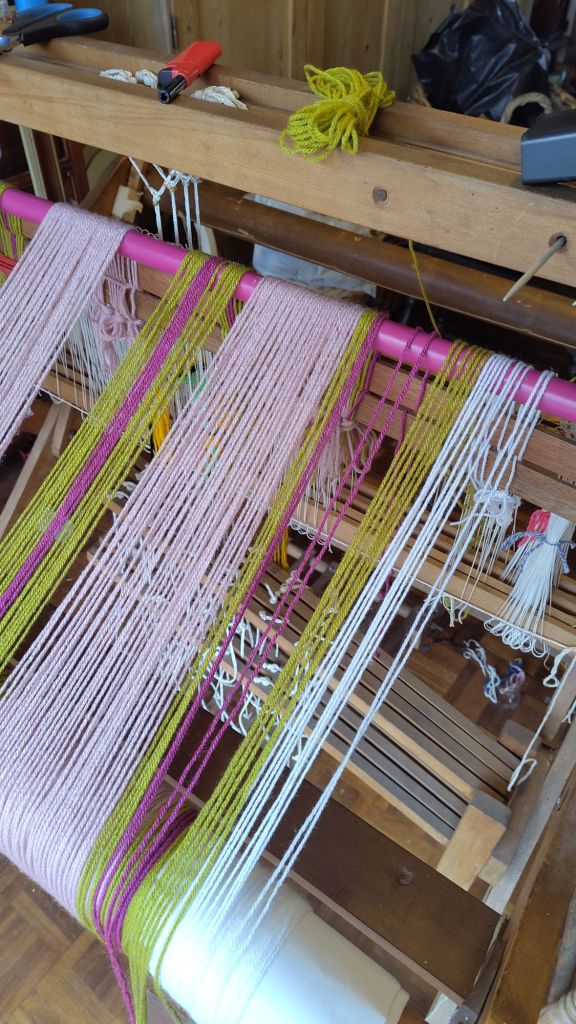
Its raining the proverbial cats and dogs here in Somerset, so it’s an afternoon indoors. I am threading up the warp for a baby blanket on my countermarche loom. Its only taken me 3 months to get this far!
Warping back to front the Peggy Osterkamp way
With the last slice of Christmas cake and a cup of tea at my side it’s a pretty nice afternoon inside.
Cake on a levitating plate
Of course that was then, and this is now. Somehow I have miscounted heddles and got in a right muddle. Its not such a lovely afternoon after all…
Update
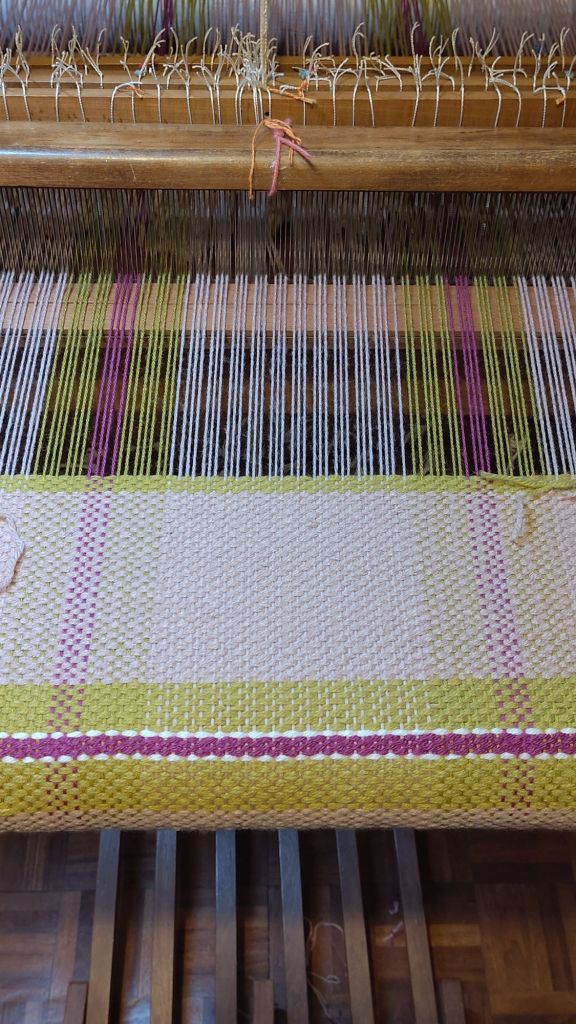
I am now 50cm into the blanket! How has it taken me this long you might ask. Well it took me ages to fine tune it, because I had some odd threads in my warp that I couldn’t get to tension right.
I have deliberately missed out the edges as they are a little bit messy, but you get the drift.
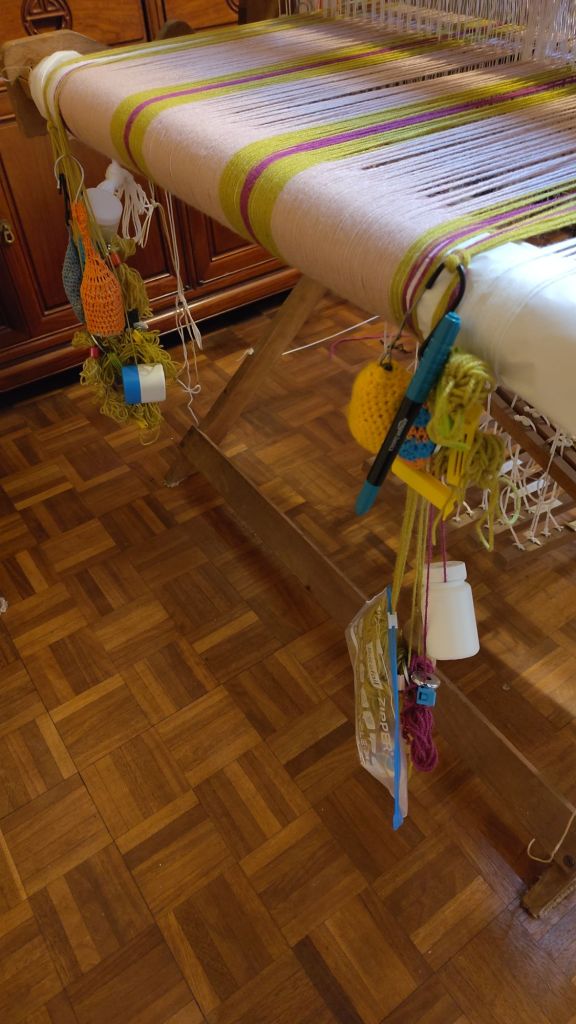
That’s sorted now I think at least for a while. The back of my loom looks like a right mess.
But seems to be holding now. I took the temple off to take the photograph, but it’s use is helping me keep my width, because one edge is still a bit wonky. My solution to that will probably be to bind it with ribbon as I did for my children’S blankets.
😂 what can I say? I’m particularly proud of the felt pen and the medicine bottles holding all the threads down.
I’m using a double thread as the weft, not quite sure why after all this time since I started, but that was what I sampled with and it worked out OK. Part of the problem was I’ve got an 8 epi reed and I thought this double knitting weight yarn would work at 8 epi. However, I’ve had to space it out further to 6 epi, because it was too bulky, but then it looked a bit thin and weedy so I decided to use a double thread in the weft.
This double thread caused me problems because it was really fiddly to use two shuttles and I found putting two ends onto the bobbin of a boat shuttle meant I only got a tiny amount woven before the bobbin ran out. I have used stick shuttles for the contrast colours, but I really wanted to weave the main pink weft with a boat shuttle because it’s more efficient as I have a shuttle race on the reed.
I was gifted a Toika double shuttle for Christmas, and have not yet had the chance to practice with it but this seemed the obvious tool to use. As with everything it takes a bit of practice and I ended up with different lengths on the bobbins and the bobbins unwinding at different speeds. A tip I remembered was to twist the threads at the end so I began twisting the shuttle, and that helps. Also I learned to stop both bobbins with my fingers in an overhang catch after sending it across.
However, I was still finding that the bobbins ran out quickly and inconsistently. I was using homemade paper ones, but didn’t find I could get any more onto a cardboard quill , (and most of those I are too big for the double shuttle anyway and I don’t want to cut them down as they fit other shuttles.
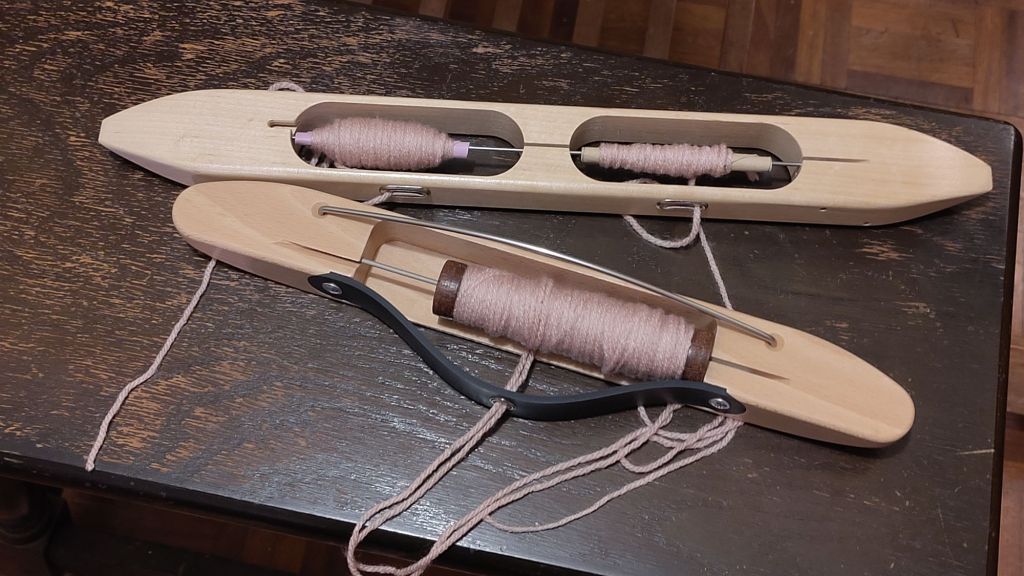
Back to the drawing board. I unearthed my Louet Flying Dutchman shuttle and found some old wooden bobbins that I bought at a boot sale which have always been too long for any of my bobbins- but which I now find fit the Dutchman really well. This time I double wound the threads very carefully onto the wooden bobbins, running them through tensions to equalise them. This has become my happy place and I will probably weave the rest of the pink using the Flying Dutchman and twisting at each end.
I will add another picture after my next 50 centimeters.
Toika double shuttle at the back and the Louet Flying Dutchman at the front
On Monday I had the pleasure of talking to Techknitters Machine Knitting Club in Chicago about my book ‘Single and Double Bed Machine Knitting; the Designer’s Guide’. Although this was published in 2024 the UK, it was not published in the USA until 2025 and I was due to talk to the group in December of that year. Moving house and having a lot of building work in progress meant that I couldn’t manage an online talk at that time, so we rescheduled. The new date came around quickly, doesn’t time fly?
Although several members indicated that they already have the book, I decided to discuss the overall content of book for those who do not yet have a copy. During this I explained my thinking behind the plan of the book and the main intention behind my writing. Following on to this, I concentrated on snippets from each chapter.
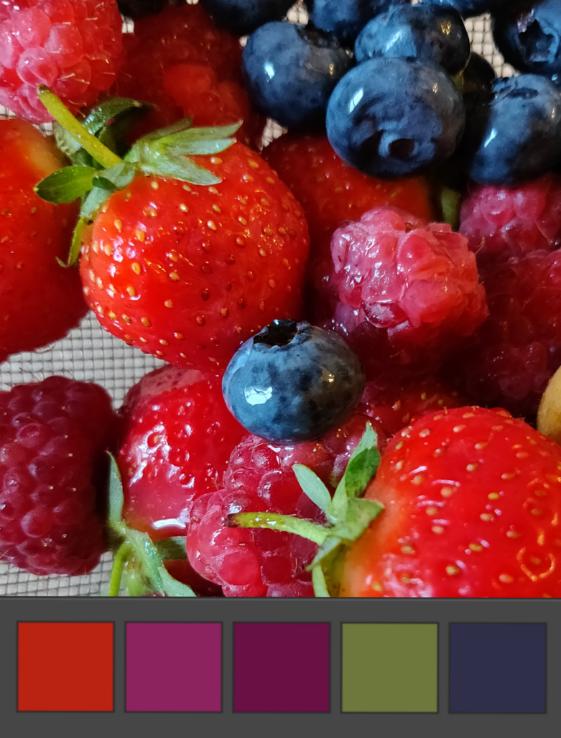
One of the reviews of the book mentioned that it is unusual to find design development and process included in a knitting book, so I took this comment as the focus of the rest of my talk working with material from the chapters, ‘Designing with Colour’ and ‘Finding Inspiration and Designing Pattern’.
This section of the talk started by looking at extracting colour inspiration from one of the images used in the book, and then reviewing a sample from the book that had been designed using these colours to work stripes. The practical part of the talk was about selecting yarns, designing another stripe, and revising and developing the design. Each step was shown and design rationales discussed. The sample was knitted and a finished and steamed version was reviewed to which the group gave feedback on how it might be improved/adapted. All in all it was an enjoyable experience.
I will be talking to the group again in August about my latest book, ‘The Machine Knitter’s Guide to Partial Knitting; Seamless Patter, Shape and Form’ which is due to be published in Spring 2026 by Crowood Press.
I planned this project of a collapsible fleece-drying rack over a year ago. Setting is always difficult as it requires a lot of space and works best if air can circulate to as much of the fibre as possible. I toyed with the idea of folding herb drying racks, but the ones I found were small, flimsy and expensive. I’ve seen others use those plastic crates with open mesh sides, but couldn’t find any of those locally, plus they take up space when not in use.
So I decided to design and make my own. My brief was:
freestanding
reasonably lightweight and portable
widely spaced shelves
a large surface area so that the fleece could be opened up to speed drying
collapsible so could be folded down and packed into a bag when not in use
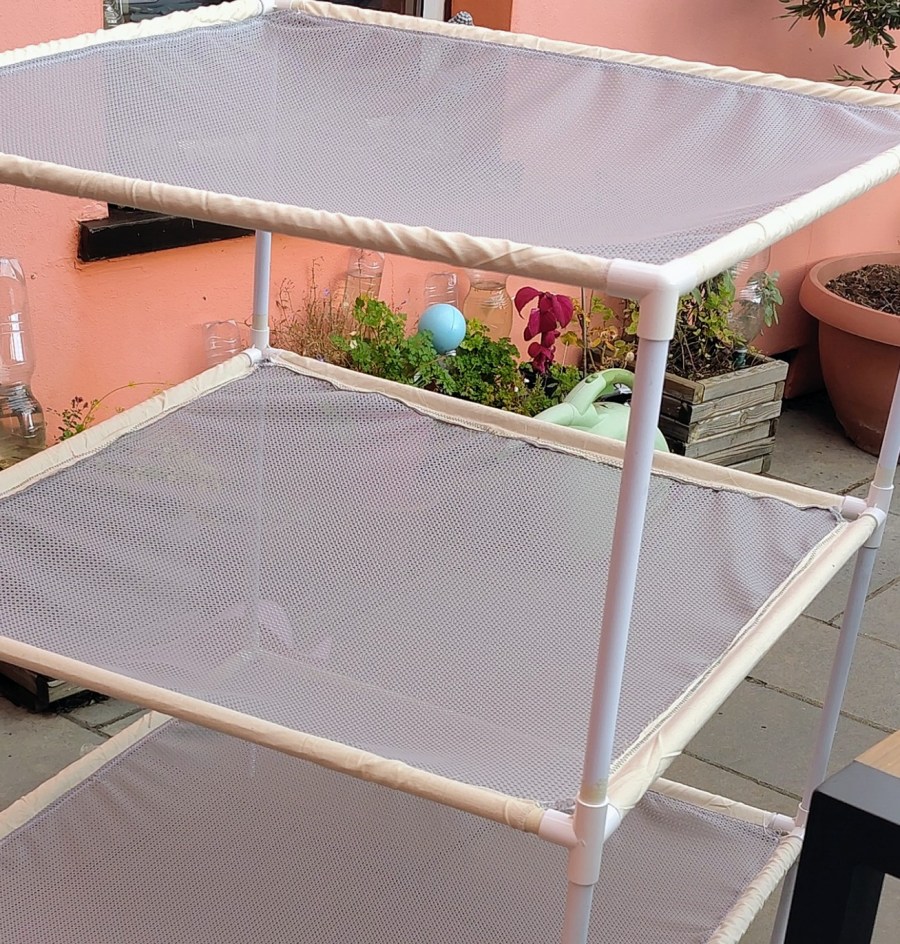
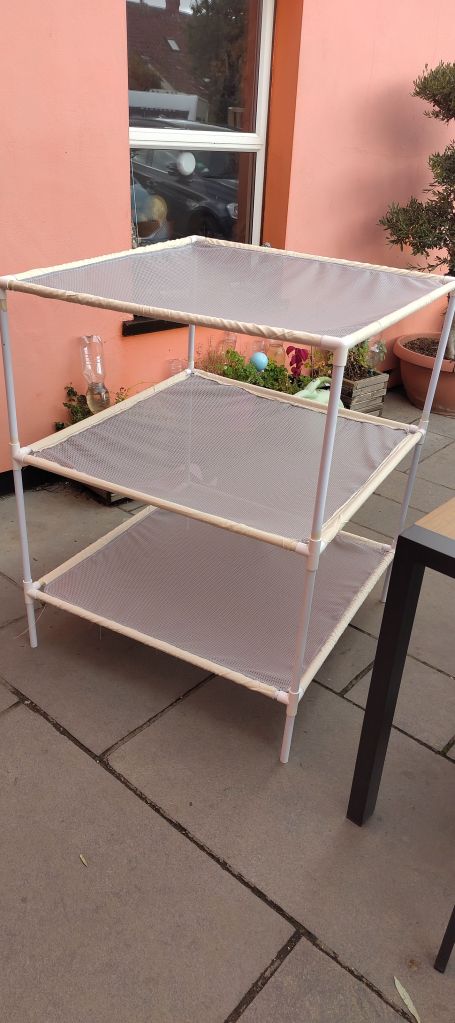
Designing the rack and working out the specs took some thought. I ended up with a plan for a three shelf rack, each shelf being approximately 80cm square. I intended to use plastic pipe and elbow joints for the frame and mesh fabric for the shelves. Mesh fabric would allow air to circulate, and if made from synthetic fibre, would dry fast itself and hopefully reduce the likelihood of mould whilst packed away. Each of the mesh shelves would have sleeves sewn along all four sides through which the pipes of the frame would be inserted. Then the pipes would be connected via the 3 and 4-way joints, putting the shelf under tension. In this way the shelves would stabilise the whole structure.
I already had some plastic piping left over from making a collapsible niddy-noddy, but bought the rest from Wickes, then cut it all into the correct lengths. I borrowed a plastic pipe cutter to do this, which gave nice neat and smooth cuts which would facilitate threading the pipe into the shelf pockets. The 3 and 4-way joints came from ebay, as I couldn’t find them locally. However, if you decided to make one of the racks, do try a local plumbing store if you have one first, before going online.
So I had the frame and it fitted together, but then winter came so fleece washing ceased and access to my sewing machine was limited by building work. But I went ahead and ordered 3m of fine mesh fabric for the shelves in anticipation of getting started when I could.
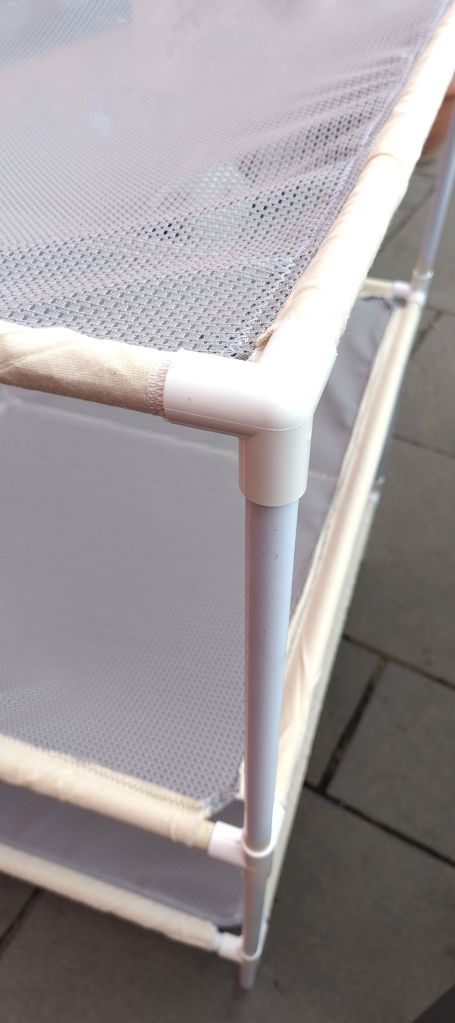
Sadly, when I finally got to sewing the shelves, the mesh proved to be too fine, overstretchy and delicate, so it was back to the drawing board. This time around I sourced a much sturdier, low-stretch mesh fabric on eBay. It was pricier, but fitted the bill really well. Luckily I found some seconds of the danger fabric, which helped keep the cost down. I also decided to use Calico I already had to sew smooth, non- stretchy sleeves for the pipes so that it would make it much easier to slide the shelves on and off the pipes. The sleeves would also make a stable attachment to the between shelf and pipe, and hopefully reduce stretching and drooping of the central, mesh shelf. As usual, cutting out and sewing took some time because I was doing it around other things.
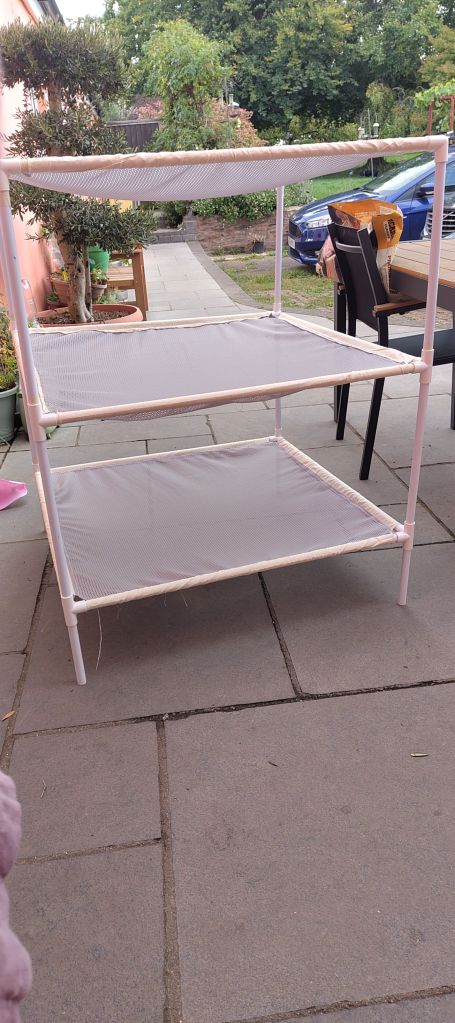
Finally it all came together. Probably too late to test on a fleece this year, but it might work in the greenhouse if necessary. I hope the shelves will not droop under a layer of damp fleece. I spin it after washing, so hopefully it will support the weight.
I guess it would also work for herb drying.
If you would like the instructions for making this fleece drying rack I will add them in a few weeks time. Please pop back to this page to download the instructions.
The finished rack The top, 3-way jointsMiddle 4-way jointsLegs are interchangeable, so the shorter ones could go in the middle if desired
I posted recently about solar dying wool with mulberries and I thought I’d now have a go dying some commercially spun cotton that I have already, and conveniently, put up into hanks. There are six 50g hanks, so I am hoping for 300g of lovely coloured cotton to play with.
I don’t dye cotton often, but I do know that it requires tannin as a mordant. Well, being a bit disorganized, if I’ve got any commercial tannin mordant I can’t find, so it was a relief when after a quick look in Jenny Dean’s Colours from Nature, I found that bramble leaves and twigs contain tannin. A bit more research on the internet suggests that mulberry leaves also contain tannin. It looks like this is going to be a multi-day effort.
DAY 1
One thing we have in plenty in the garden and surrounding fields is brambles and of course we have a mulberry tree, so I went on a little foraging trip. I collected a basket full of mulberry leaves and brambles which I chopped up and boiled for an hour as instructed in the book.
DAY 2
I left these to soak overnight and have just strained the liquor off into a pan and slightly reheated this.
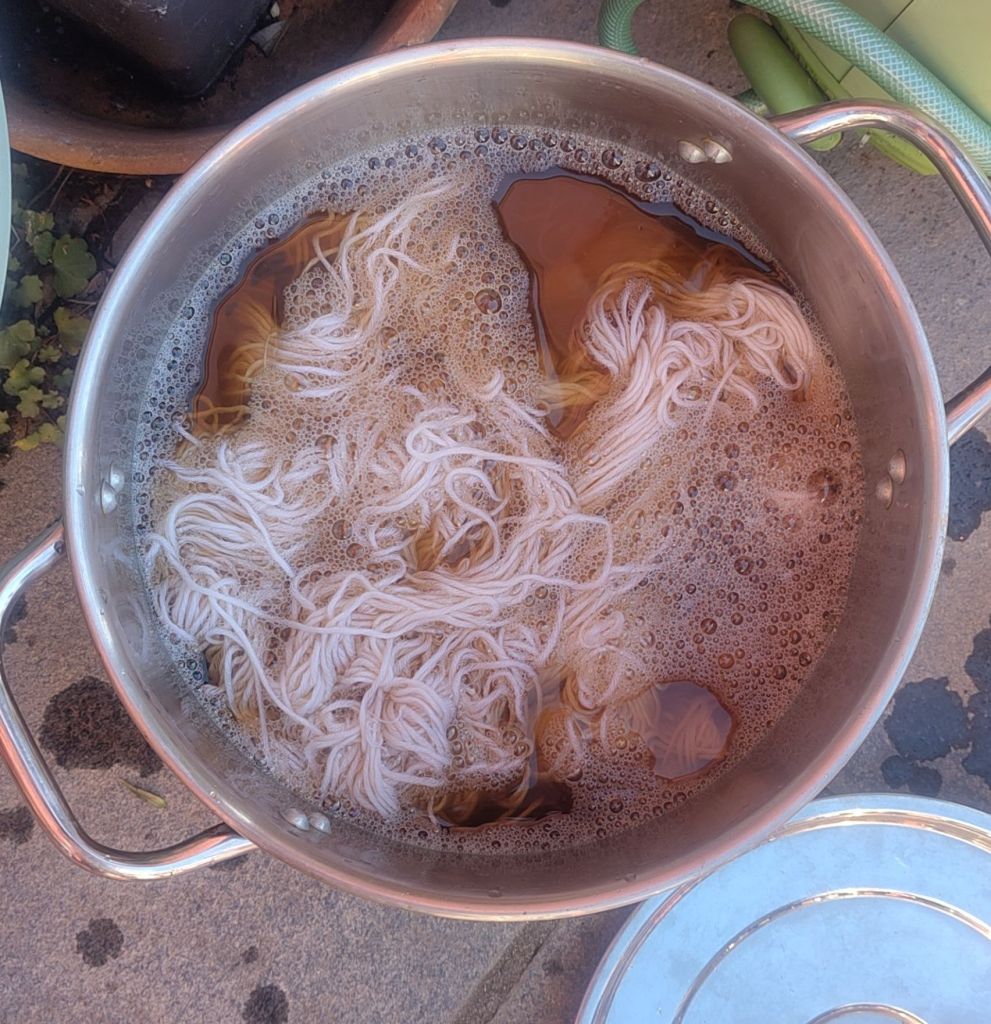
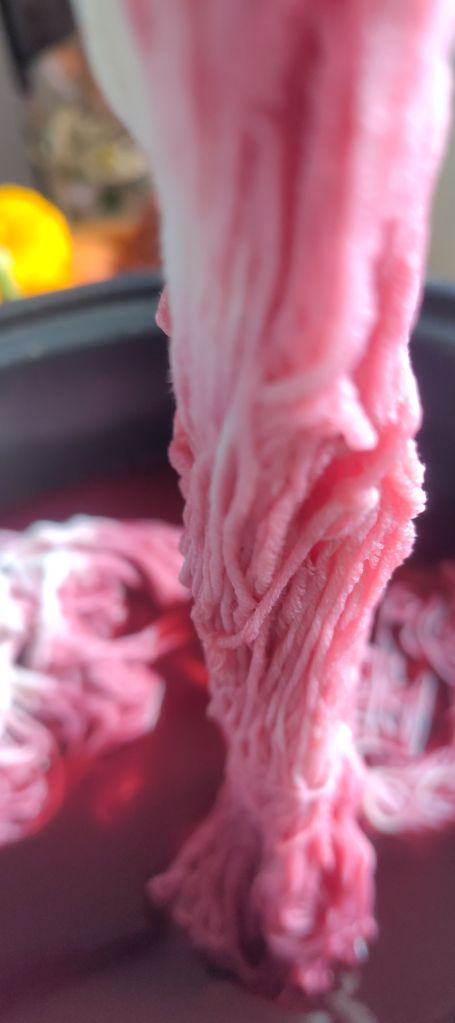
I’ve just submerged the damp cotton hanks in the tannin liquid, and will leave this for 24 hours for the cotton to absorb the tannin. According to Jenny Dean there is a likelihood this will stain my white cotton and is bleached white slightly yellow, so we will see.
Hanks of cotton soaking in the home made tannin solution
Hopefully the mulberry dye will accommodate this and give me a nice color.
DAY 3
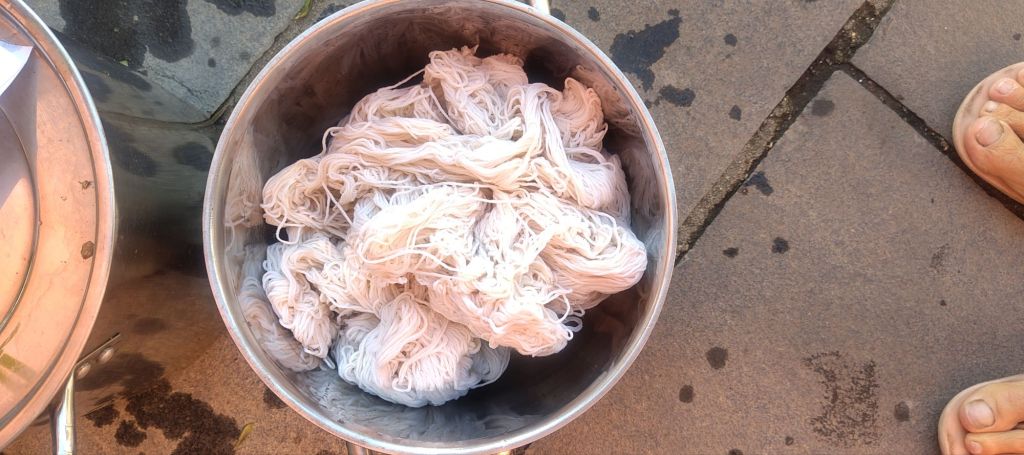
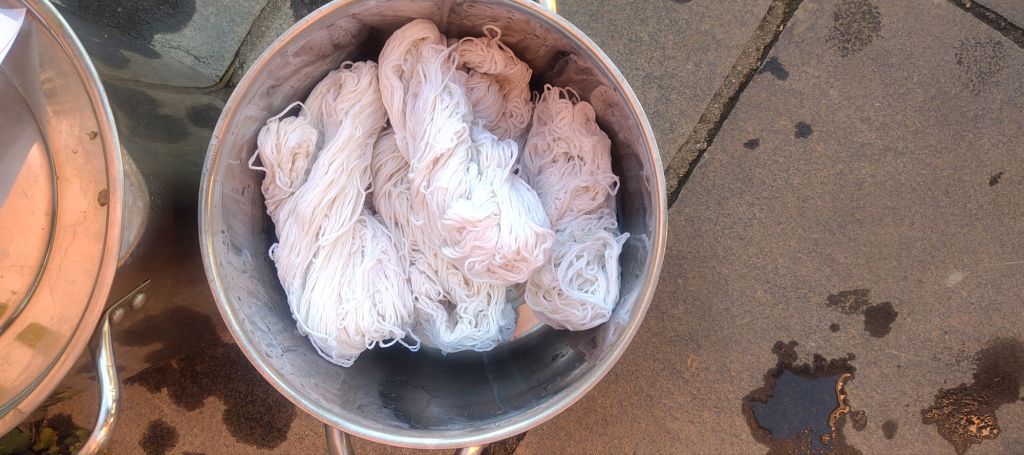
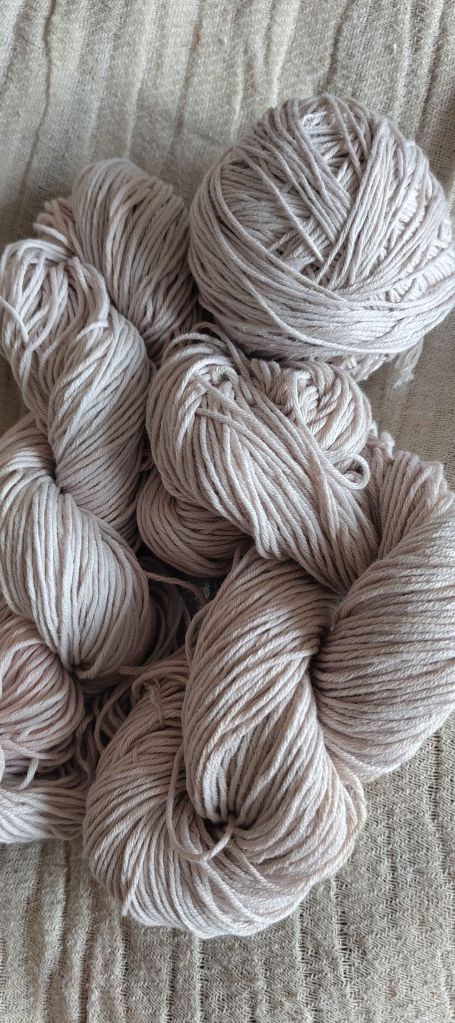
The cotton yarn after being soaked in tannin solution, a slight cream cast
After the tannin soak the cotton had taken on a slight creamy colour, not too bad at all. Maybe it didn’t take the tannin?
Straining the cooked and soaked mulberries to release the dye colour
I had prepared 1.5kg of mushy mulberries that weren’t really edible by cooking them up in some water and leaving them to soak and give up their colour overnight. I thought I was ready to get in with the dyeing, but luckily at this point I went back to Jenny’s book. Only then did I realised that the cotton needed to be soaked in an alum mordant after the tannin. How did I miss this before?
The recommended amount is 4 tsp alum and 1.5 tsp of washing soda per 100g of fibre. Dissolve the alum and soda in enough water to cover the fibre, and bring to a simmer. Then leave it to soak and cool for 12-24 hours.
DAY 4
NOW I can put the hanks in the dye..
This afternoon I took the yarn out and rinsed it. Then strained the mulberry liqour and put it in the old slow cooker I use for dyeing. I added some salt (not sure why but seemed to remember it helps the dye take) and then added enough water so that the liquid would cover the fibre. After that I immersed the yarn in the dye.
Fingers crossed it will work.
First dipped hank… Now it needs to sit in the dye overnight…but we all know it’s probably going to wash out…
Well, the hanks came out looking lovely, but as predicted, the colour mostly washed out. It’s not a bad colour, it’s very a pale, lilacy grey, just not the pink I hoped for.
As mentioned in my previous post we have a lot of fruit in the garden, a large amount of which is from a prolific Mulberry tree. I’ve made jam, jelly, syrup, sauce, dried them and made fruit leathers. Plus Ross is making wine from three kilos of them.
One of the problems with mulberries is they have big pips and a stalk that is difficult to get out. Many of the things I’ve made have involved cooking the fruit up and then putting it through a Mouli or nylon sieve to get the pulp and juice and then working with that. As we have a lot of apples I use the windfalls to make pectin and sometimes add a few apples to give some body to the pulp.
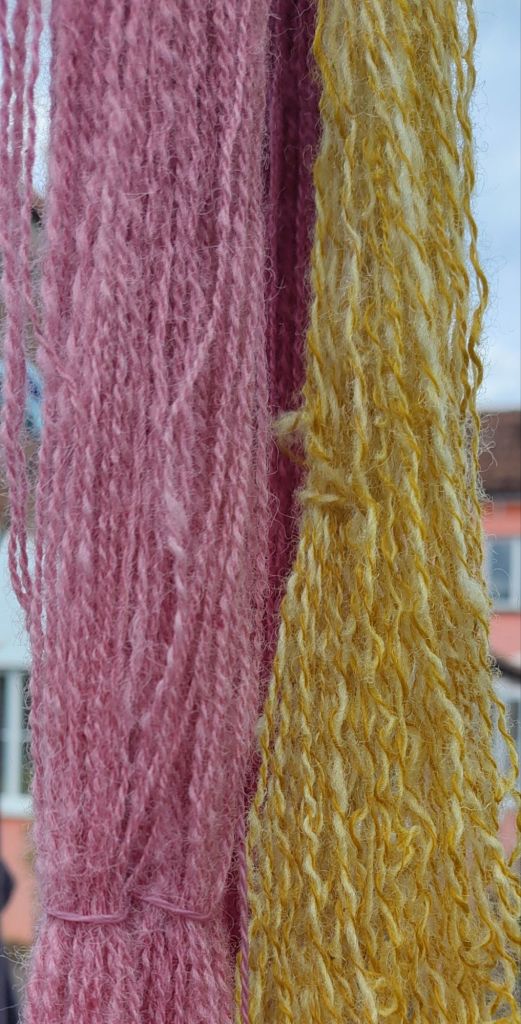
Of course you end up with a lot of mulberry mush with pips and stalks in it. However this still retains the really strong color, and staining ability, that the complete mulberries have. So I decided to do some dying with the pulp. Last year I solar dyed with raspberries, which gave me a gentle pink, so this year I worked with the mulberry pulp in a similar manner. I use my own handspun yarn and solar dying with the mulberry pulp, which gave a pretty, pale crimson. I boiled up the mulberry mush again with a bit more water and added any berries that hadn’t been good enough to go into the jam. When I thought I got as much color into the liquid that I was going to get I strained the liquid off through a fine sieve, being careful not to squash the pulp through as well. The liquid went into a big jar with 1% alum solution, some salt and a dash of white vinegar. After a good stir the dye jar was ready.
Before I started all this I had put a 100g hank of handspun wool yarn to soak in hot water with washing up liquid and a little bit of soda. Although the yarn had been washed already, this extra soak and the soda in particular, removed any remaining oil, ready for it to take the dye. The yarn had been spun and plied 2ply from a Lleyn fleece.
After rinsing and removing extra water from the yarn I put it damp into the dye jar, put the lid on and gave it a good shake to distribute the dye around you the yarn. My plan was to shake the jar every day whilst it sat in the sun for a week to ten days, but I forgot so the hank is a slightly lighter colour one end, which is pretty but not a solid color I had intended.
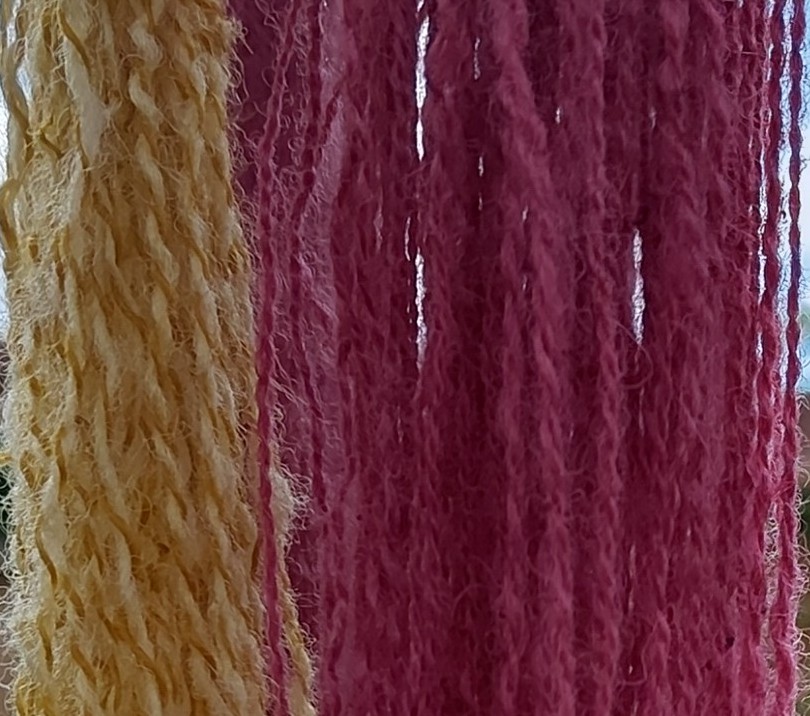
I follow the same process with marigold petals that I’d gathered when deadheading the marigolds I’d grown this summer. These had been left to dry and were cooked up and strained in the same way as the mulberries. After removing this yarn, which was only a small hank, from the dye jar I found that one of the singles had taken the color much better than the other. This is because the 2 ply yarn on the bank was plied from two different fleece singles that were on odd bobbins, and I don’t remember which forever either were from. So an interesting dye experiment, but lacking the control of knowing the fleece type.
On the left is the mulberry and on the right is the marigold dyed yarn.
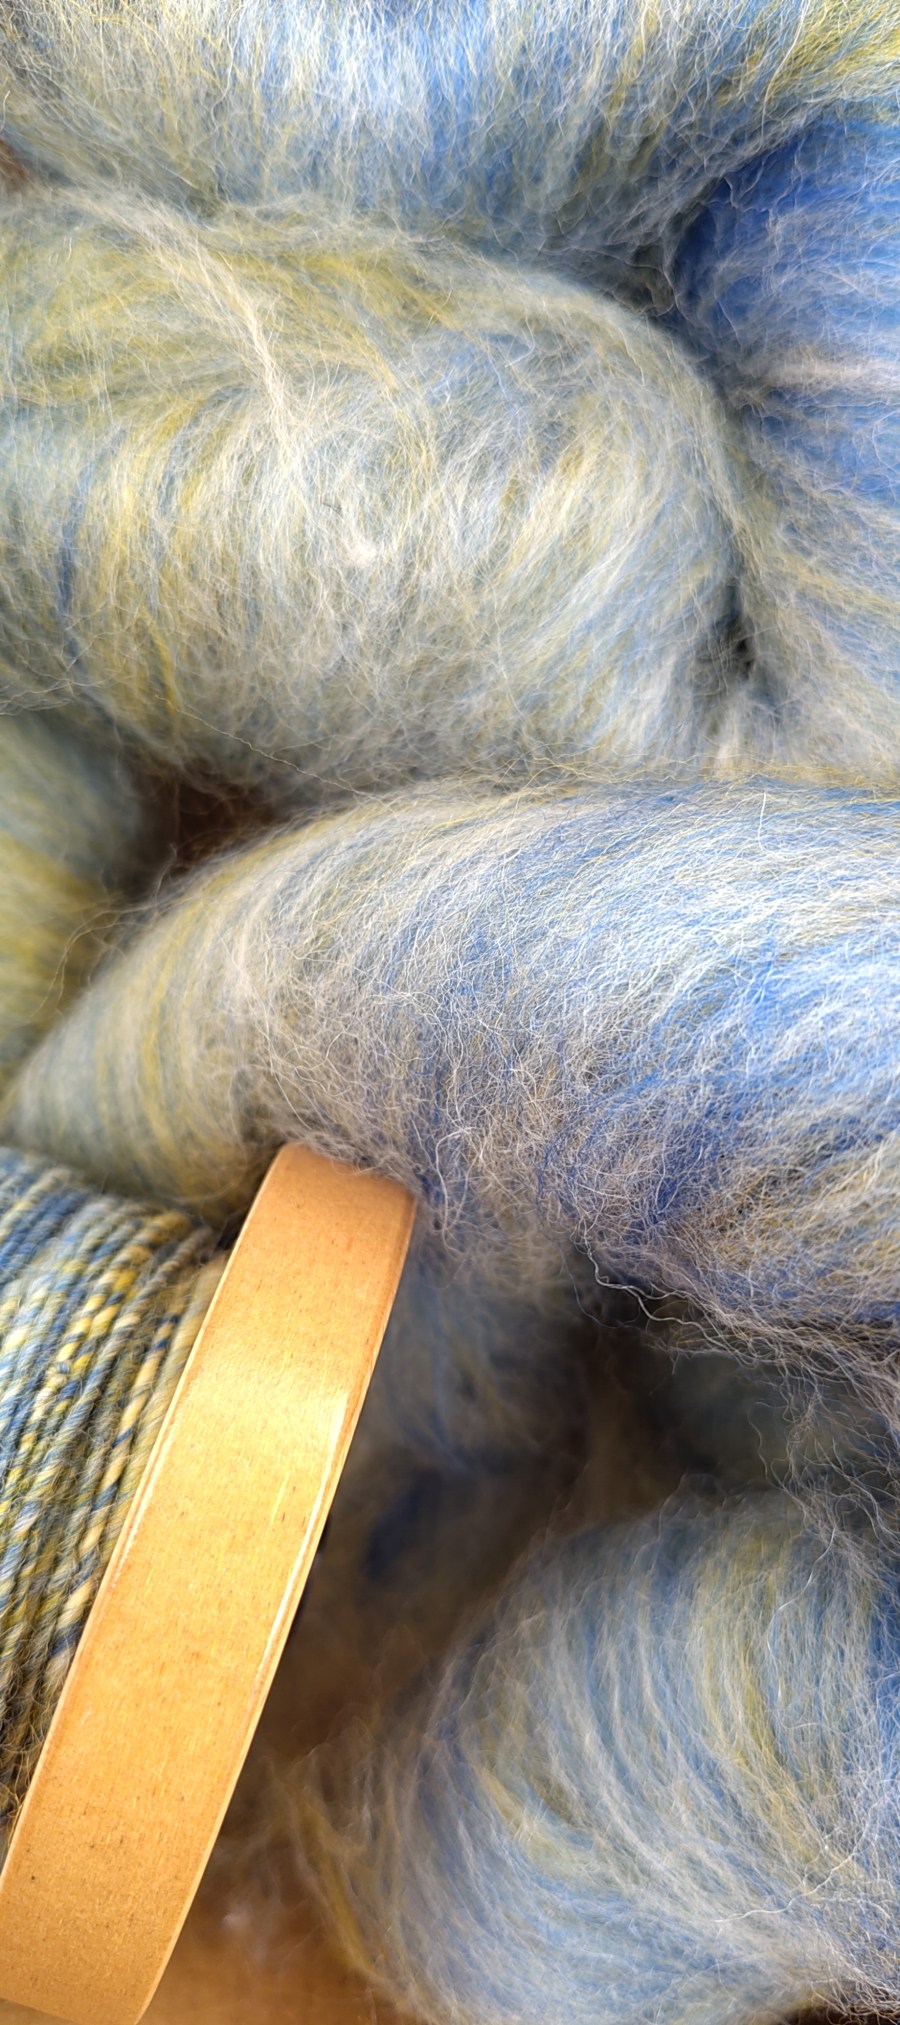
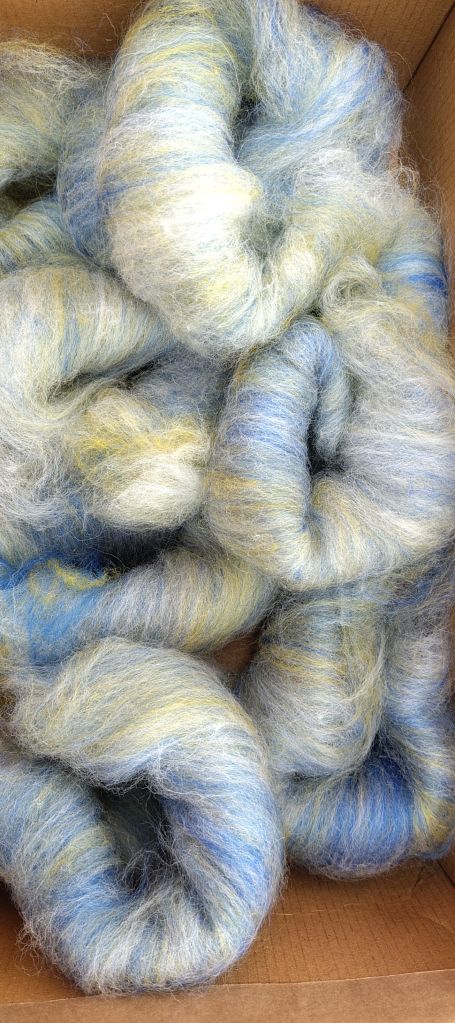
An hour spent blending on the drum carder has got me set for some serious spinning.
The yellow and natural are broken Merino tops that I picked up at the John arbon Open Day last year. I’ve blended these in equal parts with a very strong ultra marine blue which I won in my local Guild raffle.
I tested this first on hand carders and it produced a very nice yarn so now I’ve done it in bulk and taken rolags of a batt from the drumcard.
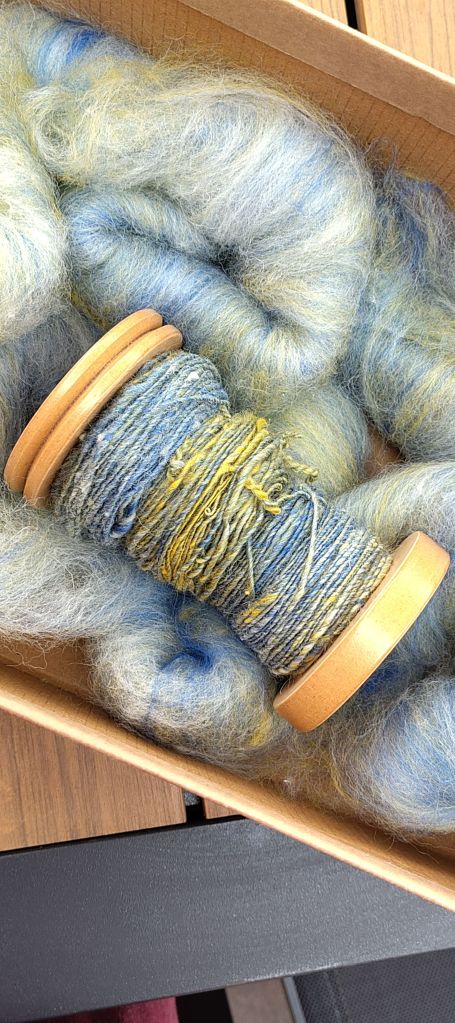
The singles so far.
I’m aiming for a 2 ply hand knit weight yarn, so spun the singles trying to let in a bit more fibre than I usually do. I read once that as you become more proficient at spinning you tend to spin finer, and that does seem to have been the case. Not that I’m claiming to be brilliant at it, just more practiced than I was.
This was spun the 1:8 whorl on my Louet S95 ‘Victoria’, which is the little folding portable wheel I take out to demonstrations. I aim to ply at the same ratio although I know it will probably work out a bit less. I am looking forward to spinning and plying this.