We are on holiday in Yorkshire and took the opportunity to visit the Ryedale Folk Museum in Hutton le Hole. The museum is a little gem, mostly outdoors it features original local buildings from different periods complete with information about those who lived in them. From the’ Witches Hovel’ to the Manor House, one can take a peak into the life of the people of Ryedale through the centuries.
Pre the Industrial Revolution the village subsisted on small scale farming and at one time a quarter of the population of Hutton le Hole were employed as weavers. It is not explained whether it was cause or effect, but flax was grown in the area in the 1700s and the women would have spun the flax into linen yarn on spinning wheels, examples of which are present in the houses. It is likely that wool was also spun as villagers grazed cattle and sheep on the common land and most households were largely self sufficient.
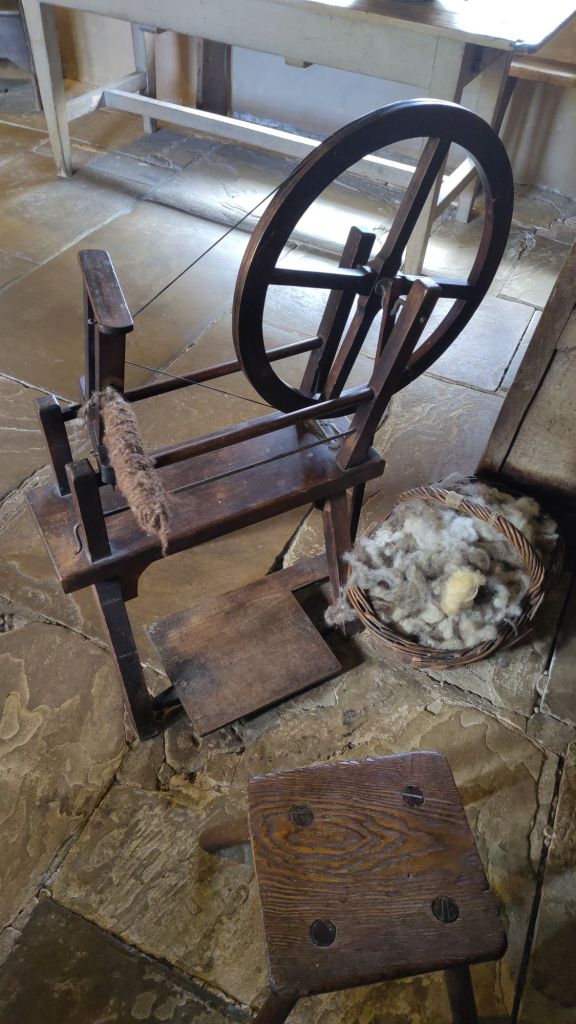
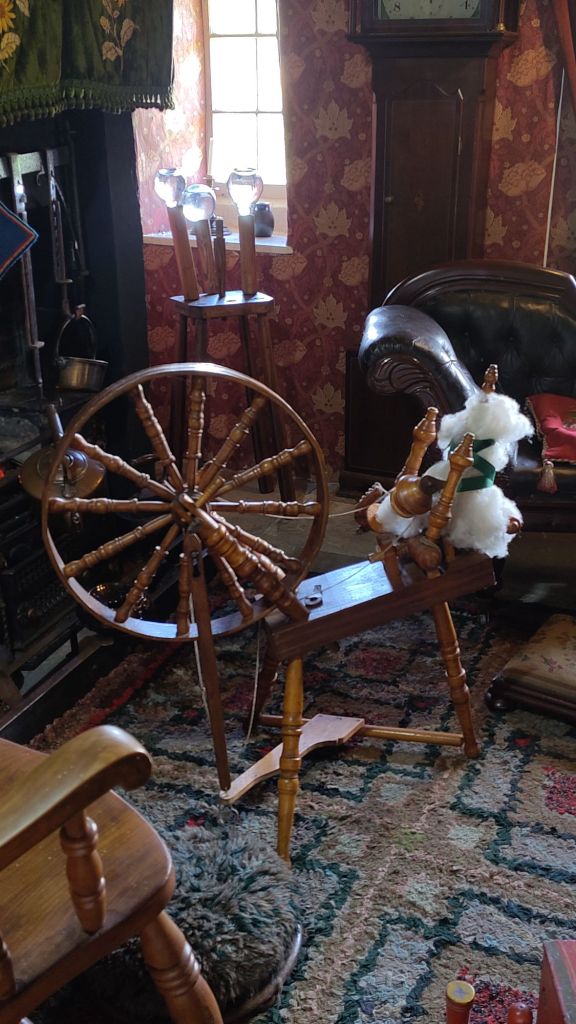
An early spinning wheel with a spindle which pre-dated the bobbin and flyer. It has a treadle which suggests that this wheel dates from after the latter part of the 1700s. Possibly originally used for flax as this was grown in the area in the 1700s to produce yarn for the village weavers. Ryedale Folk Museum.Another spinning wheel from a later period as it has a bobbin and flyer. The distaff suggests this might also have been used for flax, as wheels were, and still are, used for a range of fibres based on the spinner’s needs and skills.
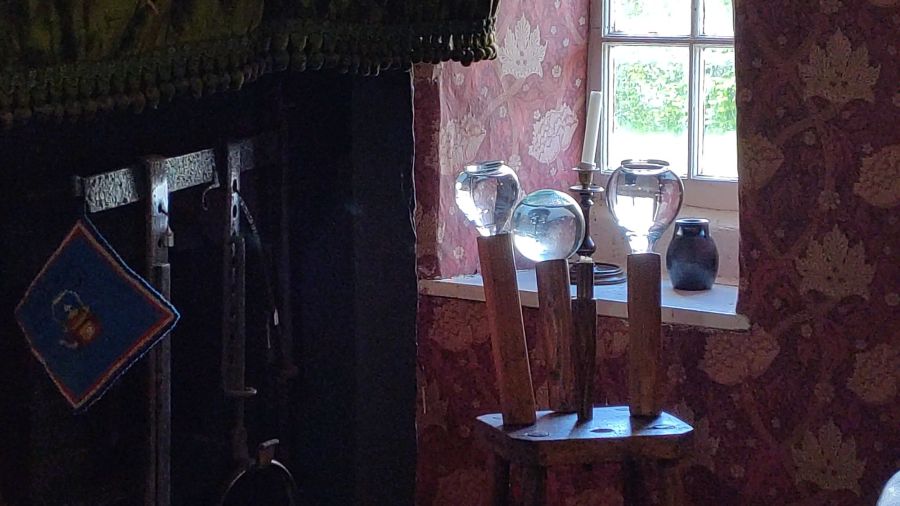
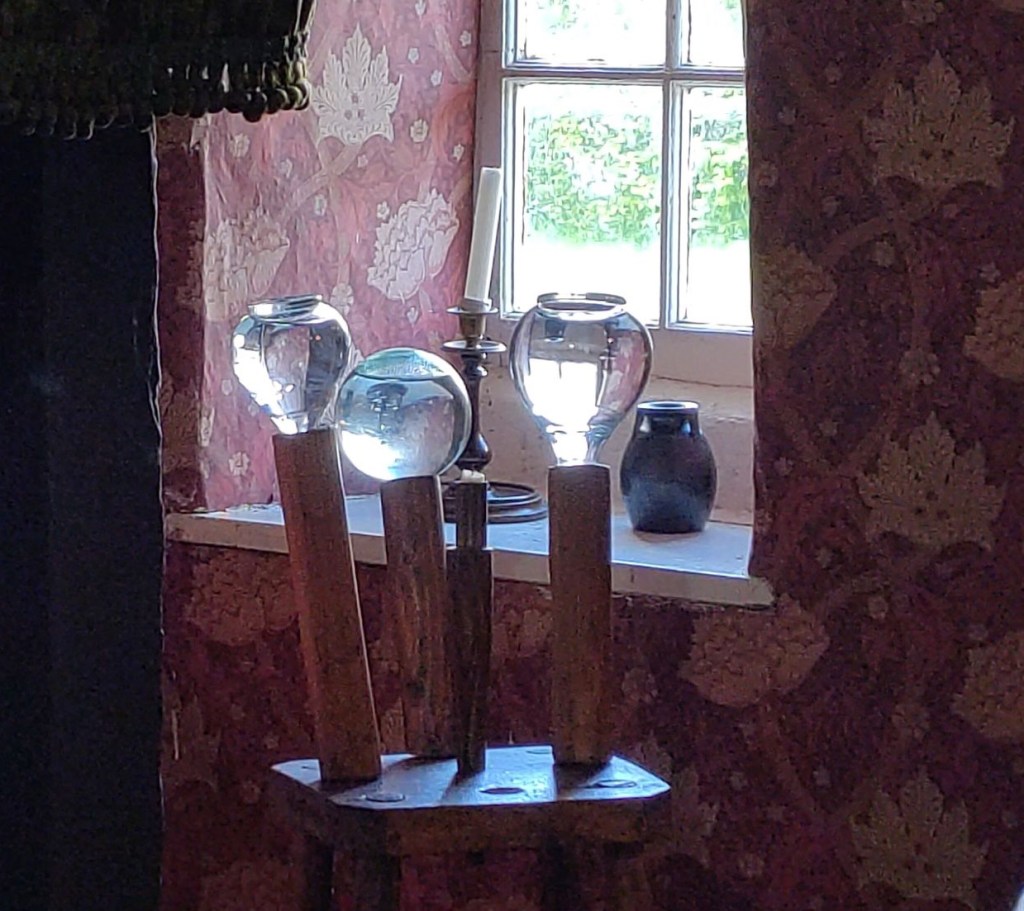
In the same room as the wheel shown above, there was a charming lace light. These glass globes amplified the light from the central candle and focused it onto the work of those sitting around the globes. I have not seen a triple globe stool version before, so that was a treat.
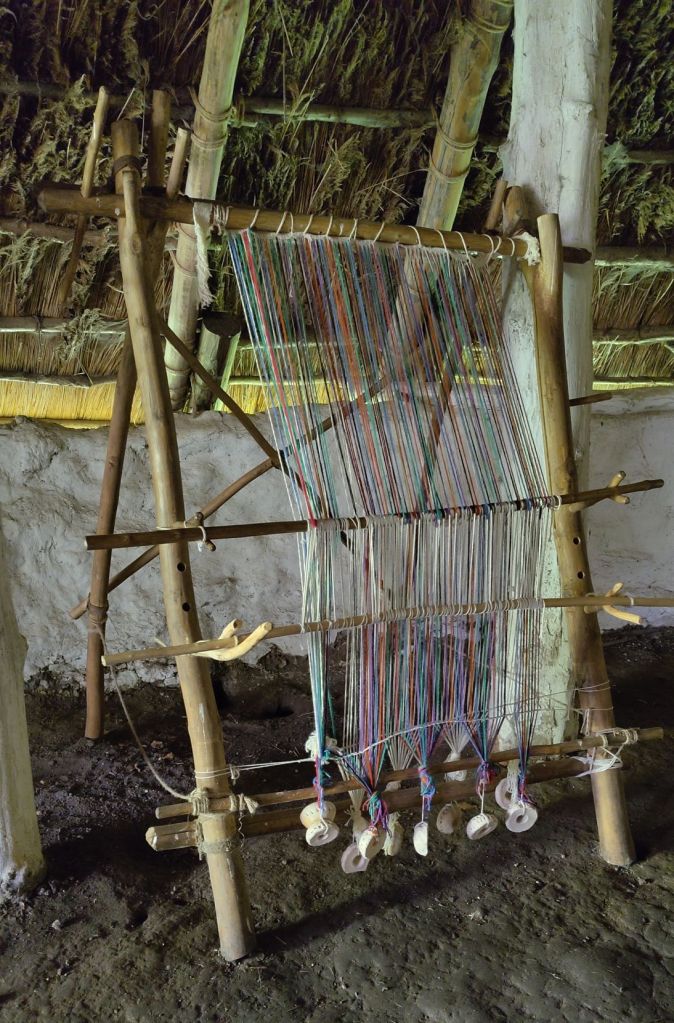
Towards the end of the path through the museum is an Iron Age roundhouse. Apparently the structure was built with wattle and daub, just as it would have been in the Iron Age. Inside there is an open fire and amongst other domestic artefacts there is a rough-built warp-weighted loom. Although there is a warp on it, there is no weaving in progress.
At a quick glance the warp-weighted loom doesn’t look that different from a modern upright loom, except for the refinements of a winding-on mechanism and reed.
I am now itching to get home to do some weaving. Luckily I have my spinning wheel with me in the caravan where I am practising spinning flax in to linen yarn.
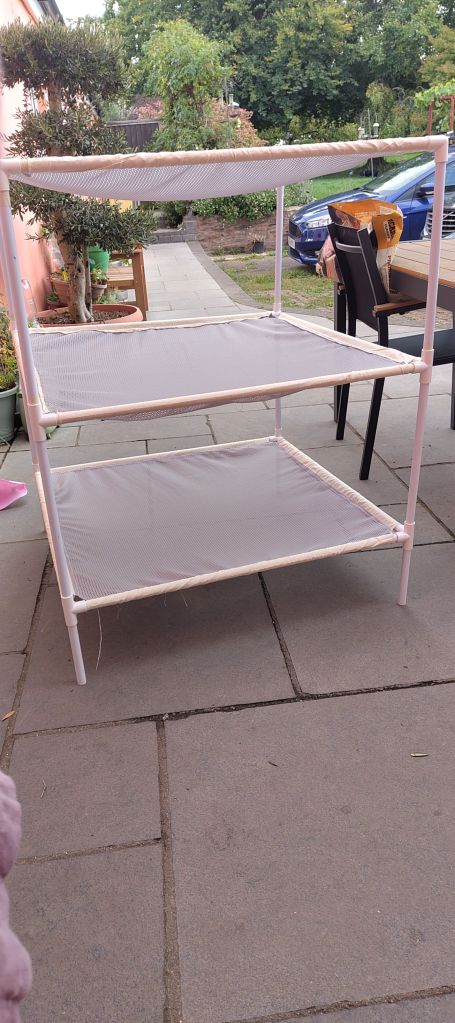
I planned this project of a collapsible fleece-drying rack over a year ago. Setting is always difficult as it requires a lot of space and works best if air can circulate to as much of the fibre as possible. I toyed with the idea of folding herb drying racks, but the ones I found were small, flimsy and expensive. I’ve seen others use those plastic crates with open mesh sides, but couldn’t find any of those locally, plus they take up space when not in use.
So I decided to design and make my own. My brief was:
freestanding
reasonably lightweight and portable
widely spaced shelves
a large surface area so that the fleece could be opened up to speed drying
collapsible so could be folded down and packed into a bag when not in use
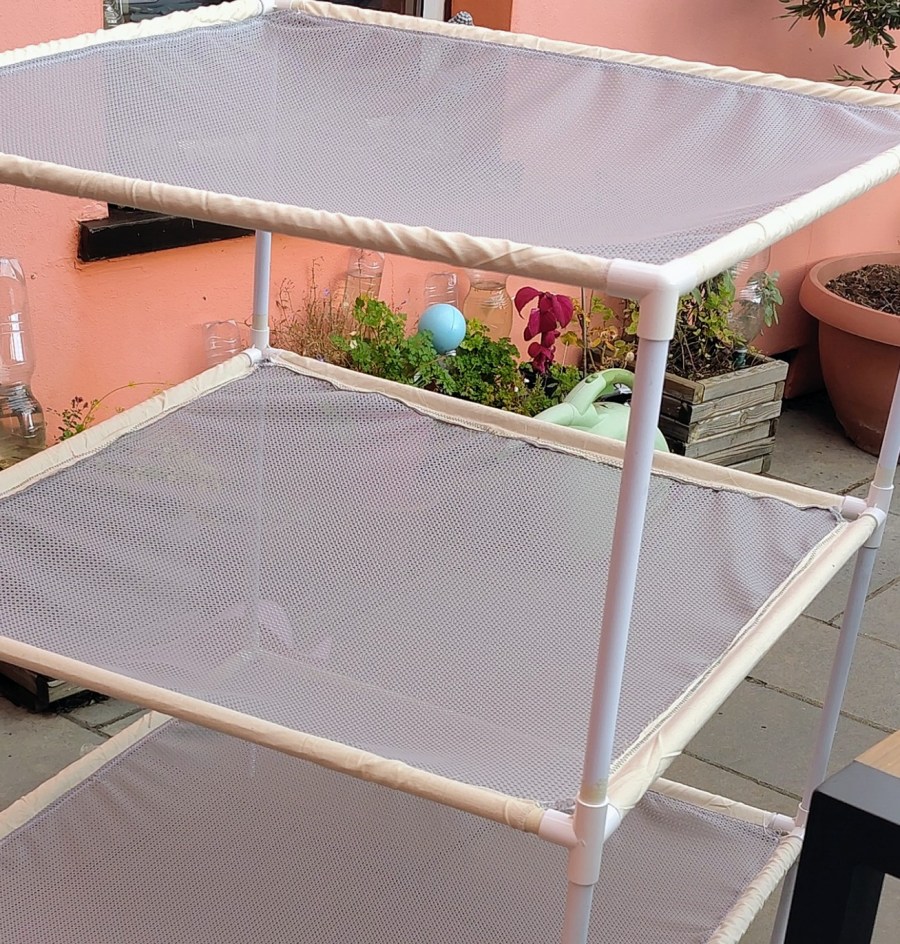
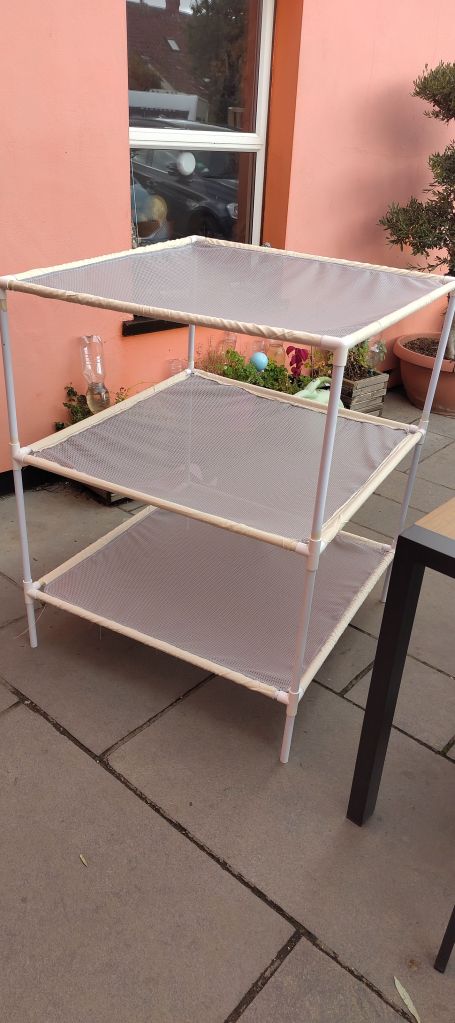
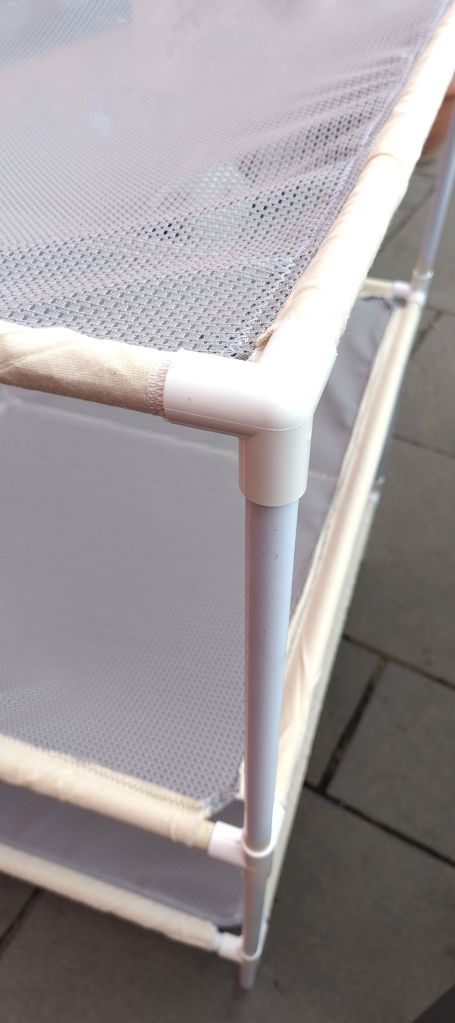
Designing the rack and working out the specs took some thought. I ended up with a plan for a three shelf rack, each shelf being approximately 80cm square. I intended to use plastic pipe and elbow joints for the frame and mesh fabric for the shelves. Mesh fabric would allow air to circulate, and if made from synthetic fibre, would dry fast itself and hopefully reduce the likelihood of mould whilst packed away. Each of the mesh shelves would have sleeves sewn along all four sides through which the pipes of the frame would be inserted. Then the pipes would be connected via the 3 and 4-way joints, putting the shelf under tension. In this way the shelves would stabilise the whole structure.
I already had some plastic piping left over from making a collapsible niddy-noddy, but bought the rest from Wickes, then cut it all into the correct lengths. I borrowed a plastic pipe cutter to do this, which gave nice neat and smooth cuts which would facilitate threading the pipe into the shelf pockets. The 3 and 4-way joints came from ebay, as I couldn’t find them locally. However, if you decided to make one of the racks, do try a local plumbing store if you have one first, before going online.
So I had the frame and it fitted together, but then winter came so fleece washing ceased and access to my sewing machine was limited by building work. But I went ahead and ordered 3m of fine mesh fabric for the shelves in anticipation of getting started when I could.
Sadly, when I finally got to sewing the shelves, the mesh proved to be too fine, overstretchy and delicate, so it was back to the drawing board. This time around I sourced a much sturdier, low-stretch mesh fabric on eBay. It was pricier, but fitted the bill really well. Luckily I found some seconds of the danger fabric, which helped keep the cost down. I also decided to use Calico I already had to sew smooth, non- stretchy sleeves for the pipes so that it would make it much easier to slide the shelves on and off the pipes. The sleeves would also make a stable attachment to the between shelf and pipe, and hopefully reduce stretching and drooping of the central, mesh shelf. As usual, cutting out and sewing took some time because I was doing it around other things.
Finally it all came together. Probably too late to test on a fleece this year, but it might work in the greenhouse if necessary. I hope the shelves will not droop under a layer of damp fleece. I spin it after washing, so hopefully it will support the weight.
I guess it would also work for herb drying.
If you would like the instructions for making this fleece drying rack I will add them in a few weeks time. Please pop back to this page to download the instructions.
The finished rack The top, 3-way jointsMiddle 4-way jointsLegs are interchangeable, so the shorter ones could go in the middle if desired