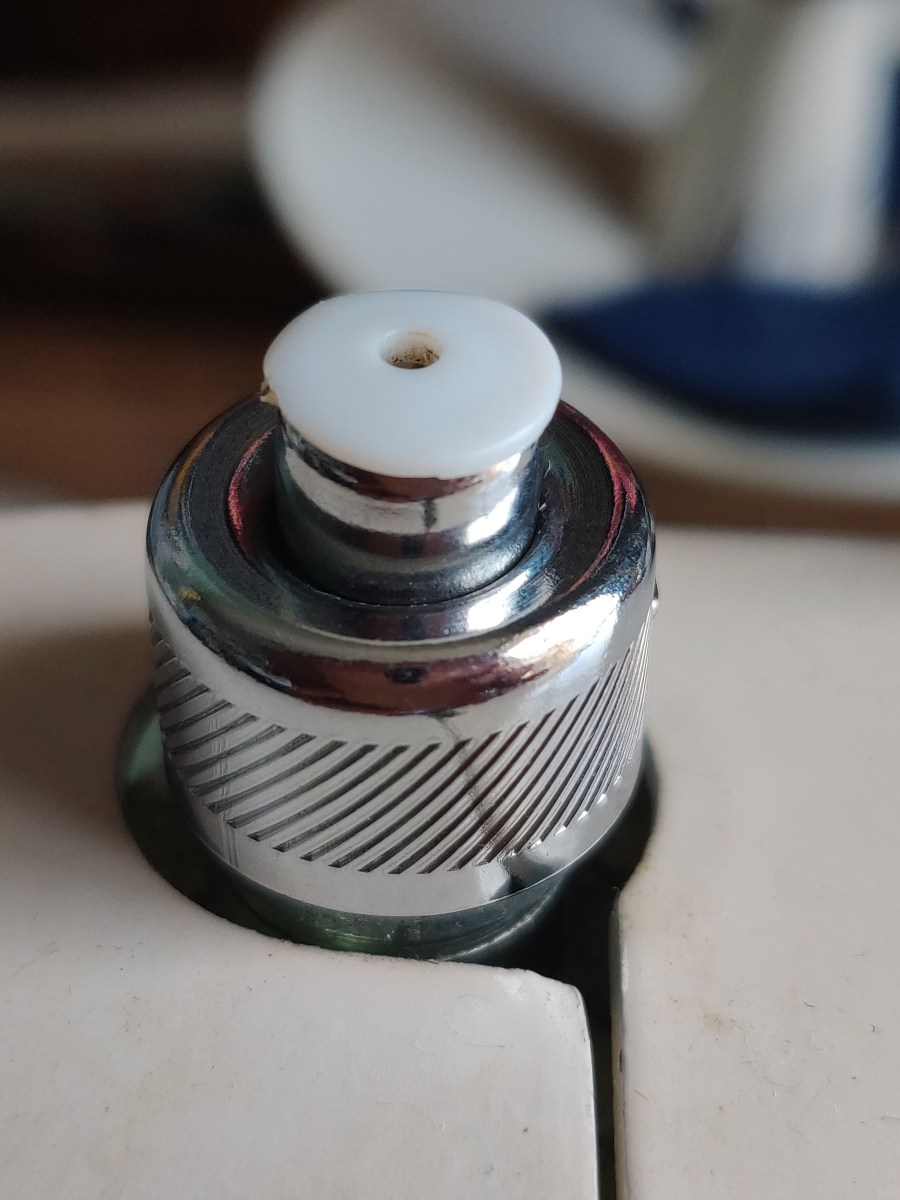
I’ve been having problems with adjusting the foot pressure on my Jones 125 machine. I’ve not seen one like it before and couldn’t work out how to use it. Today I’ve had 3 broken needles and I traced this to the really strong pressure on the foot. My Bernina 1030 doesn’t have this adjustment so it’s not something I work with much.
The pop darner for pressure adjuster on the Jones 125.
Before reading this I’d been twiddling it, popping it up, trying to unscrew it and seeing no difference. After reading this helpful page, it seems the Jones has a ‘pop darner’ style pressure adjuster. The central core pops up when you push down the outer ring, and then you depress the central core in increments to achieve the pressure you want. I imagine the name comes from popping it up to take pressure off when darning (or free embroidering) on the machine. Suddenly it all makes sense. The 3/4 position is so much better for what I am sewing today than all the way down, where it was because I couldn’t work out how to adjust it.
Probably common sense to others, but not to me!
Thank you to the kind person who took the time to write about the different methods of adjusting foot pressure, and for such a clear explanation.
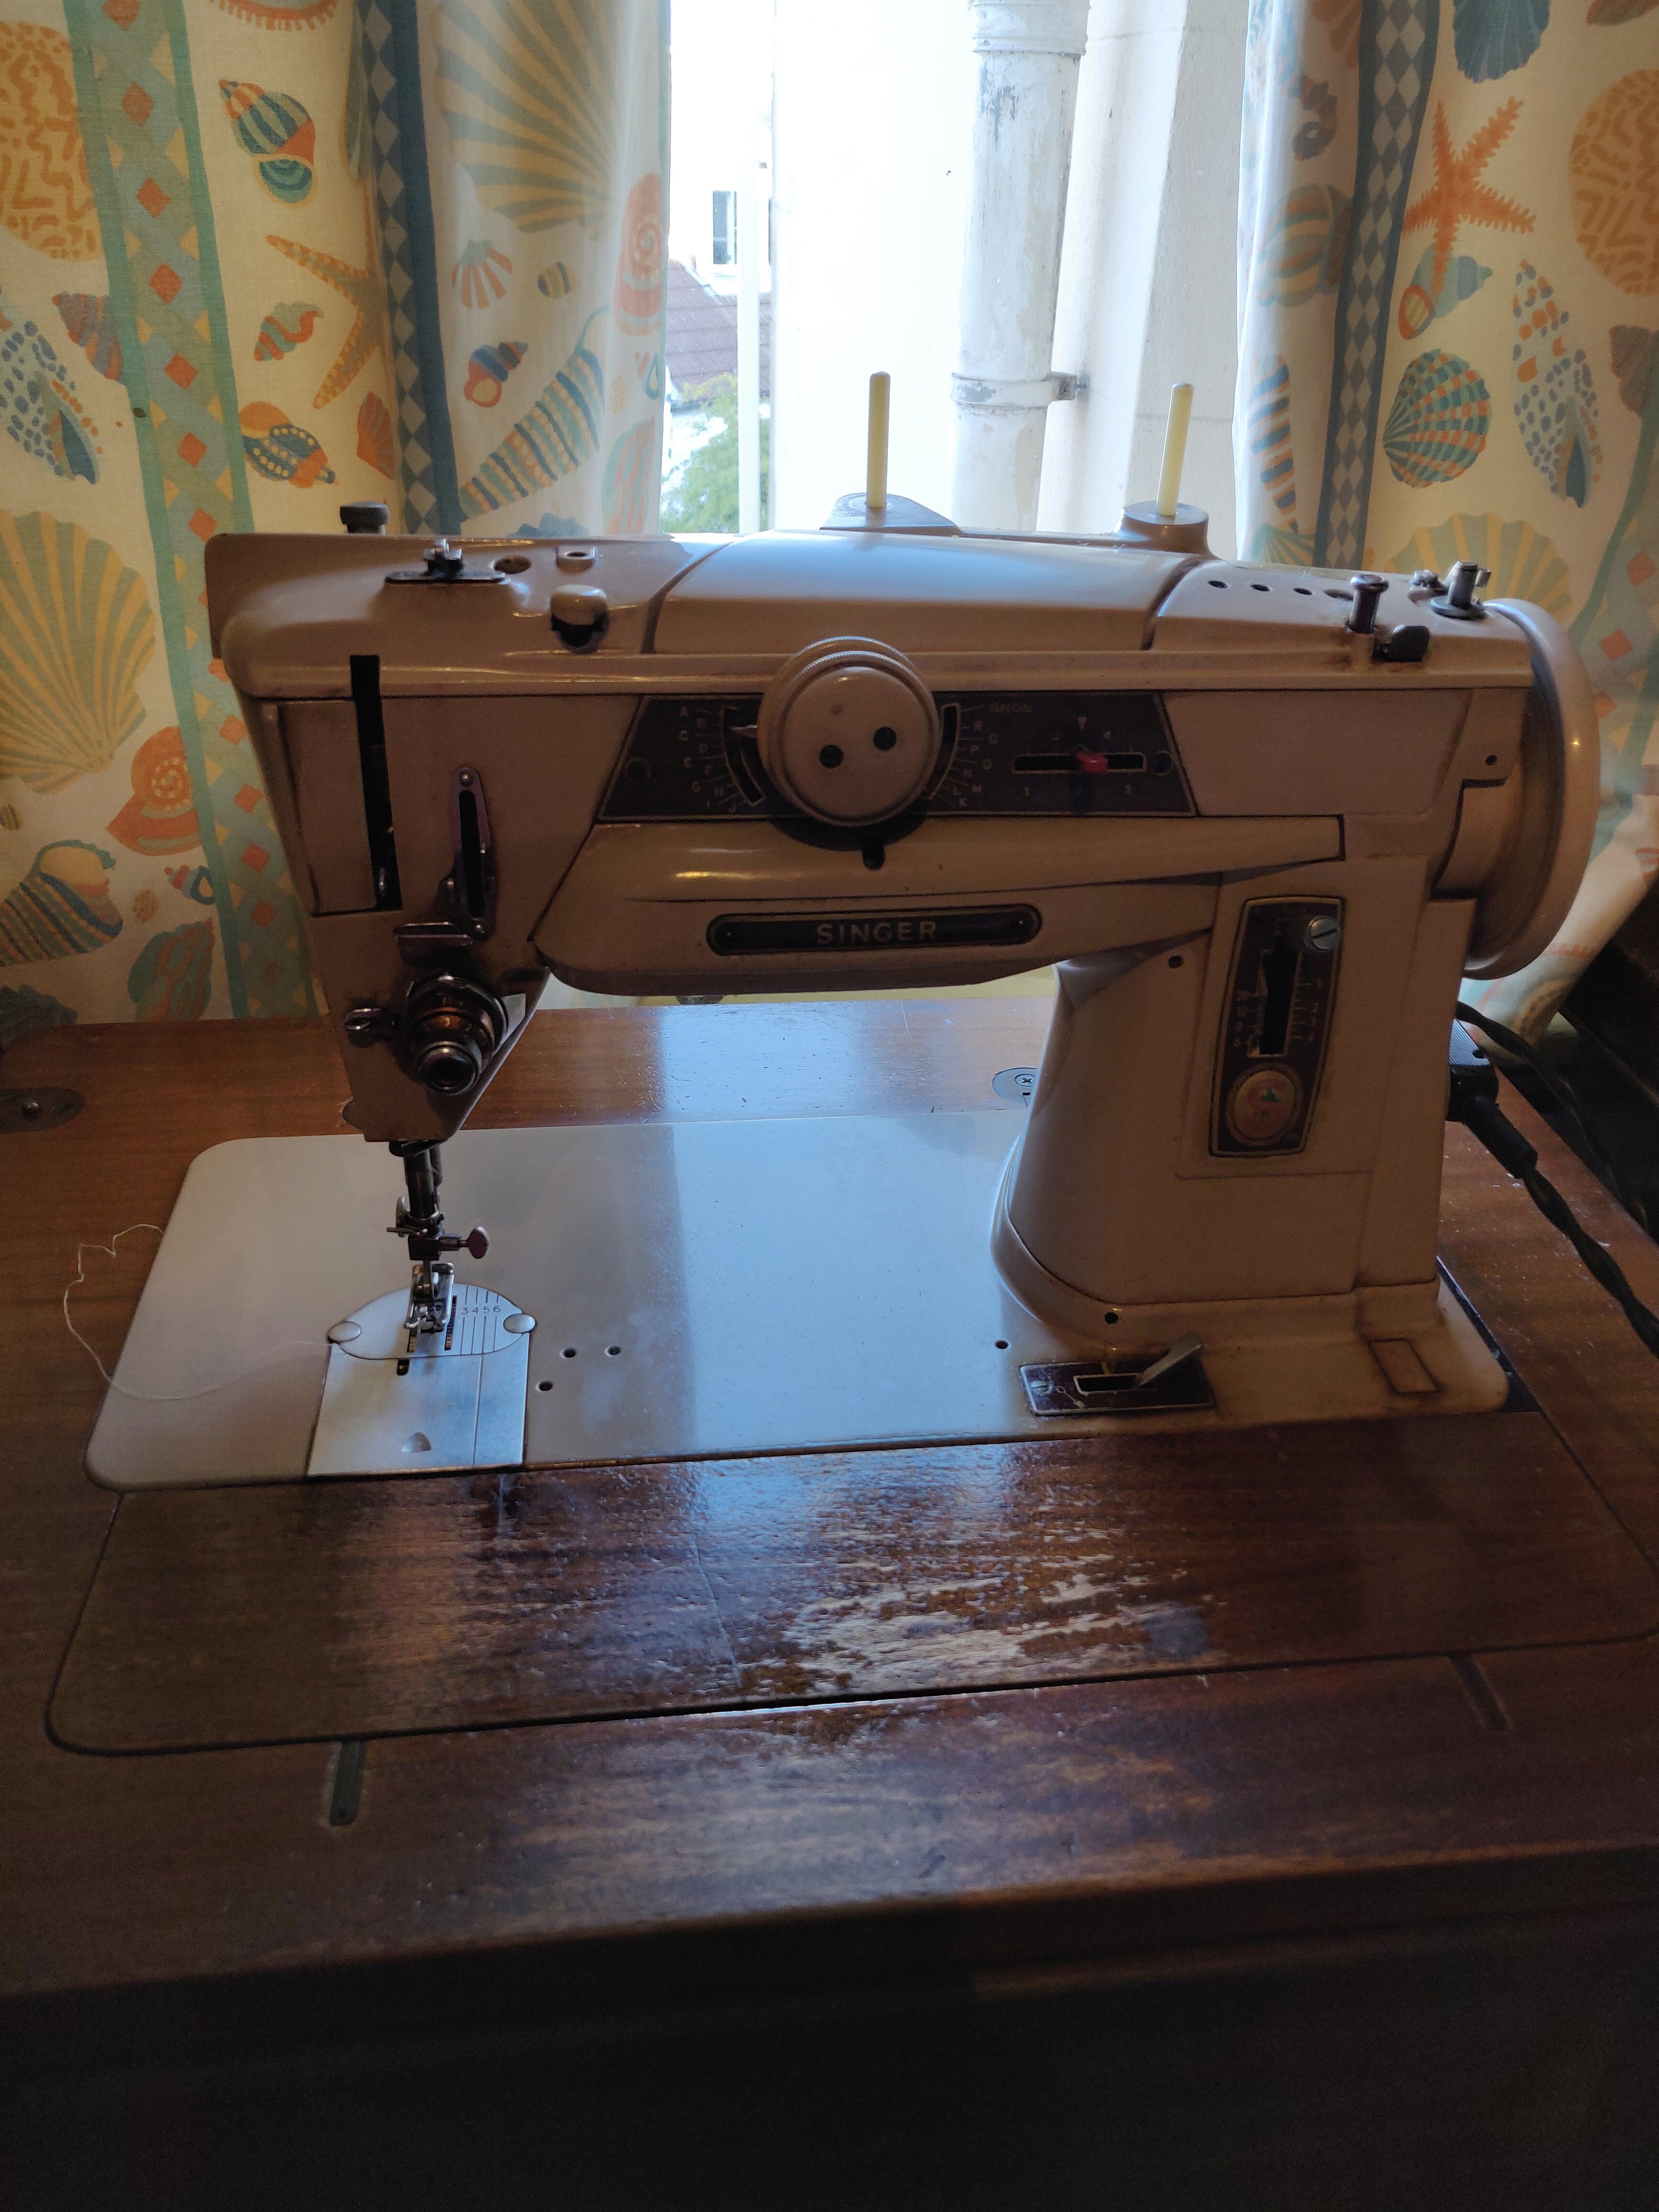
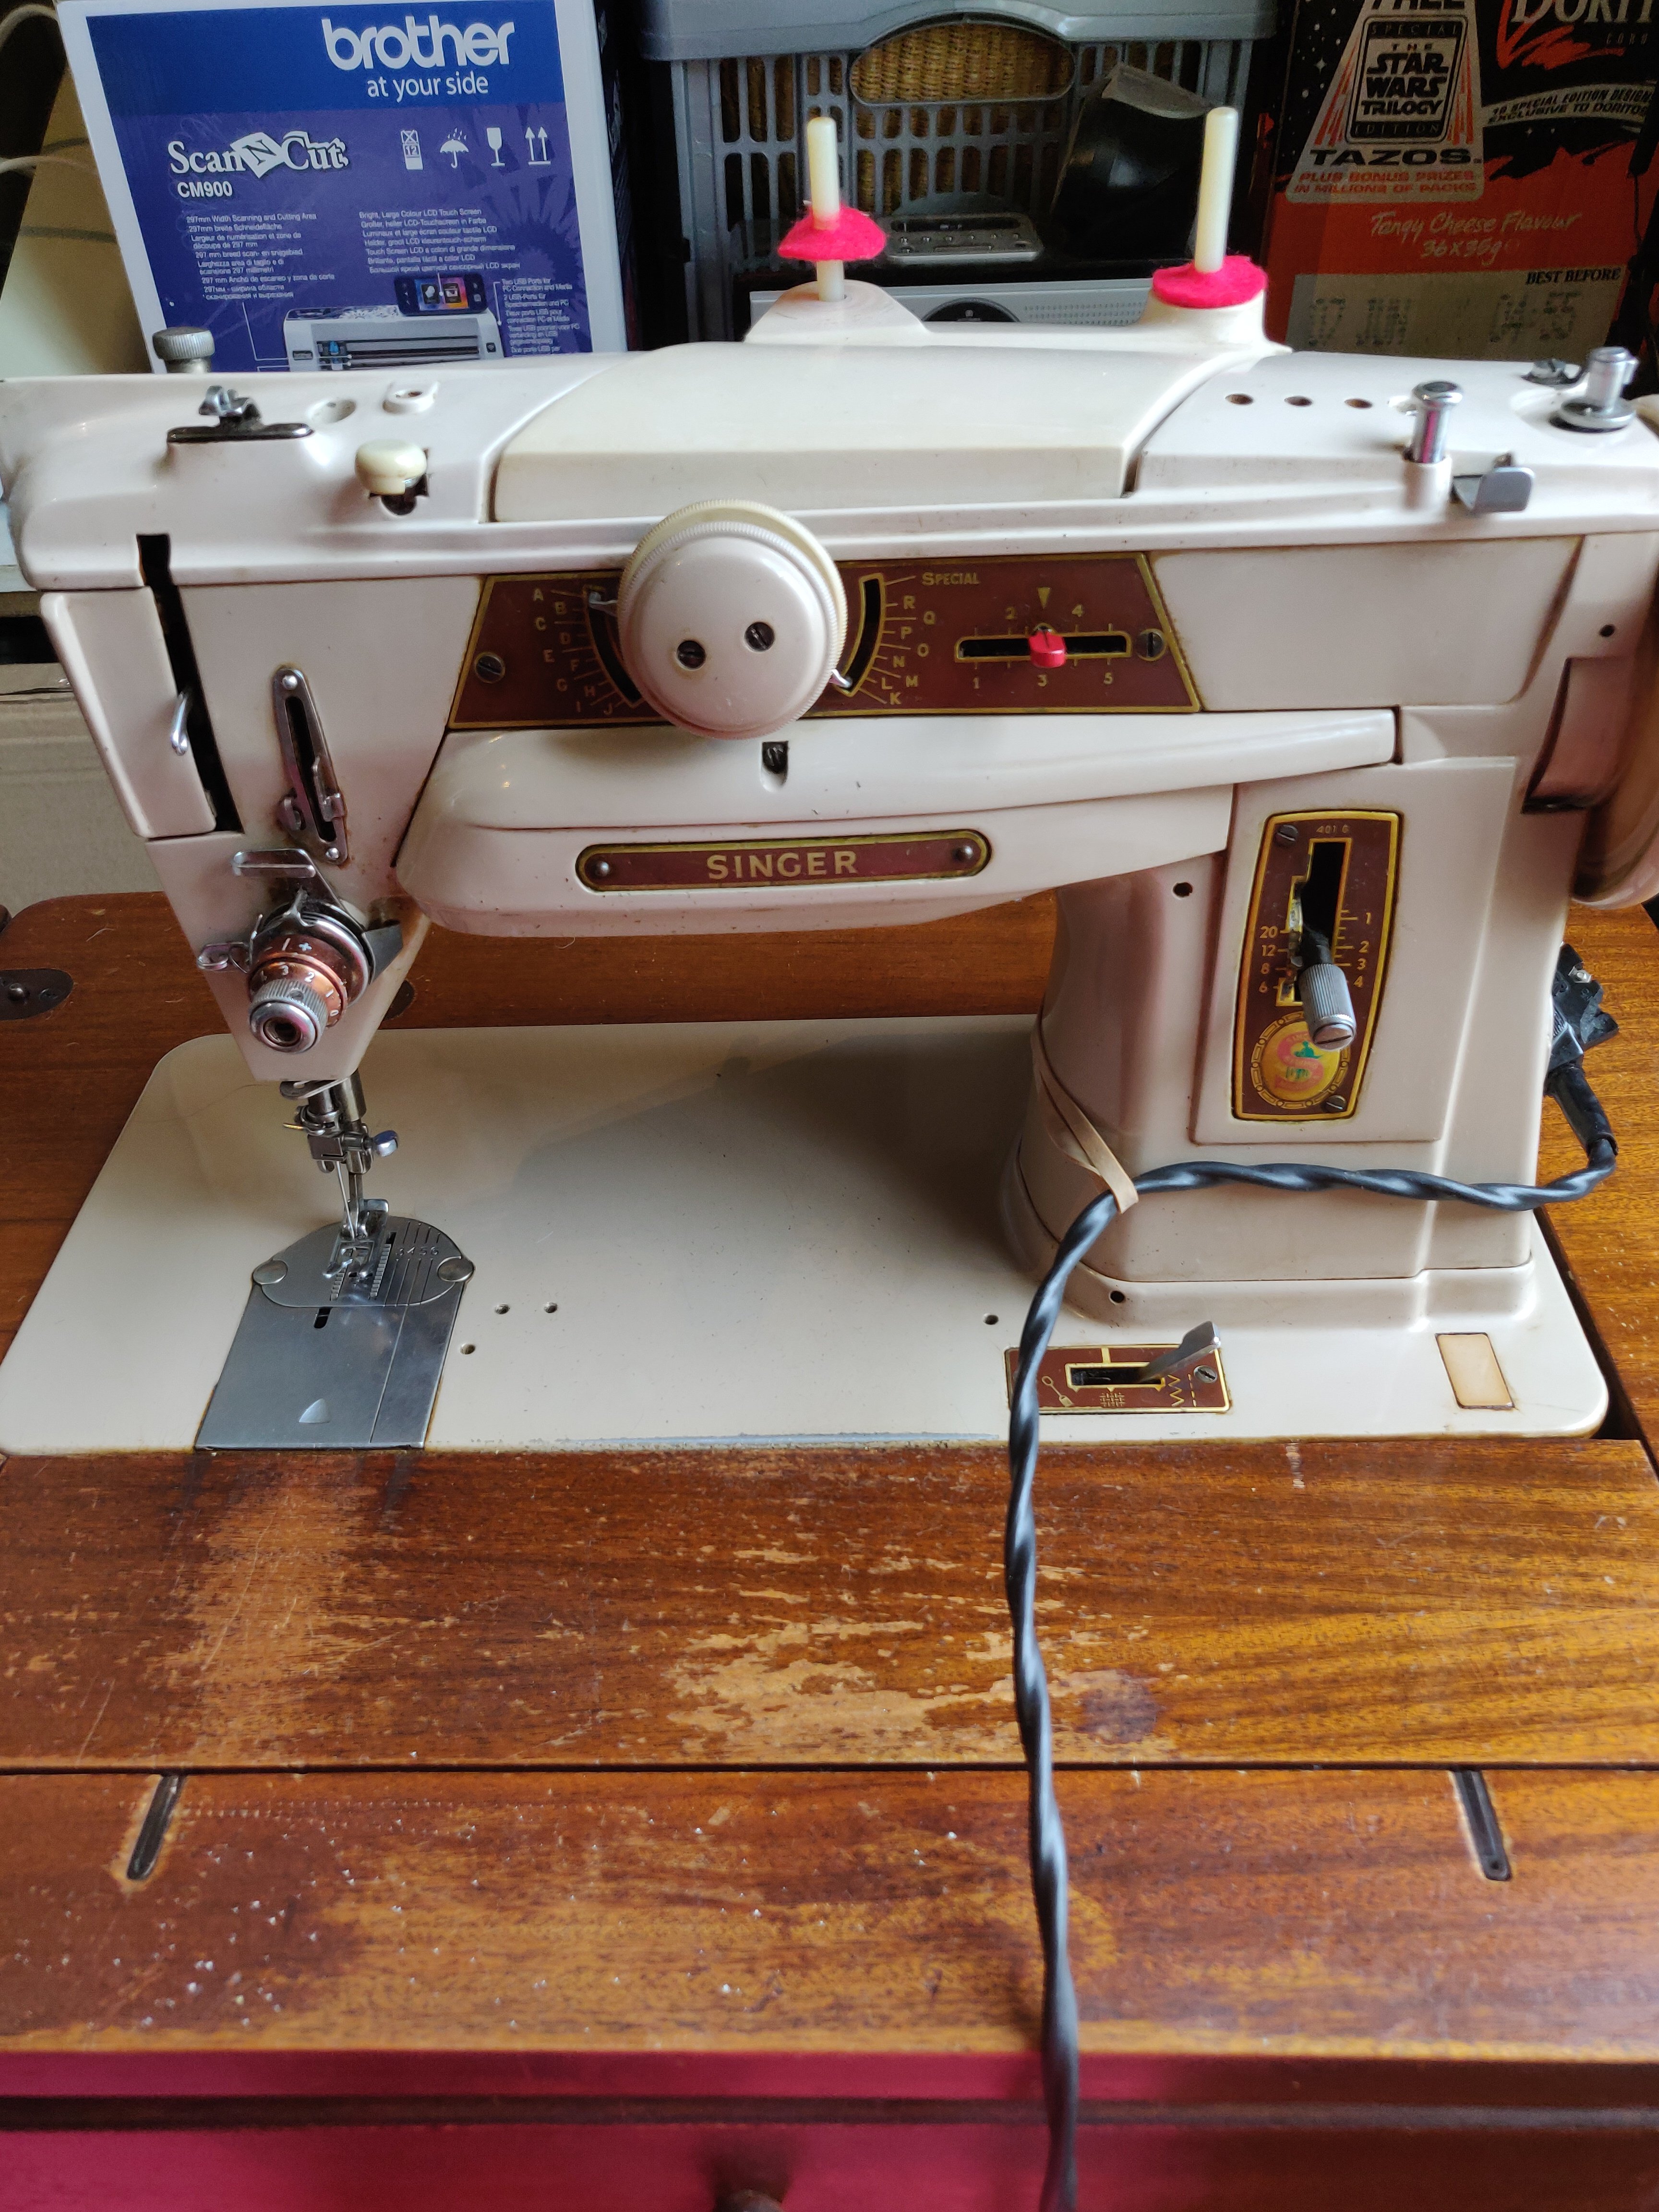
I have been toying with the idea of buying a Singer slant shank machine for a while, and during lockdown I took a punt and bought one reasonably local on eBay. Not the smartest move you might say, sight unseen and all that. I spent quite a time scrutinising the photos very carefully, read up about the machine, and asked lots of questions of the seller. Call it a treat to myself.
Updated with some photos just now, 16:00 4th July
Above, as it arrived, a bit grubb
And below, after a good clean up
Finally I went to collect it – social distanced collecting methods in use and no stopping en route. Its outside is a bit grubby, but its working and has all its accessories down to the lint brush and set of screwdrivers. Its obviously well used, it was owned by a dressmaker before, but I would guess not used for several years. However, its got service labels and having all its accessories indicates to me that it was well cared for and valued. It came in a drop down table, which was perfect as wanted one in a table, but not a massive cabinet.So far I’ve opened it up and cleaned its insides, removed as much old gummy oil – or as I can reach – and given it a thorough oil with light sewing machine oil. The double direction pattern dial was gummed up, and this gentle cleaning and oiling helped to loosen it up so that I could (very carefully) encourage it to move, and now it works freely. Its fascinating to see how the selection mechanism works, not that I am an expert at mechanics, but I can see the little paddle moving and the rise and fall of the selector post (probably the wrong name). I am itching to try out all those amazing built in patterns. I can’t right now as you will see in the next paragraph.The original clam-shell foot pedal is with it, and it did work – sporadically. After a while there was a nasty smell (reminded me of when my Bernina 1030 went into melt down, and when my Brother 950i knitting machine and very, very vintage Kenwood Chef did the same) and the machine would not stop running. Luckily the plug was close to me, so I whipped it out to the socket before any damage was done.My clever son opened the pedal and told me I should have cleaned that out (didn’t even think of it, sorry), and then he replaced a blown capacitor – he is pretty nifty at this and has a stock of electrical bits. The pedal now works – but the connection from the pedal lead to that ‘banana’ plug is dodgy. In addition some of the old plastic has broken away inside the pedal and the plug has a chunk missing which worries me. I’m not confident around electricity having had a few experiences that unnerved me, (see above). He offered to repair the lead and plug (he thought Sugru) and will in time, but I decided to order a replacement so that I could use the machine until then. I will compare them to find which gives the best speed control as some reports say new ones are not as sensitive.The motor seems OK, and my son will clean it at some point. So far the machine has displayed a lovely straight stitch – equal if not better than my Bernina 1030, and far better than the Jones 125.I did hanker after a Singer 411g or 431g but I think the 401g will satisfy me. It was only the chain stitch of these I wanted, but reading about it it sounds to require lot of fiddling to get it right and so that do you leave the machine set up just for that? Seems a waste to me, so I’ve let that wish go for the moment. I also think I remember that my Janome Coverstitch machine will do chain stitch, so maybe that is something to explore. I’m not even sure why I want chain stitch – I’m just a machine nerd (maybe?).Want this space for more chats about the Singer 401g that has joined my machine stable. Its going to be sewing frontline masks once the new pedal arrives.
Washing (or scouring) raw fleece is not a quick job, I think that’s something all can agree on. It’s also surprisingly contentious. Everyone wants to tell to their method, and you gradually learn that different fleece require different scouring methods, so everyone is probably right!
So I’m going to write about my experience today.
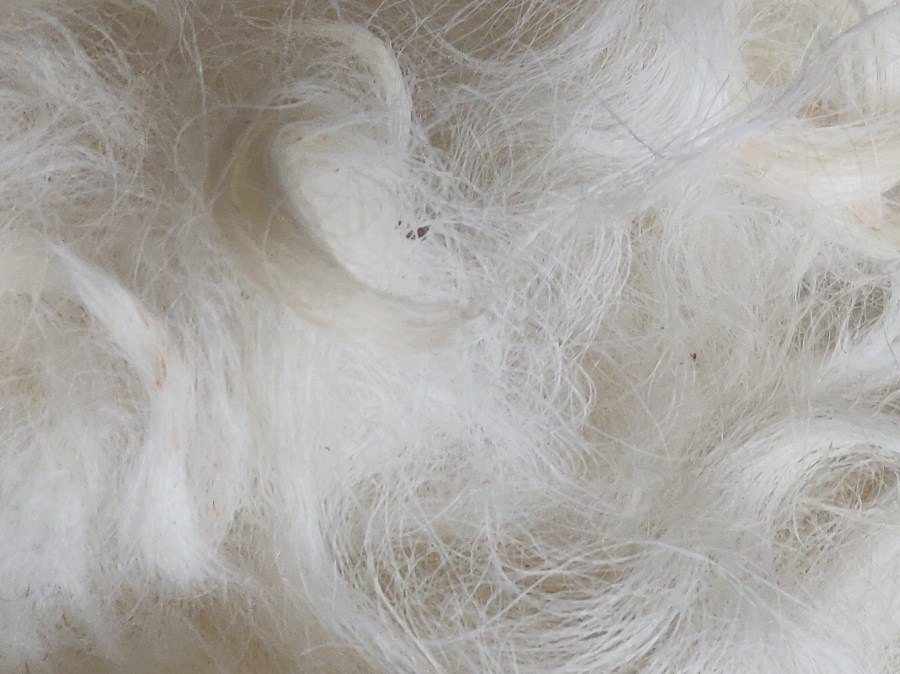
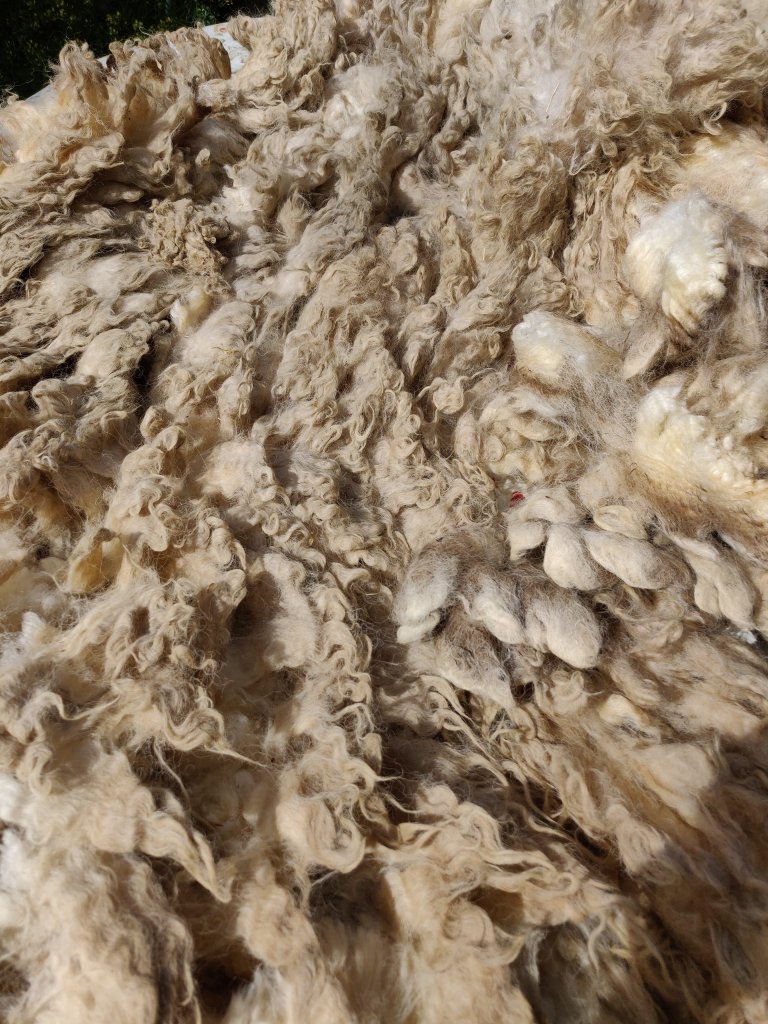
I have been given a rather nice Shetland fleece. Rather nice that is, but filthy. The fleece is very greasy and every single lock is gummed together and dirty at the tip. Underneath however, you can see the gorgeous fibre hidden under the grease-trapped dust and poo.
It doesn’t look too bad here, but thankfully this is not smelly-visionSee what I mean about those yucky tips?
I gave some of it a good hot soak yesterday with plenty of washing up liquid. The water was like oxtail soup (sorry if you like oxtail soup), but after a few rinses it seemed OK.
However, this morning’s inspection showed it to be still greasy and those dratted dirty and sticky tips were still gummed up.
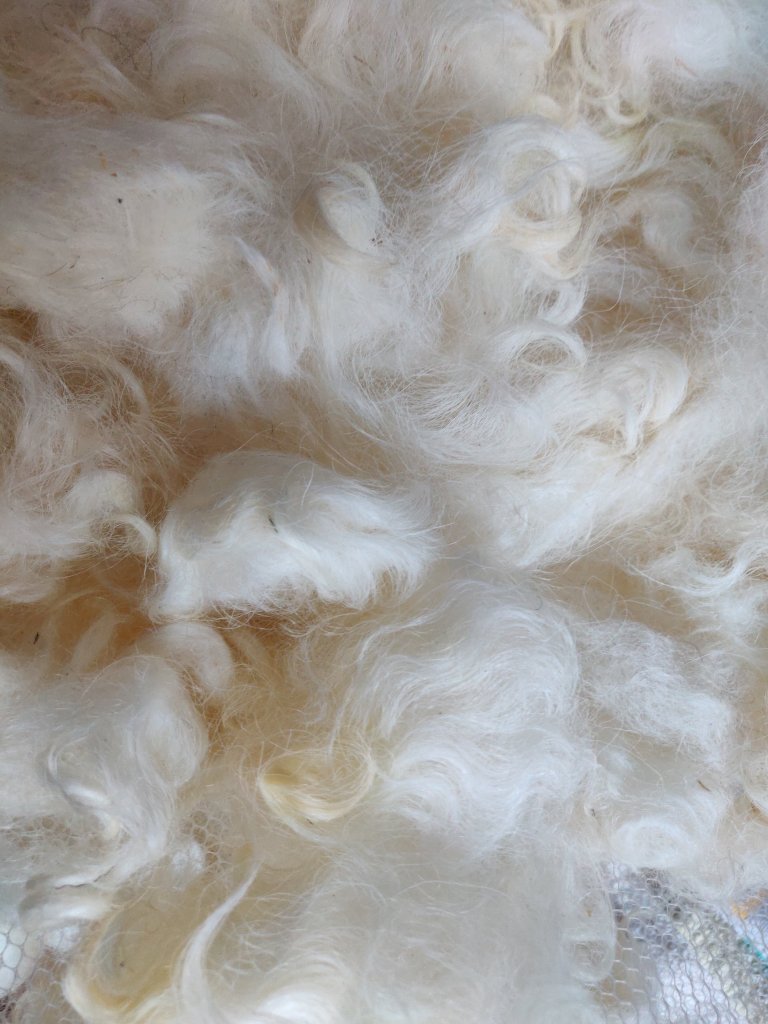
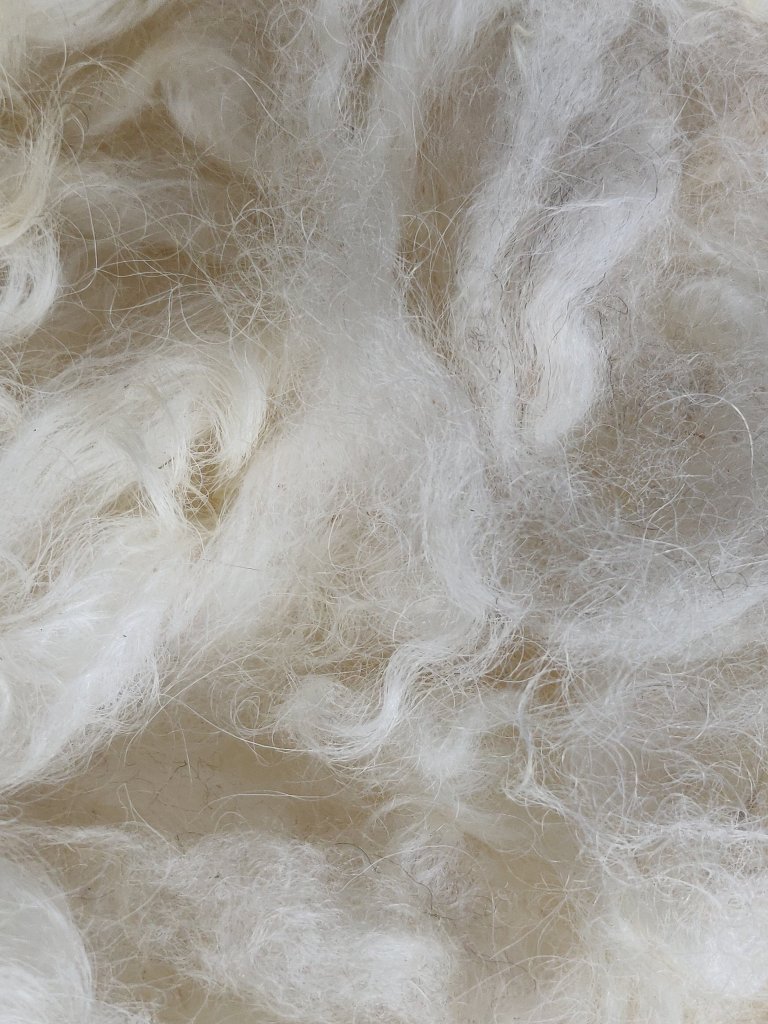
Rather than transfer that gunk to my carder I reluctantly decided to re-wash the fleece. So more really hot water baths followed. The first was so hot I couldn’t put my hand in it, with loads of washing up liquid and a dose of washing soda to break the grease. I always wash the fleece separated into small mesh lingerie washing bags. With this second wash, I opened each bag, one at a time under the water and teased the locks apart, concentrating on those dirty tips to loosen the greasy dirt.
Yes it was time consuming, bit surprisingly gratifying as the dirty came out quite easily with this method. I think because the fleece has just been sheared the dirt hasn’t had to much time to harden-off.
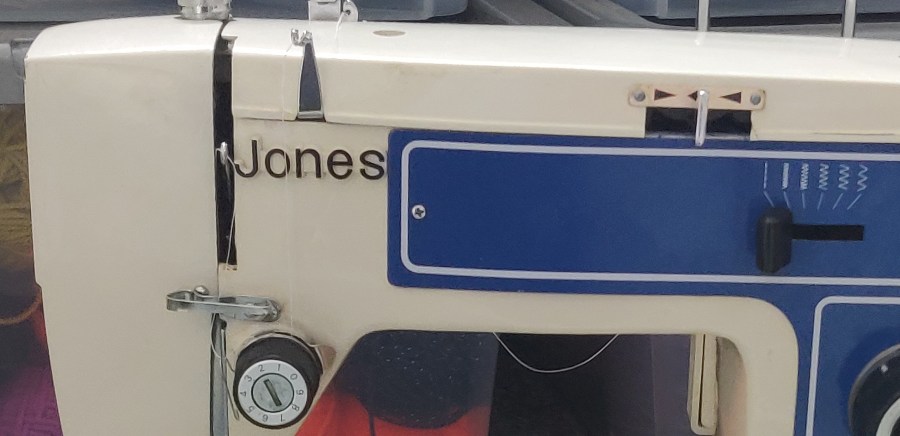
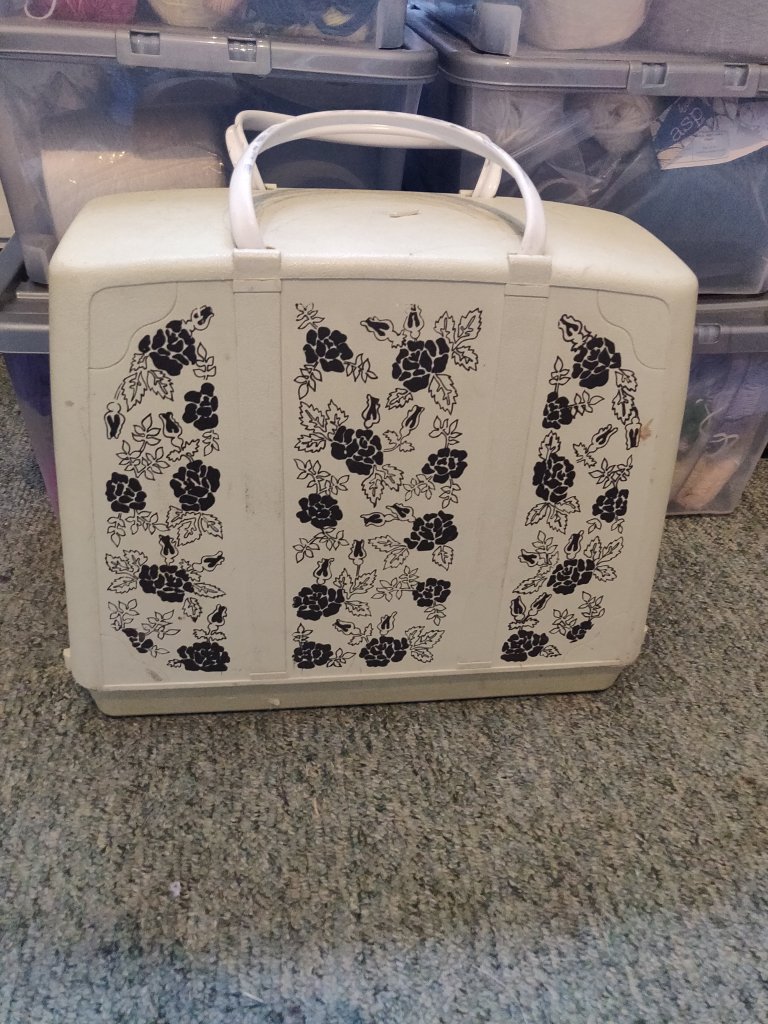
I’m doing quite a lot of sewing at the moment, so to supplement my Bernina 1030 I bought an old machine on eBay – not a modern one, an old second-hand 1980s model (my guess), very cheap and local pick up only. It’s a Jones, (later these were rebranded Brother), built like a tank and weighs a ton as the machine itself is all metal.
Its a Jones model number 125 with TUR 2 written on the motor at the back. I can’t find any info online about this machine, so if anyone has a manual or other info that would be helpful if be most grateful if you’d contact me.
The main problem was that the plastic case is degraded so the bed machine has dropped below the top edge of the case which means you couldn’t open the bobbin case, so that needed a bit of attention.
The Jones 125 machine
I have it several hours of TLC; opening the machine top, checking, cleaning and oiling everything. The bobbin and shuttle hook had all sorts of thread wrapped around it but that was easy enough to take out, clear and oil. Then I had to sort out the bobbin tension that was wildly awry. the light bulb had blown, and I will replace it with an LED version.
There was no manual with the machine just a foot pedal, a plastic need extension and some spare bobbins – which for the price I really didn’t mind. However someone had put the needle in with the hole from front to back, like my Bernina, when actually it should have been in so that you thread it left to right. Its been a while since I’ve used a machine which threads like that, so it took me a minute or two to work out why the bobbin thread was not being picked up. Once I put in a new needle that faced left or right it picked up the bobbin thread no problem.
Going back to the bobbin and case. The machine has a side facing bobbin in a vertical shuttle that is accessed from the top, so it’s not as easy to get to as a front loading one. Because the bottom case in which the machine suits is degraded and the plastic hinges have broken, the machine has dropped below the level of the case-edge, making it hard to reach the bobbin. I’ve stuck some shims in the sides of the bottom case which have raised the machine bed so that the bobbin plate will now side open. This also means the bed extension will now for correctly. The machine is in one of those classic Jones and Brother flowery carry-cases and although the bottom case plastic is a bit fragile, this seems reasonably sound.
Unlike the Bernina the Jones has adjustable pressure on its presser foot which takes a bit of getting used to. Now I’ve got it sewing it’s working fine.
What’s nice is that the feed dogs will drop for free embroidery if needed. It has good stitch length and a nice wide zigzag, so does the face mask job perfectly.
Having got it sorted out I prefer to keep the Jones threaded for the masks and my Bernina for my personal sewing. OK, I’ll admit it, I’m a machine nerd!
I think the Jones is also a bit of a consolation prize to myself; I’ve bought myself a vintage Singer slant shank machine which I’m really looking forward to getting, but I can’t collect it because of Covid.
The Jones is a great everyday all-purpose robust machine. I do get fed up with those people on eBay who are selling old machines as ‘heavy-duty’ and ‘semi industrial’. There are industrial or domestic sewing machines, but none that I know of were ever sold originally as ‘semi-industrial’. I agree that some modern machines are a load of rubbish, plastic and not really got for purpose, not that only a few – believe me I have seen some in the course of helping people with their machines.
I’ve always preferred older machines, having owned a hand cracked Singer and a treadle one (I am filled with regret that I didn’t have the storage to keeping these), an Elna Supermatic (why oh why did I get rid of that?), a Singer Touch and Sew, and then a Bernina 730 (still got that one) and an Elna TS (had to go for lack of storage again).
Even the Touch and Sew would sew through loads of fabric, and I did like the pattern cams of that and the Supermatic. I think the slant needle slant shank machine I have just acquired probably won’t go through that many layers of fabric because the needle may possibly deflect? I will have to wait and see!
So now it’s back to my sewing.
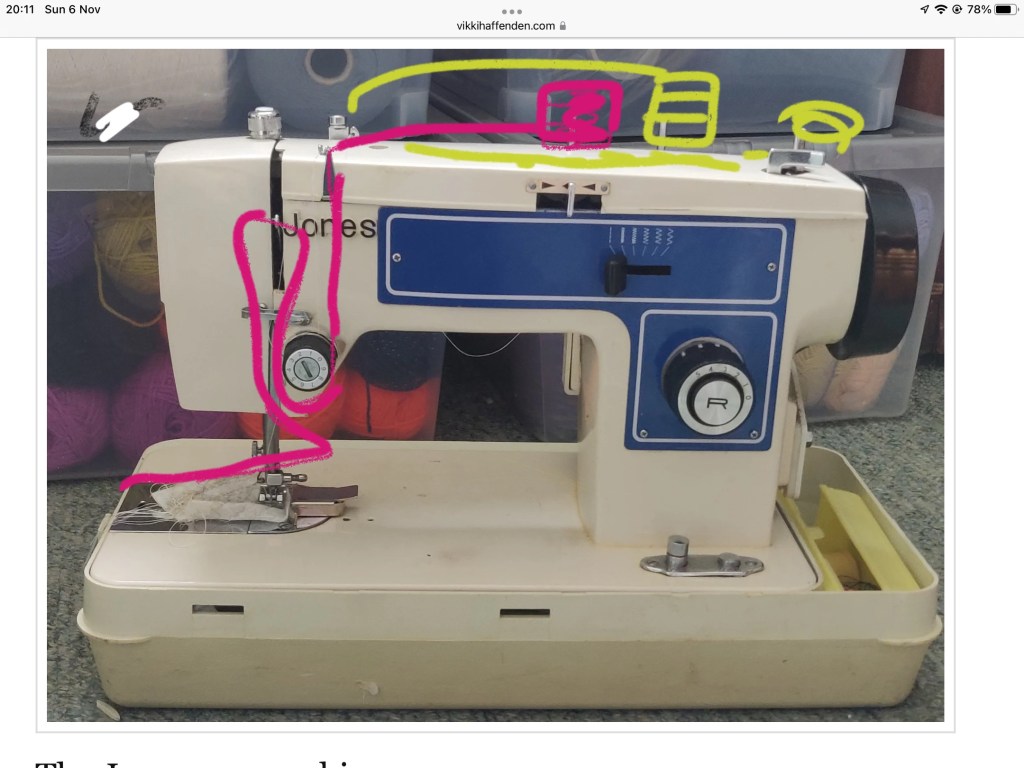
Someone has asked how to thread the machine, but as I no longer have the machine I have drawn onto the photo. Also see my post about adjusting the presser foot pressure. Search ‘Jones’ at the top of the page to find the post. I do hope this is helpful.
How to thread the machine . Pink is the top needle thread. Needle threads sideways. Yellow is the bobbin.
I organised an online face-mask-making workshop yesterday, and the links below are to the instructions and pattern for the mask we made. You can read more about making different types of masks on my DIY mask making page. If you just want to get stuck in, please use the links below to download the pattern and instructions and make cotton face masks for your family and to donate to key workers. The pattern has an opening to allow a filter to be inserted.
Due to the virus situation the workshops have been closed at the University where I work, and we are ‘remote teaching’ from now on. That is quite a challenge for a practical subject like knitted textiles.
One thing I have enjoyed over the years of teaching first year knit design students is their excitement and enthusiasm when they realise that they can make their own yarns. Normally I would be running a hand spinning workshop for them next week, but obviously not anymore. We have two spinning wheels and I take in a box of drop spindles. Cartons of fibre are pulled out of cupboards and spill all over the floor, its a lovely day with some wild yarn developments taking place. I think its a great way to encourage them to explore the raw materials of textiles, and also to introduce them to yarn design.
But sadly this year its not to be! So I decided that before they left I would demonstrate ‘pencil spinning’ using two commercial yarns. Even this simple method was received with excitement, so I have made two short videos for the students, but have shared them on YouTube for everyone and put them on here as well. Bear in mind they were made for the students, following a demonstration so I refer to this, and the focus is on making small amounts of marl yarn for hand knit design sampling.
They have taken yarns away with them, so I hope to see that they have applied their wonderful creativity to making new and colourful yarns.
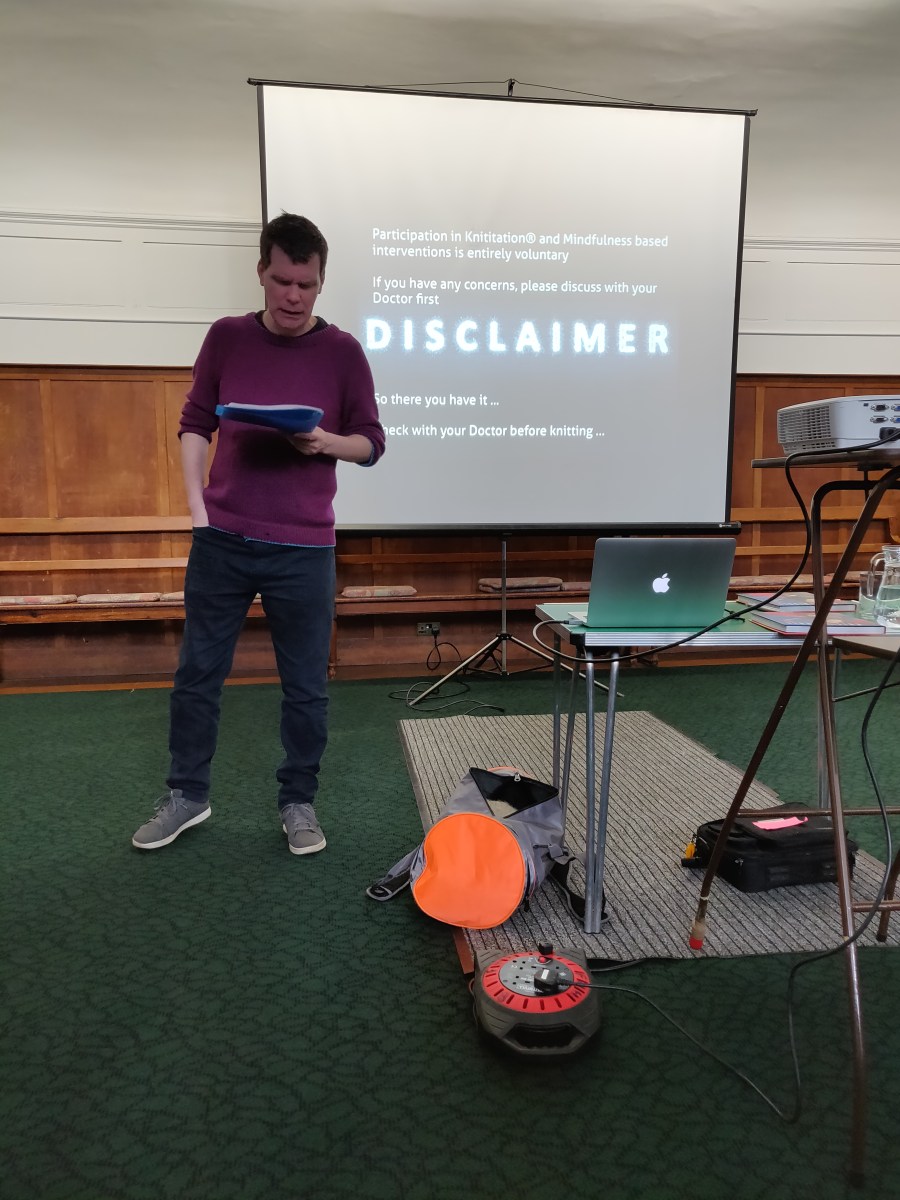
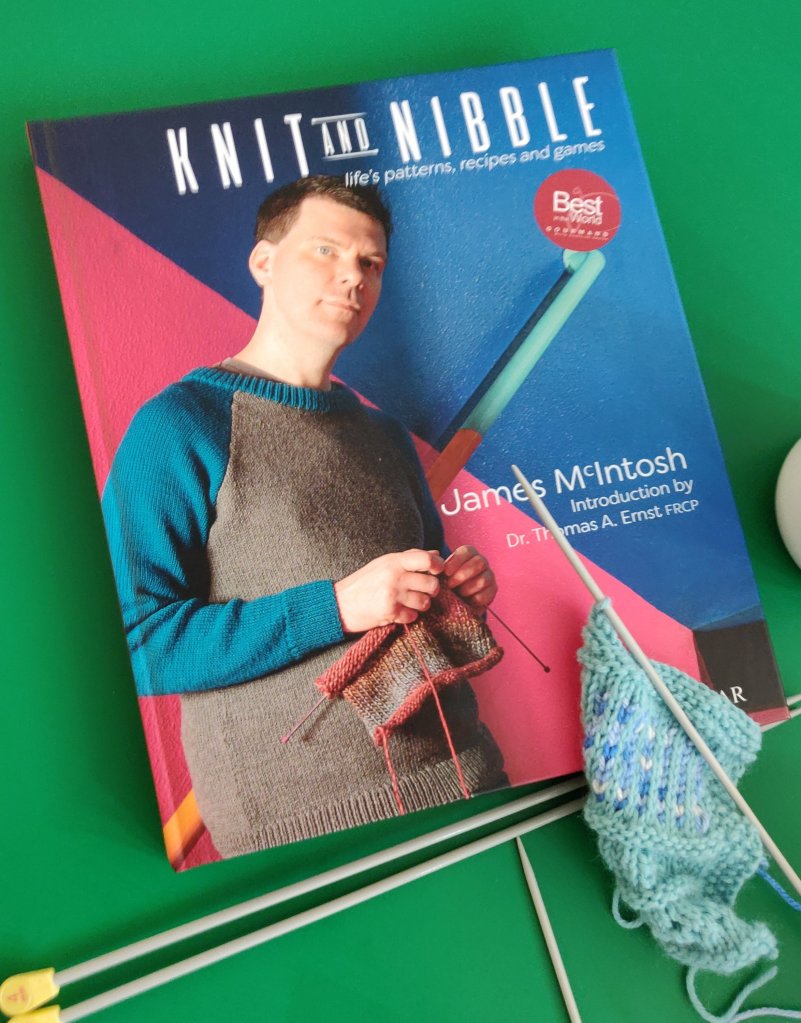
Today met James McIntosh and Dr Thomas Ernst, inventors of the term ‘knititation’ and authors of Knit and Nibble. They had been invited to speak at the University of Brighton School of Art’s Centre for Arts and Wellbeing event, Knitting and Wellness.
When we first met, James told me that he had found The Knitting Book really helpful when he was teaching himself to knit – which was truly gratifying feedback. It’s nice to find out how people use and value my contribution to sharing knowledge.
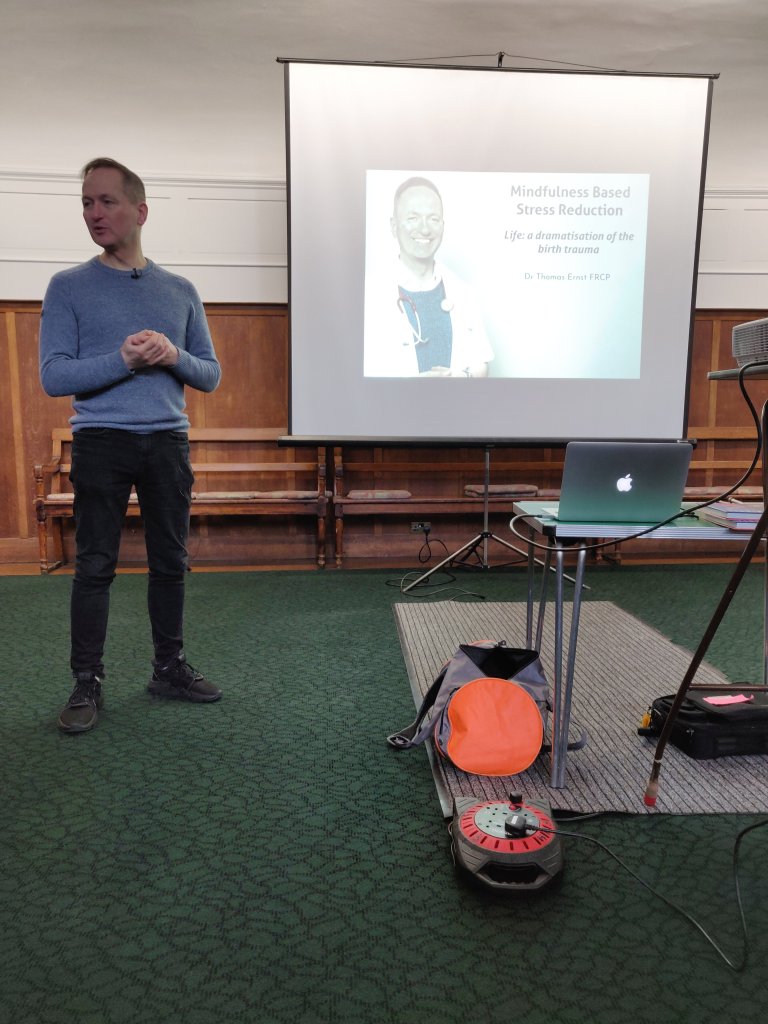
James was first to speak, and he described his personal journey through depression and how knitting mindfully enabled his recovery and brought colour back into his life. Thomas discussed the science behind mindfulness and it’s aptness to knitting.
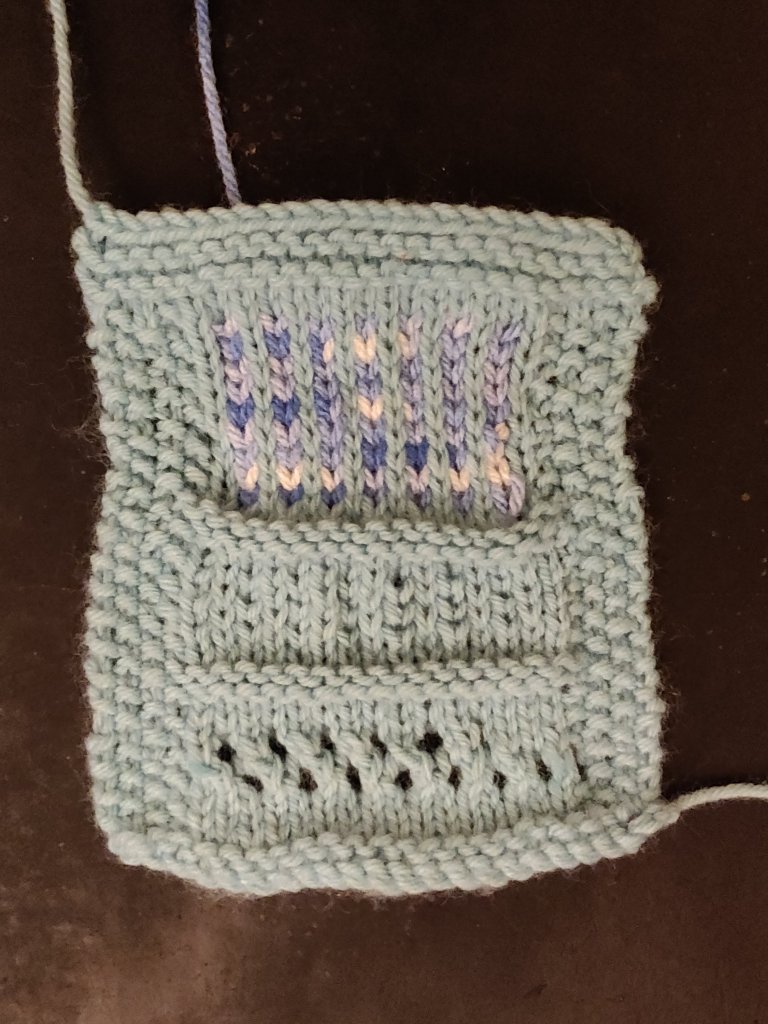
Nina Dodds, author of Invisible Jumpers, and I provided yarn and needles so that everyone who wanted to could knit during the event. We were gratified that everyone took up the opportunity!
This was my piece of knitting.
It was a great talk, entertaining and interesting. James and Thomas kindly gave me a copy of their book which I am reading this weekend.
At the end Thomas led a short mindfulness session, which was a new expressive for some of the audience. Hopefully we all left feeling refreshed.
Like James, and so many others, I find hand knitting keeps me calm; it’s repetitive movements bringing my attention back in a rythmic cycle. So now I’ve written this it’s time to take up my needles for a soothing session.
Today I had a lovely day with Long Buckby Machine Knitting Club. They had asked me to come and talk about my book Translating Between Hand and Machine Knitting and gave me a wonderfully friendly welcome. This meant talking about my experiences as a machine knitter was like sharing with friends.
I met so many interesting people who have interests in common and was pleased to see some younger faces on the audience.
Janet Collins, Chair of the Knitting and Crochet Guild was there and spoke to the meeting about the recent amalgamation of the Knitting and Crochet Guild and the Guild of Machine Knitters. She also gave an impassioned plea for members to encourage younger people to become members. She told me that if the Guild is not offering what young knitters want, the way forward is to find out what they do want and make this an aim, otherwise the Guild will dwindle. As there are 1,500 members this would be a real shame.
I’m now on my way home feeling a warm glow from the kind words and the opportunity to meet genie machine knitters with so many skills.
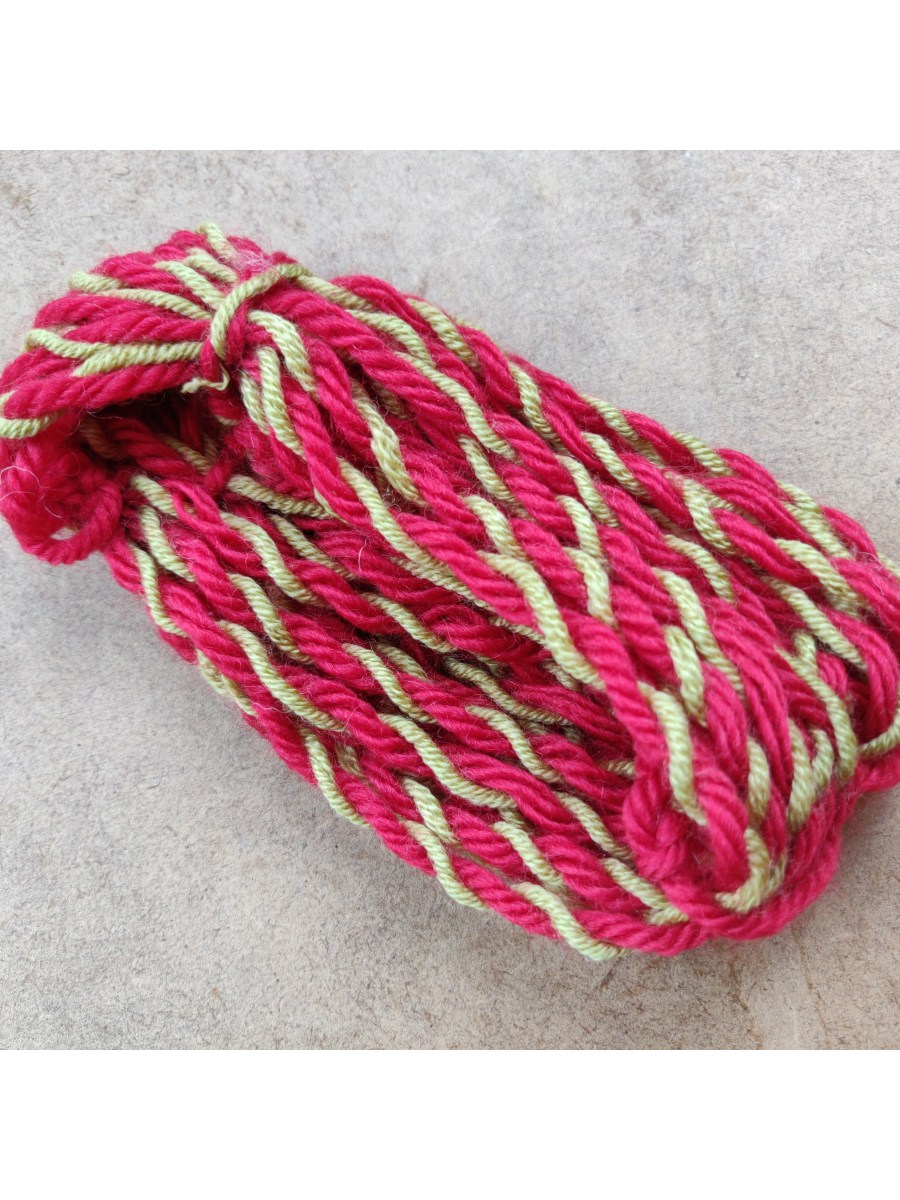
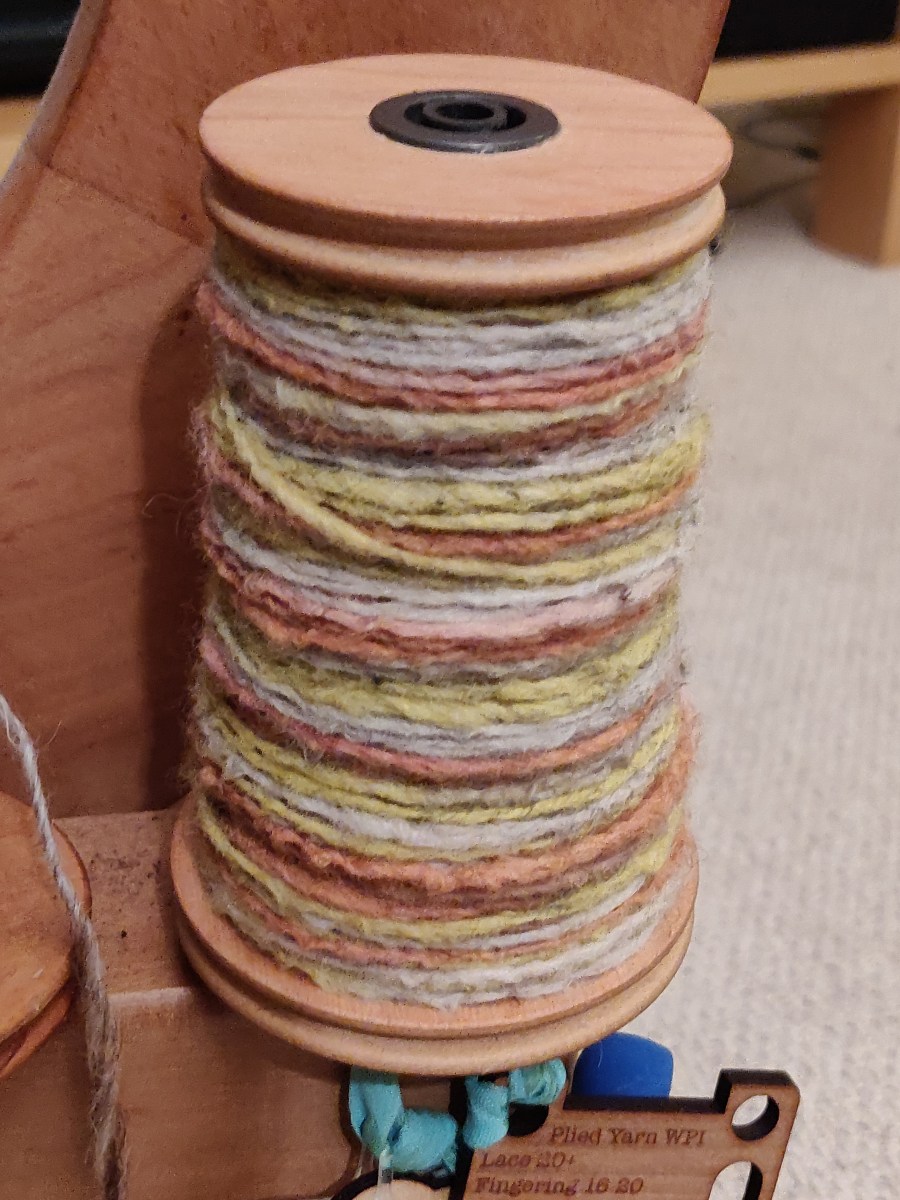
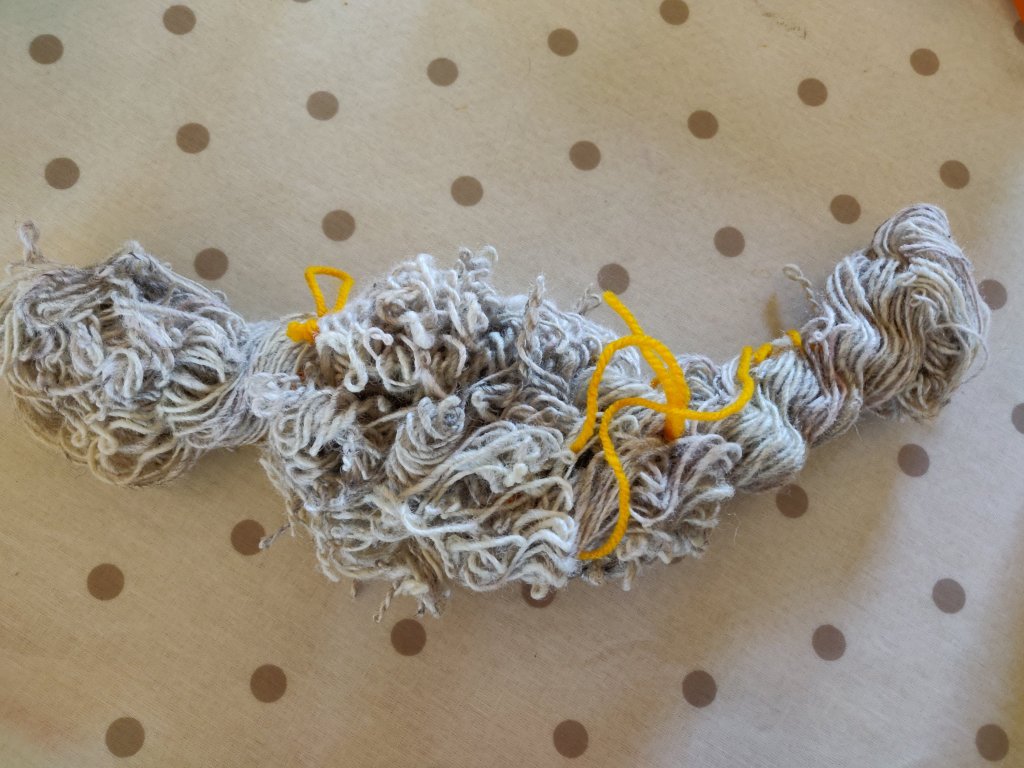
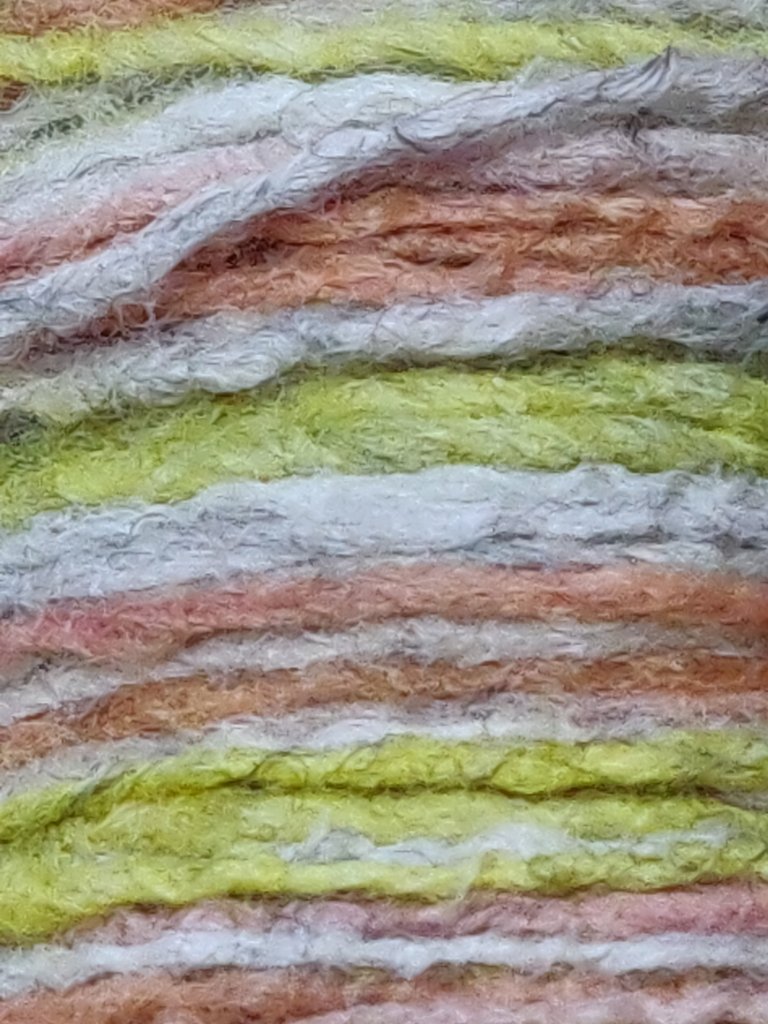
Having read about this spinning technique I though I’d have a go. It doesn’t save much time as you still have to run the yarn back through the wheel, which takes as long as simple plying. It was prompted by my practise at making a ”Z’ twist fat singles’ and so I decided to over-twist this singles yarn as I practised the night before a dyeing session. So I treated it cruelly when washed it, and also in the hot dye bath as well.
As there were several colour dye baths it was too tempting not to dip-dye the hank. Firstly it went into red-cabbage allover, and then the ends were dipped into madder and turmeric.
This is what it looked like before hot washing and dyeing.And after re-spinning it’s open up nicely and is quite soft.
I’ll be trying this out soon to see what it looks and feels like as a knit.
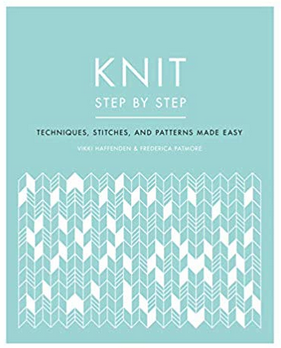
A new edition of Knit Step by Step has been published this month. With new content including step-by-step instructions (with lots of lovely photos) of how to work the exciting on-trend chunky ‘arm knitting’. All wrapped in a smart new cover it looks great!