A bit of cotton dyeing using home made tannin extract

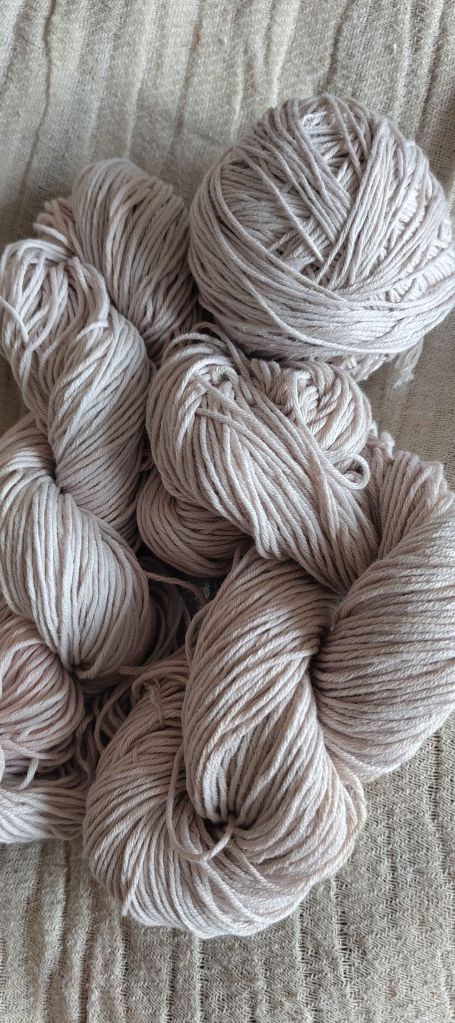
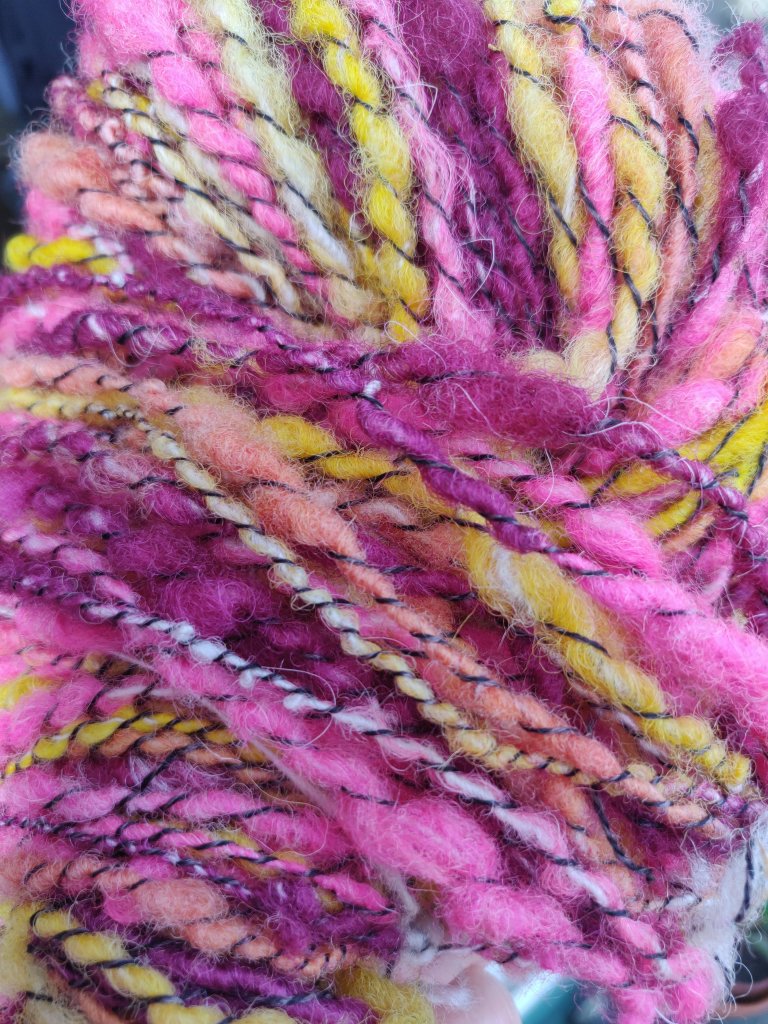
I posted recently about solar dying wool with mulberries and I thought I’d now have a go dying some commercially spun cotton that I have already, and conveniently, put up into hanks. There are six 50g hanks, so I am hoping for 300g of lovely coloured cotton to play with.

I don’t dye cotton often, but I do know that it requires tannin as a mordant. Well, being a bit disorganized, if I’ve got any commercial tannin mordant I can’t find, so it was a relief when after a quick look in Jenny Dean’s Colours from Nature, I found that bramble leaves and twigs contain tannin. A bit more research on the internet suggests that mulberry leaves also contain tannin. It looks like this is going to be a multi-day effort.

DAY 1

One thing we have in plenty in the garden and surrounding fields is brambles and of course we have a mulberry tree, so I went on a little foraging trip. I collected a basket full of mulberry leaves and brambles which I chopped up and boiled for an hour as instructed in the book.

DAY 2

I left these to soak overnight and have just strained the liquor off into a pan and slightly reheated this.

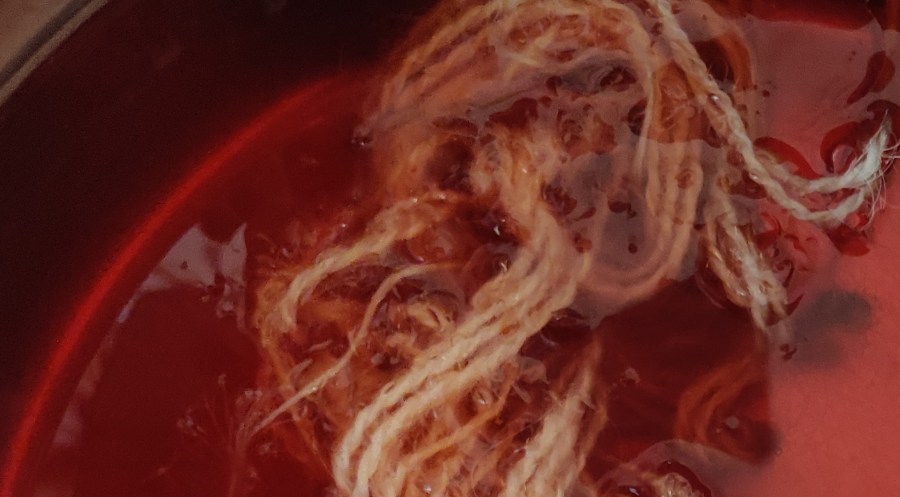
I’ve just submerged the damp cotton hanks in the tannin liquid, and will leave this for 24 hours for the cotton to absorb the tannin. According to Jenny Dean there is a likelihood this will stain my white cotton and is bleached white slightly yellow, so we will see.

Hanks of cotton soaking in the home made tannin solution

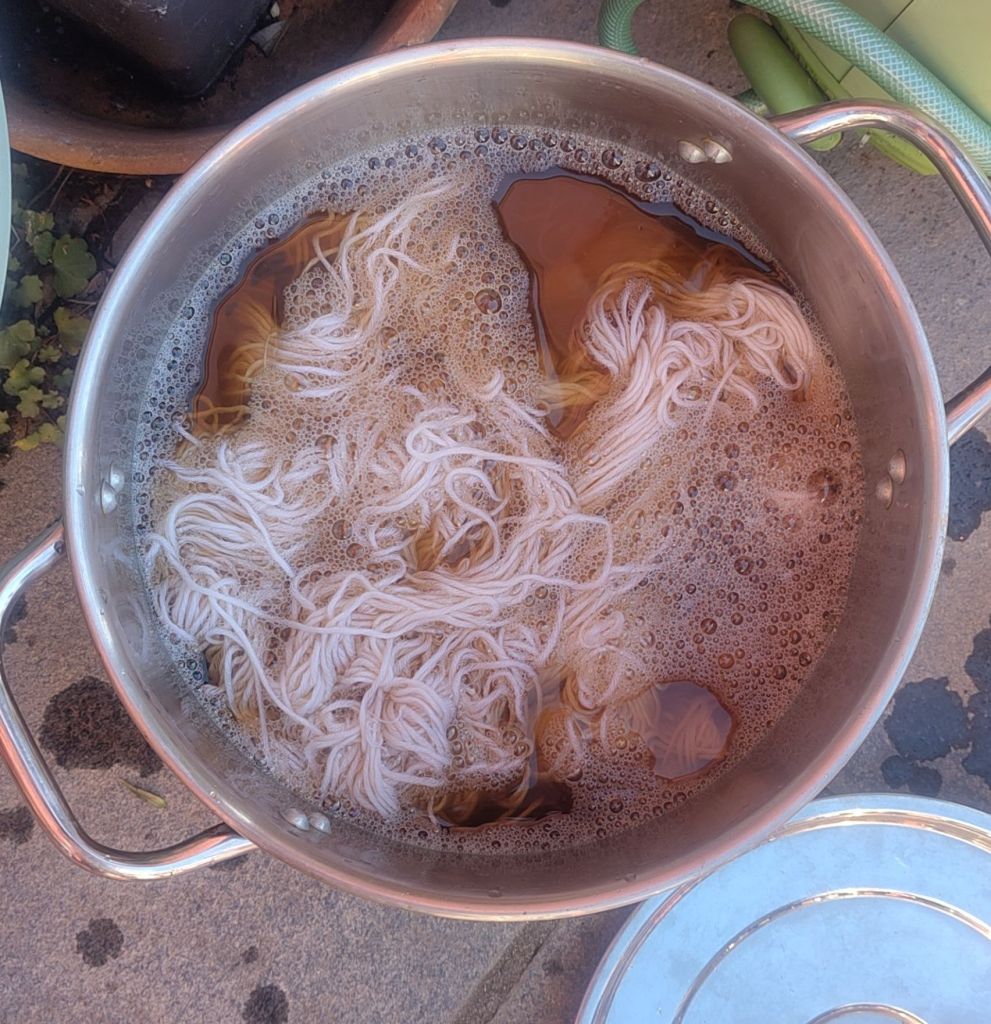
Hopefully the mulberry dye will accommodate this and give me a nice color.

DAY 3

The cotton yarn after being soaked in tannin solution, a slight cream cast

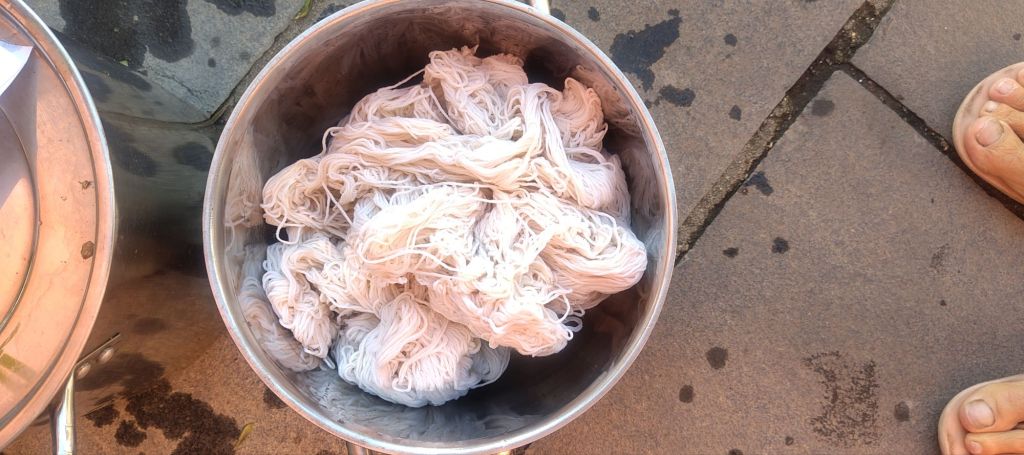
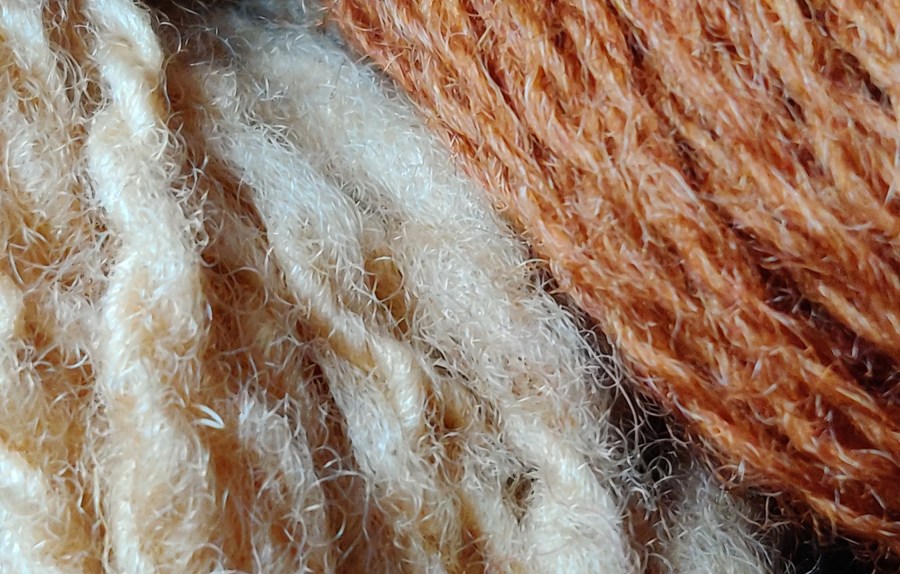
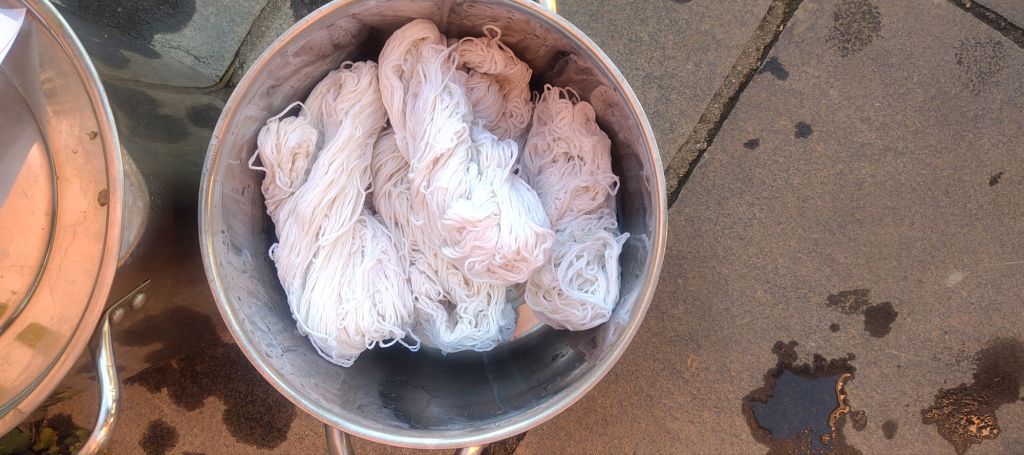
After the tannin soak the cotton had taken on a slight creamy colour, not too bad at all. Maybe it didn’t take the tannin?

Straining the cooked and soaked mulberries to release the dye colour

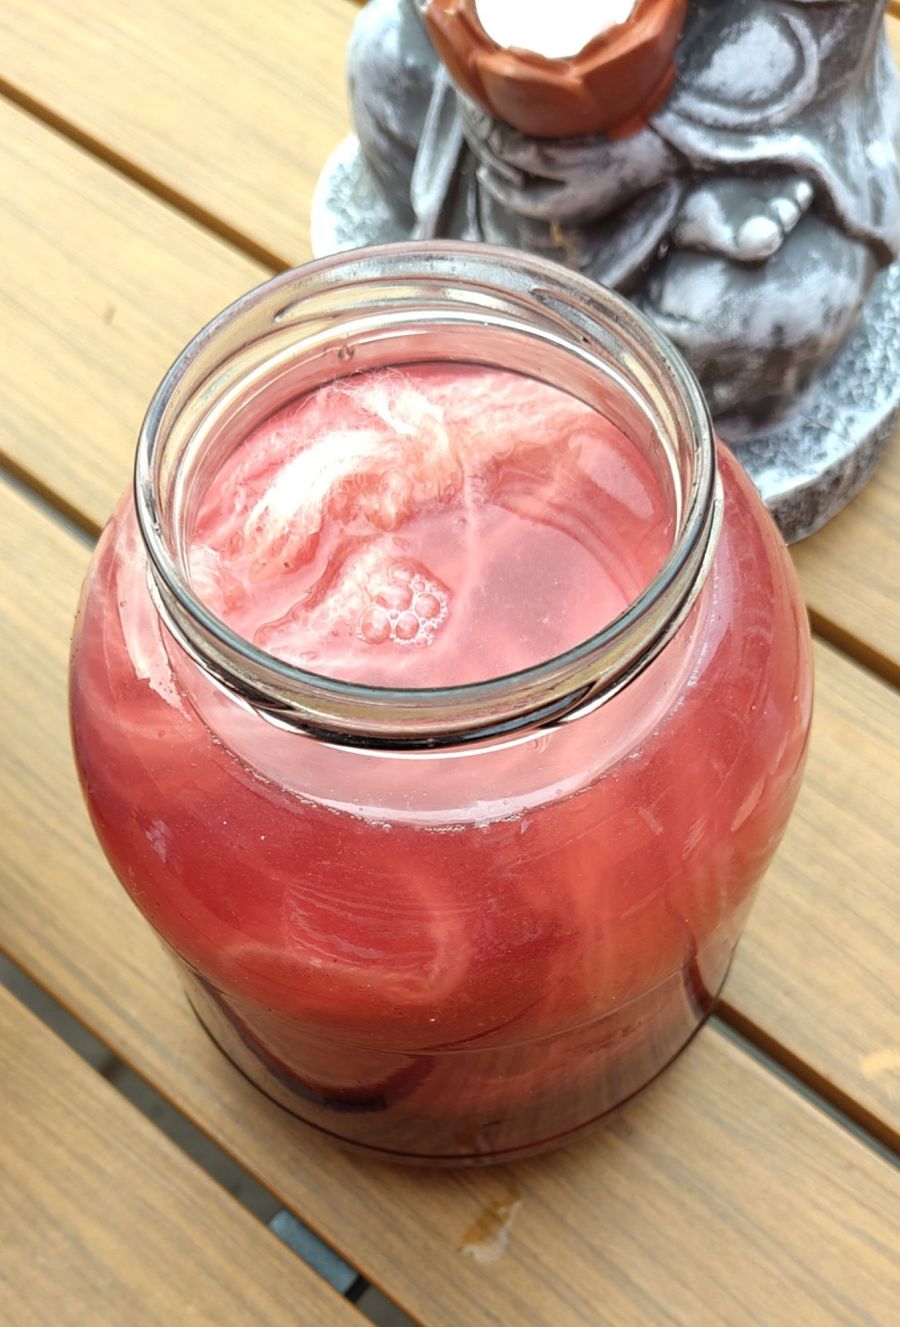
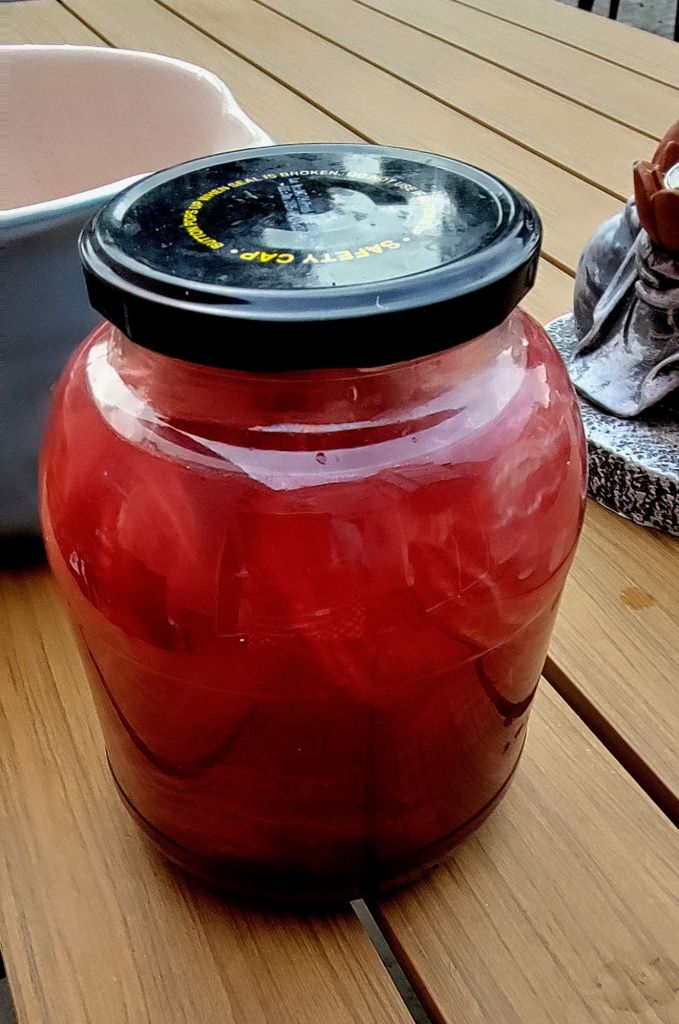
I had prepared 1.5kg of mushy mulberries that weren’t really edible by cooking them up in some water and leaving them to soak and give up their colour overnight. I thought I was ready to get in with the dyeing, but luckily at this point I went back to Jenny’s book. Only then did I  realised that the cotton needed to be soaked in an alum mordant after the tannin. How did I miss this before?

The recommended amount is 4 tsp alum and 1.5 tsp of washing soda per 100g of fibre. Dissolve the alum and soda in enough water to cover the fibre,  and bring to a simmer. Then leave it to soak and cool for 12-24 hours.

DAY 4

NOW I can put the hanks in the dye..

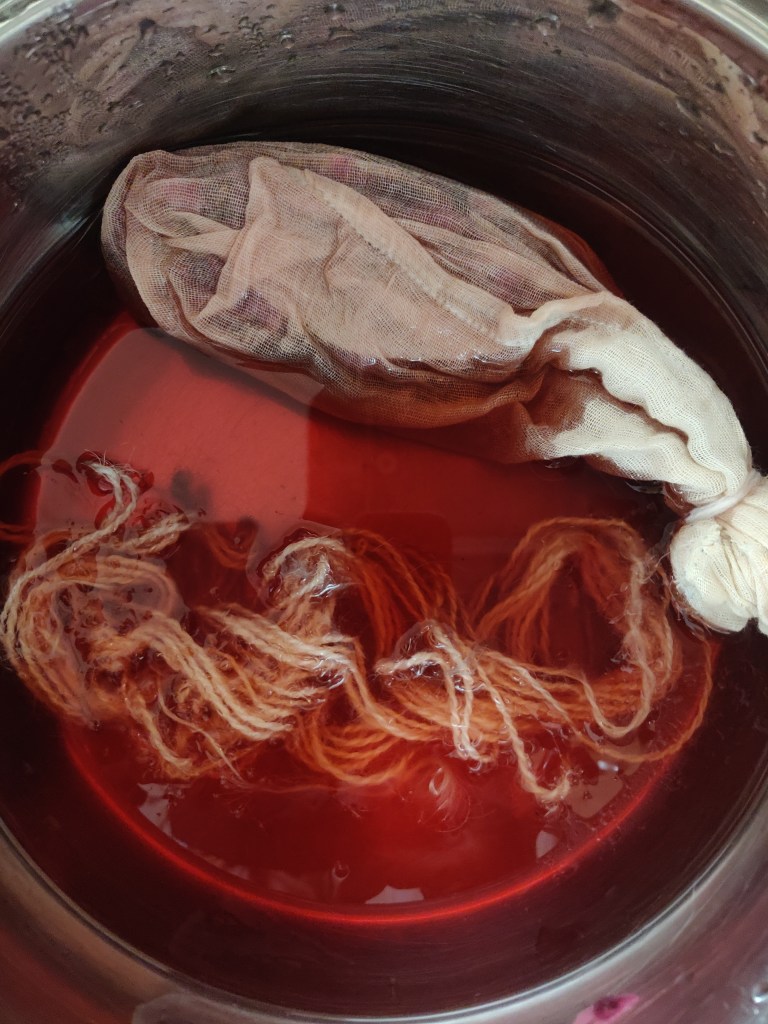
This afternoon I took the yarn out and rinsed it. Then strained the mulberry liqour and put it in the old slow cooker I use for dyeing. I added some salt (not sure why but seemed to remember it helps the dye take) and then added enough water so that the liquid would cover the fibre. After that I immersed the yarn in the dye.

Fingers crossed it will work.

First dipped hank… Now it needs to sit in the dye overnight…but we all know it’s probably going to wash out…

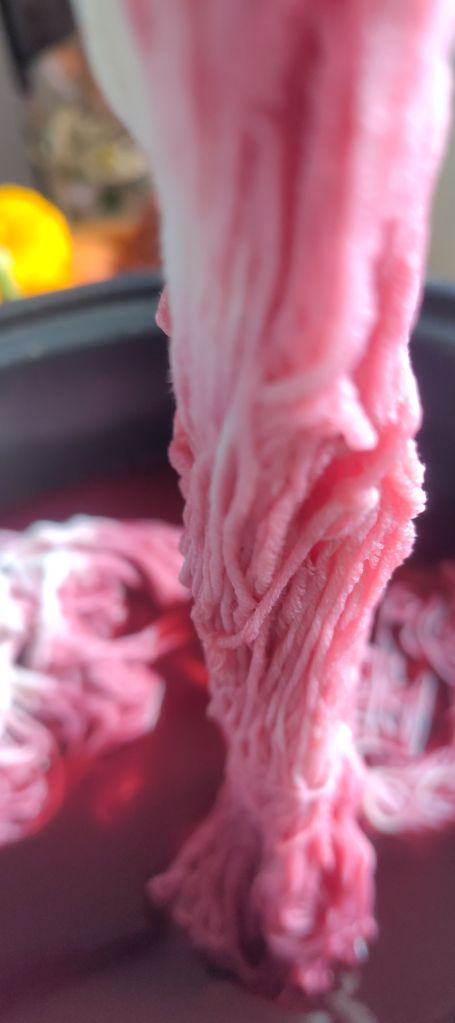
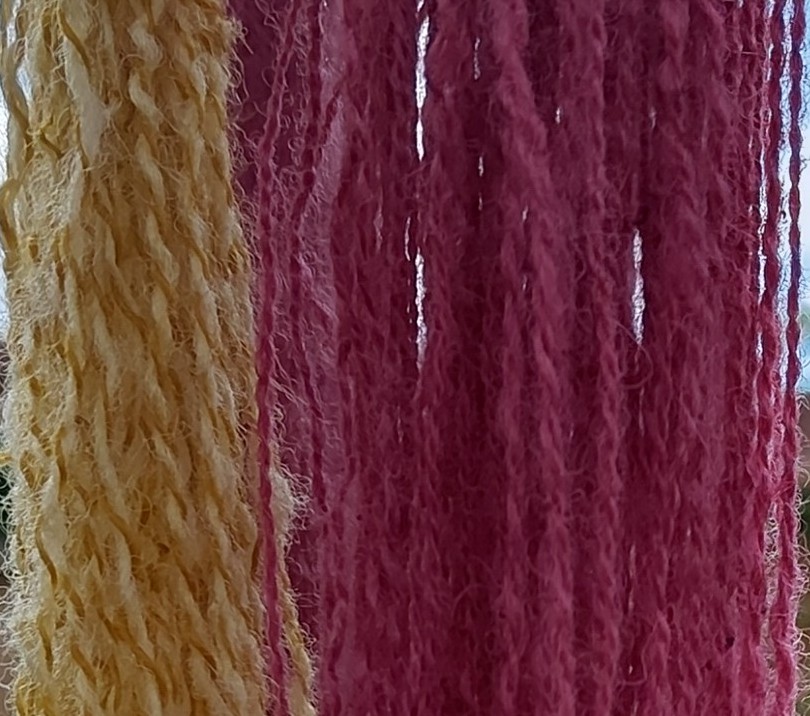
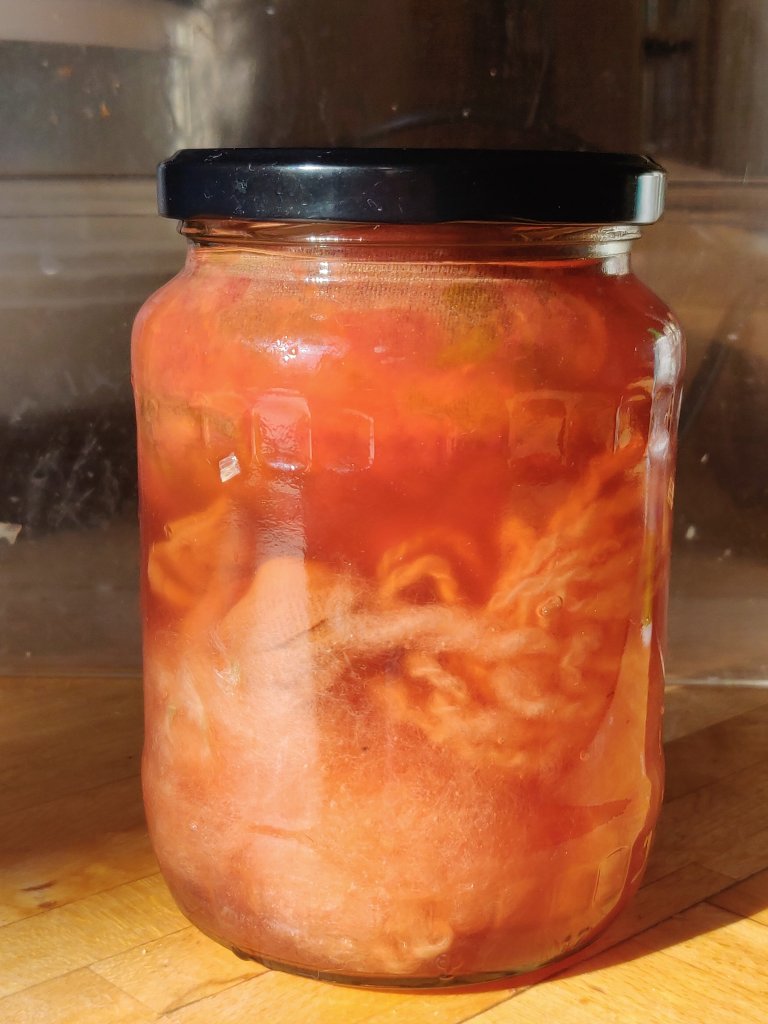
Well, the hanks came out looking lovely, but as predicted, the colour mostly washed out. It’s not a bad colour, it’s very a pale, lilacy grey, just not the pink I hoped for.

The final colour, a pale lilac grey.

Solar dyeing from the garden waste

As mentioned in my previous post we have a lot of fruit in the garden, a large amount of which is from a prolific Mulberry tree. I’ve made jam,  jelly, syrup, sauce, dried them and made fruit leathers. Plus Ross is making wine from three kilos of them.

One of the problems with mulberries is they have big pips and a stalk that is difficult to get out. Many of the things I’ve made have involved cooking the fruit up and then putting it through a Mouli or nylon sieve to get the pulp and juice and then working with that. As we have a lot of apples I use the windfalls to make pectin and sometimes add a few apples to give some body to the pulp.

Of course you end up with a lot of mulberry mush with pips and stalks in it. However this still retains the really strong color, and staining ability, that the complete mulberries have. So I decided to do some dying with the pulp. Last year I solar dyed with raspberries, which gave me a gentle pink, so this year I worked with the mulberry pulp in a similar manner. I use my own handspun yarn and solar dying with the mulberry pulp, which gave a pretty, pale crimson. I boiled up the mulberry mush again with a bit more water and added any berries that hadn’t been good enough to go into the jam. When I thought I got as much color into the liquid that I was going to get I strained the liquid off through a fine sieve, being careful not to squash the pulp through as well. The liquid went into a big jar with 1% alum solution, some salt and a dash of white vinegar. After a good stir  the dye jar was ready. 

Before I started all this I had put a 100g hank of handspun wool  yarn to soak in hot water with washing up liquid and a little bit of soda. Although the yarn had been washed already, this extra soak and the soda in particular, removed any remaining oil, ready for it to take the dye. The yarn had been spun and plied 2ply from a Lleyn fleece.

After rinsing and removing extra water from the yarn I put it damp into the dye jar, put the lid on and gave it a good shake to distribute the dye around you the yarn. My plan was to shake the jar every day whilst it sat in the sun for a week to ten days, but I forgot so the hank is a slightly lighter colour one end, which is pretty but not a solid color I had intended.

I follow the same process with marigold petals that I’d gathered  when deadheading the marigolds I’d grown this summer. These had been left to dry and were cooked up and strained in the same way as the mulberries. After removing this yarn, which was only a small hank, from the dye jar I found that one of the singles had taken the color much better than the other. This is because the 2 ply yarn on the bank was plied from two different fleece singles that were on odd bobbins, and I don’t remember which  forever either were from. So an interesting dye experiment, but lacking the control of knowing the fleece type.

On the left is the mulberry and on the right is the marigold dyed yarn.

Acid dyeing session

Having acquired a Devon/Cornwall fleece that is quite similar to a Romney in feel and quality, I thought I’d dye some for blending. This fine will be great to comb for a semi-worsted spun yarn.

One of my favourite methods for safely dyeing fleece without matting the fibres is to use a slow cooker. I have a large family sized one that will dye 100g comfortably and 150g at a pinch, and a single-person one that does 20g for samples etc.

Using a pre-mixed colour I’ve used before I did a blue first. However, on this fleece it came out darker than I anticipated, but will probably lighten up once combed or carded and spun.

From the remains of the dyebath I got a pretty light turquoise.

The blue at the back, turquoise at the front

I have combed these colours as shown in this video.

Note that in this video I talk about ‘roving, but technically I am making ‘tops’. Roving is a similar narrow length of fibres drawn off a drum carder (usually, but can be hand carders) and has a slight twist added to keep the fibres together.
After combing, both colours have come out as
I hoped.

I also wanted an olive green, and have a recipe that worked perfectly on a Dorset fleece last year. I must have made a mistake somewhere, because I got a dark green instead. Maybe it is the different fleece, but I think I got my proportions wrong!

Pretty enough, but not olive green!

Once again they was some colour left in the bath, so in went 100g of Dorset fleece. OMG, the colour was bright! No idea what I did wrong, but it makes me blink.

The only compensation is that the fleece has not called at all due to using the slow cooker method.

That bright green total exhausted the dye – no surprise really! I will probably card this as the staples of the Dorset fleece are short and it is a soft fibre. Great for soft woollen spun yarn.

If you are interested in discovering the difference between different terms such as roving, tops etc, click here to read Abby Franquemont on Spin Off.

Avocado surprises

Having been eating loads of avocados last summer I dried the skins and stones for dye material later on in the year. I want sure if the colour outcome would be effected by drying so decided to try some out recently.

I took 60g dried avocado skins and two skeins of yarn; one 14g hand spun 50/50 cream wool and alpaca and 12g commercially spun 2/9nm will and nylon (sock yarn). I reckoned half yarn to dye material, but being dried may have made a difference.

I cold mordanted the yarns overnight and soaked and cooked up the skins. Stained the liquid and made up the due bath. Then gently simmered the yarn for about 60 minutes, with the skins in a muslin bag in the bath as well. After that I left the whole pot to cool overnight.

I was surprised that the hand spun did not take much colour whereas the wool and nylon took loads. Both had had same pretreatment.

Left is hand spun 50/50 wool alpaca yarn, right is wool and nylon

I will be using the will nylon in machine knit socks, so pleased with the colour. It’s not as warm as the undried skins I’ve used in the past, more like onion skin colour.

UPDATE On reflection I think the Alpaca may have influenced the way the dye was taken up by the hand spun yarn

Colour-changing yarn spun from a distaff

I’ve had a number of different colour hand dyed carded batts sitting waiting for me to find inspiration. They are all from fleece I have scored and carder myself, so are a mix of Shetland, Suffolk and Texel, with maybe a little Alpaca blended into some of them. Some are in 200g amounts, some less. I’d got a bit stuck about how to use them until I saw a useful tip by Anna from my spinning group that she has put on YouTube.

Before you start, select a group of colours that work together. After a designing session during which I wrapped different colours together, I chose five: orange, pale green, mid blue, pale blue and lilac.

Anna used a combination of hand dyed and commercial roving, but the principle is the same with your own carded batts.

1. First of all split the roving/batt into the required lengths, (I just used the whole length of the batt of my drum carder).

2. Then split each length lengthwise into 4, (or more, depending on the thickness of the roving/batt).

3. Next, lay out the colours lengthwise, next to each other in the order you want to spin them into yarn. Test this beforehand to see how they mix throughout one repeat of a yarn, and if this works for your chosen outcome, such as knitting.

4. Repeat the colour sequence three more times so you have a table full of ‘stripes’ of fibre. If you have more than four lengths let colour, carry on until all are used up.

5. Now this is the clever part. I have hand spun colour changing yarns before and got the sequence wrong because I put it all away in a box between spinning sessions. To keep the sequence do the following.

6. Take a metre + long length off ribbon and tie a pencil or empty pen across one end. This is your fibre-stopper. Tie a hand-sized loop on the other end. This is your distaff.

7. Starting at one end of the ‘stripes’, wind each length off fibre into a loose roll and slip the looped end of the ribbon through the centre hole. Carry on doing this, working methodically through the fibre lengths, keeping the colour order as mapped out in your ‘stripes’.

8. You will end up with a ‘necklace’ of colour ordered fibre rolls on the ribbon. Tie the ends together to stop the fibre sliding off.

The dyed fibre arranged on the ribbon distaff before spinning

Now to can put them in a box and they won’t get muddled. To start spinning, simply lift the necklace out, untie the ends, and slip the loop over your hand. It acts as a distaff and will hold your fibre nicely as you spin each colour.

Spinning the lengths into singles

What a great tip!

I plied the colour changing yarn with a single spun made from navy blue Corriedale. This made a lovely marl yarn that to me resembles stained glass windows. I can’t wait to see what it looks like knitted.

The plied yarn

Here is the link to Anna’s video

Rose petal dye anyone?

Update:

The weather has turned so I have taken both sample skeins out of the dye. The results are shown below.

Over ripe strawberries on hand spun Dorset fibre on the left and dark red rose petals on handspun Shetland fibre the right.

Original post

My lovely husband gave me roses a week ago, but sadly they have drooped and begun to drop petals. I’ve decided to use the petals for dyeing; they were a lovely dark red and I hope I’ll get at least a pale pinky-brown from them.

The main thing I have learned is not to overheat petals – or any red natural dyes for that matter – as that seems to make them brown.

I tore up the petals and covered them in cold water, then added a little salt and white vinegar to the pot before gently heating it to below a simmer. I left the petals overnight to steep and strained the liquid off this morning. After that I put the drained petals into a muslin bag, returned this to the pan and added a skein of wet mordanted yarn to the cold liquid before reheating to a mid range temperature.

Hand spun Shetland yarn in the pan – hand spun never seems to take the dye as well as commercially spun yarn, but its more fun to try with my own yarn.

After heating the dye I poured the contents of the pan into a large lidded jar and have left it to steep for as long as it needs…

The dye looks jewel-like in the glass jar, but I bet I get a brown yarn!

I’ve also put some over-ripe strawberries into a solar-dyeing jar next to the rose petals.

The dye smells wonderful!

Going for brighter colours

I’ve been dyeing a whole fleece into 100g lots mixing my own colours from primaries from Colourcraft acid dyes bought from George Weil.

I’ve gone into detail about this here, but the colours are zinging.

Pink, greens, dark red, yellow and orange. I’ve just completed a blue, but it’s still wet so will have to wait to be added later on. I added another batch of fleece to the finished due bath to exhaust it totally, which gave me a pretty pale blue.

Watch this space for the blues…

I’ve also tried stove-top rainbow dyeing. More about that can be found here.

Spinning outdoors

Last week a few of us got together (safely distanced and masked), to take our textiles into the park. I enjoyed myself so much I forgot to take a photo!

The thought of spinning outside in the sunshine encouraged me to use bright colours. So I took along some Shetland fleece I dyed a while ago using acid dyes, (I have written more about dyeing fleece with acid dye here).

I’d spun up a bobbin of Suffolk fleece that is not very exciting, so I planned to use that as the core for a bright, irregular spun, core-spun yarn to which I would add a charcoal wrapping yarn. All 100%wool. I took my folding Louet Victoria S95 wheel which is a joy to use.

The core yarn was Z twisted quite tight. The wrapping colours were also put on Z twist, and the final charcoal, commercial yarn was S spun over the others.

Photo taken at might, so the colours are not accurate.

After washing and drying the twist the colours hardly muted and it’s come out as lovely yarn.

Taken outdoors, but the colours are a bit light.