Taunton Machine Knitting Club will be demonstrating the wonders of machine knitting at Craft4Crafters this March.


Taunton Machine Knitting Club will be demonstrating the wonders of machine knitting at Craft4Crafters this March.
Reformin, or ‘latching-up’ single bed stitches into a rib structure is sometimes seen as far too time-consuming for a ‘fast’ activity like machine knitting. However, I quite enjoy the process and have written about it and made a ‘workshop’ video of working a 2×2 reformed rib here. I hope you find it of interest and useful.

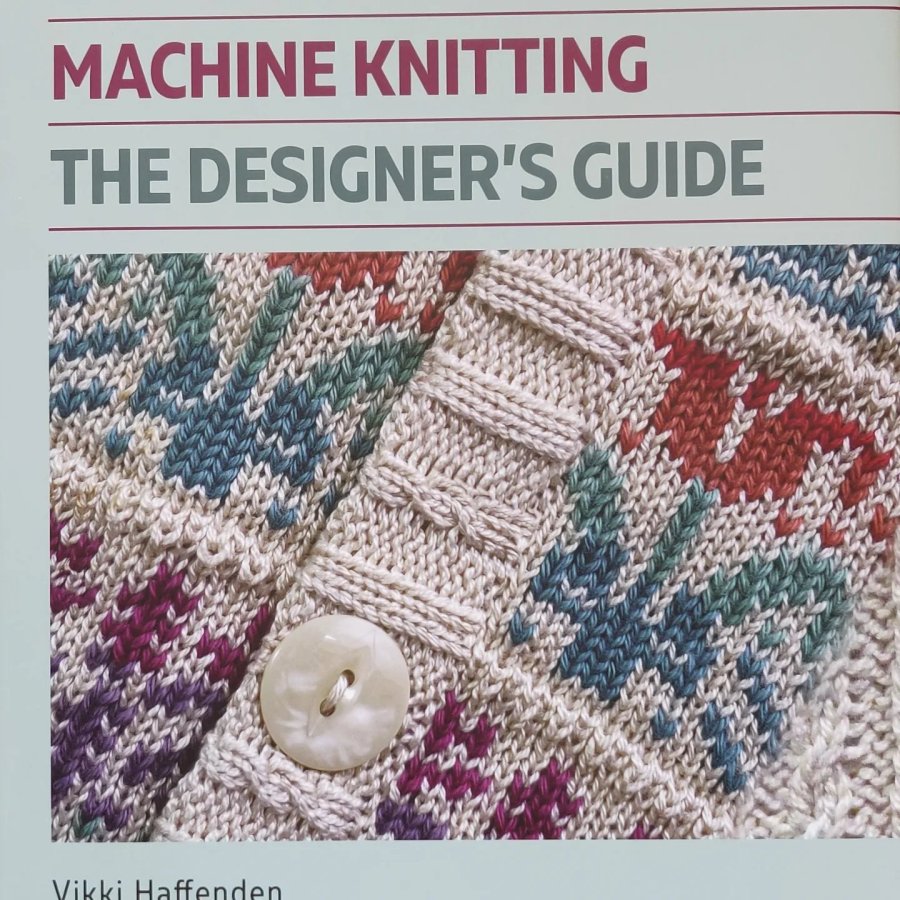
November’s edition of Machine Knitting Monthly has a great review of ‘Single and Double Bed Machine Knitting; the Designer’s Guide’. Amongst other nice things, they mention the broad scope of the book’s contents. I deliberately wrote so that it is suitable for any machine owner from Brother to Passap with lots of hints and tips to work on different types of machines. Thank you Machine Knitting Monthly!
Read excerpts from the review here.
The advance copy of my new book arrived today, and you can see some pages from the book here.
Meanwhile here is a quick look at the book.
I have made a more in depth video introduction to the book, and if you would like to watch this, please keep on scrolling down the page.
I’ve been having back problems and unable to use my knitting machine for several months which had been frustrating. Especially as I am coming towards the end of writing my latest book and wanted to knit some of the final samples. The same was of course true of trying to sit down to write the text of the book, or do any work at the computer.
I had seen sit-stand desks, and fancied one for computer work when I first looked at the start of the panedemic in the UK, but they were terribly expensive. My son acquired one for his work as a computer programmer and it looked an interesting solution for spending a long time writing at the computer. I tried putting my computer on a static raised desk, which was great for teaching as I could move about, but then I couldn’t sit down to do the accompanying admin and ended up with real back problems. After the best part of two years struggling with WFH teaching online, (actually we were all trying to do most things online weren’t we) as well as writing a book, my back finally gave up with an acute bout of sciatica
Several months down the line I am still plagued by this problem, and have invested in a sit-stand desk converter. So far this is proving to be a solution for computer work, (along with a timer telling me to take a walk). I chose a converter because I didn’t want to lose the lovely desk my husband had built for me.
Back to the knitting machine. Yes I know this is a round about way of telling the story, but I’m getting there.
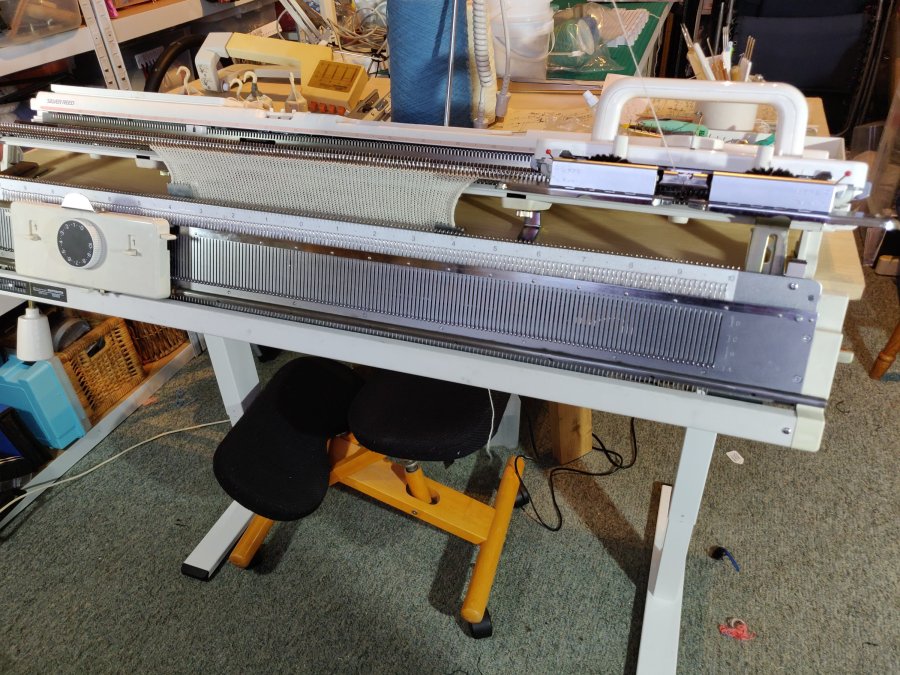
The physiotherapist from whom I am receiving treatment for my back problem suggested putting the knitting machine on a high table to improve the ergonomics of working on it. I have long wanted to do this so that I could stand whilst working on it – as if it was a Dubied – but I also sometimes want it lower, for example with or without ribber. The practicalities of moving machines from high table to low table, let alone the space I would need to do this made a static high table a poor solution. Recently, whilst investigating sit-stand converters it dawned on me that I might be able to solve both of these ‘wants’ by using a sit-stand desk as the table for my knitting machine. Having been put off by the price when I had looked before, I did a fresh internet trawl and found the price first these desks has become almost sensible – lots of demand I guess – so I decided to research a combination that would work.
The max load for the lower priced, single motor ones seemed to be 70kilos, and my machine plus ribber comes within that. Next questions were, ‘would it overbalance? and ‘would there be room for the clamps?’ I bought the powered version, frame only and we fitted a separate top so that it could be positioned to address these issues. In fact the frame is pretty sturdy, and the feet quite deep, so the balance works OK and the top overlaps at front and back sufficiently to allow room for clamps. Another advantage of fitting our own top was that the controller could be fixed to the side so it isn’t obscured by the ribber. Cable management was next, and not to arduous and then my machine was ready to zoom up and down – well not too fast!
Price-wise this solution cost probably five or six times that of a standard machine table, but I hope it will mean I can use my machine comfortably both now and in the future. So far its going well, and I am very pleased with the result. The top is wide enough for two single bed machines back to back instead of the double bed if I want to do this at some point in the future. Let’s hope it lasts long enough for me to test this arrangement!
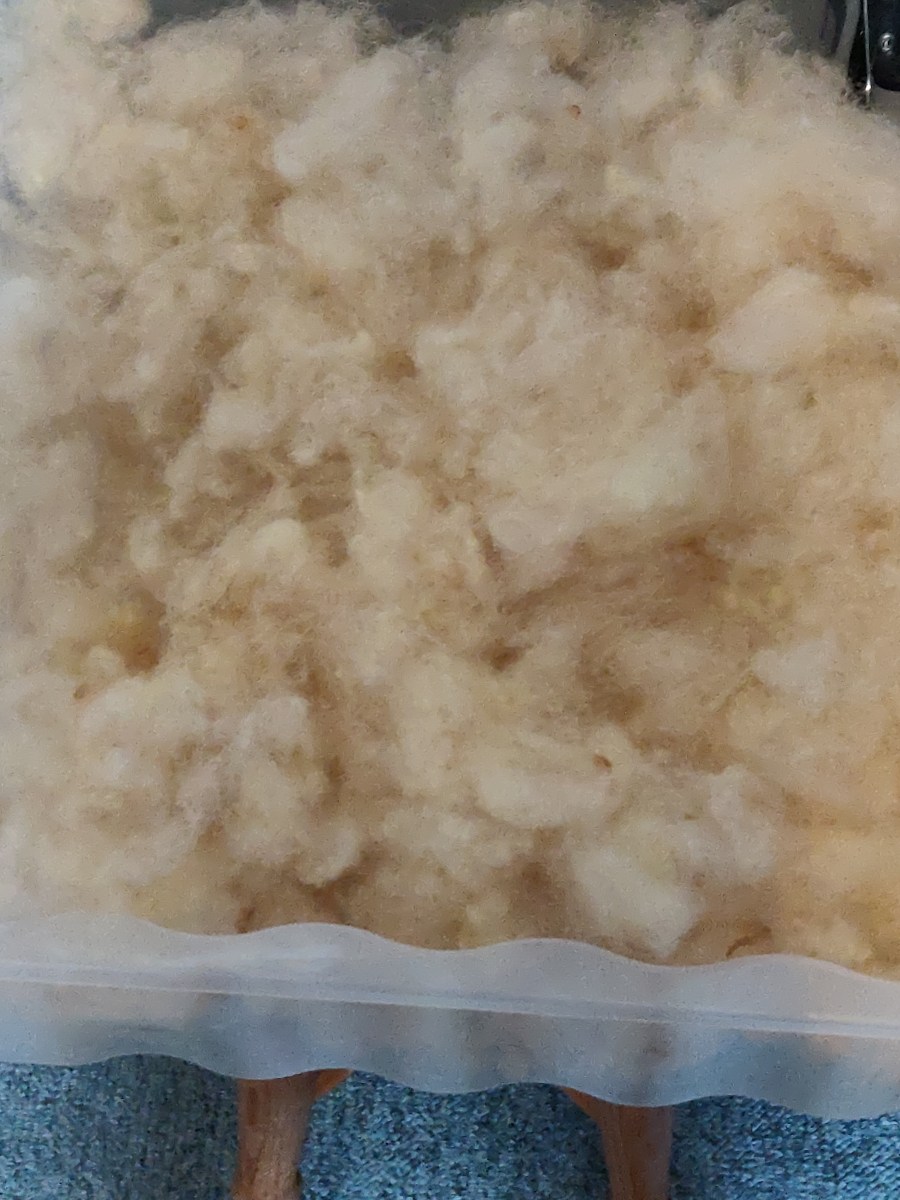
I have a large sack of Texel fleece that had been making me feel guilty for a while. It’s not the most soft of fleece so I decided to blend it with some Alpaca that has also been lurking in the cupboard. Unfortunately the Alpaca (from an animal called Kiki), has quite a bit of VM in it, but it is deliciously soft.
Picking and hand picking got a lot of the VM out, but sadly not everything. I carded both the Texel and Alpaca separately and then split the batts and layered them up in alternate layers; one wool, one Alpaca etc, and put them back in smaller batches through the drum carder.
As my carder is quite coarse I do a second run through for most fibres. So I did it for these batts. I think I probably should have done a third run, but I was afraid of over-carding the fibres and decided they had blended well enough. The result is a little uneven!
I’ve spun two small samples, one thick singles sort of semi-woollen and the other long draw woollen spun.
I’m now perfecting, (ha ha) my long draw technique with several hundred grams of comb waste that I have carded up. Hopefully by the time I get through that I will be proficient enough to tackle long draw spinning that large amount of Texel/Alpaca fibre!
I’ve hand knitted small samples of the both yarns The thicker spun on 6mm needles and the long-draw spun on 5mm needles

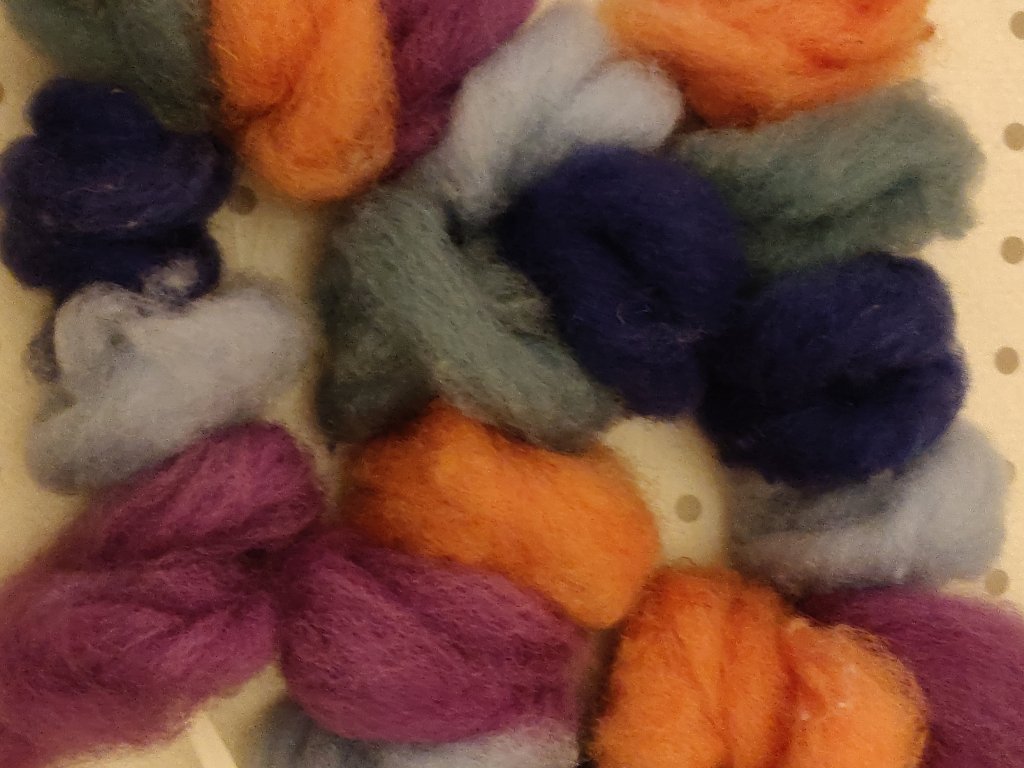
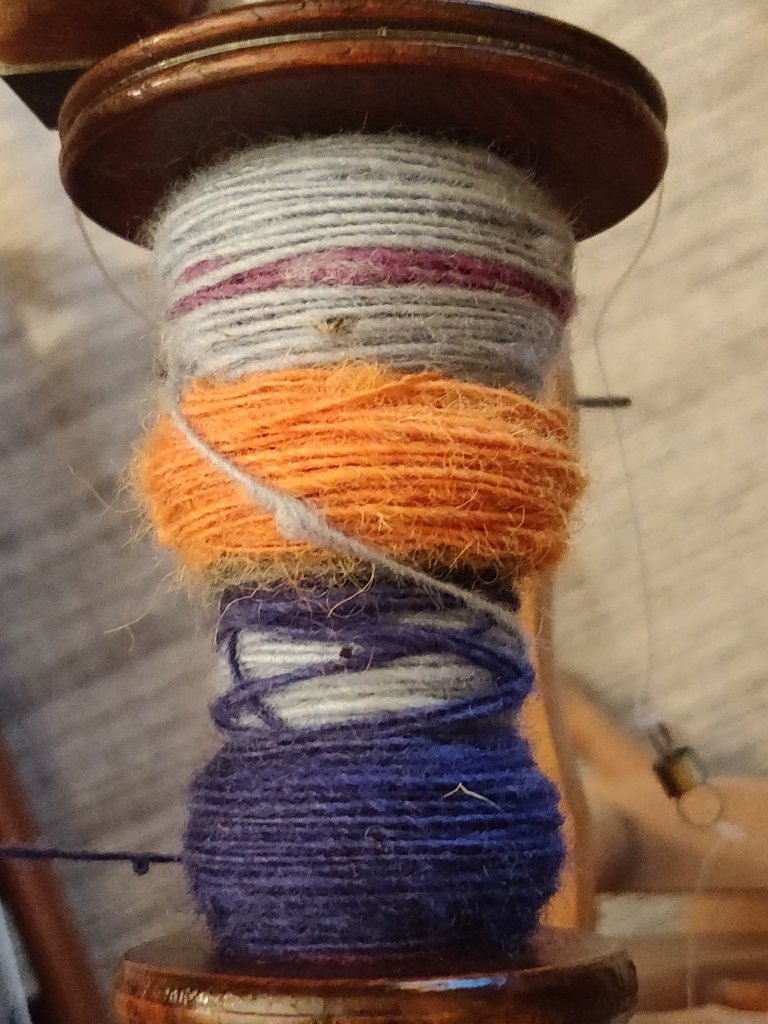
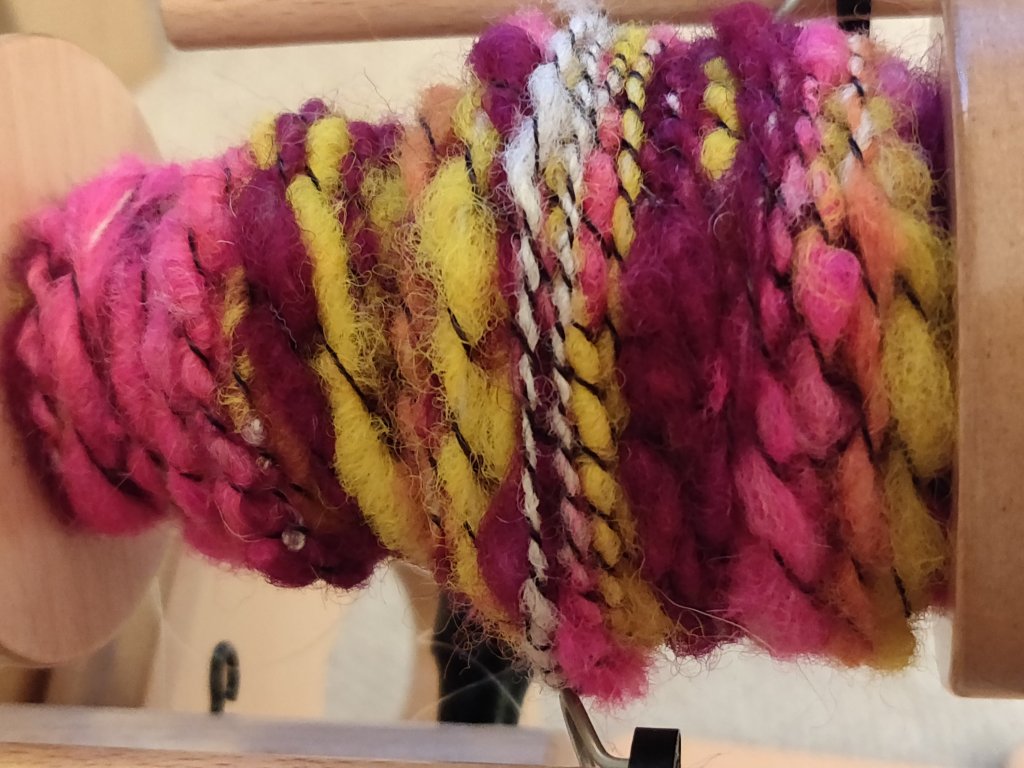
I’ve had a number of different colour hand dyed carded batts sitting waiting for me to find inspiration. They are all from fleece I have scored and carder myself, so are a mix of Shetland, Suffolk and Texel, with maybe a little Alpaca blended into some of them. Some are in 200g amounts, some less. I’d got a bit stuck about how to use them until I saw a useful tip by Anna from my spinning group that she has put on YouTube.
Before you start, select a group of colours that work together. After a designing session during which I wrapped different colours together, I chose five: orange, pale green, mid blue, pale blue and lilac.
Anna used a combination of hand dyed and commercial roving, but the principle is the same with your own carded batts.
1. First of all split the roving/batt into the required lengths, (I just used the whole length of the batt of my drum carder).
2. Then split each length lengthwise into 4, (or more, depending on the thickness of the roving/batt).
3. Next, lay out the colours lengthwise, next to each other in the order you want to spin them into yarn. Test this beforehand to see how they mix throughout one repeat of a yarn, and if this works for your chosen outcome, such as knitting.
4. Repeat the colour sequence three more times so you have a table full of ‘stripes’ of fibre. If you have more than four lengths let colour, carry on until all are used up.
5. Now this is the clever part. I have hand spun colour changing yarns before and got the sequence wrong because I put it all away in a box between spinning sessions. To keep the sequence do the following.
6. Take a metre + long length off ribbon and tie a pencil or empty pen across one end. This is your fibre-stopper. Tie a hand-sized loop on the other end. This is your distaff.
7. Starting at one end of the ‘stripes’, wind each length off fibre into a loose roll and slip the looped end of the ribbon through the centre hole. Carry on doing this, working methodically through the fibre lengths, keeping the colour order as mapped out in your ‘stripes’.
8. You will end up with a ‘necklace’ of colour ordered fibre rolls on the ribbon. Tie the ends together to stop the fibre sliding off.
Now to can put them in a box and they won’t get muddled. To start spinning, simply lift the necklace out, untie the ends, and slip the loop over your hand. It acts as a distaff and will hold your fibre nicely as you spin each colour.
What a great tip!
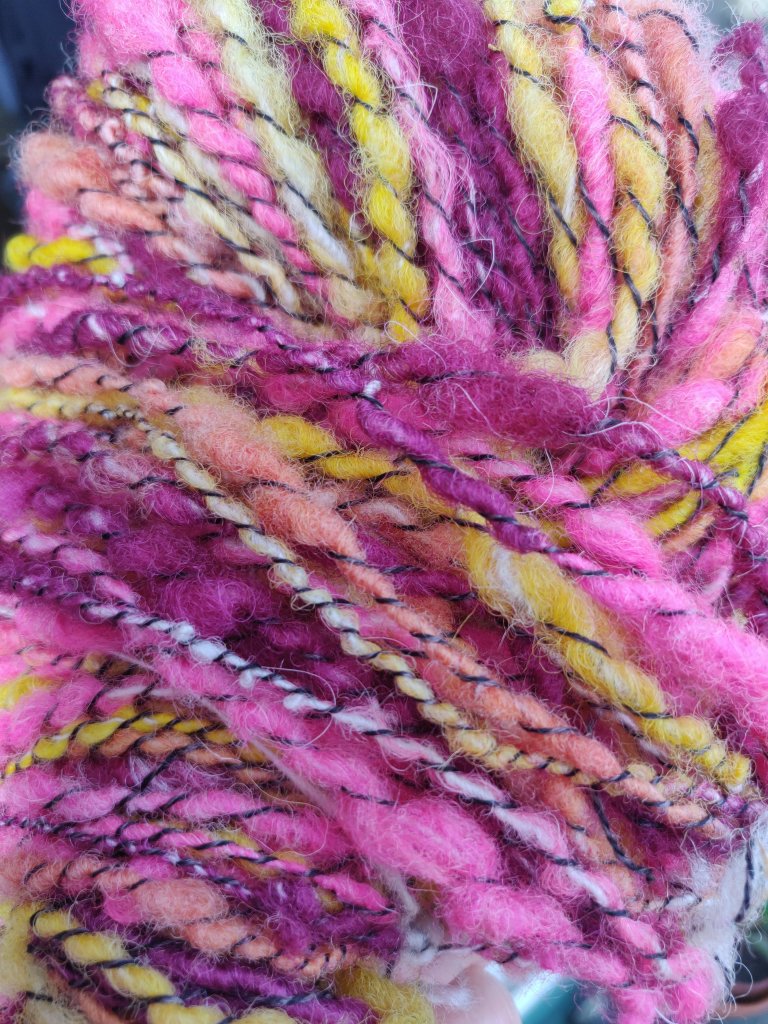
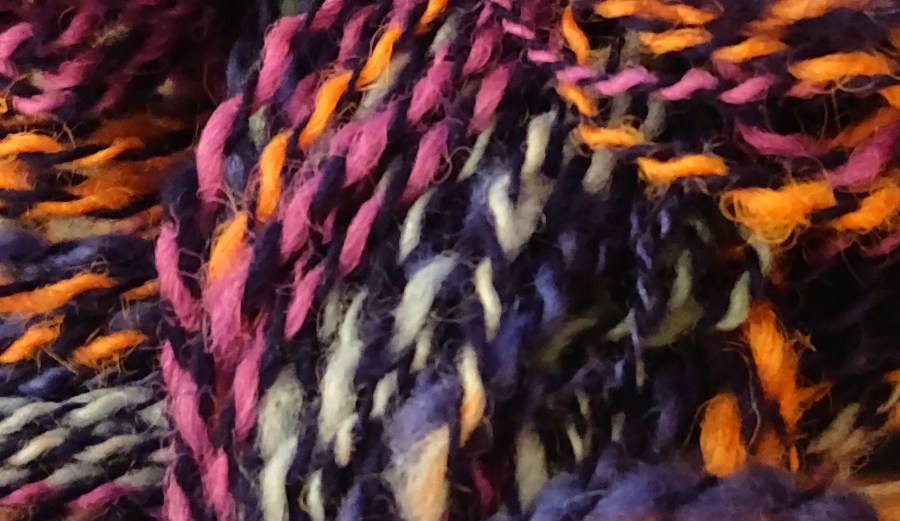
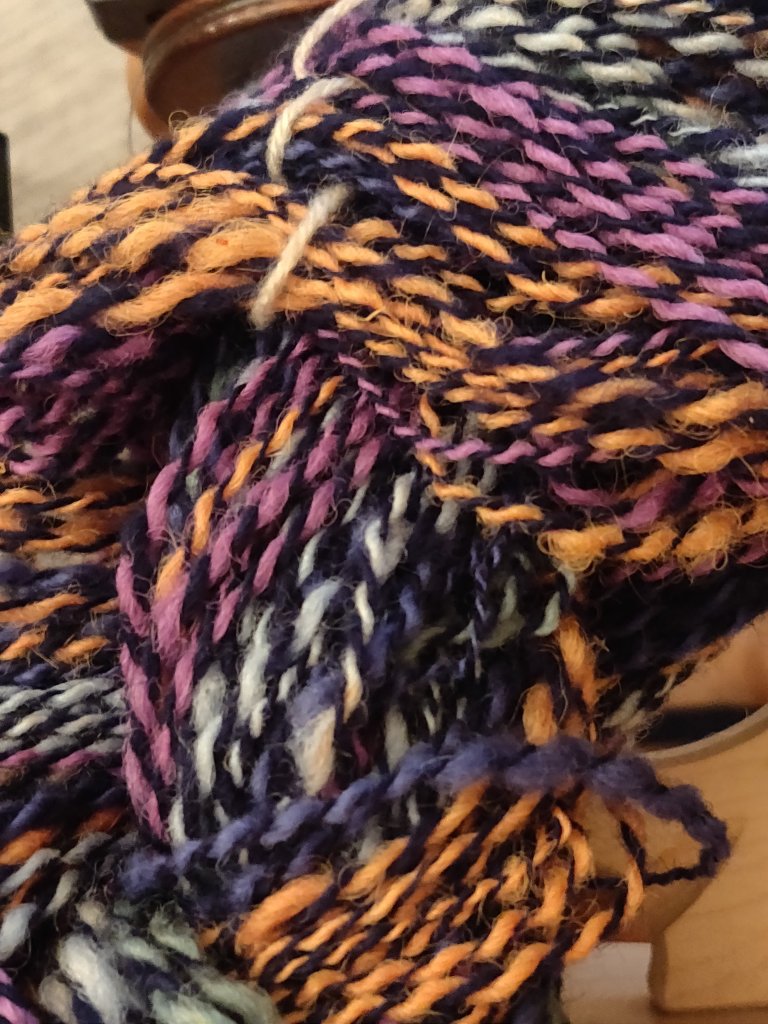
I plied the colour changing yarn with a single spun made from navy blue Corriedale. This made a lovely marl yarn that to me resembles stained glass windows. I can’t wait to see what it looks like knitted.
Here is the link to Anna’s video
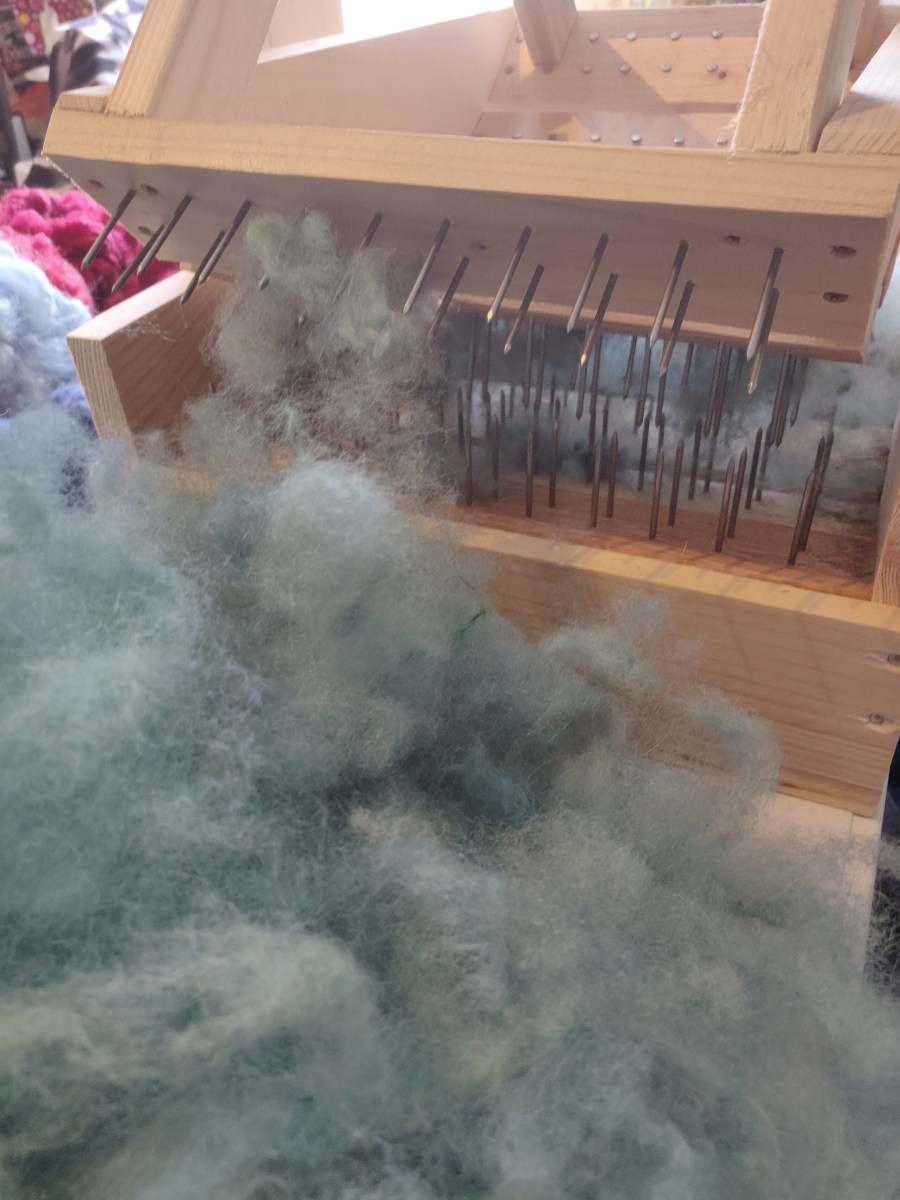
To chew my way through all that dyed fleece and open up the fibres I am using my swing picker.
As with any machine, I fiddle endlessly with the settings, but for the moment it’s picking like a good’un.
They are advantages to machinery. My son came in and is fascinated with the picker, so I can carry on carding whilst he does the picking!
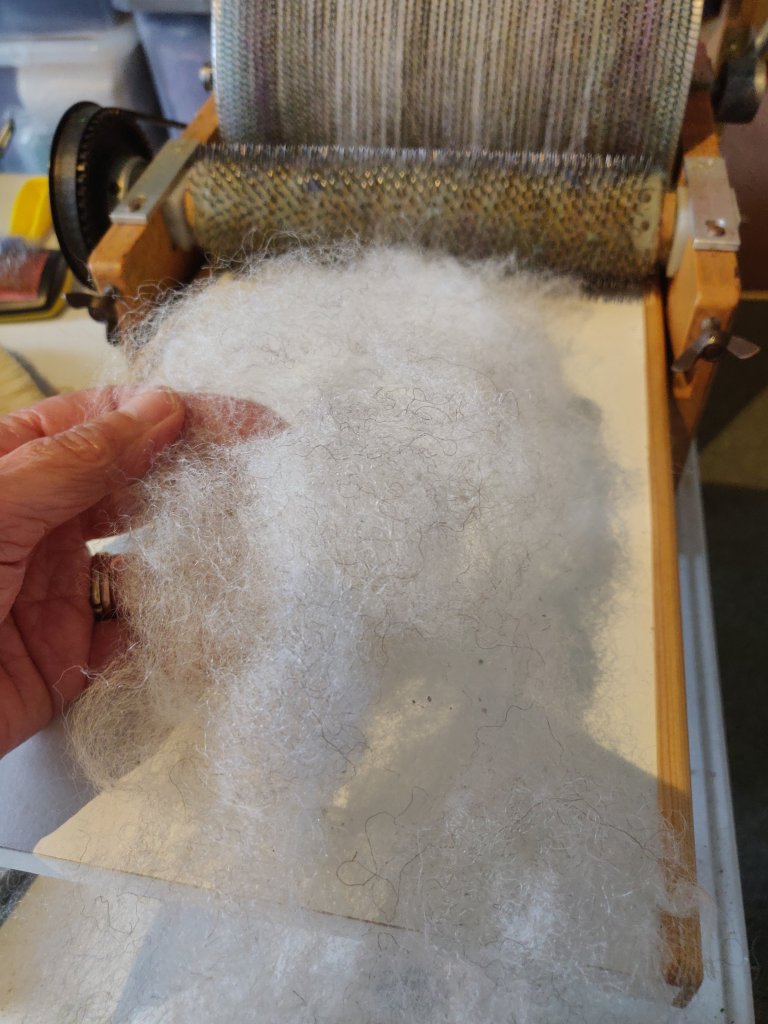
I can’t believe how cloud soft the Dorset fleece I’m carding is after just a brief finger pick. You’d never have thought it would be like this if you’d seen the fleece before it was scoured!
Last week a few of us got together (safely distanced and masked), to take our textiles into the park. I enjoyed myself so much I forgot to take a photo!
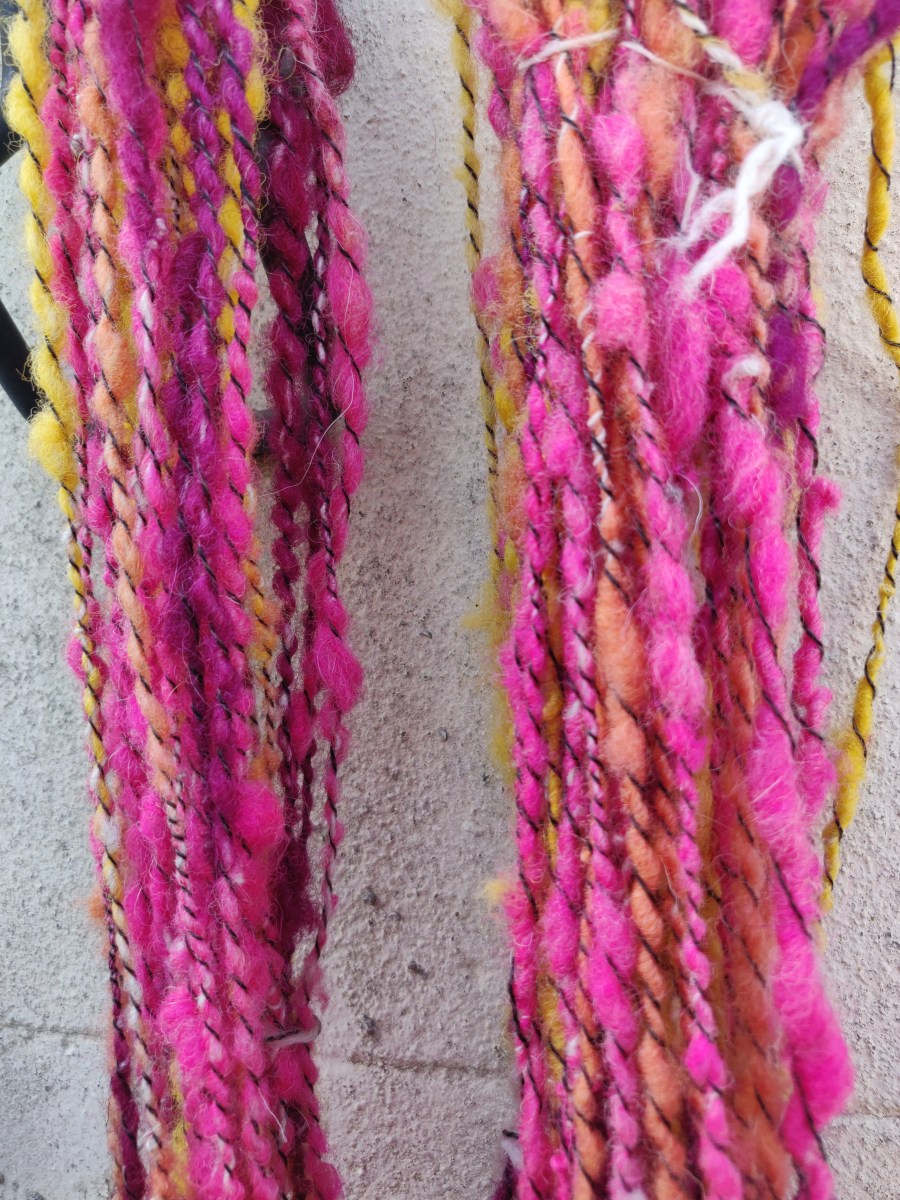
The thought of spinning outside in the sunshine encouraged me to use bright colours. So I took along some Shetland fleece I dyed a while ago using acid dyes, (I have written more about dyeing fleece with acid dye here).
I’d spun up a bobbin of Suffolk fleece that is not very exciting, so I planned to use that as the core for a bright, irregular spun, core-spun yarn to which I would add a charcoal wrapping yarn. All 100%wool. I took my folding Louet Victoria S95 wheel which is a joy to use.
The core yarn was Z twisted quite tight. The wrapping colours were also put on Z twist, and the final charcoal, commercial yarn was S spun over the others.
After washing and drying the twist the colours hardly muted and it’s come out as lovely yarn.