My hand knit patterns from Rooster Book One are downloadable from Ravelry:
Man and Babies’s Hat
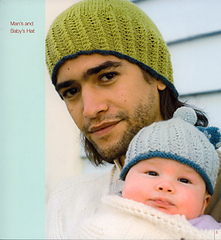
Soft Baby Blanket
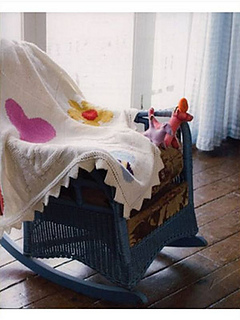
both patterns are worked in the lovely Rooster yarns.

My hand knit patterns from Rooster Book One are downloadable from Ravelry:
Man and Babies’s Hat
Soft Baby Blanket
both patterns are worked in the lovely Rooster yarns.
I have finally unearthed my Passap E6000 from its hibernation and even got the motor running!
Of course I still don’t have much time to use it – but last night I stole a few hours to try to remember how to use it. Luckily I spent the summer servicing a ‘green’ Passap and bringing it back to life, its just the electronic patterning that I have lost touch with.
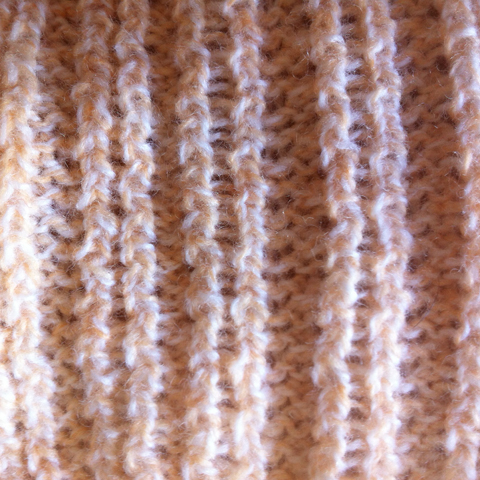
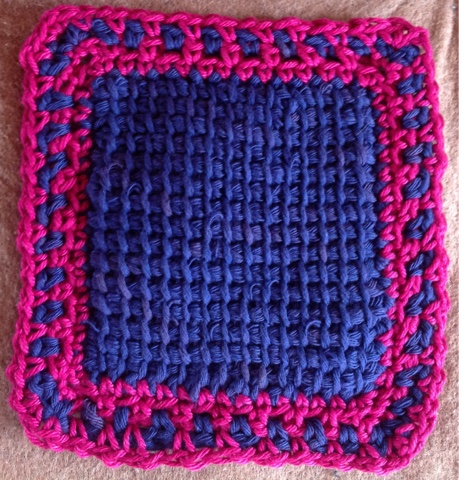
So here is my first piece off the machine that even warrants mentioning. Its a racked tuck pattern with a needle selection on the front bed, knitted with manual settings only as I didn’t have the energy to tackle the controller at the time. Its knitted in 2/16nm lambswool and washed.
How exciting to have been awarded a place in the British Knitting Awards. Thank you to all who voted for my book. I will be going to the Knitting and Stitching Show at Olympia next week to receive my award.

We are coming to the end of a 2 week holiday in Brittany in our caravan. I have just eaten a delicious lemon tart.

Aubergine and Feta bake is tomorrow, but I have made bread, pizza, lasagne, birthday cakes, bolognese sauce, loads of dishes in the Remoska. The slow cooker is also useful, great for bolognese, stews, curries that will cook whilst we are out during the day. I’ve not used that this holiday as its so warm, but it was great last summer when we were walking in the New Forest and Forest of Dean.
I have replaced the LED strip lights my son originally fitted to the underside of the arm of my Bernina 1030 sewing machine. These had to come off when the machine blew it’s circuit board and needed repairing. They lost their stickiness, and as the set-up had never been very satisfactory due to lots of wires I looked for a better design. This new configuration of lights in series came from a YouTube video tutorial here: http://youtu.be/7J91Z9rngE0. The tutorial is very clear and simple to understand.


I bought the 4 original strip LEDs from eBay with the wires already soldered on. However this, and the fact that the seller had cut off the little copper terminals at the opposite end meant they had to be wired in parallel and
rendered it impossible to now put them into series. Wiring them up and attaching them in parallel onto the machine looked messy as there was so much wire, and four strips was really overkill.Making up knitwear can be quite a chore, and using a linker makes it a lot quicker. Linkers make a chain stitch, which is extensible so will not burst the seam when the fabric is stretched.
Domestic linkers can be operated by hand or have a motor. The most common make in the UK is the Hague linker, which is blue, and made in the UK by Hague. It can used on a table, or mounted on its own stand. When joining large pieces whilst working a table you have to be careful that the pieces don’t drag as the dial revolves as this is likely to effect the stitch formation and make the machine heavy to use. Using a stand means that larger pieces can hang down and revolve with the dial.
Hague type linkers make the stitch on the outside of the dial where the needle is positioned, and the chain on the inside where the looper is situated. A linker is a usually circular, and has a dial of spikes radiating outwards. These are called ‘points’ and as with a knitting machine, the number of points per inch is used to describe the gauge of the linker.
Linkers have large eyed, usually curved, needles and are designed to be used with a similar weight yarn to that in which the garment has been knitted, e.g. a linker with 5 points to the inch will take yarn of similar diameter/count to that used on a domestic knitting machine. The linker in this video has more points per inch than one intended for use with domestic machines; it is probably a 10-12 point model.
Obviously its not possible to have a linker for each of your different machines, or for hand knits, but the good news is that you can use a linker for different gauges of knitting. If the stitches are wider spaced than the points, spread them out so that not every point has a stitch; the chain will carry over the odd empty point. If the stitches are closer together than the points, it is a little more difficult as you have to double them up on the points, and to frequent doubling can lead to a gathered seam, so I wouldn’t recommend using a domestic linker for finer than 8gge knitting.
Before starting, hold the knitting up to the dial (remember that the circumference of the dial is smaller at the inner end of the points, where the stitches are made), and estimate how often you need to add a space, or double-up on a point. Make a note of this, and put the stitches up onto the points with evenly spaced gaps or double stitches.
If the garment is knitted in a fancy of fluffy yarn, I recommend linking with a smooth, strong yarn of a suitably matching colour instead.
The tension of the chain stitch can be adjusted with a thumb screw, and it is important to use this adjustment to achieve successful linking. Put broadly, over-large and/or missing loops indicate loose tension, and skipping, dragging and stiff operation indicates too tight, but the only way to get it right is to practise on scraps of knitting prior to sewing the garment.
In very rare circumstances the timing of needle and looper can become disrupted, and it is impossible to get the linker to make stitches; the needle may break or bang into the looper, or the looper may be totally out of synch with the needle thrust. Although it is possible to adjust this yourself, unless you are very experienced with the machine and understand how the stitches are formed, I recommend sending the linker to Hague for repair.
When preparing knitting for point-to-point linking the last row of main yarn knitting is not bound off; the stitches are left ‘live’. Before removing the knitting from the machine, 10-20 rows of ‘waste’ yarn are knitted, then the piece is knocked off the machine without binding off. When choosing ‘waste’ yarn, aim for a strong colour contrast in a yarn that is slightly thicker than the main yarn. A thicker yarn will open the last row of stitches, making it easier to insert the points, and a contrast colour helps the operator pick the correct row of stitches to catch onto the points. Try to choose smooth waste yarns; fluffy ones may leave contrast colour fibres when the waste is removed.
The video above shows how to point-to-point link a double thickness, folded collar around the neckline of a garment. The collar in this example has been knitted across the needle bed of the knitting machine, with ‘live’ stitches left at both start and finish as follows:
See ‘Preparing your knitting’ for how to work the joining rows between main and waste yarn to facilitate easy linking.
Before starting to put the collar and garment on the linker, check whether your linker makes the stitches inside or outside the dial, and position the piecs accordingly. In my example, the stitches are on the outside, the loops inside.
Put the open stitches of the inner edge of the collar onto the points as described in the video, (wrong side facing in this example), and then put the garment neck onto the points (right side facing the operator in this example). Finally fold the collar over the top of the garment neck edge, and catch the open stitches onto the points – make sure to align the inner and outer stitches so that the collar is not twisted.
Sew through the three layers, and pull the end back through the last chain to secure the linking. Remove the garment and unravel the waste yarn back to the main stitches. Take care on the last row, and if any stitches have been missed, catch them with a pin or a strand of waste yarn. I find those little safety-pin stitch markers very useful for this on domestic- machine knits.
Sadly my treasured Bernina 1030 sewing machine blew its electrics a few weeks ago, and it smelled and sounded expensive. After ringing round a number of repair centres I found one who knew what the fault was likely to be and what might have caused it. They couldn’t do the repair for a few weeks so I hauled my old Bernina 730 out and refreshed my love for that whilst the ‘newbie’ sulked in the corner awaiting repair.
Although I teach in knitted textiles, this is the first year I have taught spinning as part of a module, so in a fit or inspiration I asked my son to climb into the loft and retrieve my Ashford wheel that had been up there for 15-20 years.
I used to have two wheels, and spin on both at one time. However a succession of small children couldn’t resist fiddling with them, and. I didn’t have time to use them. First of all one went in the loft, and then I reluctantly sold the other as there wasn’t space for it and I couldn’t bear to see it being damaged. Now child-free, but sadder for it, I have resurrected the Ashford.
A year or two ago I had prematurely acquired a fleece thinking my time had come, only to myself busier than ever. By the time I got there, apart from the smallish amount I had had time to scour I had to throw the rest away as it was infested with moth. So I am starting to spin with the small amount of Kent wool mixed with Merino tops I had bought in for felting. It’s not a problem as I need LOTS of practise, so odd colour mixes rule at the moment.
Of course the wheel seems to have shed bits during its vacation in the loft, and a refurb was necessary. I have purchased a flexible drive belt because the one on the Kiwi wheel we have at University does seem to give a nice drive to the wheel, plus the old one is a little brittle. The tension knob and spring has disappeared, so they needed replacing, and I wanted a drop in to make the bobbin easier to swap. Finally one of the Lazy Kate spikes and a bobbin have gone walkabout, so new ones of those were required.
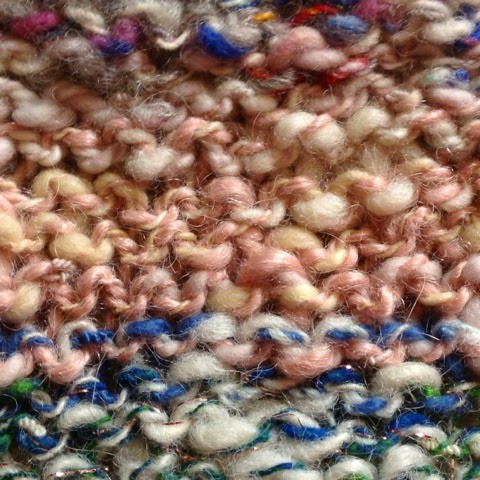
This photo is of the first hand-spun yarn I have made for years, so apologies for its unevenness and it’s mish mash of colours. I just needed to celebrate my enjoyment.
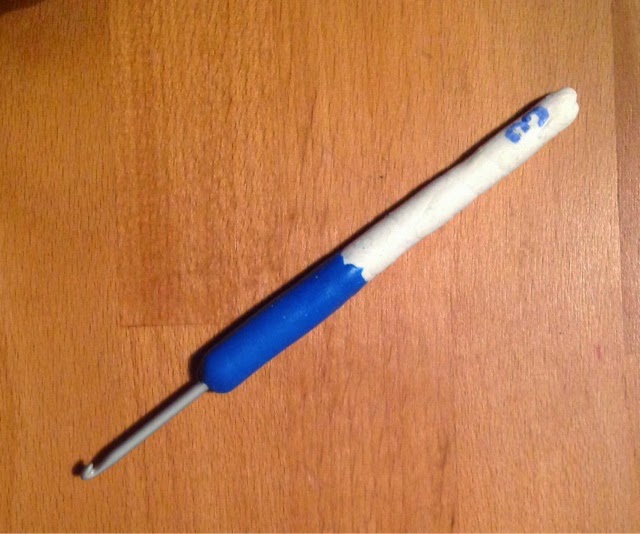
Because thin crochet hooks are making my hands ache I decided to experiment making my own version of the soft handled ones. I don’t want to have to replace all of the thin metal ones I have collected over the years at considerable cost with commercially available soft or chunky handles ones, nice as they may be. I decided at first that I was going to use Sugru, but very quickly realised that to mould each handle would require lots of Sugru, which would cost the same as replacing the hooks because Sugru is expensive.